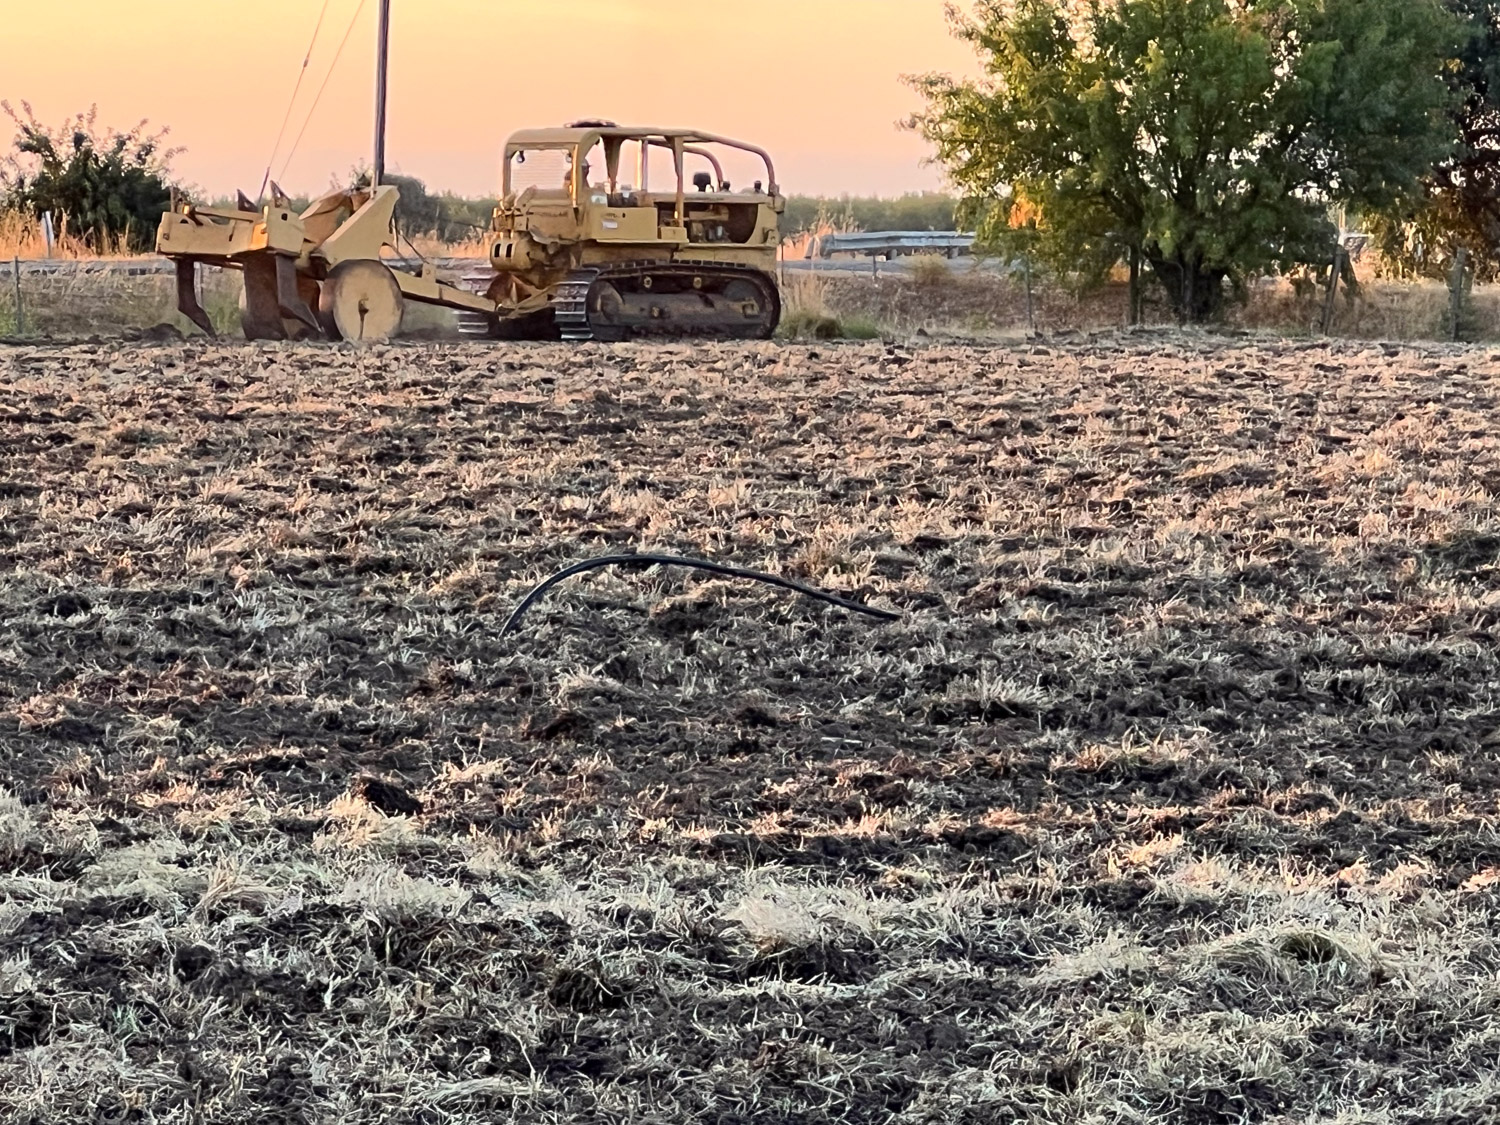
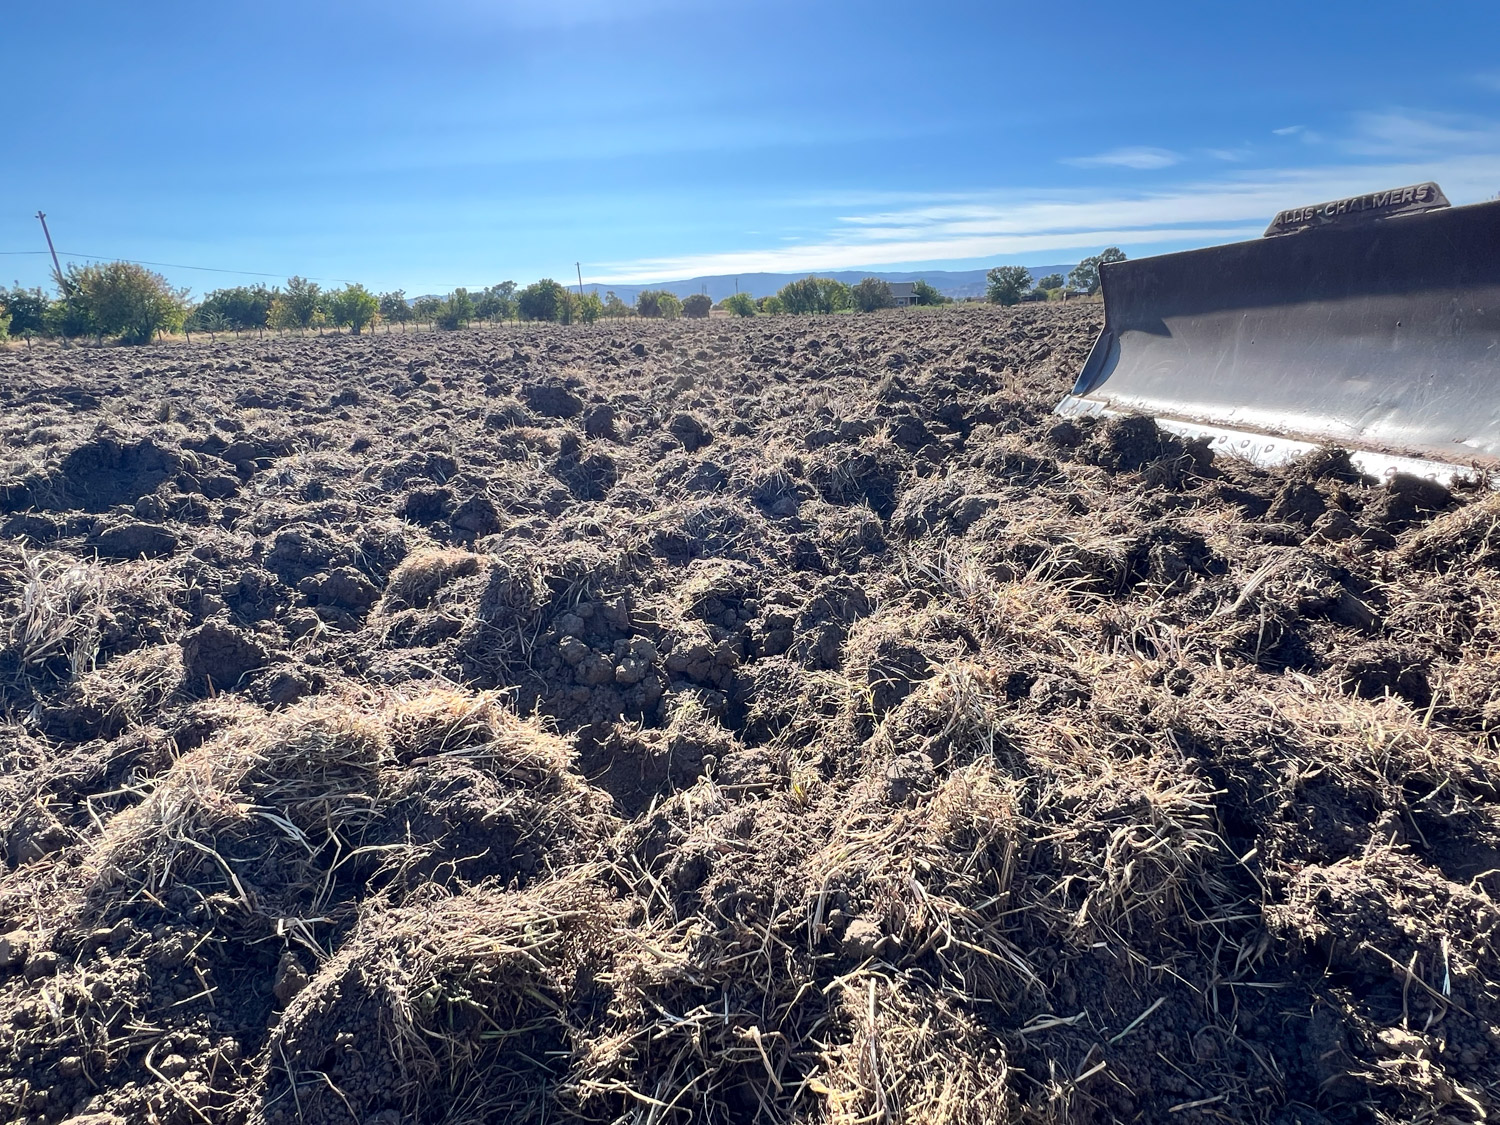
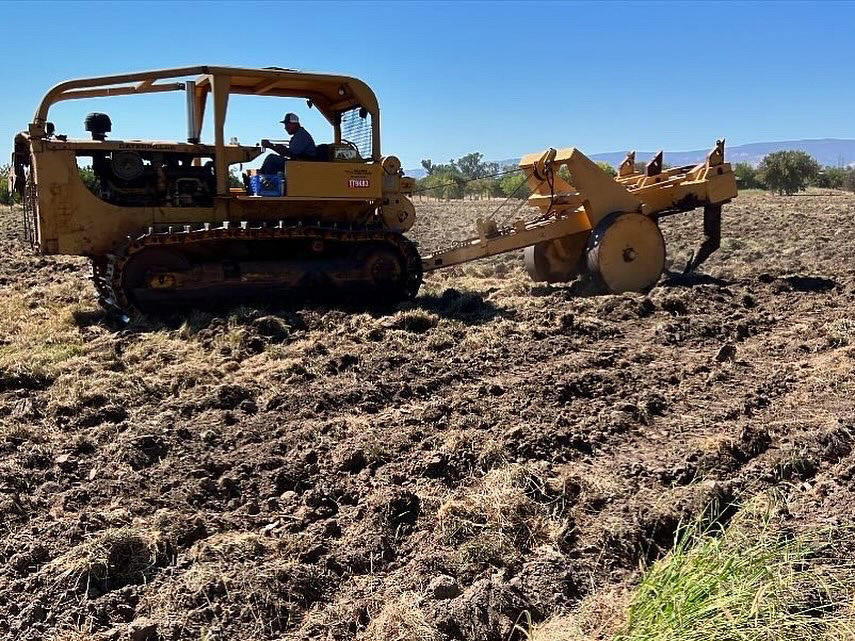
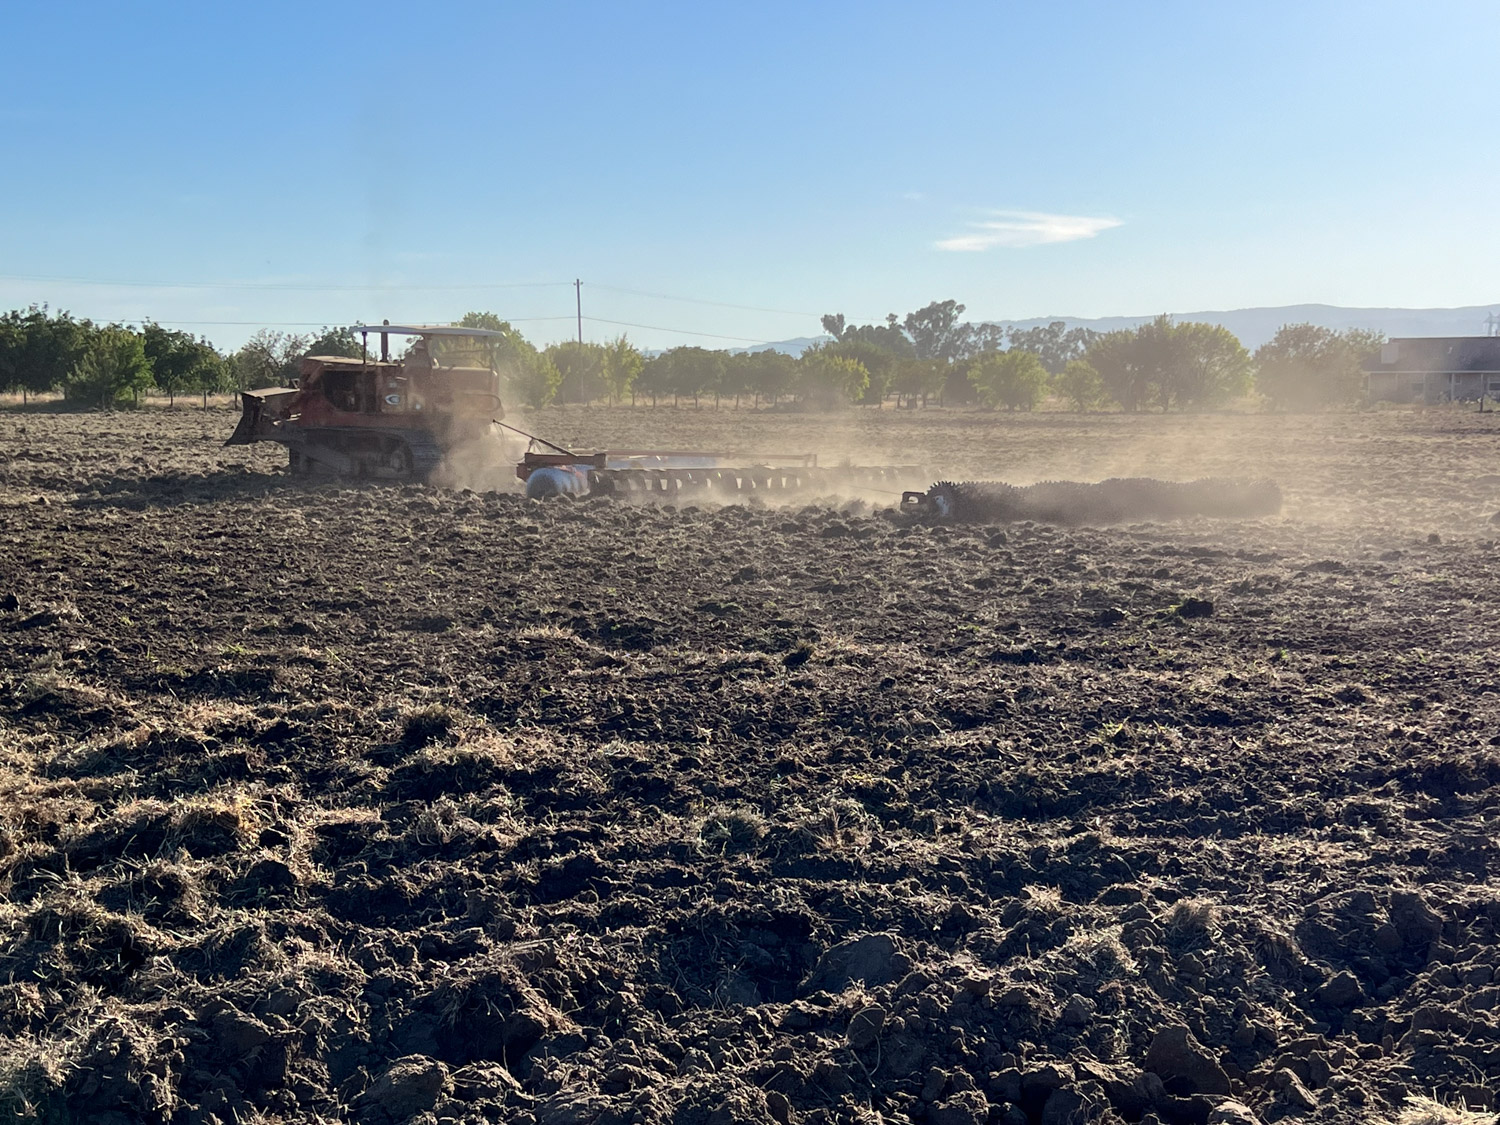
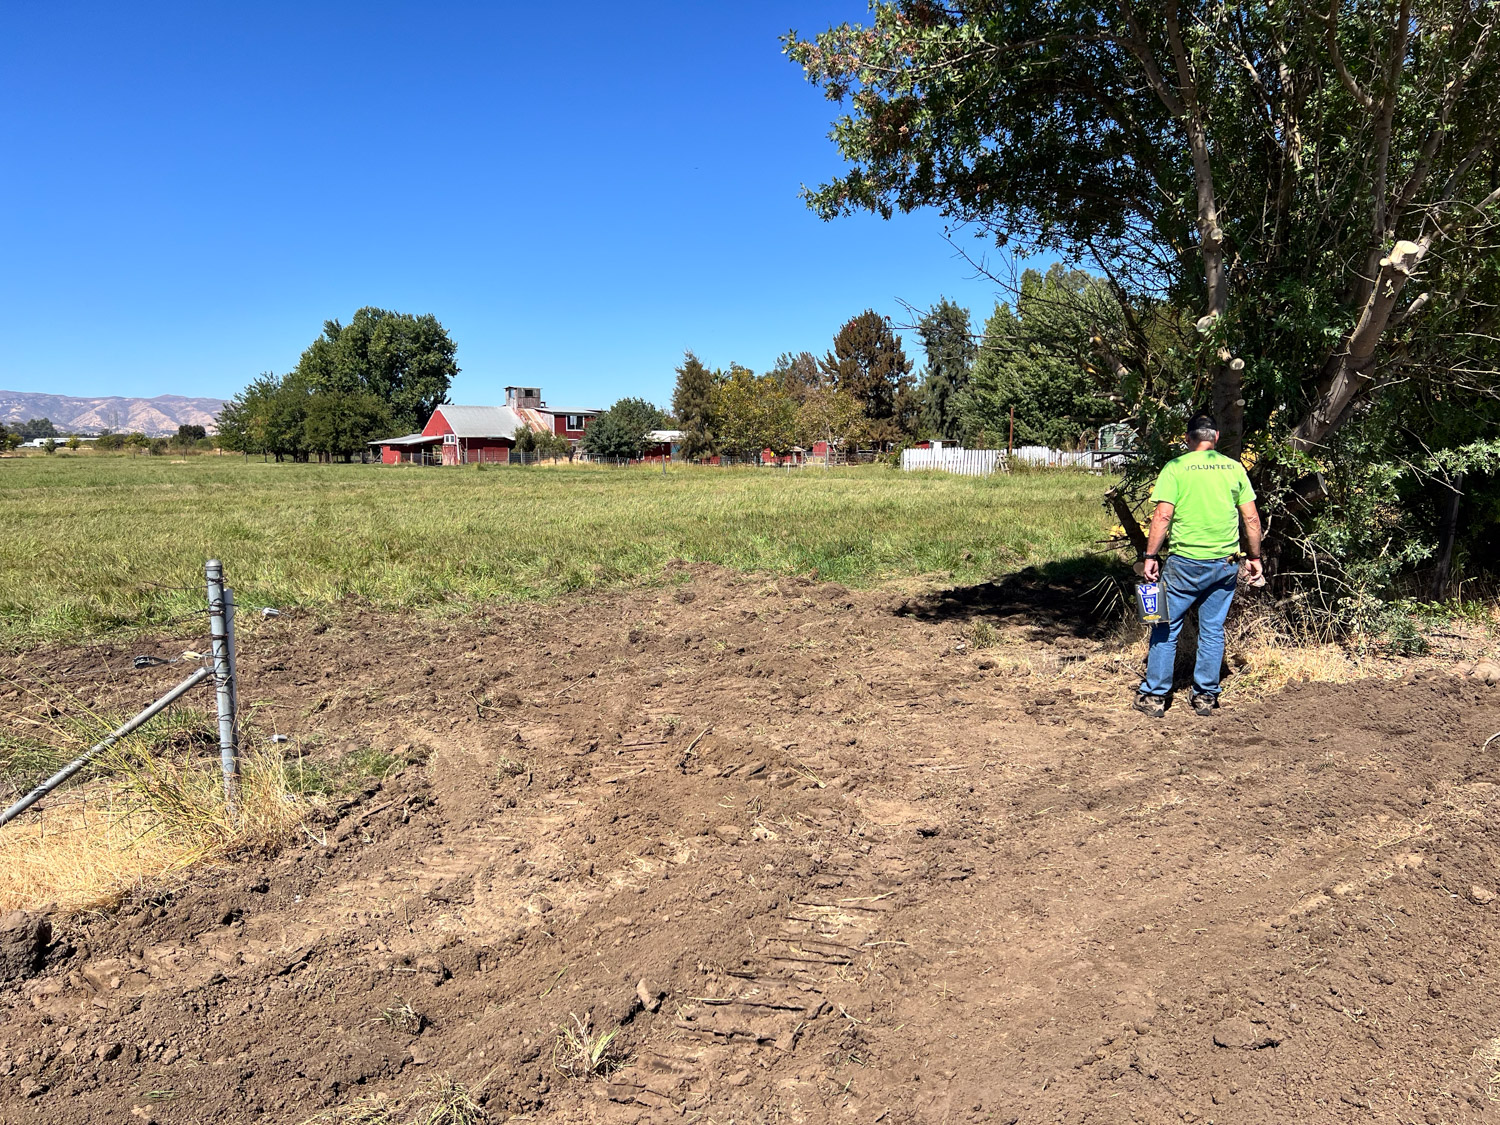
Ground was broken for this project with “obstruction removal” September 18. These photos are from September 25, eight days into it. This is early morning as Brett brought the ripper out again, this time going mostly east-west.
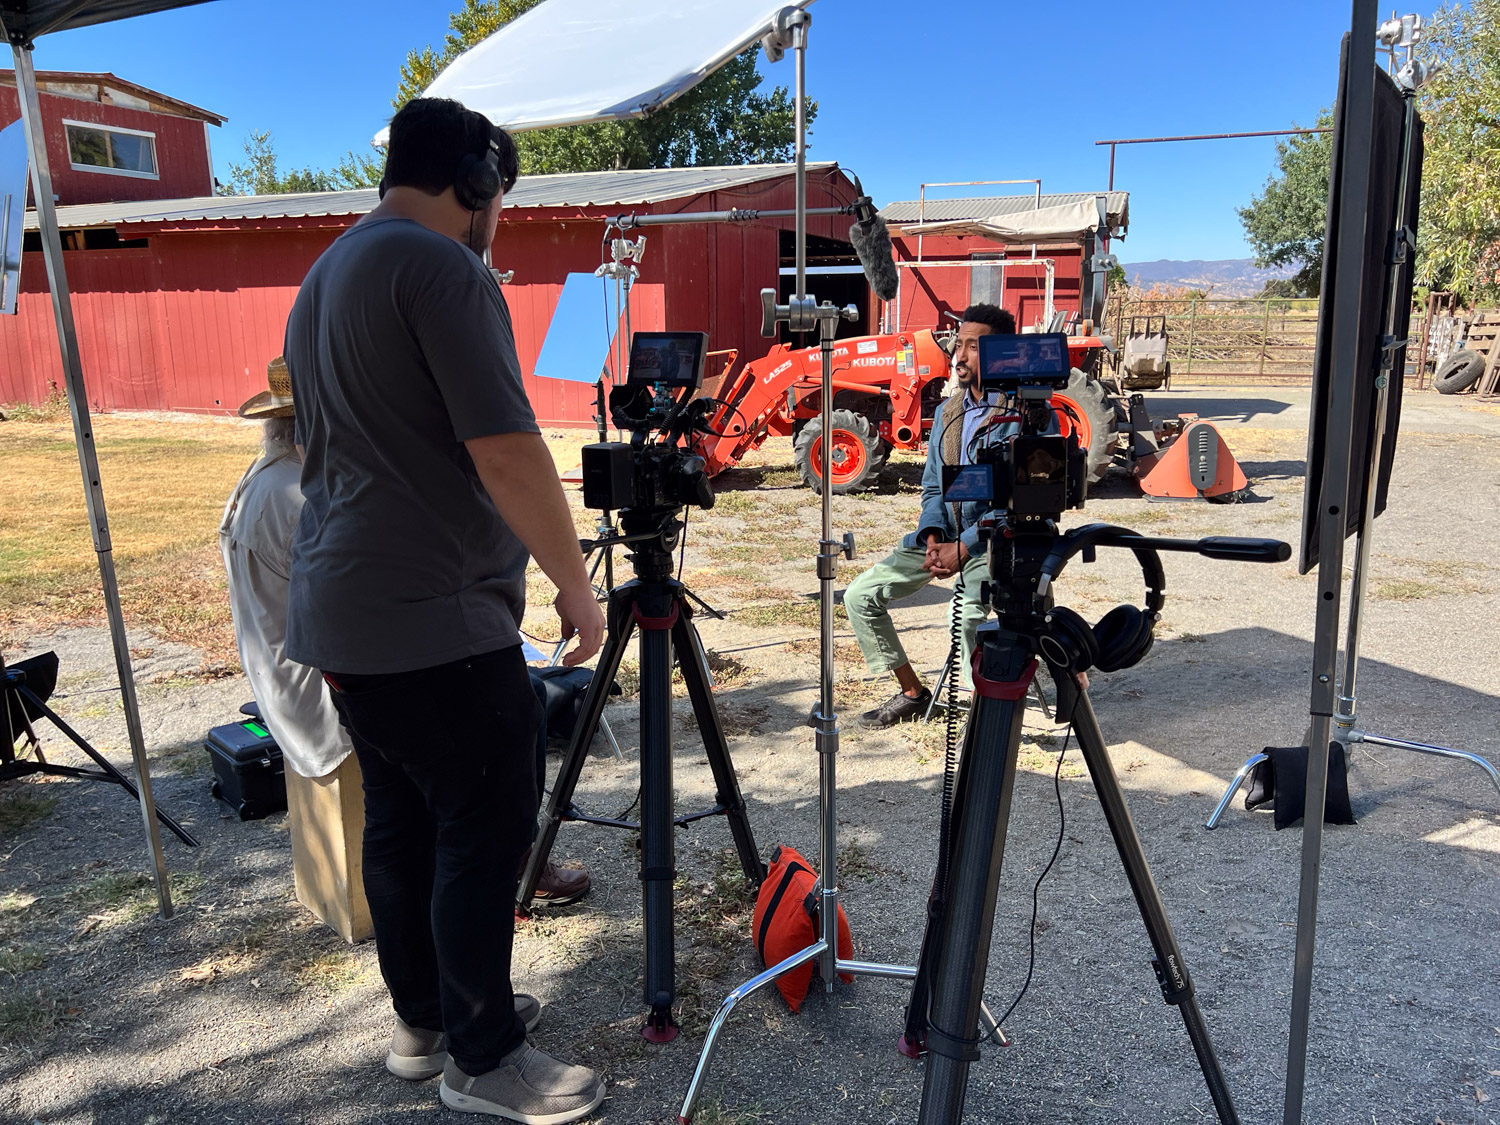
I had been asked if NRCS could bring a crew to film while some of their personnel and I were interviewed for an in-house video they wanted to create. I said sure. The crew set up shades, screens, reflectors, and two cameras and were here about three hours.
I learned a few things from the interviews and discussion. I hadn’t thought about NRCS being a voluntary agency as opposed to a regulatory one. That means that we, the clients, volunteer to have them come to our farms. We have asked for help and they provide it. In our case they have provided all the engineering assistance and the request for funding.
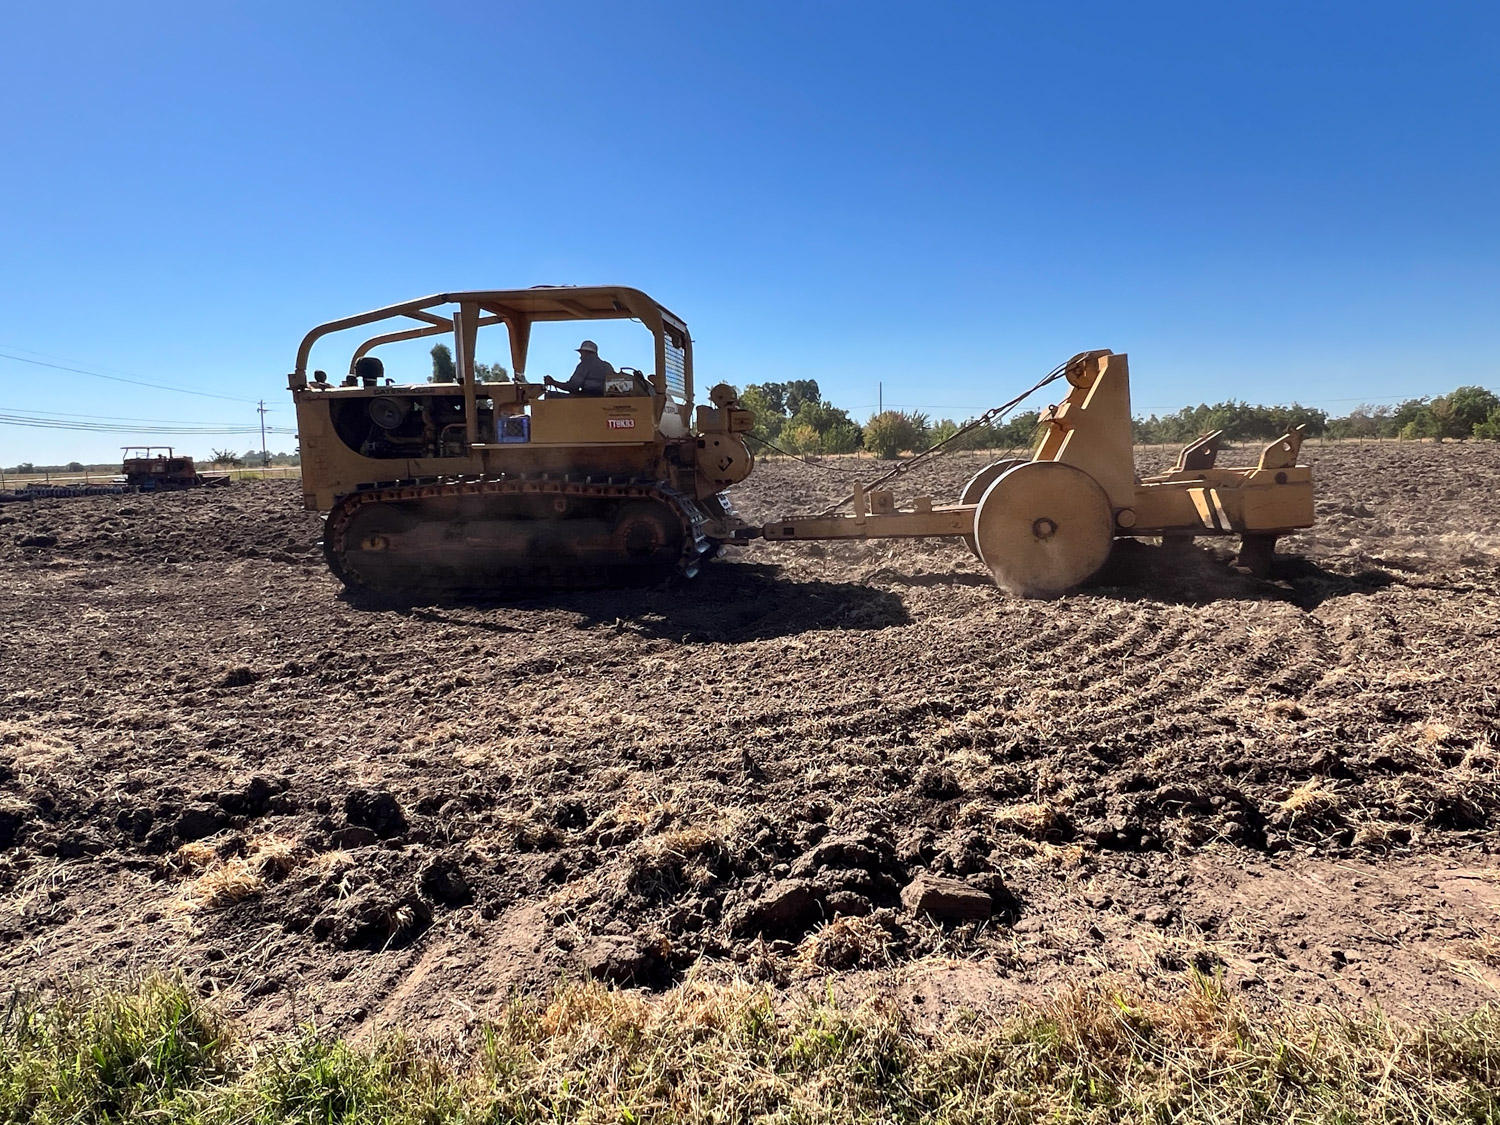
In the meantime Brett was still working.
Dan had borrowed a larger chain saw from our son and needed to finish cutting the tree that was in the way of truck access for the irrigation supplies that would be coming.
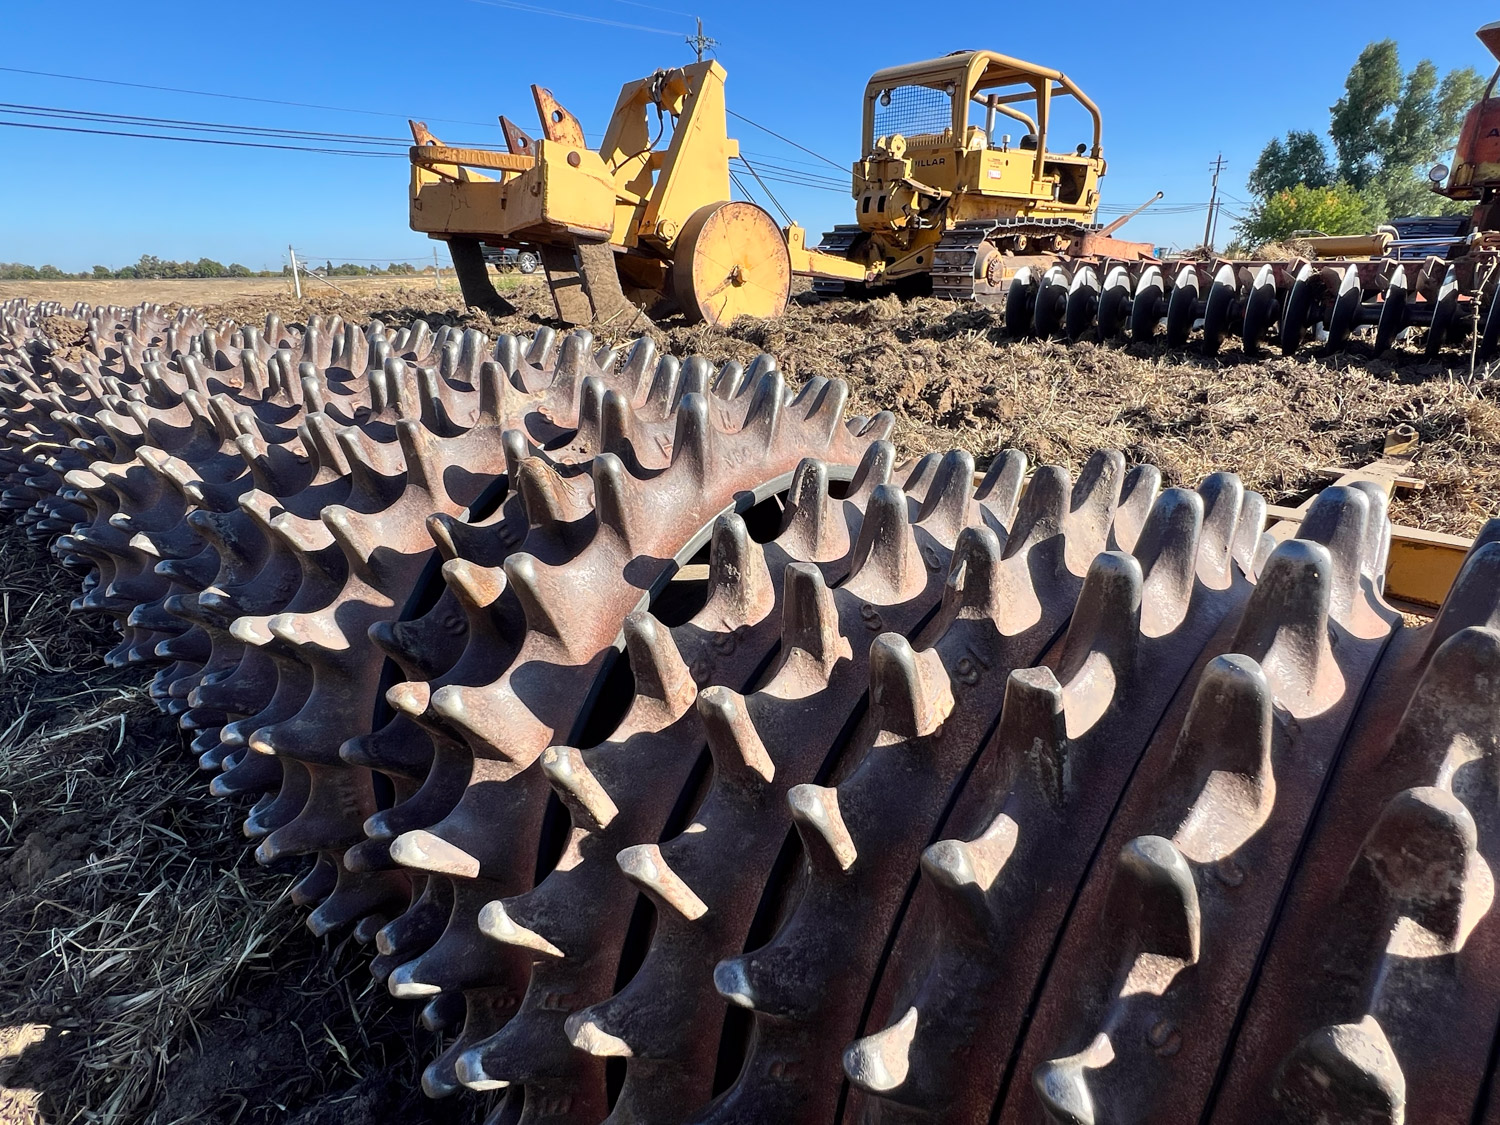
Close-up of the ring-rollers pulled behind the disc.
Phase 1 of this project was Obstruction Removal which I described in the last post.
You’ve probably heard about “Call before you dig” There is a number to call to make sure that there is nothing underground to worry about–gas, power, phone, water lines. You are supposed to allow a couple of days for the various companies or utilities to give you the all clear. Brett took care of this and marked the corer of the property as directed.
He felt comfortable going ahead with the concrete removal before this approval because that concrete had been there for so long. Brett started to disc with the stubble disc (large blades farther apart), but found that the dallisgrass made it a challenge. He came back with a skid steer tractor with a mower. Dan had been mowing but Brett’s mower set up went a lot faster than what we have. Then he was ready to continue discing after a bit more prep.
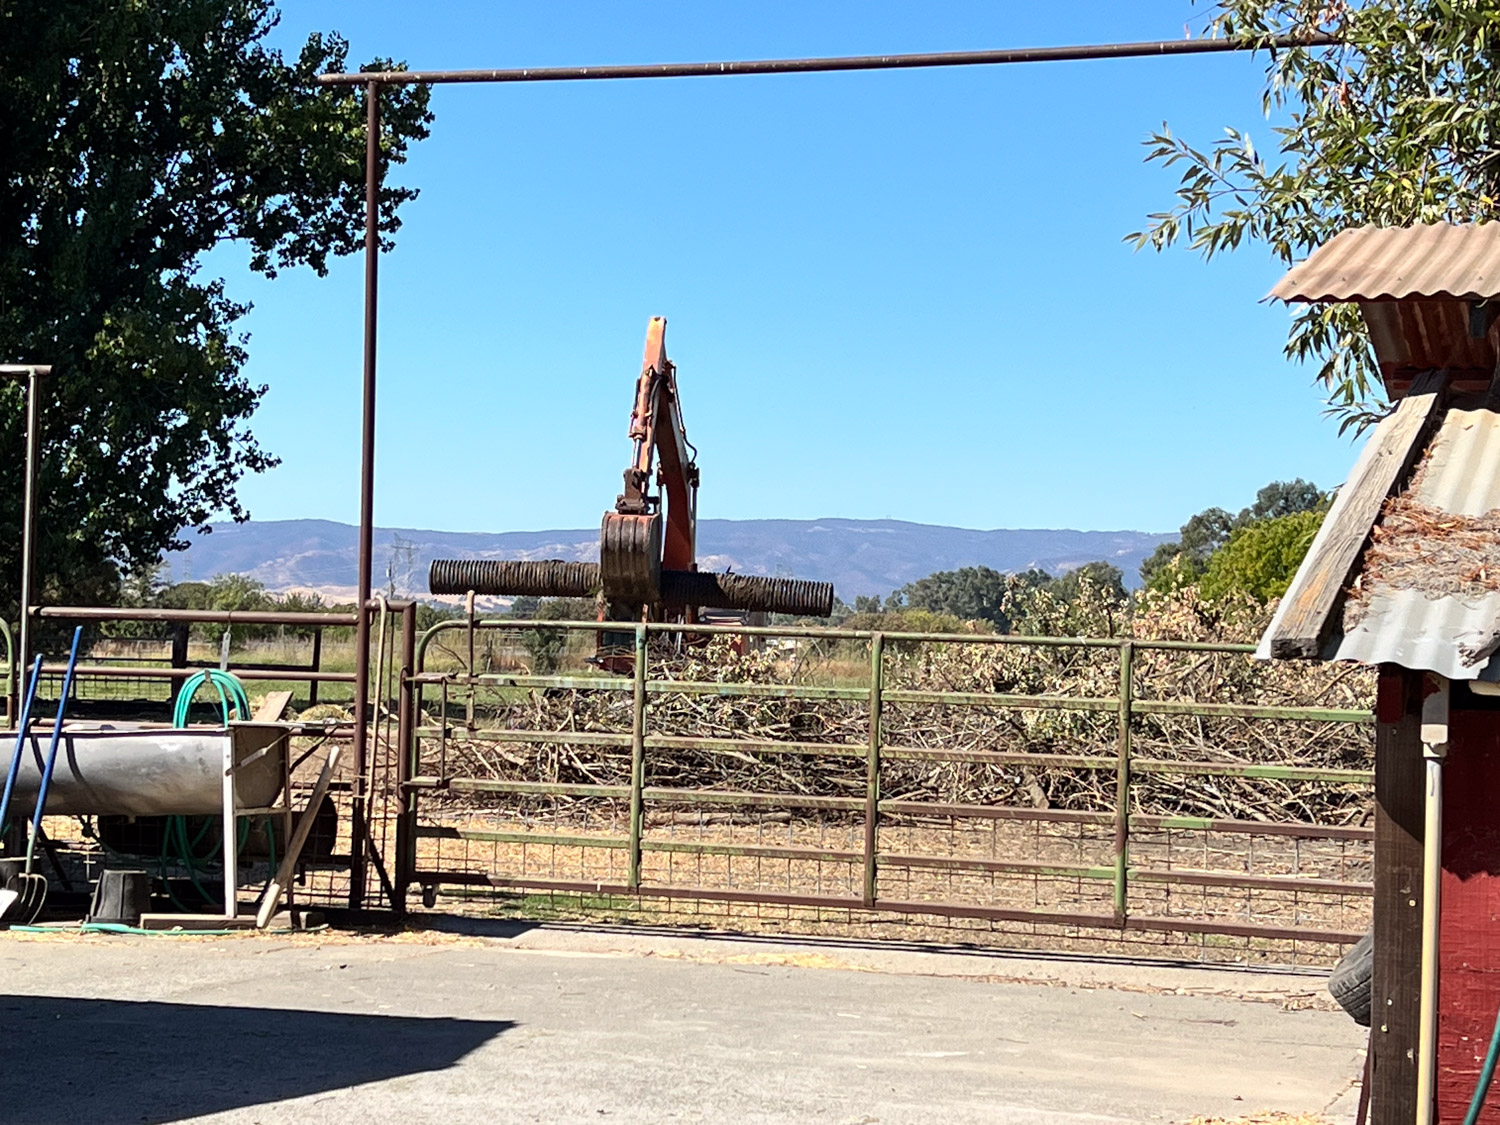
Brett used the excavator to drop the culvert from the south end of the barn over the fence and away from the field where he would be working.
Dan and Brett used their respective tractors to work on the ditch at the north end of the property.
Dan pulled out the structures he had made to block and direct water while Brett broke down the berm and filled in the ditch.
Then Brett continued discing with the stubble disc.
After that he ripped going in a north-south direction.
The ripper has three stout teeth that are buried in the earth when they are lowered.
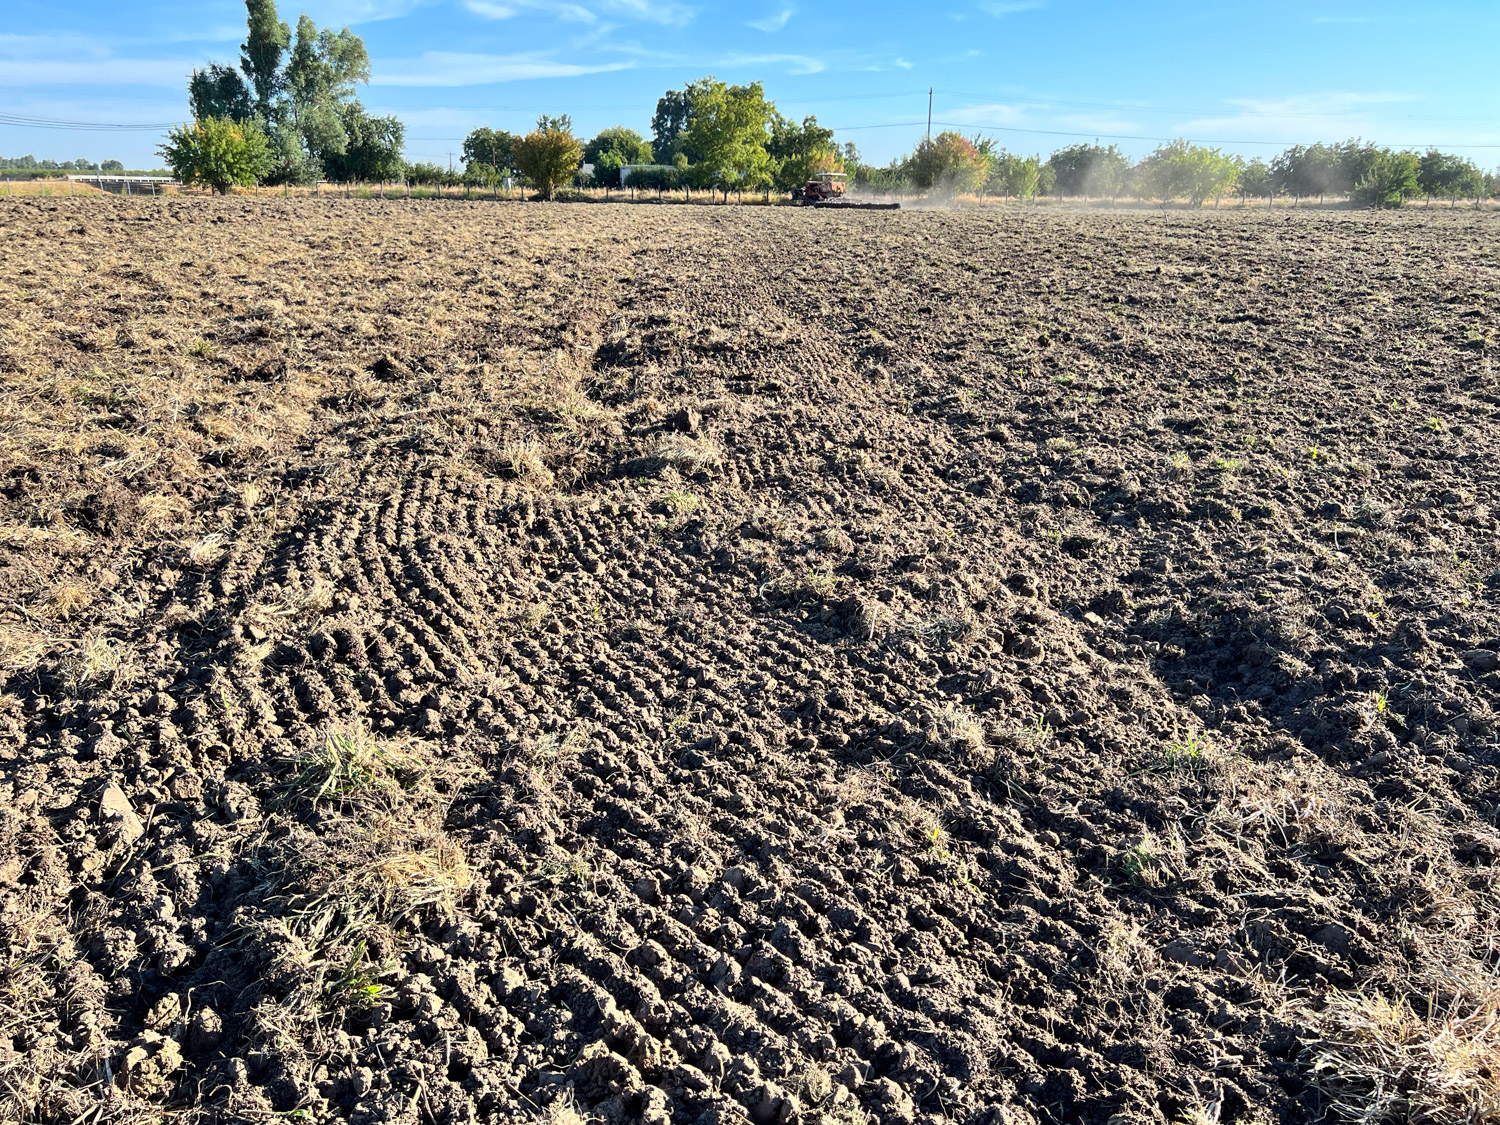
This is how the field looked after discing and ripping.
Dan had more tree work to do so that Brett could get his equipment close enough to the fenceline.
After ripping Brett brought the smaller disc with ring rollers.
It makes the field a lot smoother.
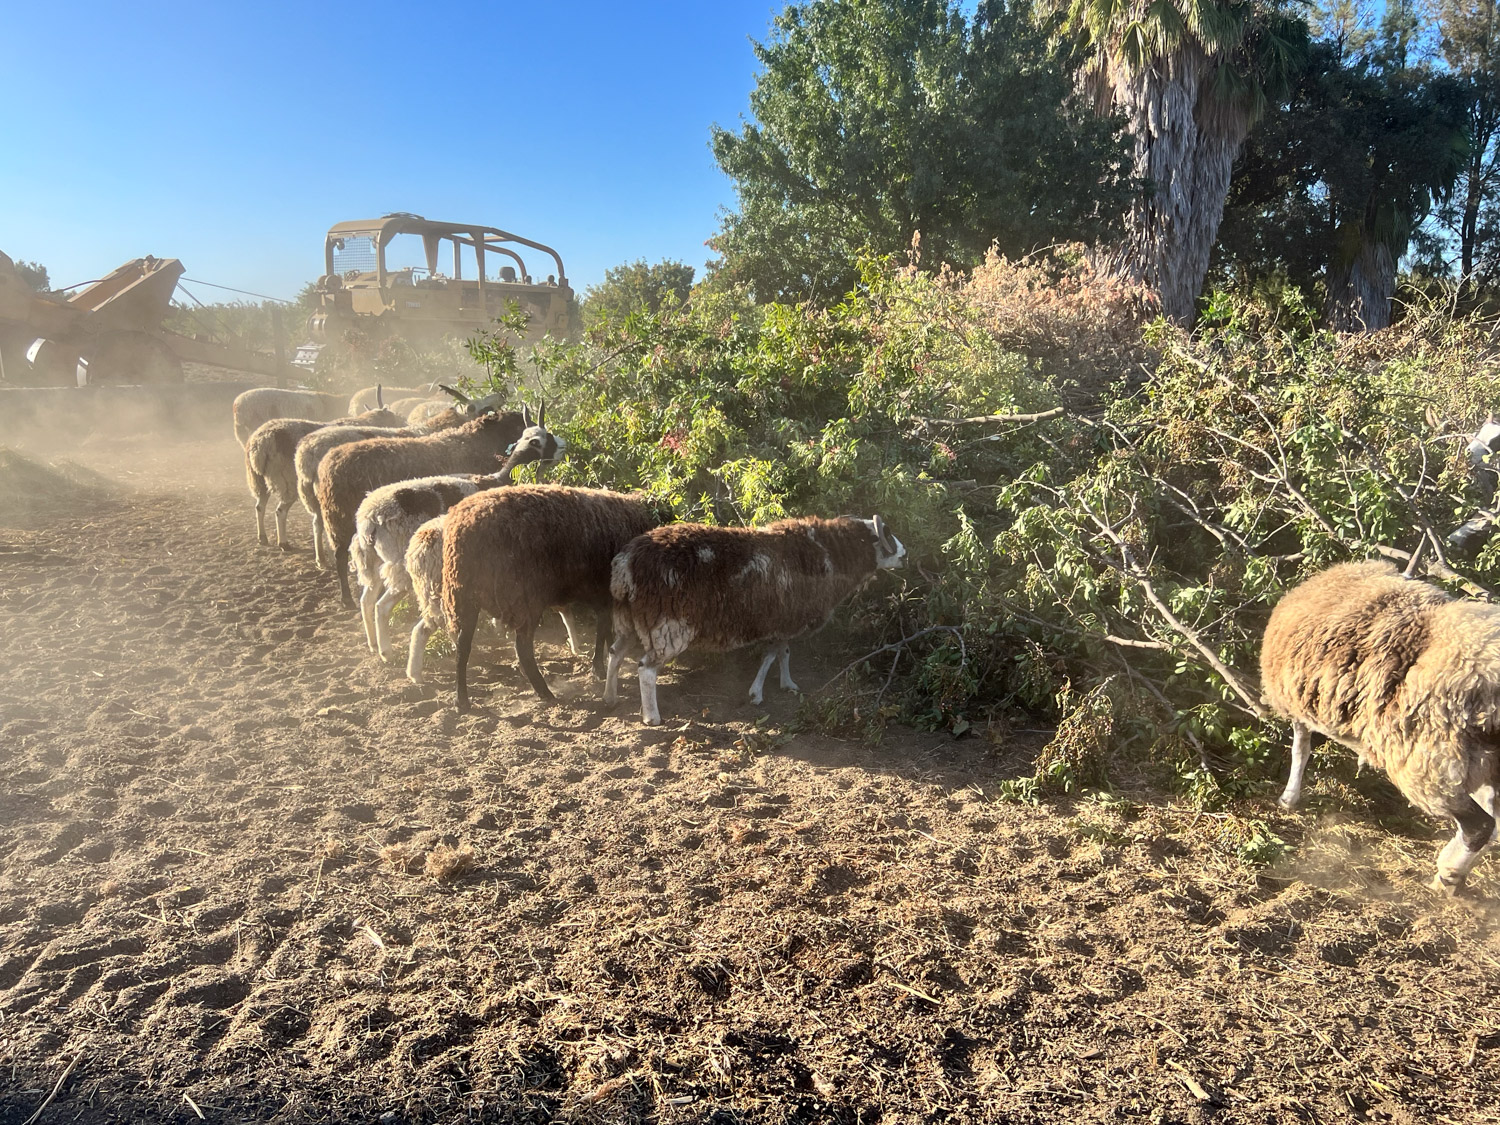
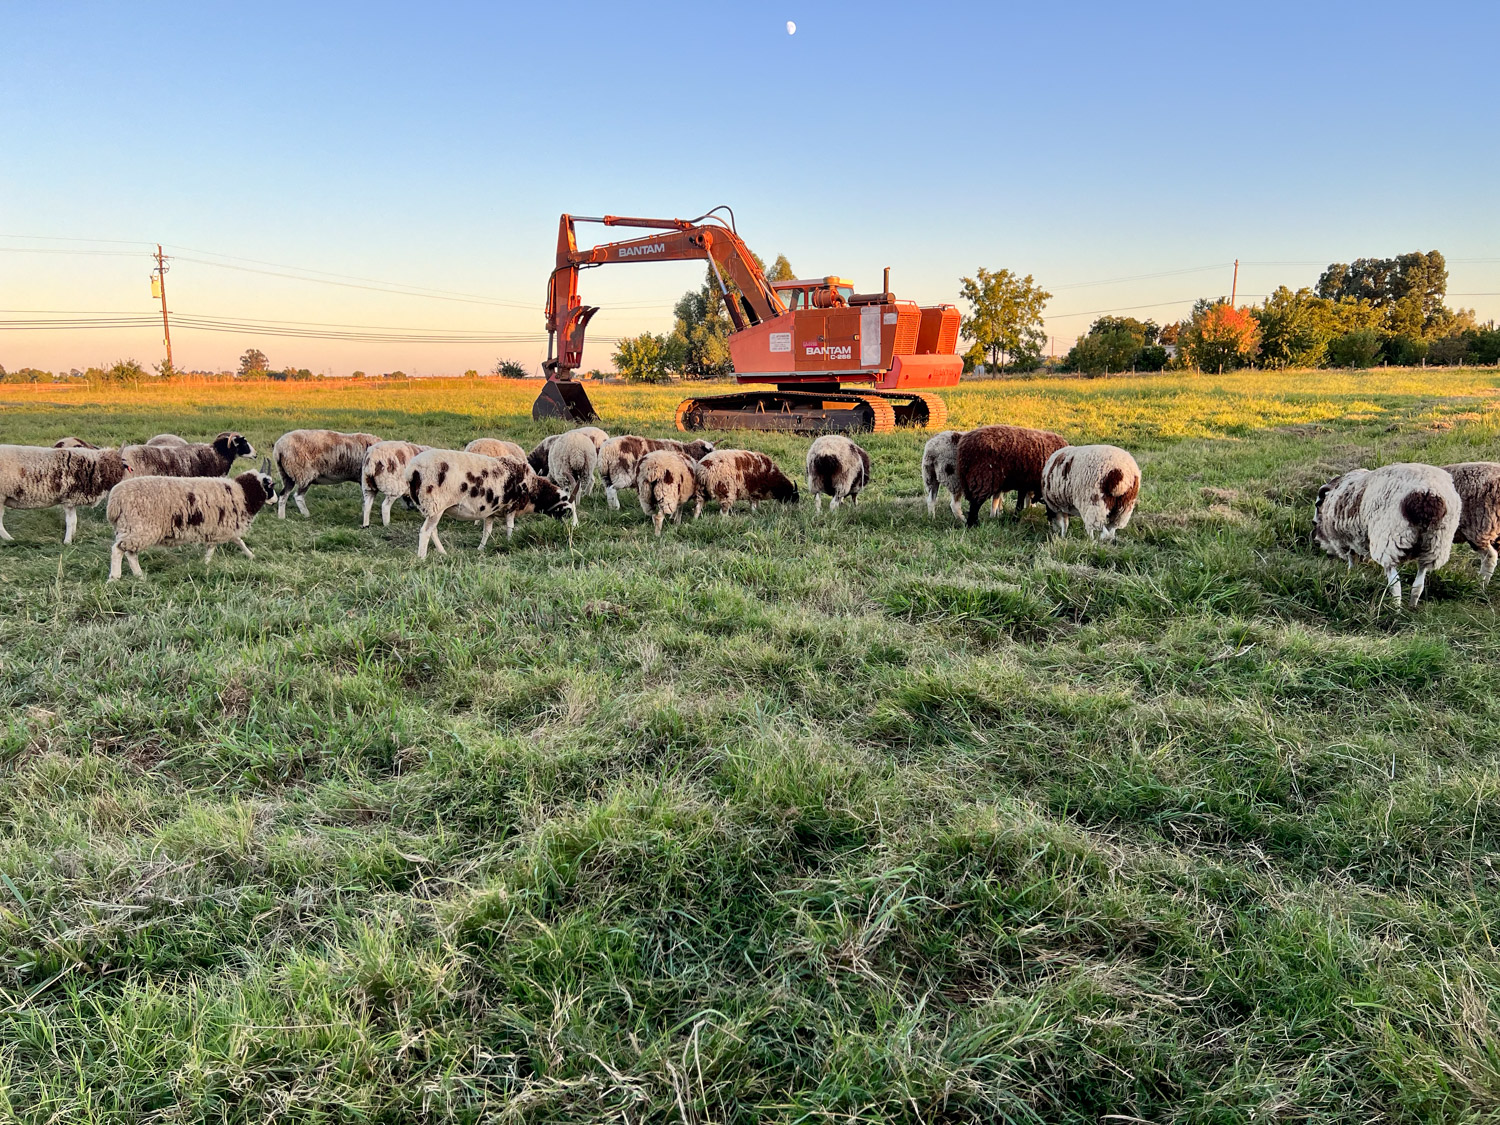
The sheep have been locked out of the pasture, They were happy to get a continued supply of green leaves as long as Dan was still trimming trees.
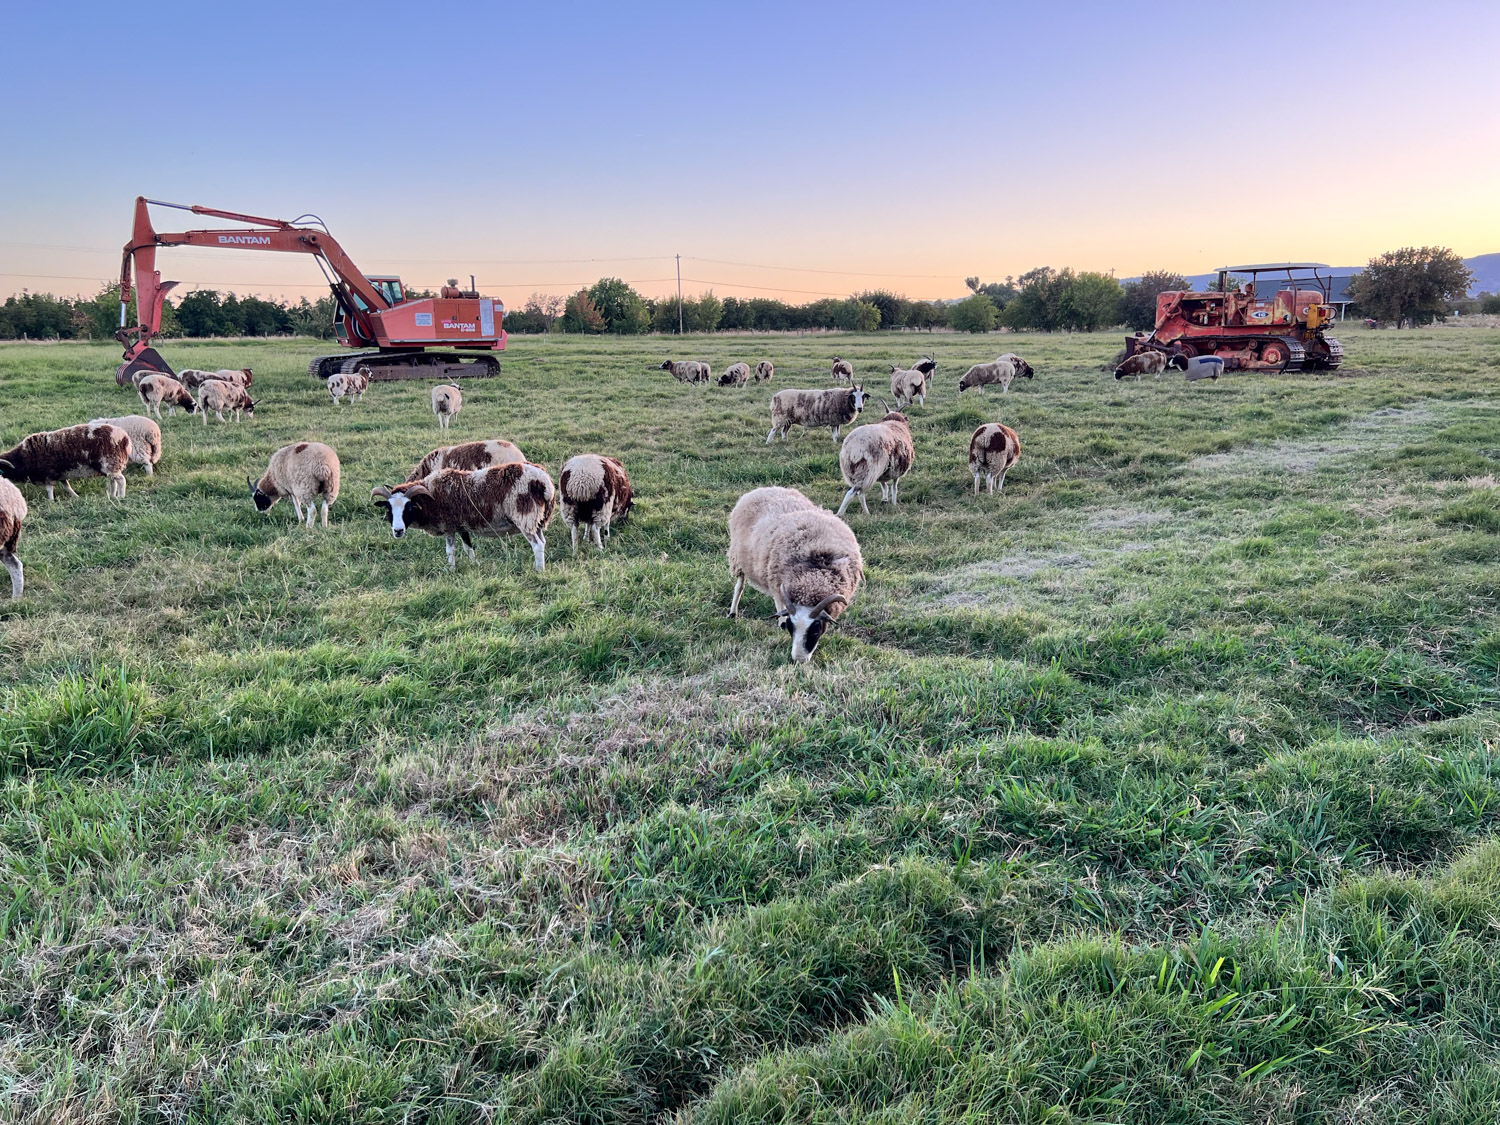
A few weeks ago I wrote Part 1 of Pasture and Irrigation Renovation. I ended that post with the sheep coming in from the pasture for the last time and a lot of heavy equipment in their place. A lot went on for a couple of weeks and then there was a lull. I have to go back and find the photos I took at each step.
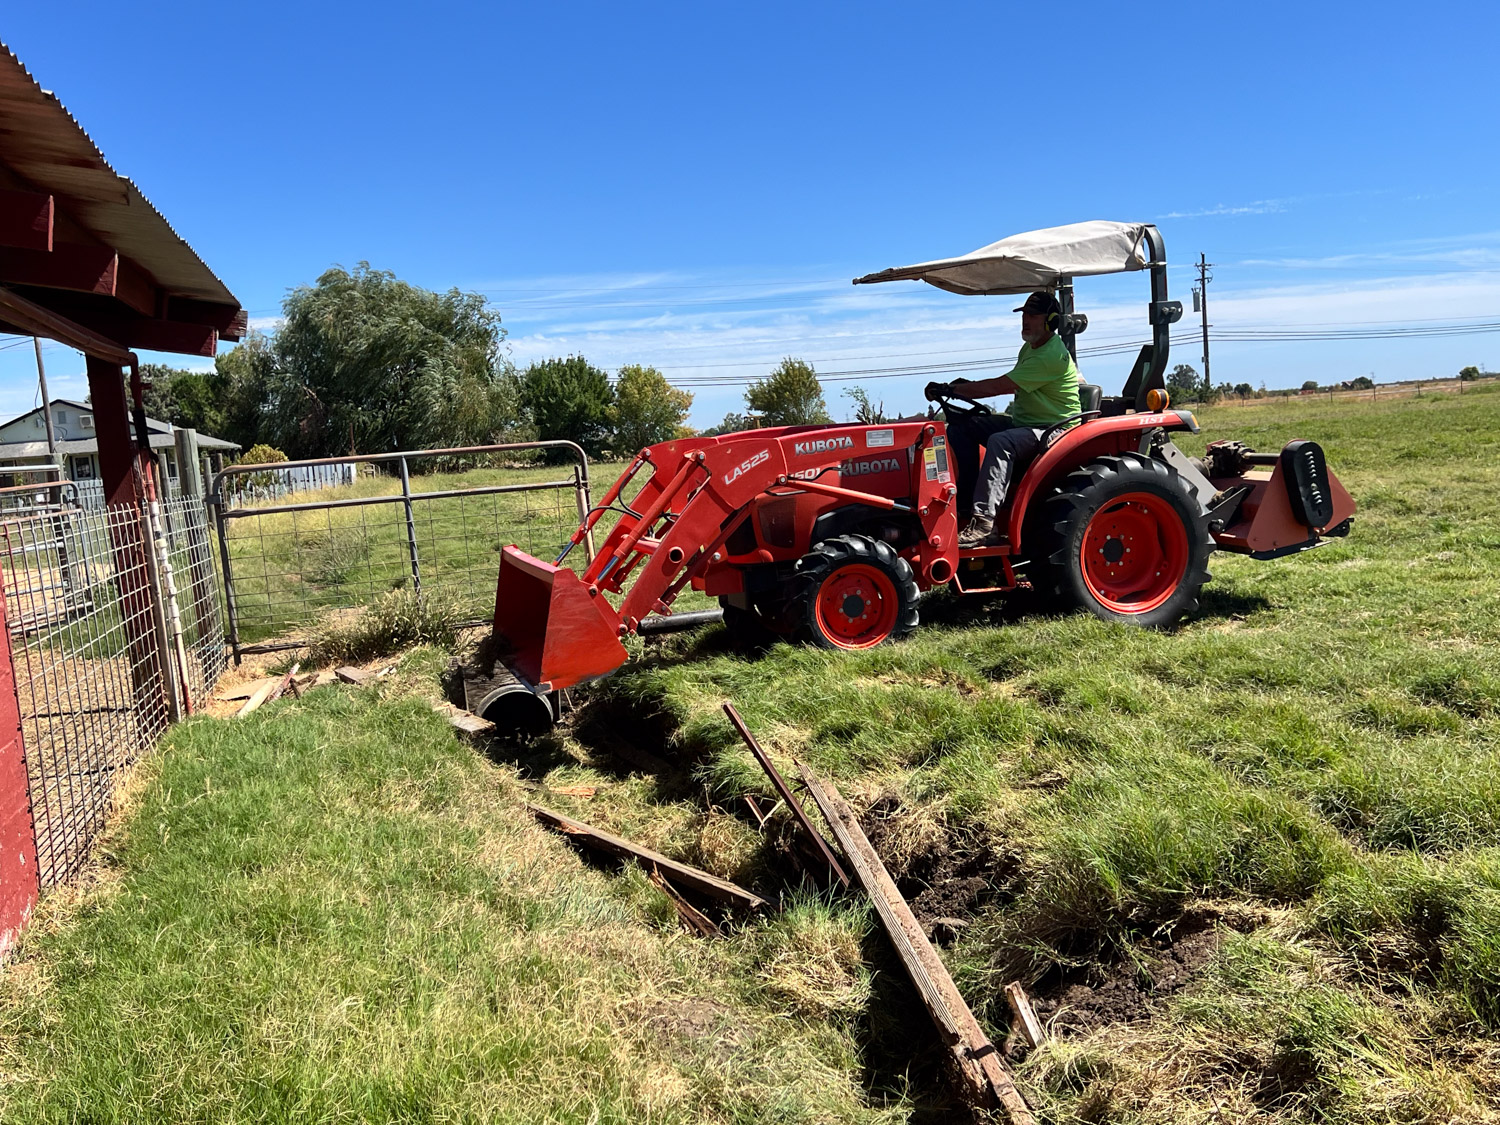
There was still more work for us (Dan) to do. Here he is removing the wood and stakes we had used to make the ditch more functional near the barn and taking out the culvert.
Before work began we were asked to hold a meeting with the contractors where we could all listen to a representative of the tribal people who used to live in the area. He showed photos of the cultural items that one might find when soil is disturbed and talked about procedures if something was found.
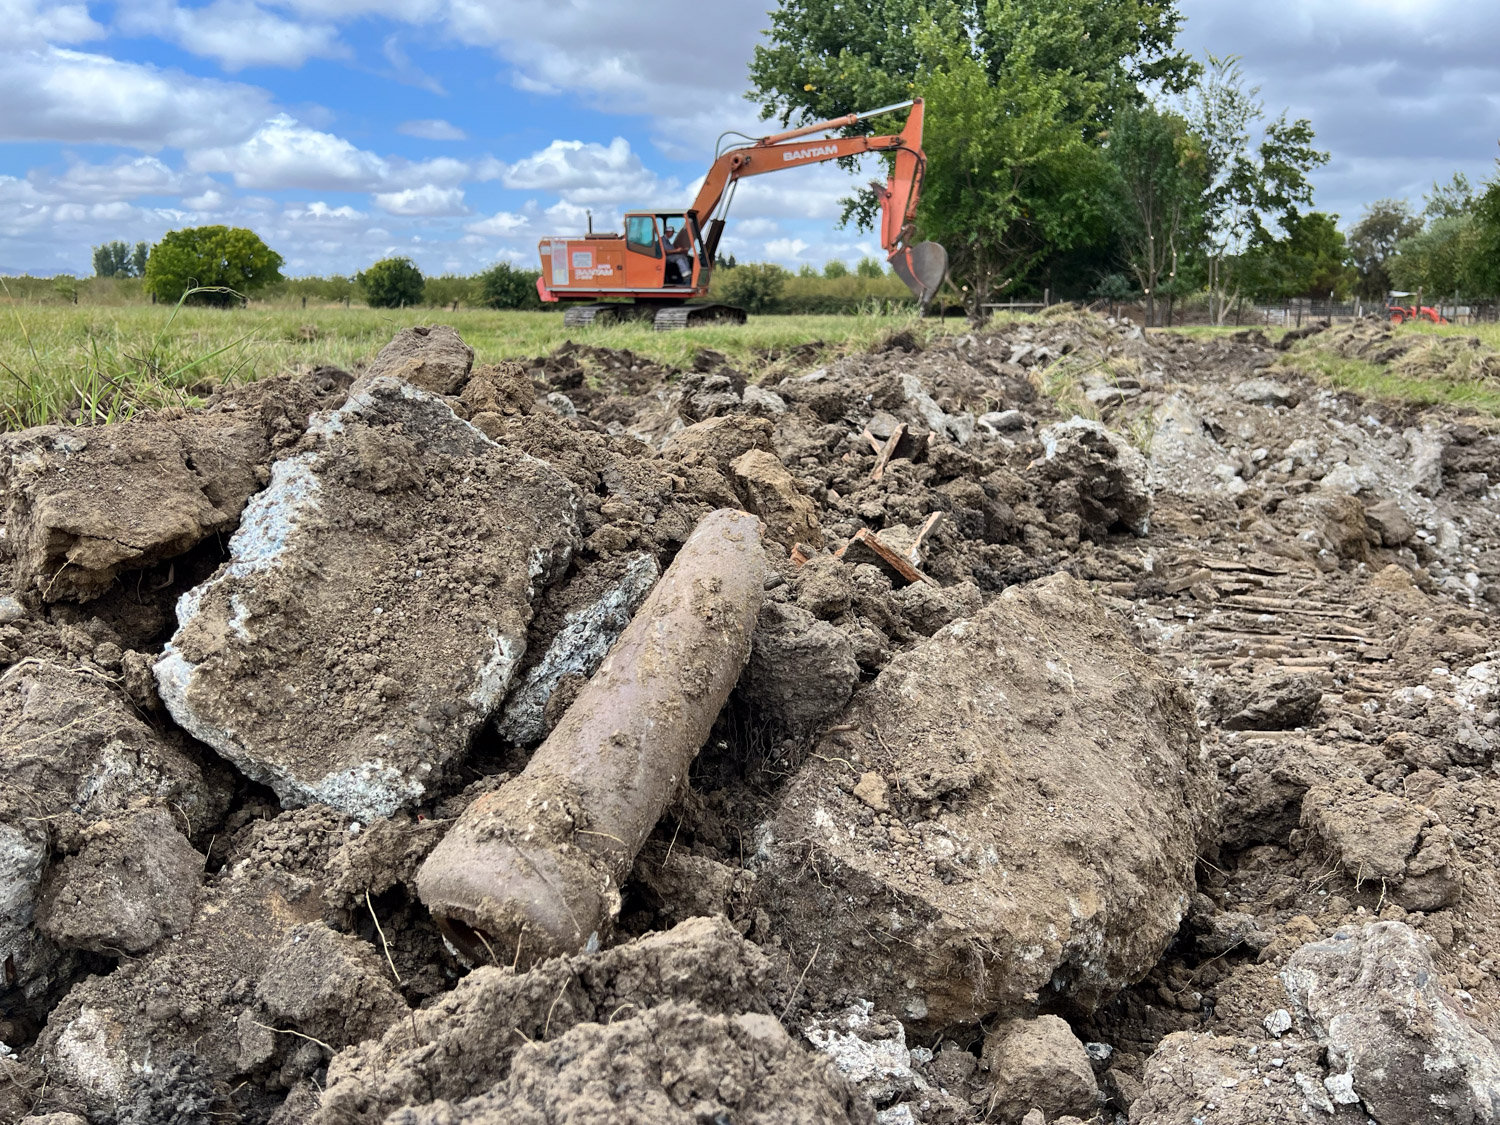
The first job was to remove the old cement foundation that ran north to south over 3/4 of our property. We suspect it was the floor of an old barn–I don’t know what else it would have been. That would have been a big barn and maybe someday I’ll be able to talk to a local history buff who knows what this was. It doesn’t really matter–it’s just that we have always had to work around it. Part of it was broken apart to put the original irrigation ditch through and, even though grass will grow on top in the winter, it dries out in summer and the desirable pasture plants don’t grow there. NRCS calls this job “obstruction removal”.
Brett is the contractor with the heavy equipment. He first scraped the layer of dirt and grass off the top of the cement. Most of the concrete was only 2″ to 3″ inches thick and a lot of it broke into smaller crumbly pieces . The borders were a lot larger however.
Brett used the excavator to scoop up chunks of broken concrete.
We found that a clay pipe ran the length of the concrete.
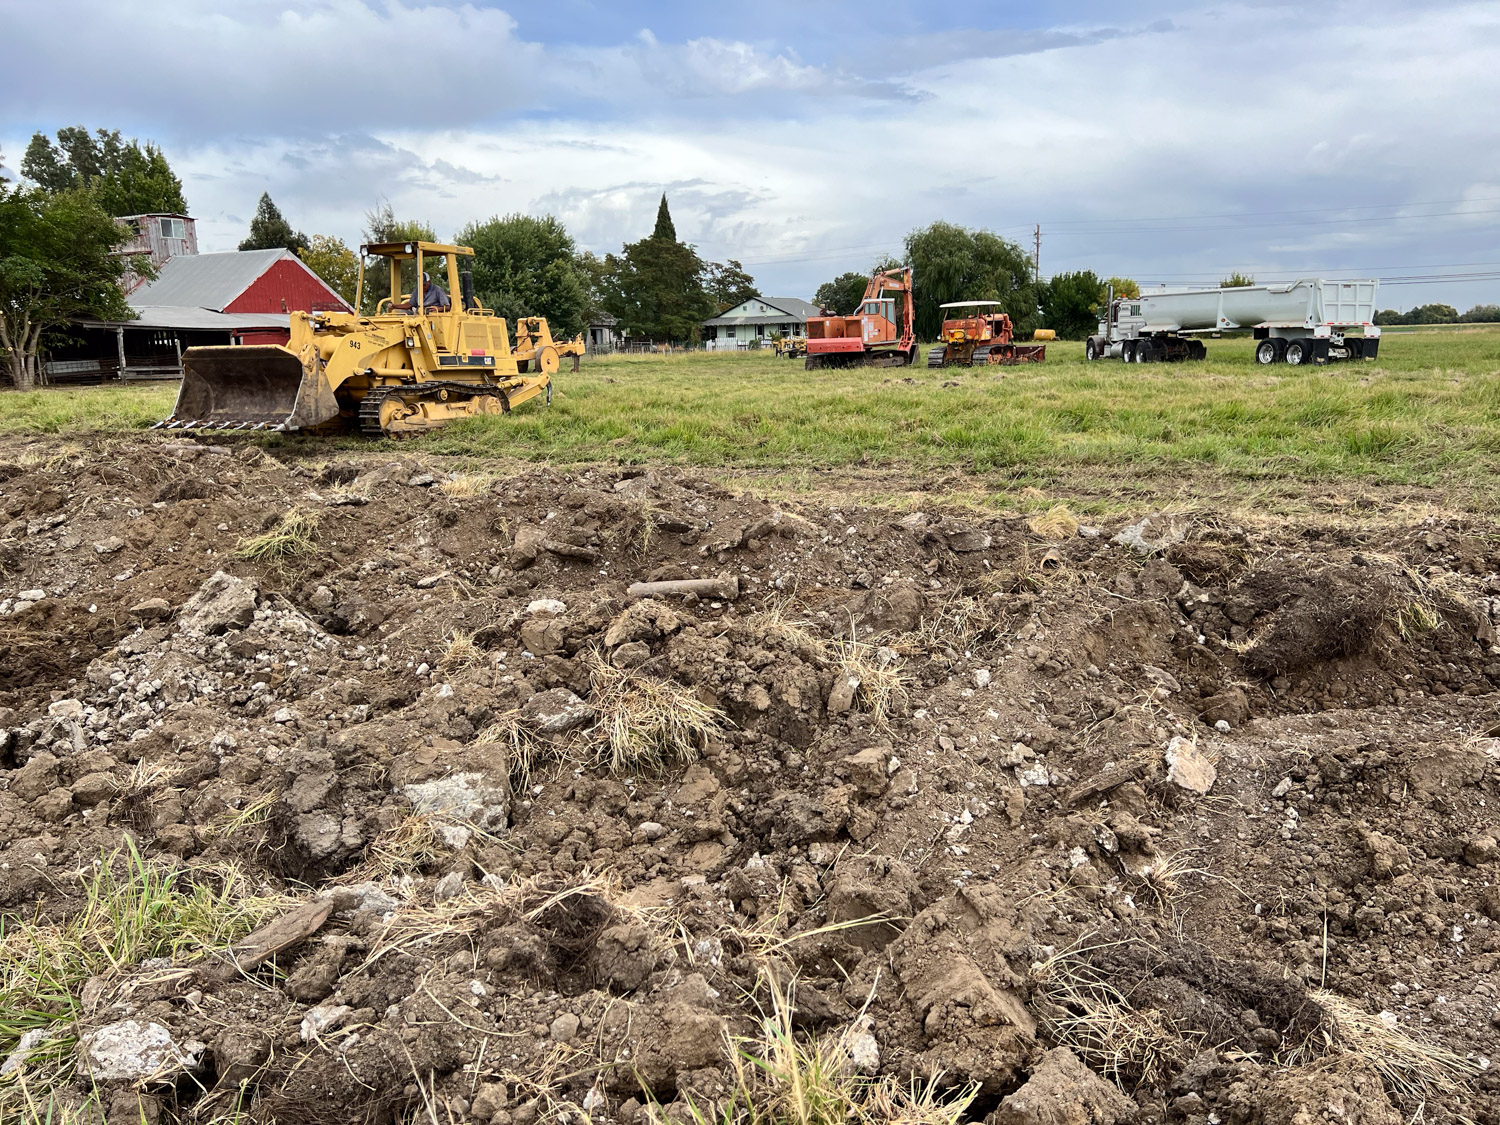
Brett used the teeth on the track loader to rake through the dirt and find the concrete chunks.
The chunks were loaded into a truck for removal to a place where they’d get broken up even more for use in road bed material.
Eventually the pile of dirt that was scraped off the top was incorporated back into the area where it had been.
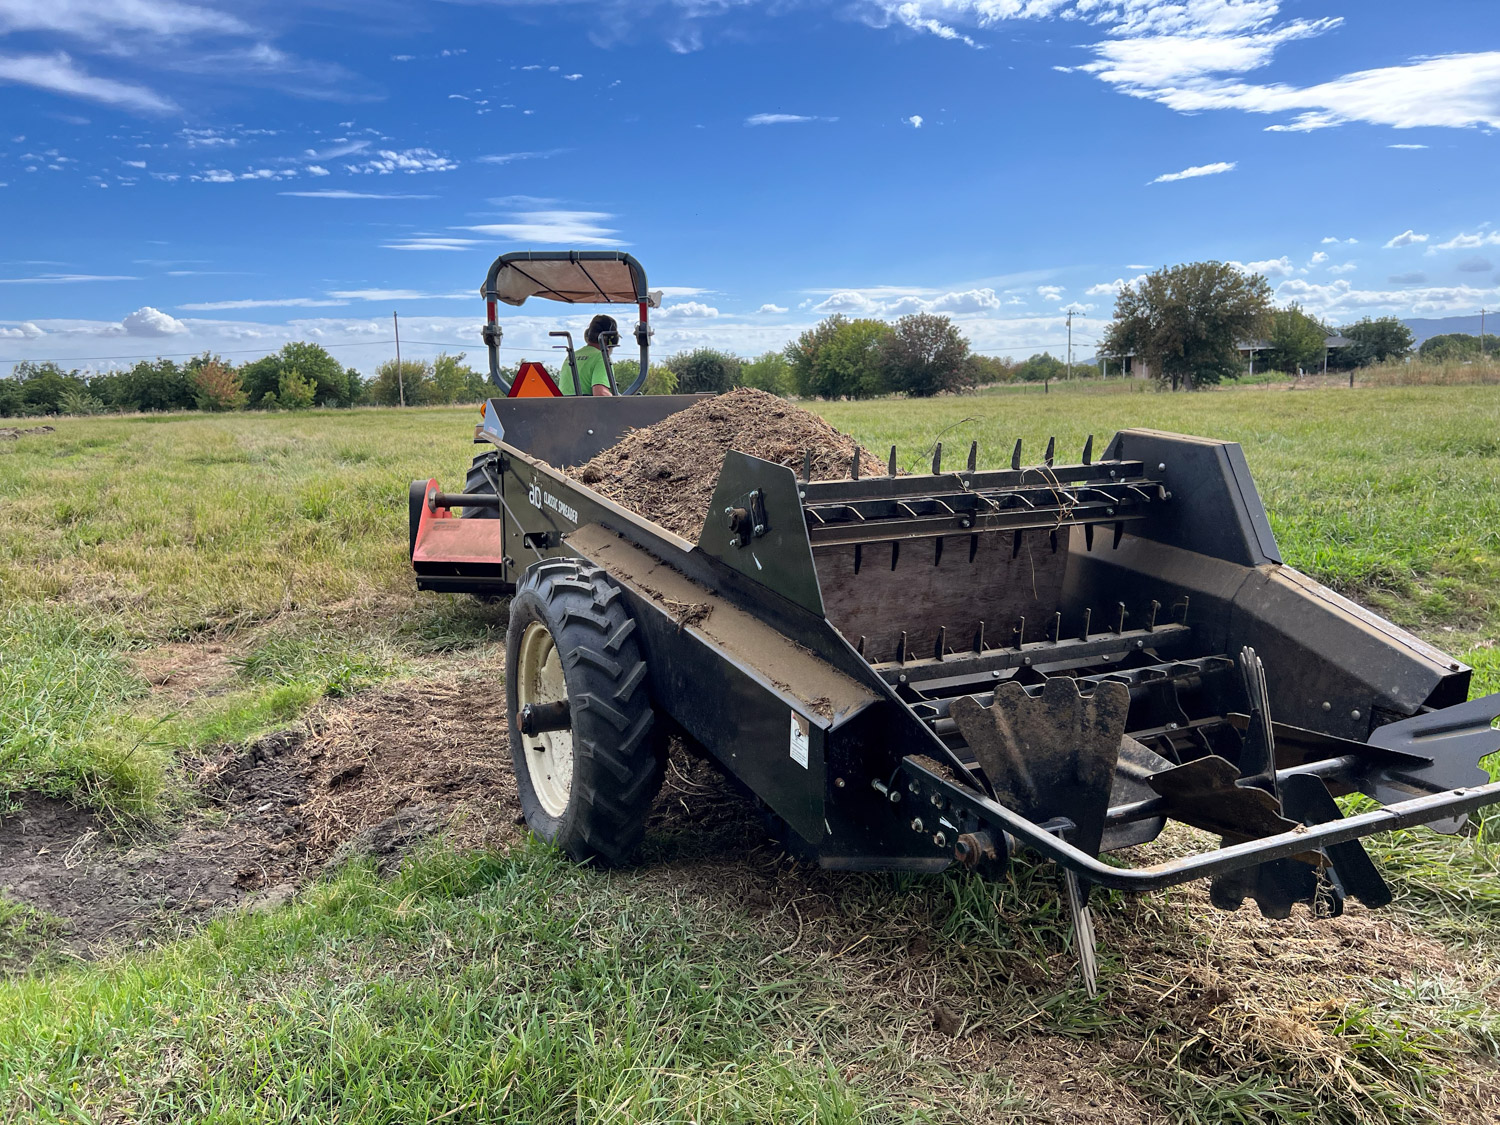
While Brett was working on this part, Dan spread the rest of the composted manure pile.
This part of the job took about three days using all this equipment.
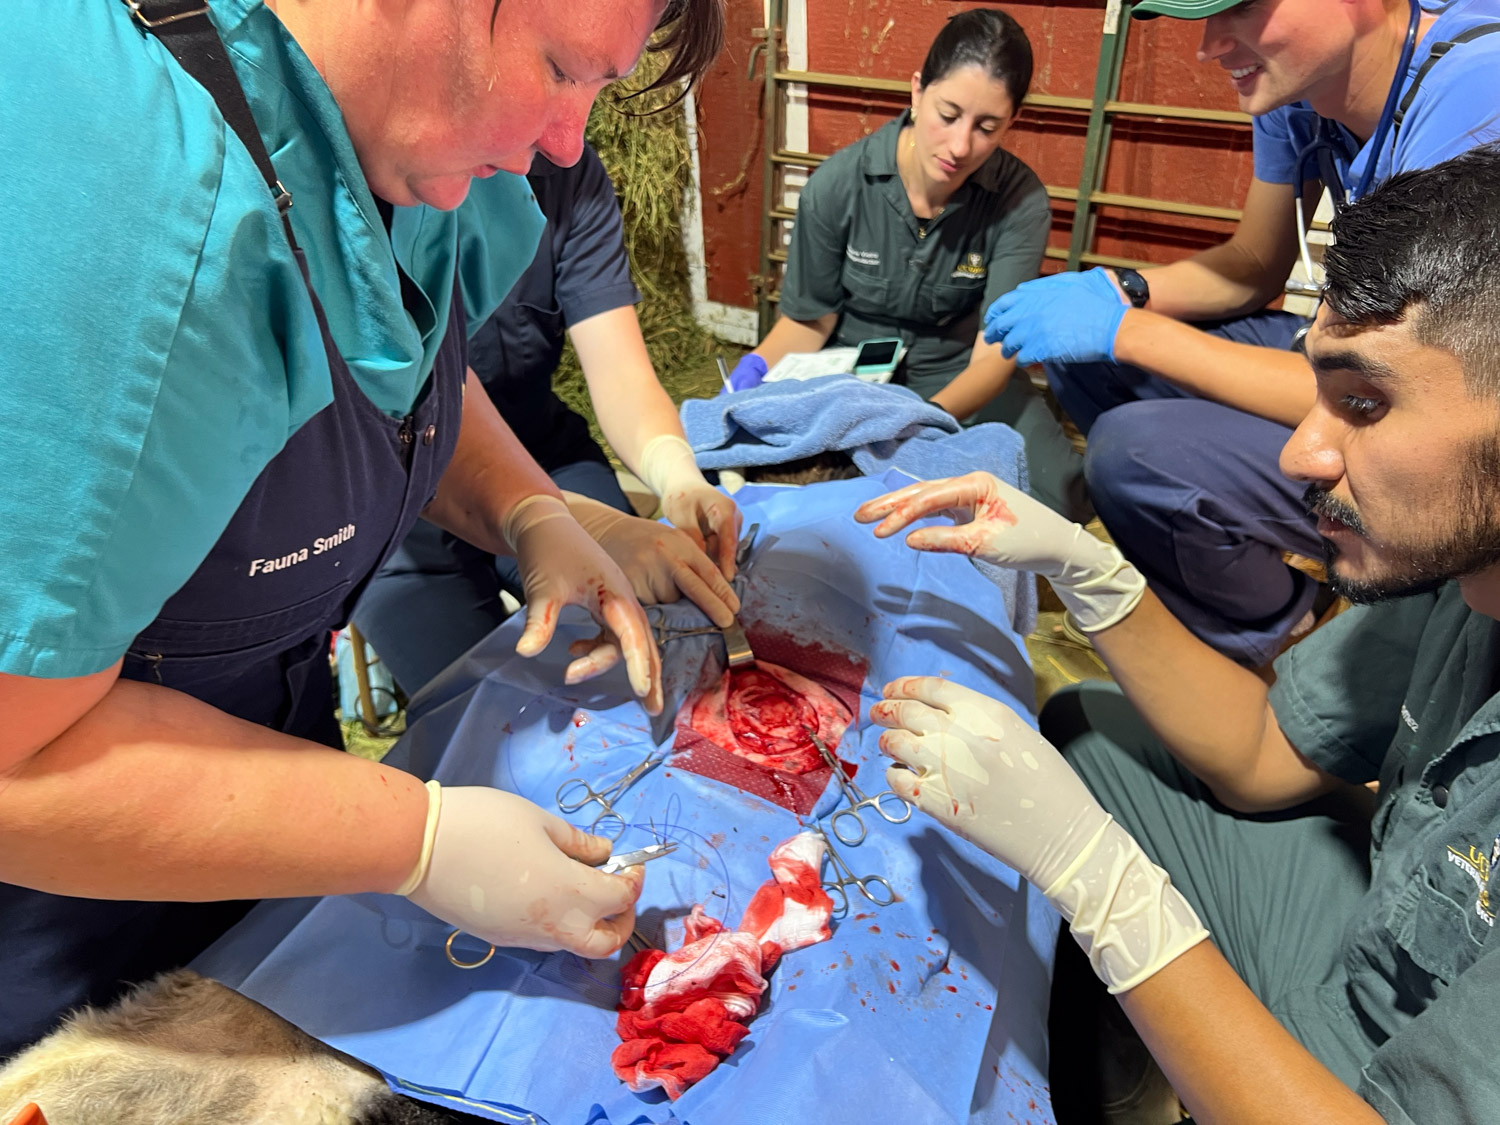
Field Surgery doesn’t necessarily refer to doing surgery in a field, but it means that it is not at the hospital or clinic. This surgery was in the barn.
Patchwork BettyLou is a sheep that I bought in 2021 from a well-respected flock in Georgia. She is only three years old and has several years ahead of her. I had a dilemma.
This is Bettylou in May of this year. The UCD Field Service vets were out here for something else and I brought her in for an exam. The recommendation was to take her to C-Barn (the vet school large animal hospital) for a further look. It was determined that she had an abscess. The abscess was lanced and drained and I was to flush the opening for ten days while it was healing. I did that and finally let her back out.
This is September. I had been watching this get larger over the last couple of months.. It didn’t feel like an abscess and it didn’t seem to bother Bettylou. She didn’t show any pain when I touched it and she was acting normal. I needed to do something though. I am trying to sell a few sheep to lighten the load while we go forward with the big pasture project. Bettylou is not one on the list of most likely to sell, but sometimes you have to cull sheep with problems that will make them less fit to stay in the flock. I couldn’t sell her like this and I didn’t want to sell her anyway, but I needed to do something. The first visit was about $350. I talked to one of the veterinarians on the phone and she asked if I could reduce the swelling. I had been hesitant to manipulate that more than to find out that Bettylou didn’t seem to be in pain and that it didn’t feel like an abscess. Sure enough, I could easily squeeze everything back through a hole in the body wall and feel the opening that was about the diameter of a golf ball. It was a hernia that could probably be fixed with surgery. I got estimates for surgery if I took her to C-Barn and for field surgery. I chose field surgery, the less expensive option. That call was three weeks ago and the hernia was definitely larger by the time we had this appointment.
How did Bettylou get first the abscess and then the hernia? It was not on the midline, but off center. Have you ever seen Jacob sheep at the feeder? Sometimes one will put her head down and butt the one next to her. You can imagine the damage those pointed top horns can do. That’s the only thing I can figure out–that she had a small wound that became infected. It turns out that an access can weaken the tissue around it so maybe that is why a hernia developed even though the original abscess was cleared up.
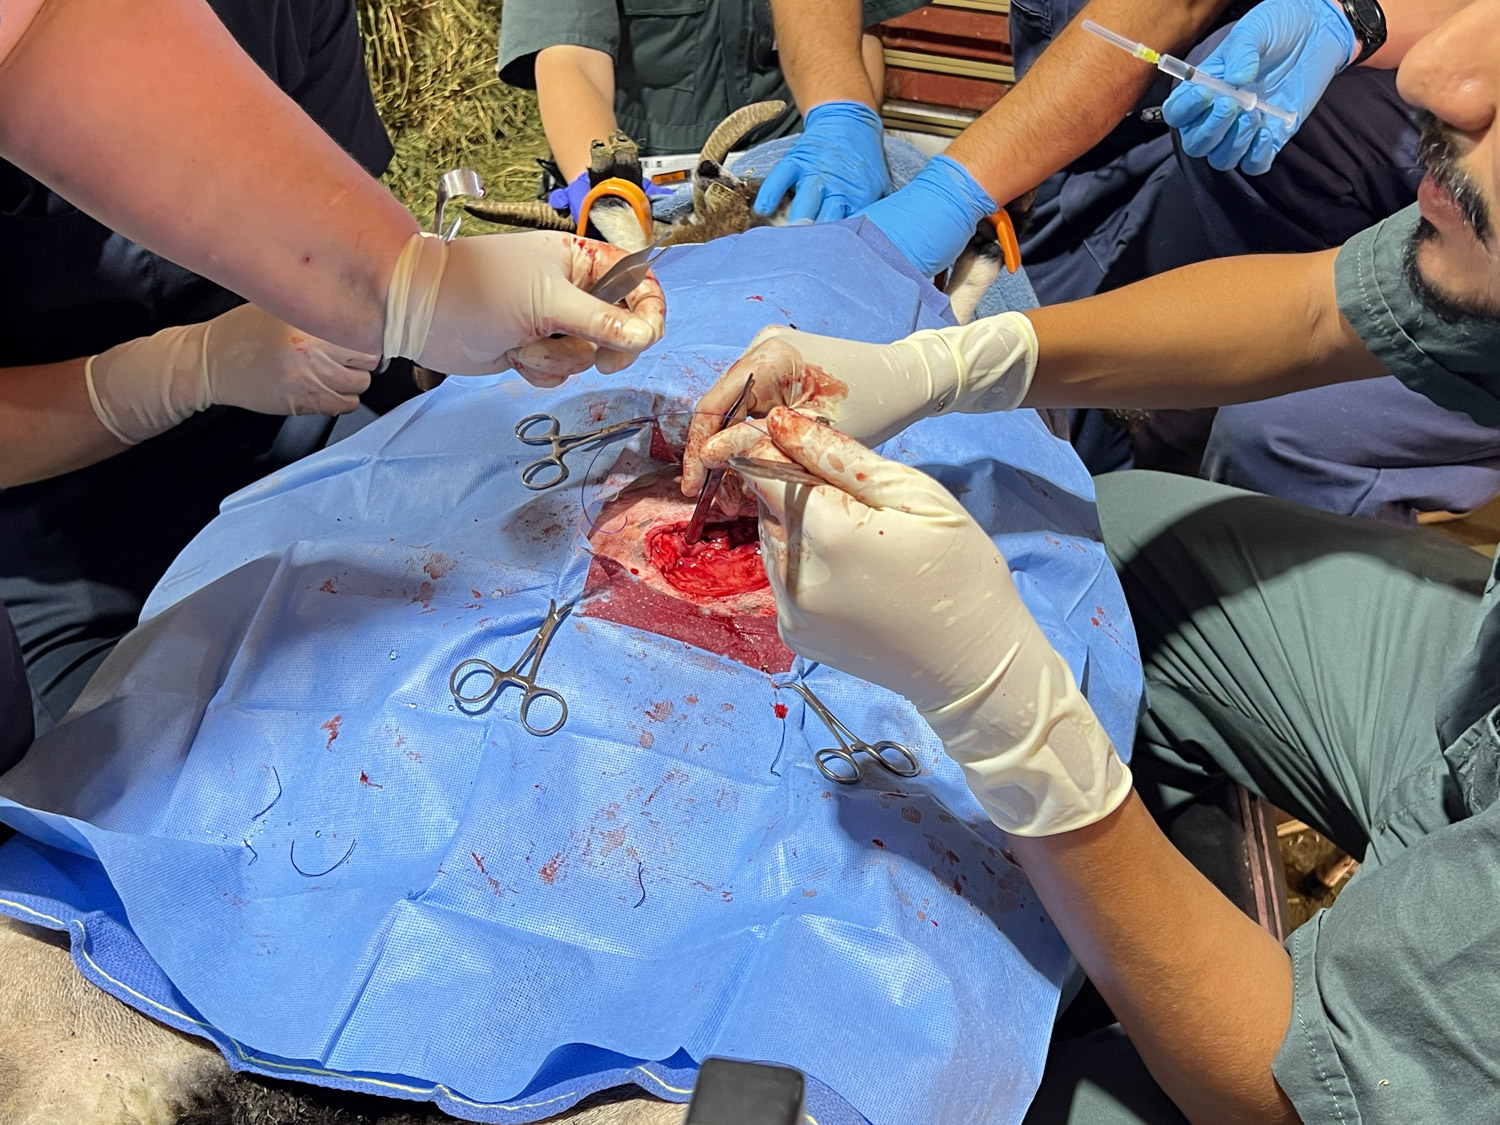
I hope I don’t get somehow blacklisted for showing the following photos. It’s real life and a happy ending. So what’s wrong with that?
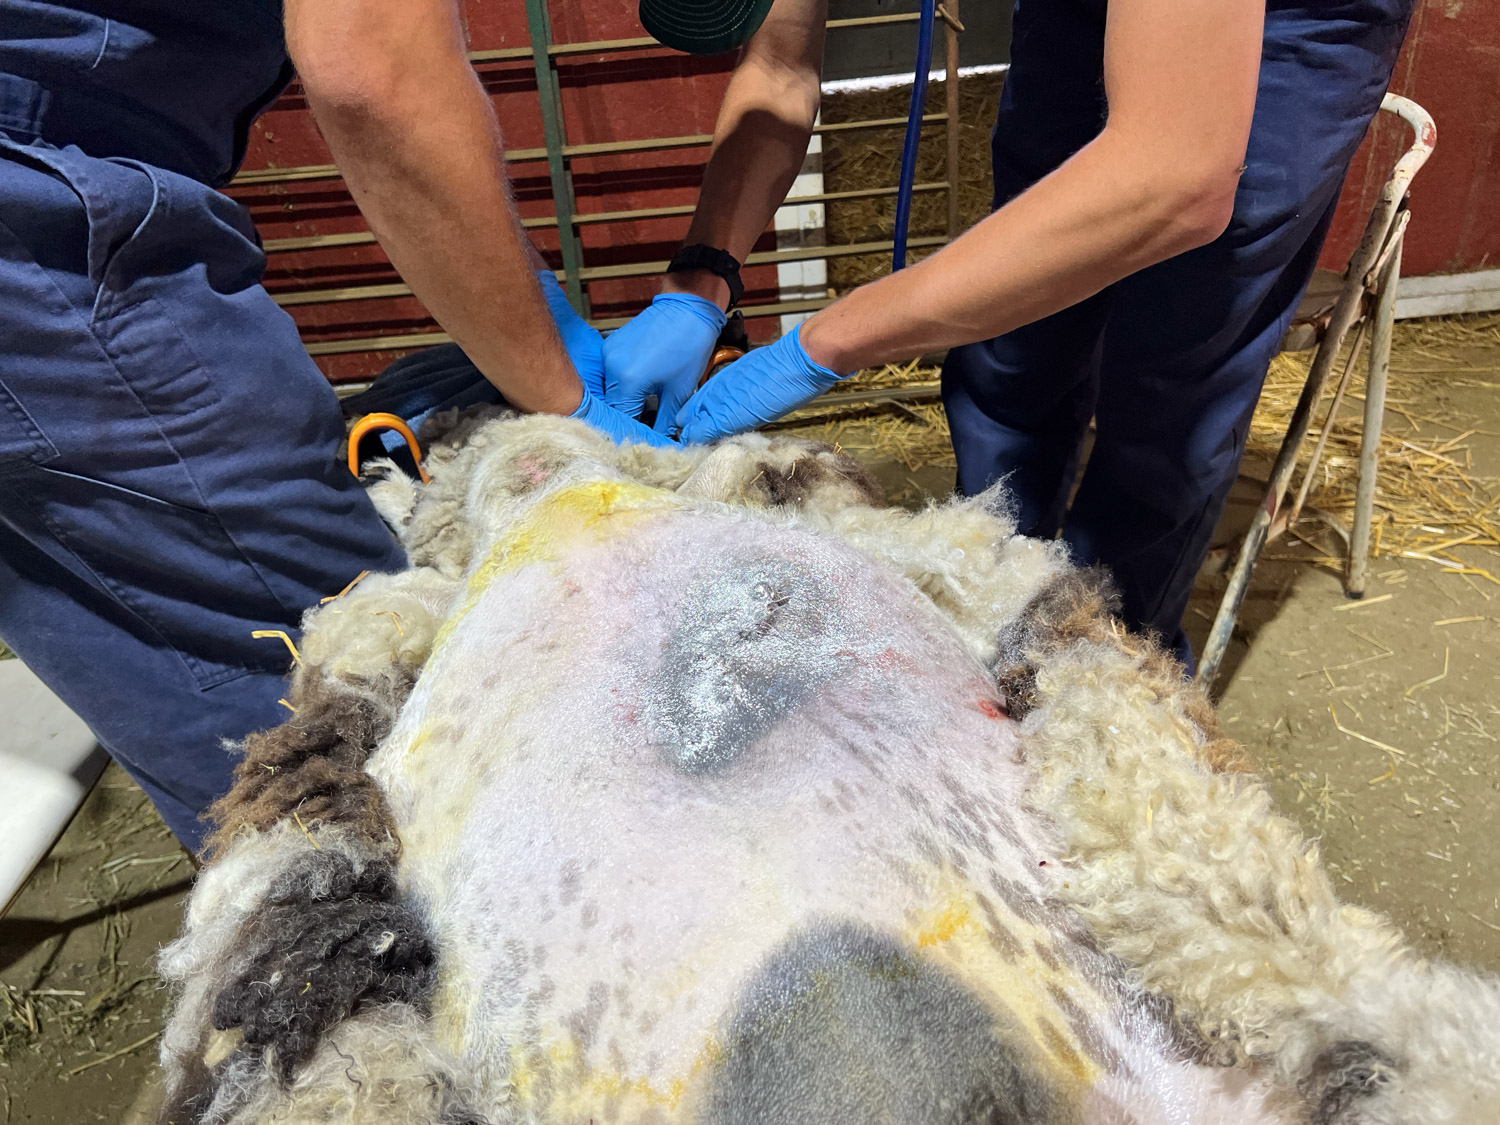
The vets brought a cradle on wheels to hold the sheep in position. She was given anesthesia first and the wool on her belly was trimmed away. Notice how the protrusion is gone. Gravity helped with that as the intestine and fatty tissue dropped back inside the hole in her body wall.
Bettylou’s belly was thoroughly scrubbed and the vets injected lidocaine around the place where the wound would be.
This is the extra skin that had stretched as the tissue weighted it down from the inside.
The vets cut an ellipse in the skin around the area.
Once that skin and the next layer of tissue was removed you could see the ring through which the fat and intestines were dropping. The vets made sure that any adhesions were loosened before closing the wound.
They stitched three layers. First they closed that hole and used what I think they said was a mattress stitch. The different stitches they used reminded me of teaching hemstitching in weaving classes. They closed another layer of membrane (or muscle?)
Then they closed the skin wound.
The final coating of an aluminum bandage spray.
Here is Bettylou on her feet…
…and back in a pen where she’ll stay for 2 weeks.
Bettylou won’t be bred this year but she’ll be ready to go for next year. I’m glad to have been able to keep her in the flock.
I brought Ginny home ten years ago when she was two months old.
She is a red and white Border Collie named after the red-headed girl in the Harry Potter books.
She came from Mendenhall Wool Ranch, where I also got Rusty. They were related in some way, but I forget how now.
We still have this moose in the toy basket.
I don’t remember who brought this drone here, but Ginny didn’t think it belonged.
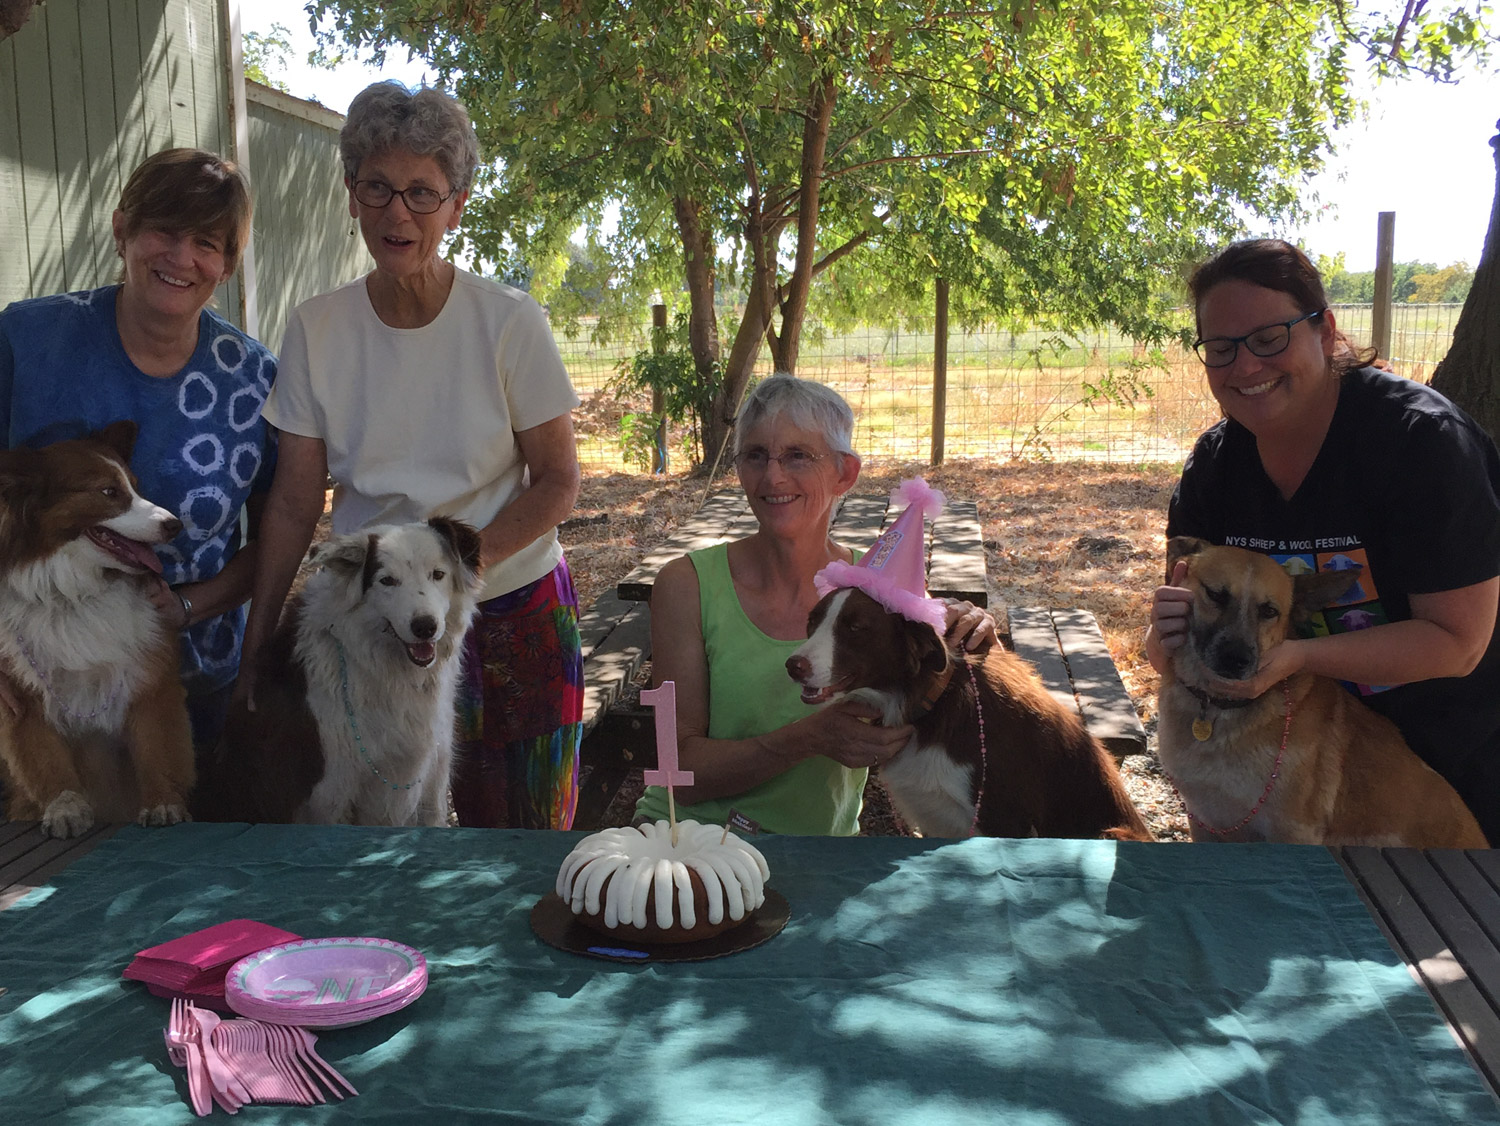
Ginny’s one-year birthday. Fiona, Rusty, and Maggie were in attendance.
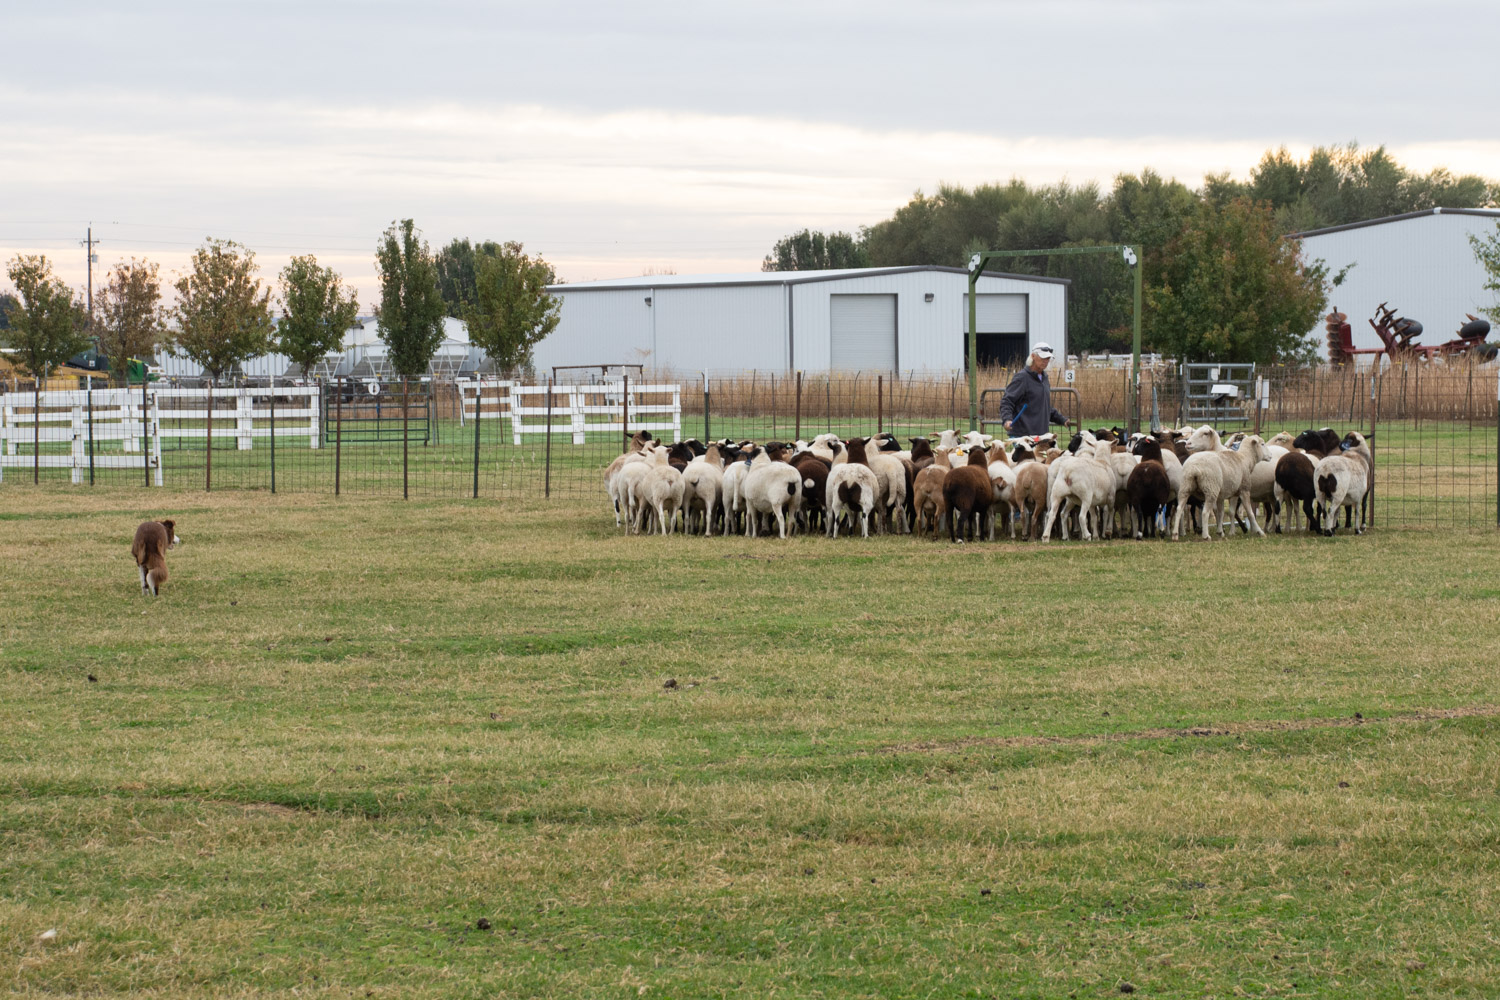
Ginny was born with good herding ability. The most training that is needed is that of the partner (me). I learned most of what I know from Debbie at Herding 4 Ewe, just up the road from here. I had worked with Rusty there when he was younger and took Ginny for awhile.
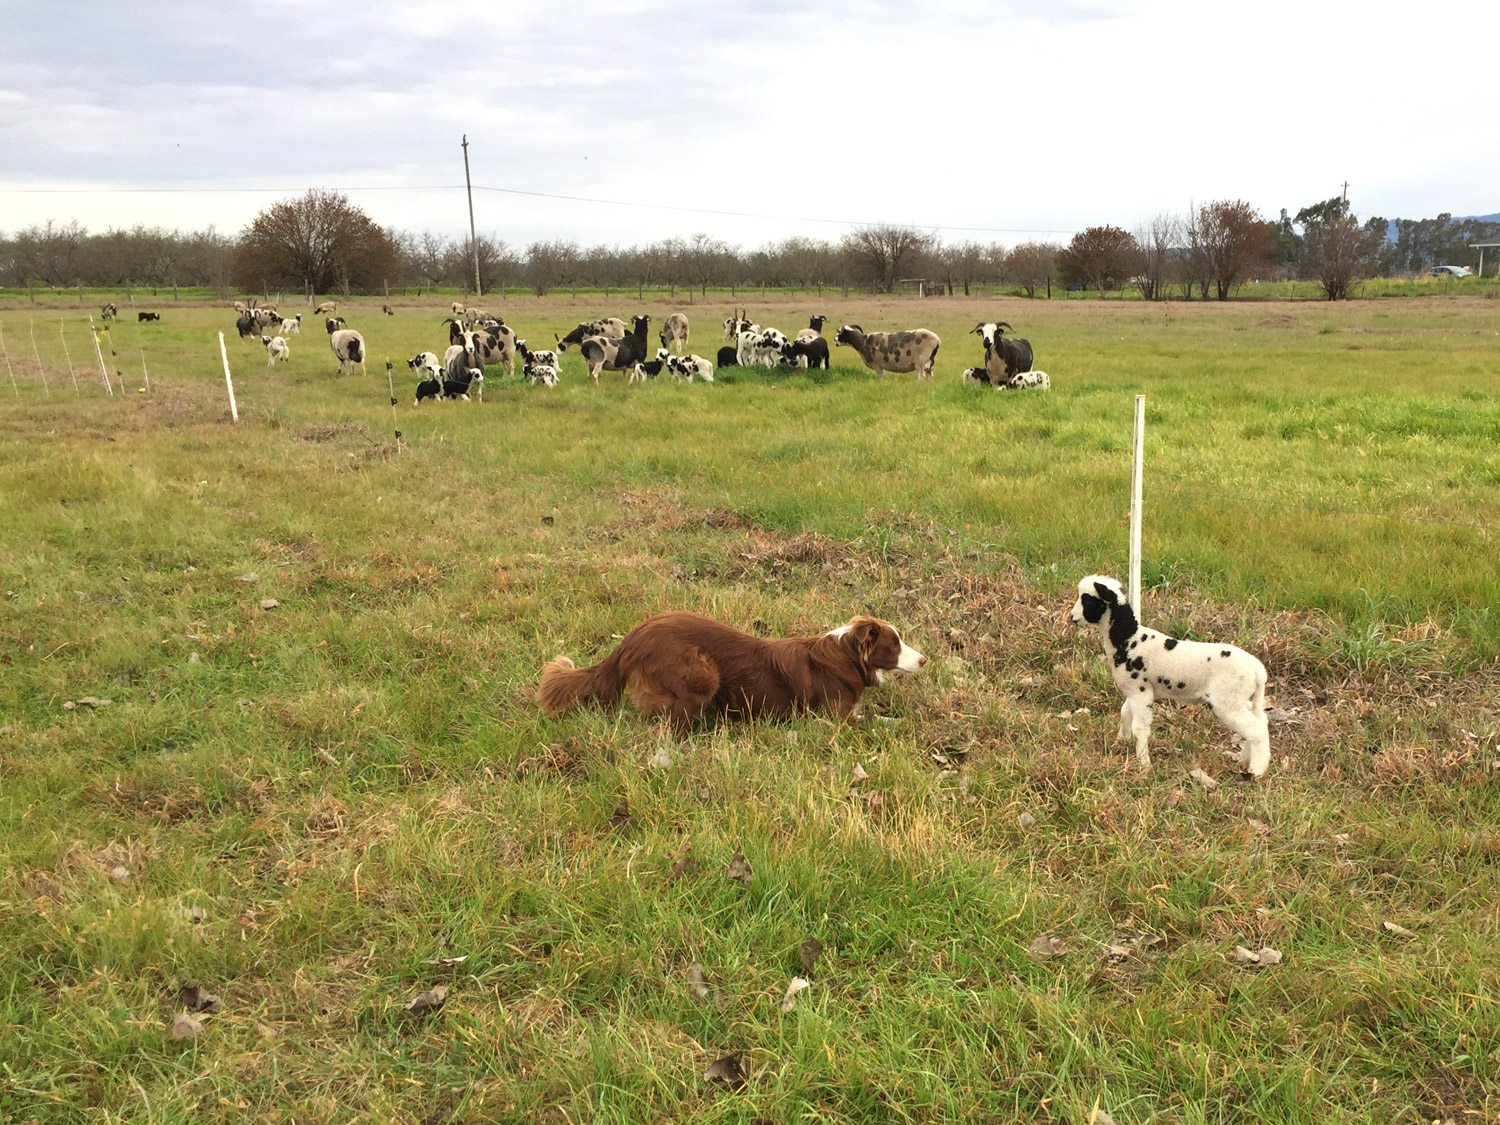
We don’t have that much work for a dog here and I try to create situations where she can work. Most of it is after I have weaned lambs and we can work with them. It’s difficult for a dog to move sheep with young lambs when the ewes aren’t “dog-broke”, meaning that they are going to defend their lambs and threaten the dog.
And young lambs certainly don’t know that they are supposed to move away from a dog.
One of the important jobs I have for a dog is to either move the rams into a place where I can catch them or to keep them away from me while I’m working in the pen. Ginny and Rusty keeping rams away in this photo.
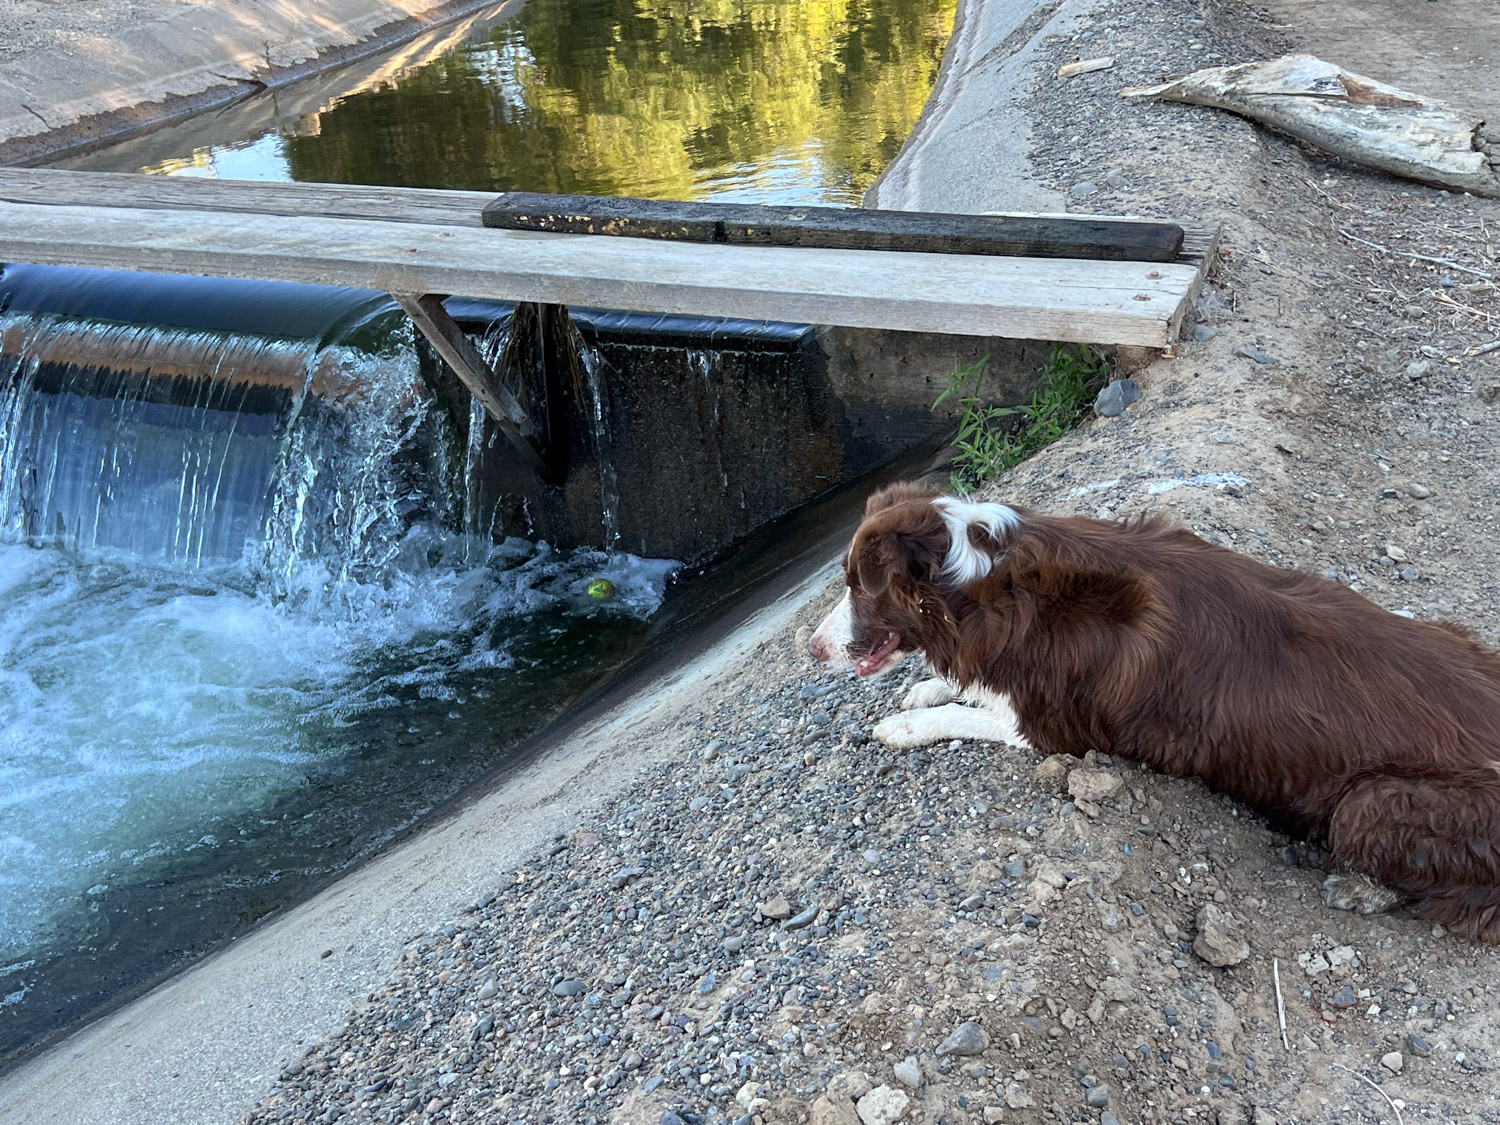
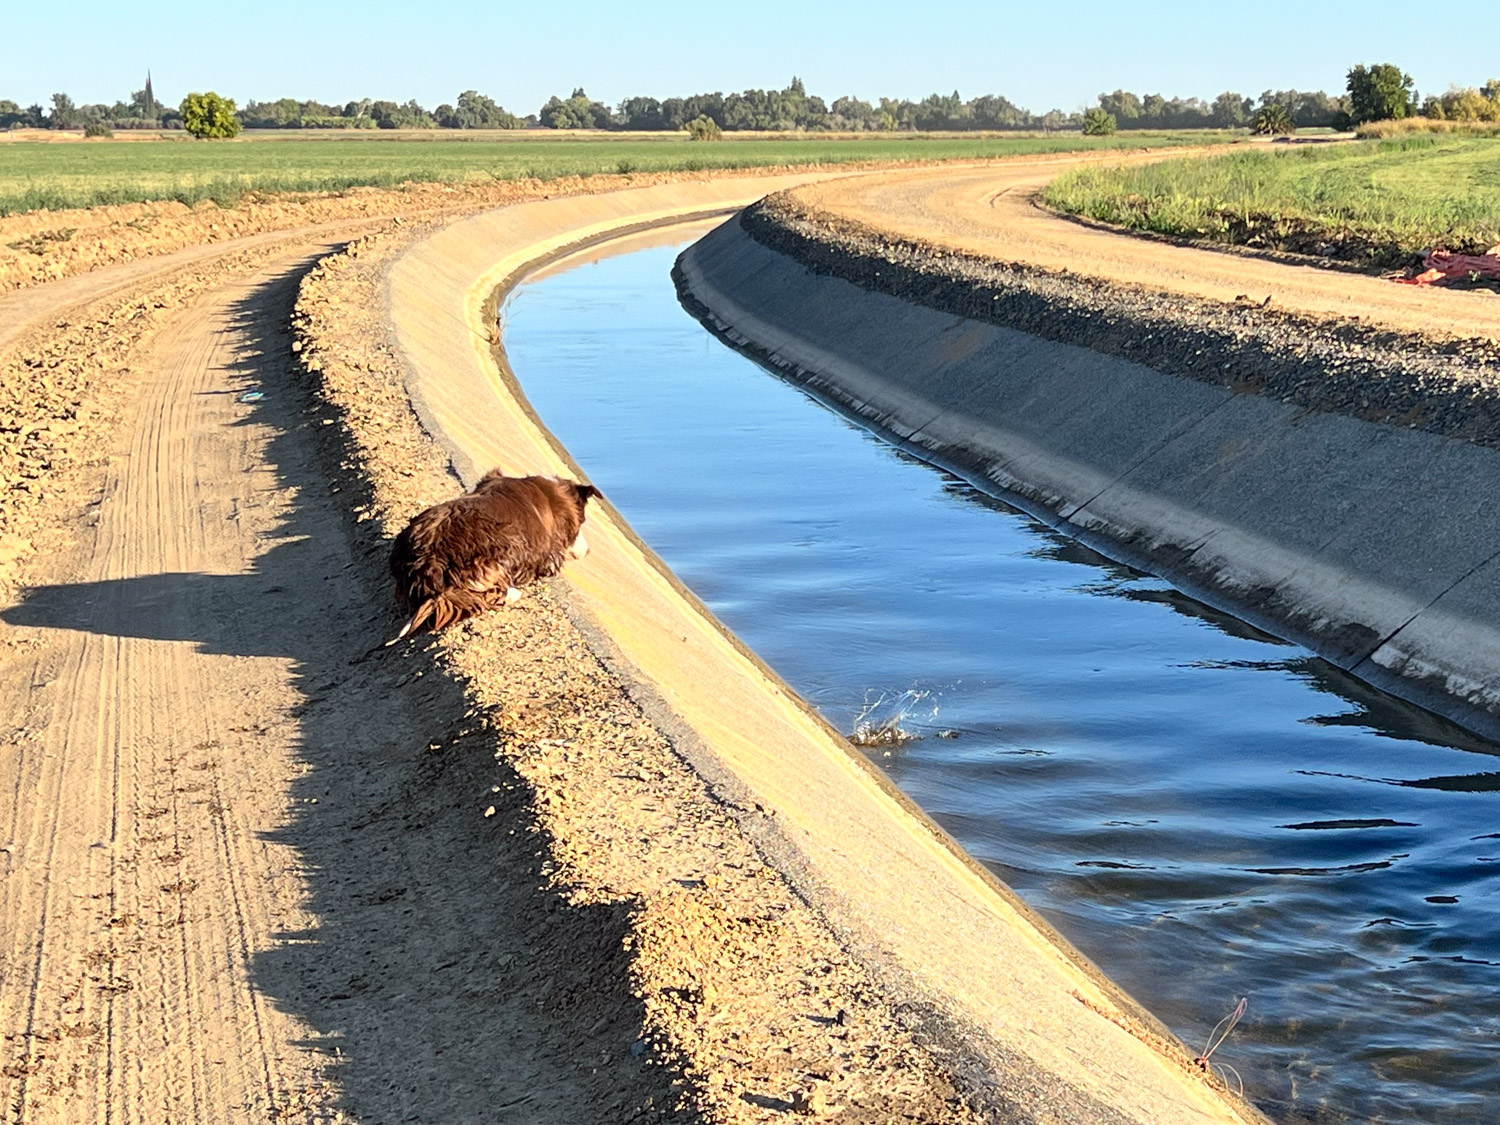
Rusty never wanted to play with a ball. I taught Ginny about balls thinking that would be a good distraction when we didn’t have real sheep work to do. Sometimes I wonder if that was a mistake. On walks Across the Road her favorite thing is to drop the ball into the canal just beyond the dams where the water is swirling.
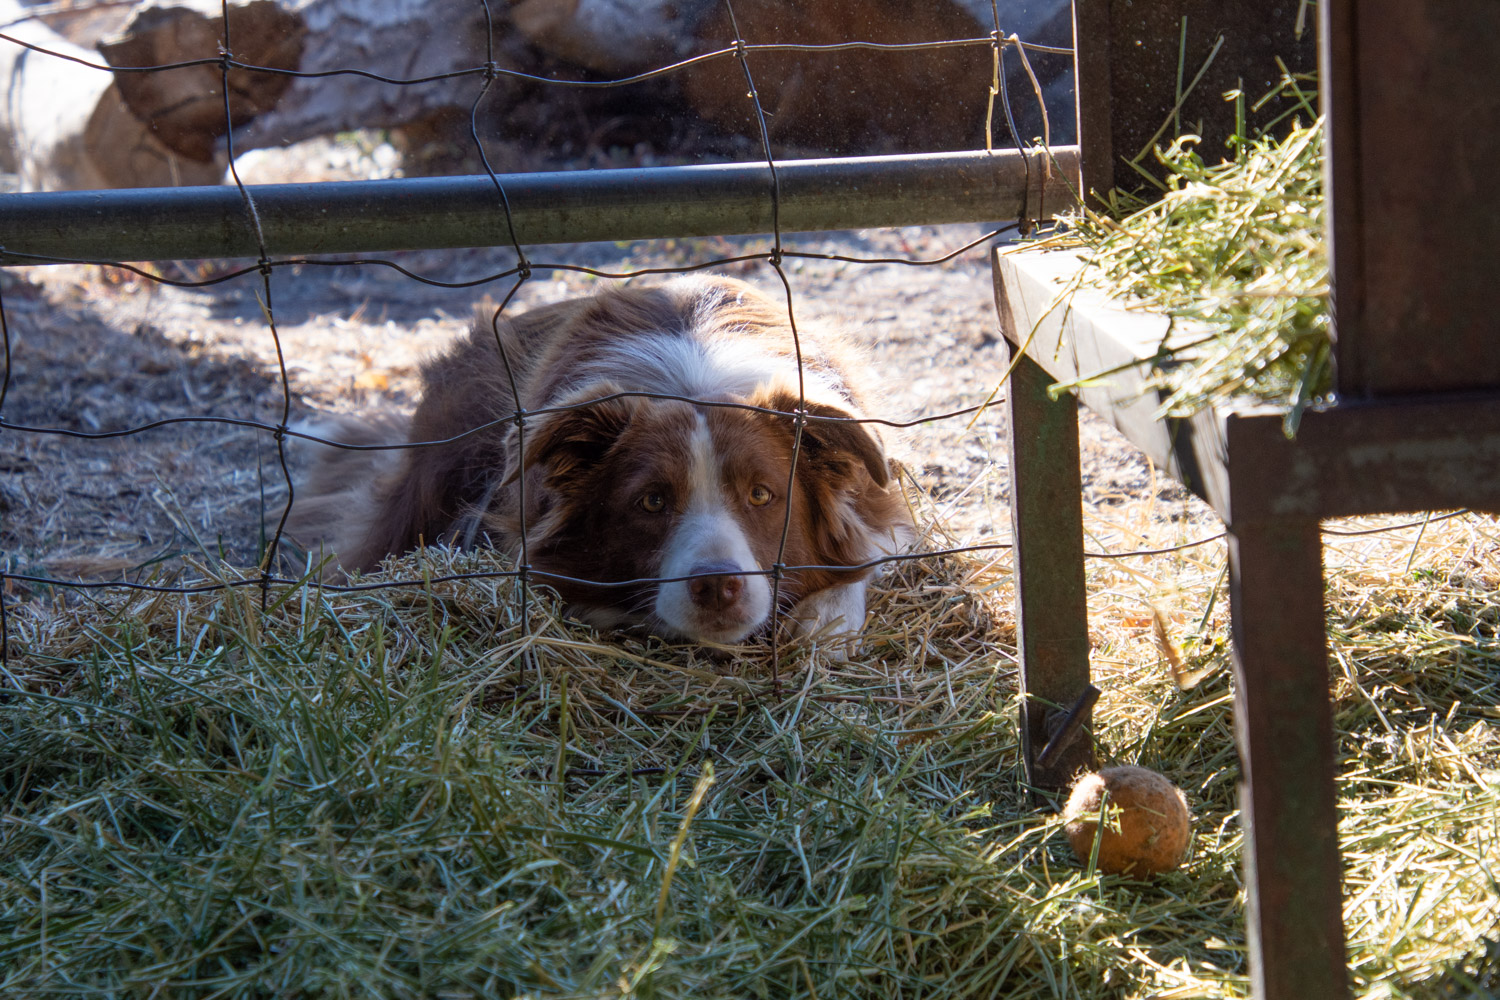
She also puts the ball through a fence where I am working and she can’t get it. Therefore I am expected to pick up the ball and throw it.
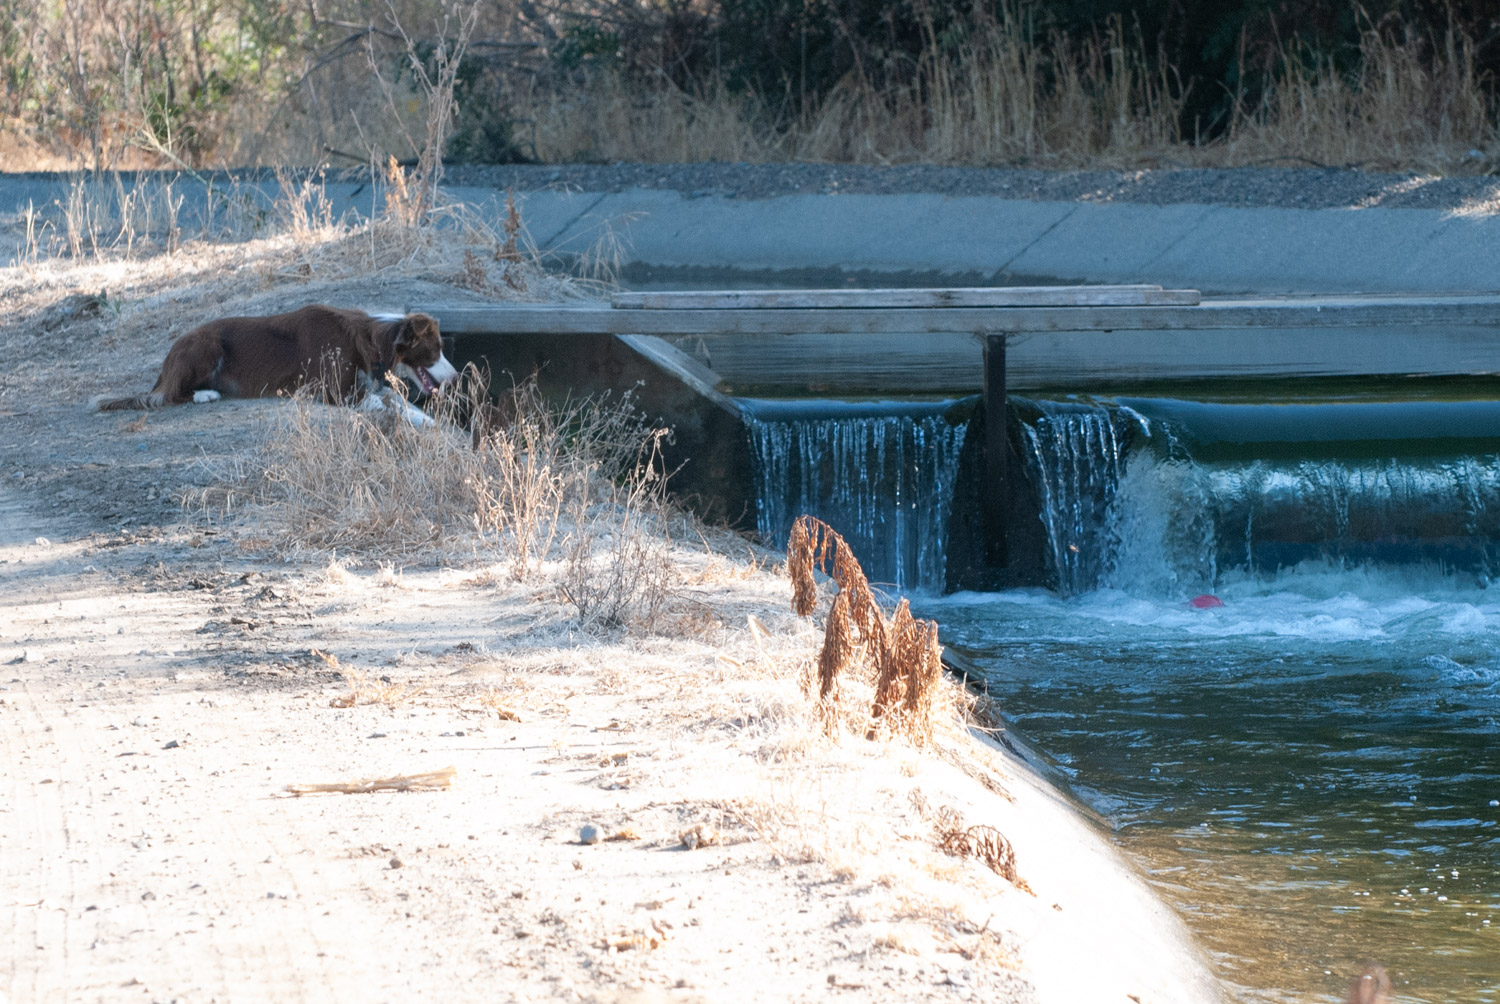
Here is a different canal photo with a pink ball. Ginny gets in the canal in the other portions but I don’t want her jumping into the cement canal at these areas where the water is fast and swirling.I have been known to create a net using a forked stick and the leash so I can get the ball out of this situation.
This photo is from about a year ago. That’s the same moose and an oil bottle she took out of the recycle bin.
Also taken a year ago.
This photo is from last week. I didn’t let her have the ball while we were near those dams but she dropped it in the canal repeatedly as we walked along here. She drops it in and jumps in for it after I tell her she’ll have to get it.
How will we celebrate? We’ll go for a walk Across the Road and she can help move rams as we set up breeding groups.
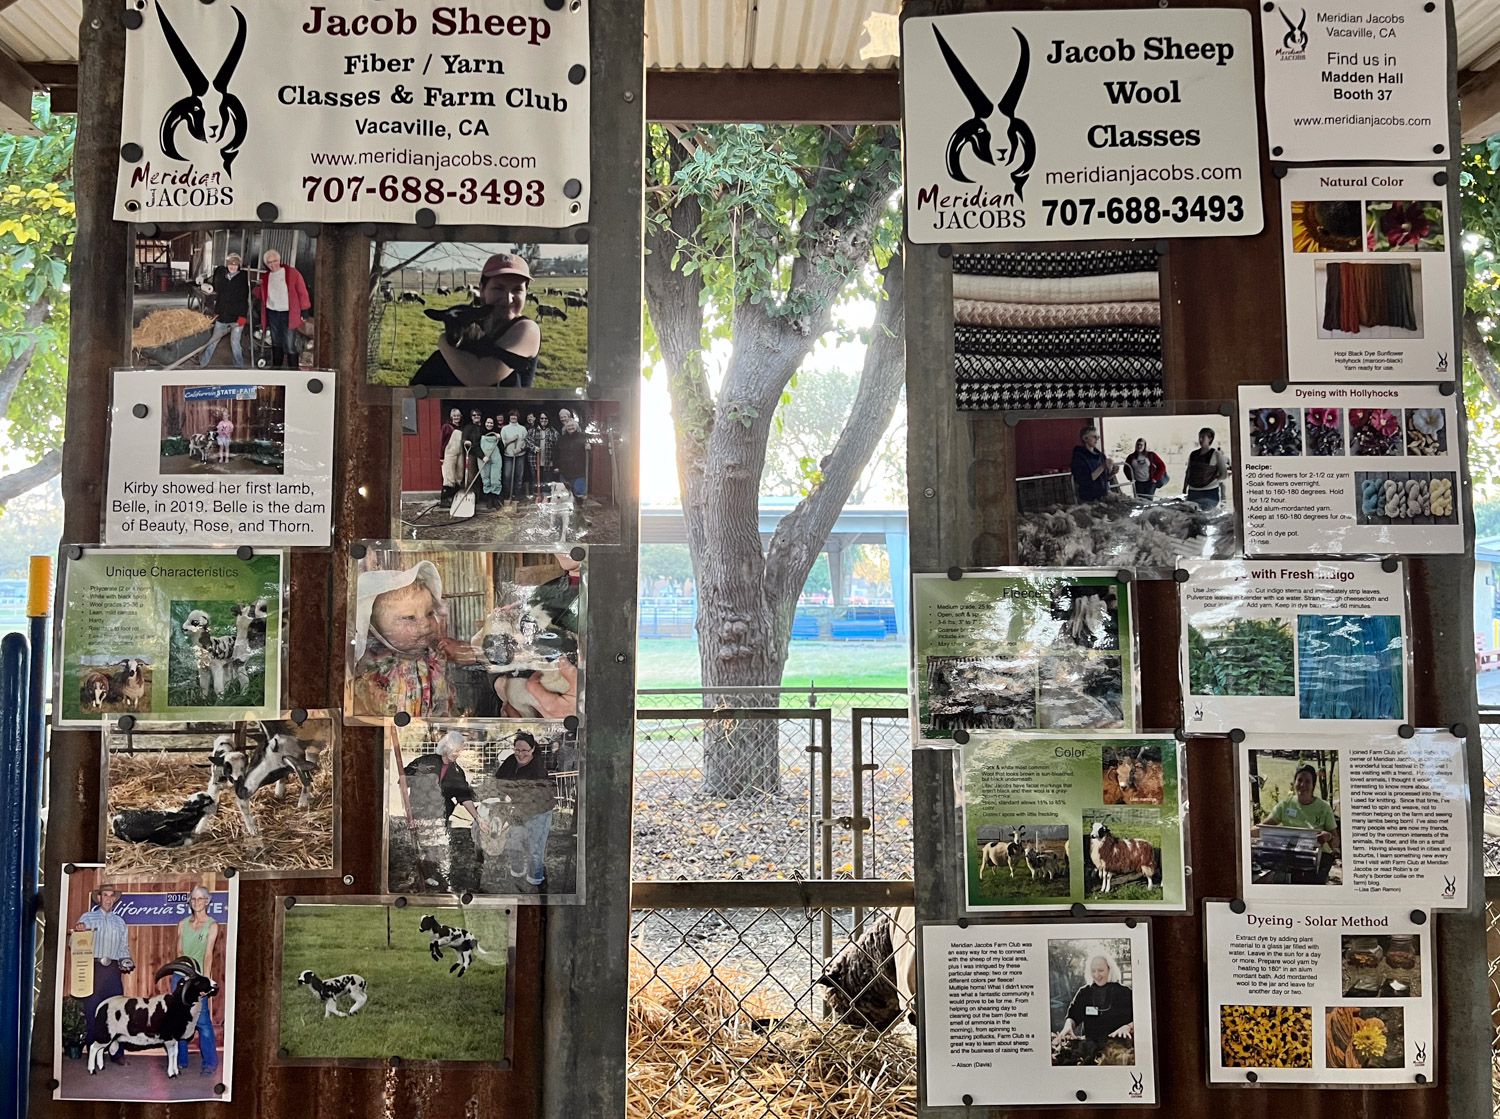
I went early on Saturday and Sunday to feed sheep. This is the display that Farm Club members put together for the barn.
The ram, Blizzard, started out in a different pen but he and the ram lambs were fighting through the fence during the night. Dan and Farm Club members switched pens for him and a couple of ewes so there wasn’t direct contact with the other rams.
Walking back to the vendor building I stopped at Woolly Adventures. This is quite an undertaking, but Gynna does a fabulous job.
There are over a dozen different activities for kids here. ..
…and she thinks up more each year.
I labeled more naturally dyed yarn Saturday night and had it at the booth on Sunday..
The sheep show was on Sunday. I had to be in the vendor hall so Farm Club members handled all the show details. Marina, Beth, Reba, and Nicki showed most of the sheep.
Dan helped out with the yearling ram.
Thanks to Deborah and Nicki for the photos of the sheep show.
Thanks to Doris for recording the show and the judge’s comments so I could watch it later at home! The sheep show didn’t end until after 4 when the vendor hall closed. Friends and I took the booth down quickly. Dan loaded sheep and drove them home. Then he came back with the other trailer for the booth.
He walked in with this new dolly with a note that said Happy Birthday (early for my November birthday)
All these years I have carried these grids in and out of buildings two at a time. Now it will be easier.
Lambtown is our local fiber festival–only 15 minutes from my farm. After a very different beginning many years ago (but that would be another story) it is now a full-fledged fiber show complete with sheep, sheepdogs, contests, classes, vendors, demonstrations, and other activities. It is the first weekend of October, but starts on Thursday with classes. If I am going to teach it has to be on Thursday because I set up a vendor booth on Friday and am in the booth both Saturday and Sunday. This makes for a busy week. I knew I had to have the trailer packed up on Wednesday.
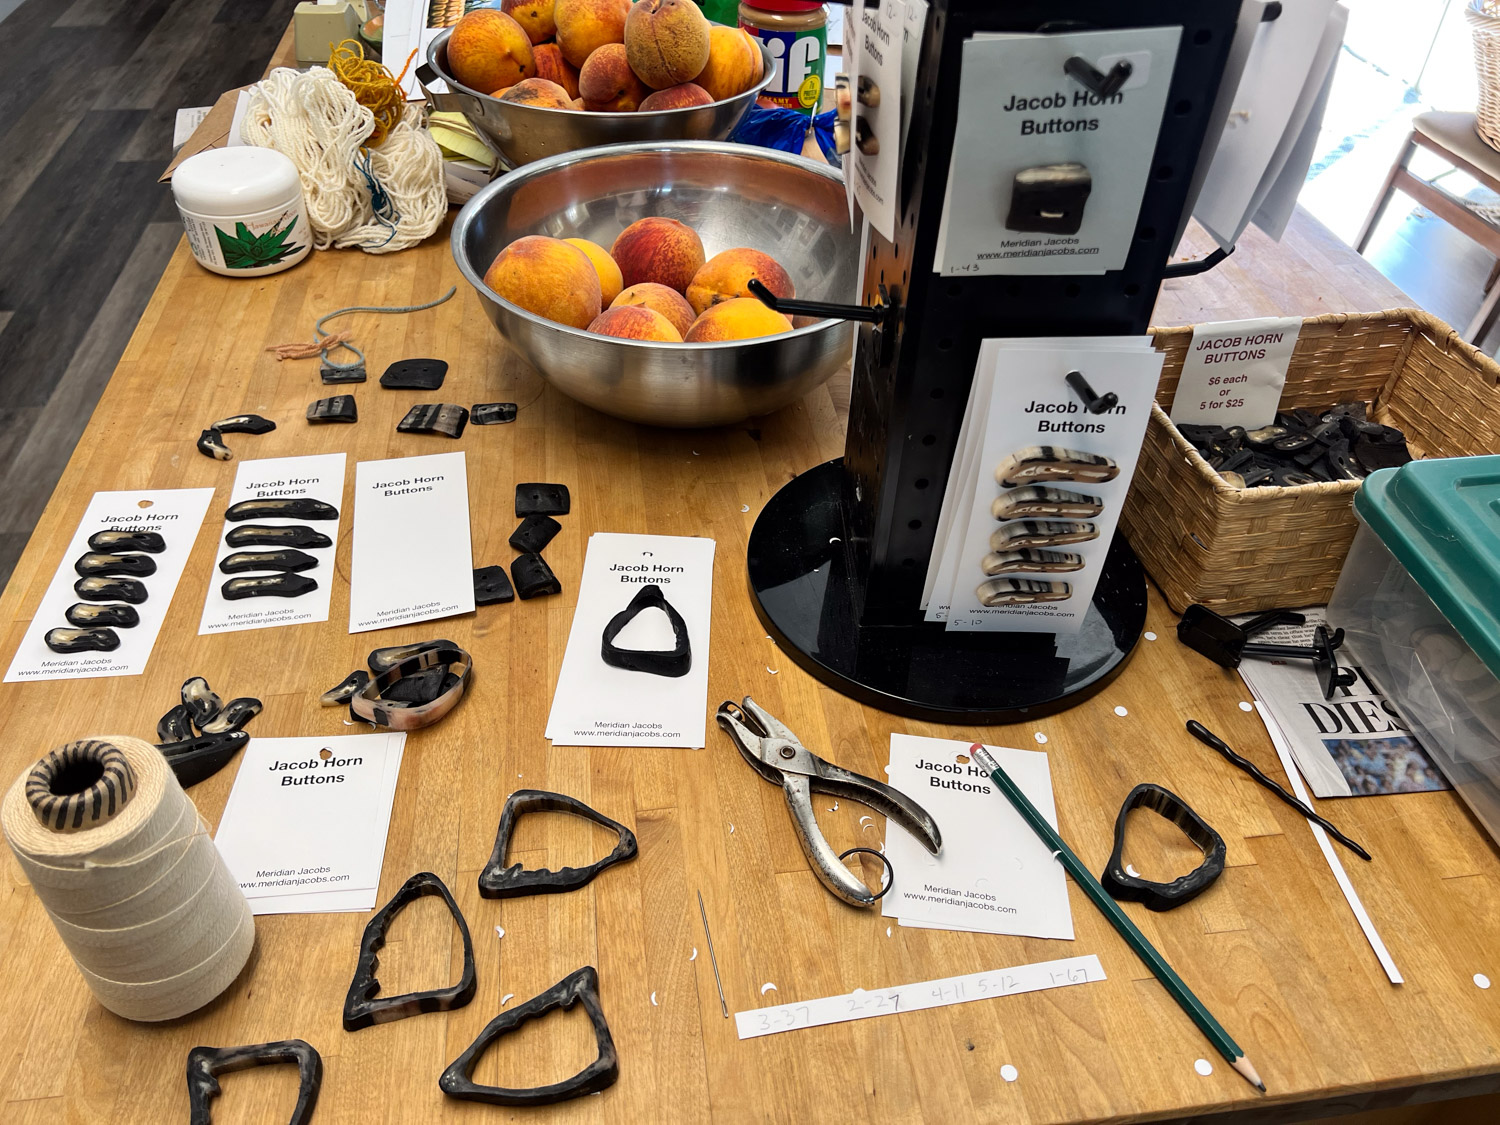
The kitchen island one of the evenings that week. I described making these buttons here. After making them I still have to put them on cards, especially for selling online later.
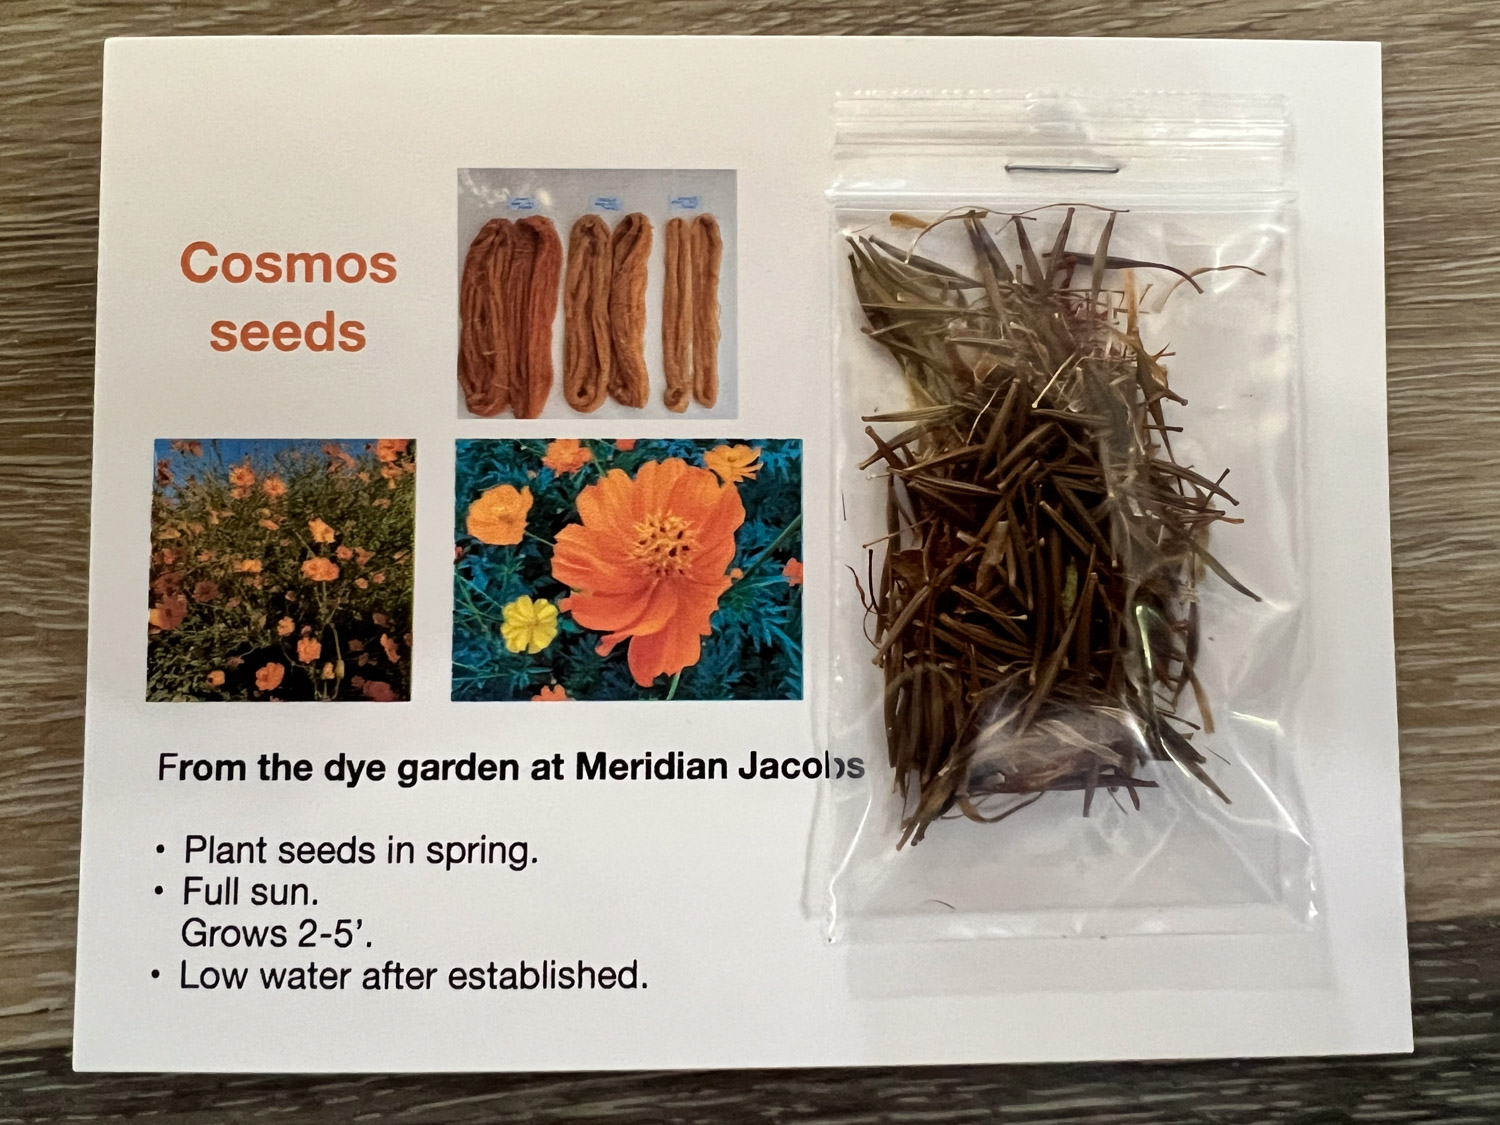
A friend thought that I should sell cosmos seeds to grow flowers for dyeing and printing, so I worked on that too.
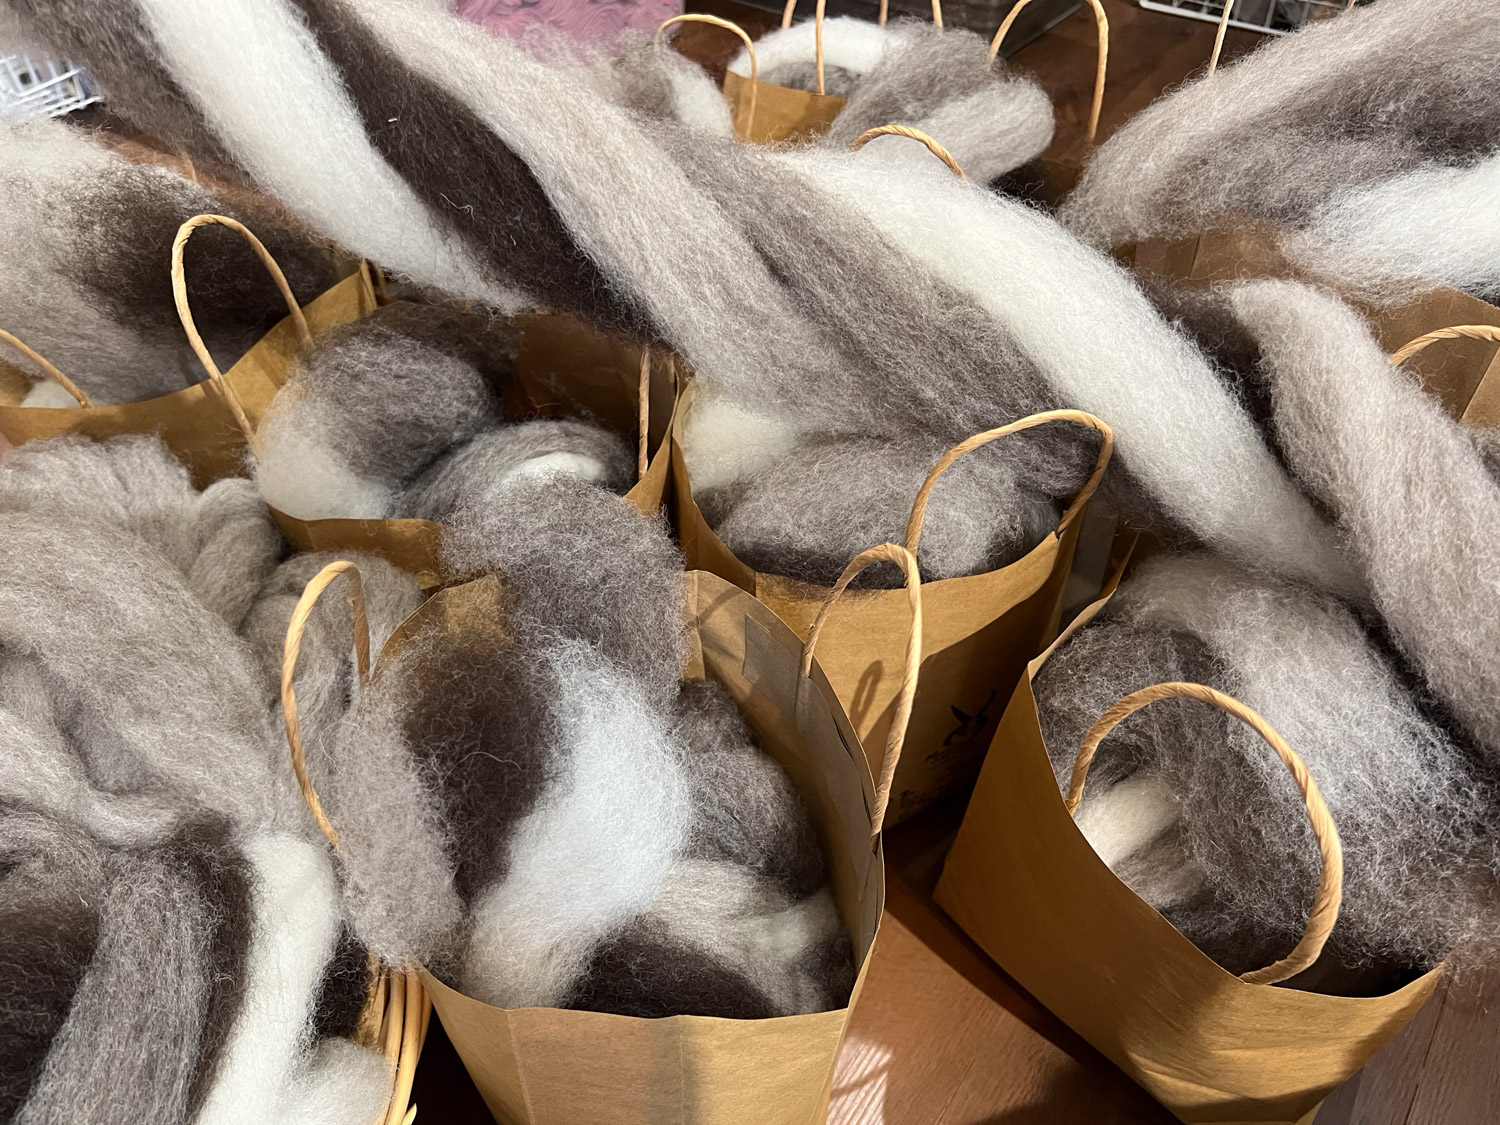
I picked up the 2024 Jacob fiber from the mill on Tuesday and needed to weigh it. Some were single color bags and others are a mix of all four colors.
A few of the shop while I was still trying to decide what to pack up for the show.
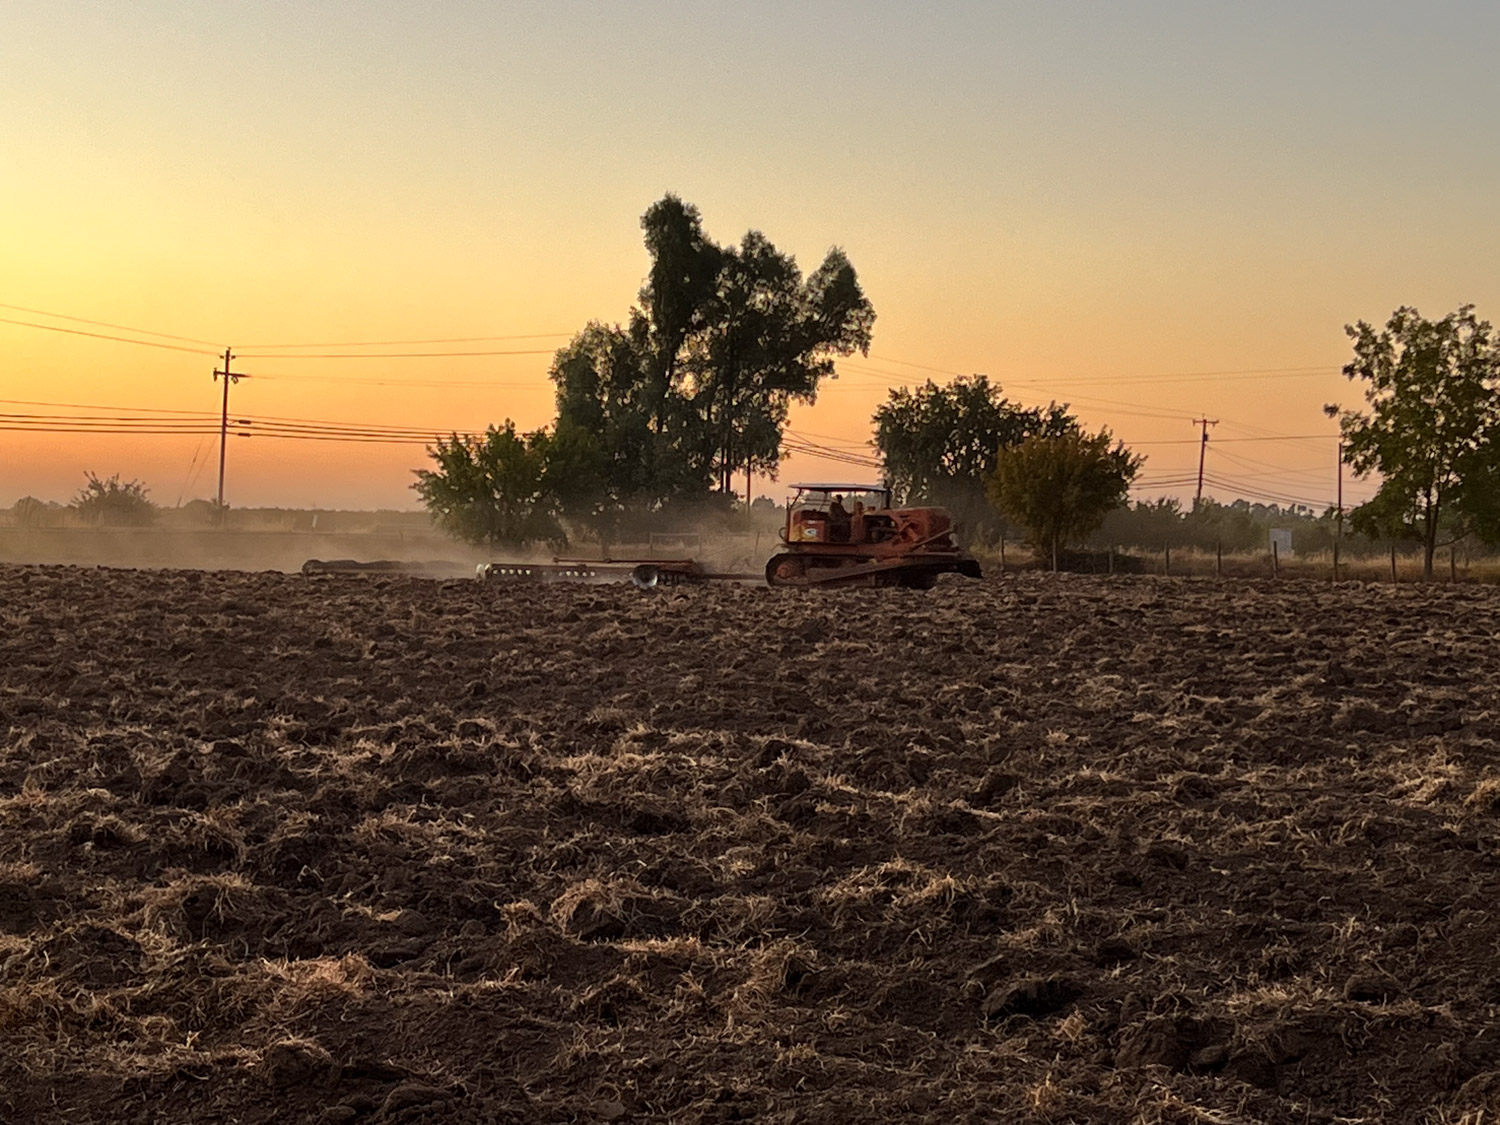
Thursday morning, Brett was at work discing the pasture. That project was described here. We haven’t moved beyond the last discing. Hopefully leveling will happen soon.
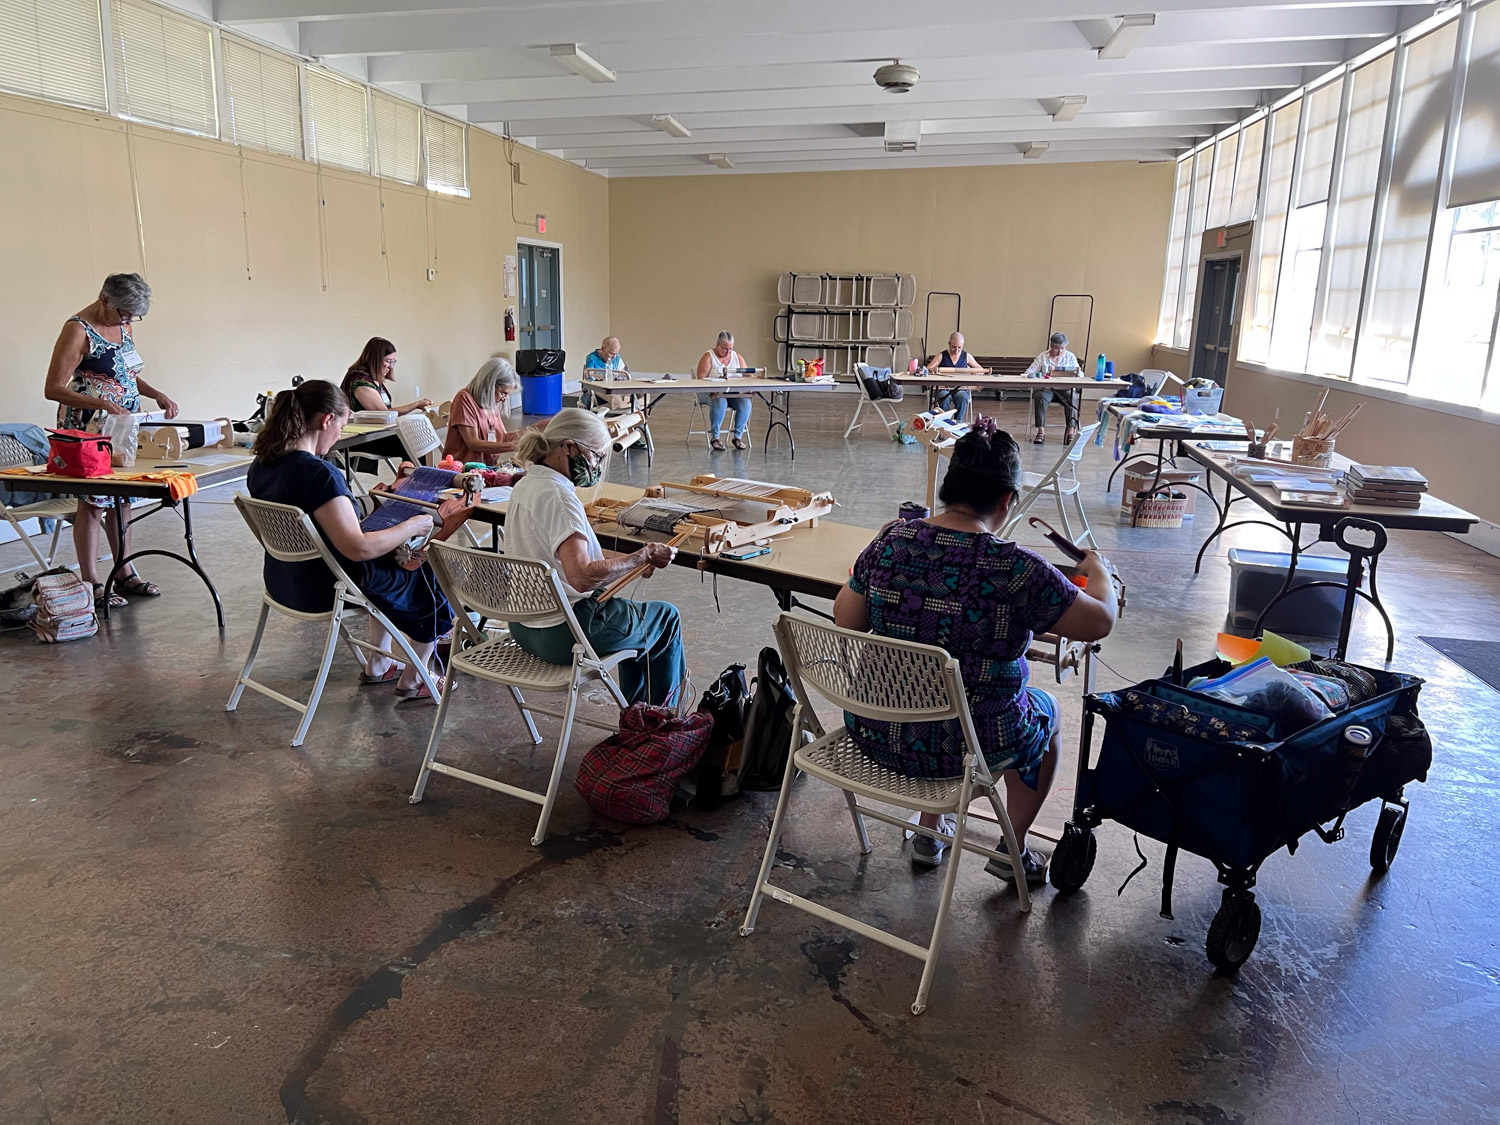
Thursday there were ten students in my “Let’s Get Fancy” class where I showed hand-manipulated techniques for design in weaving.
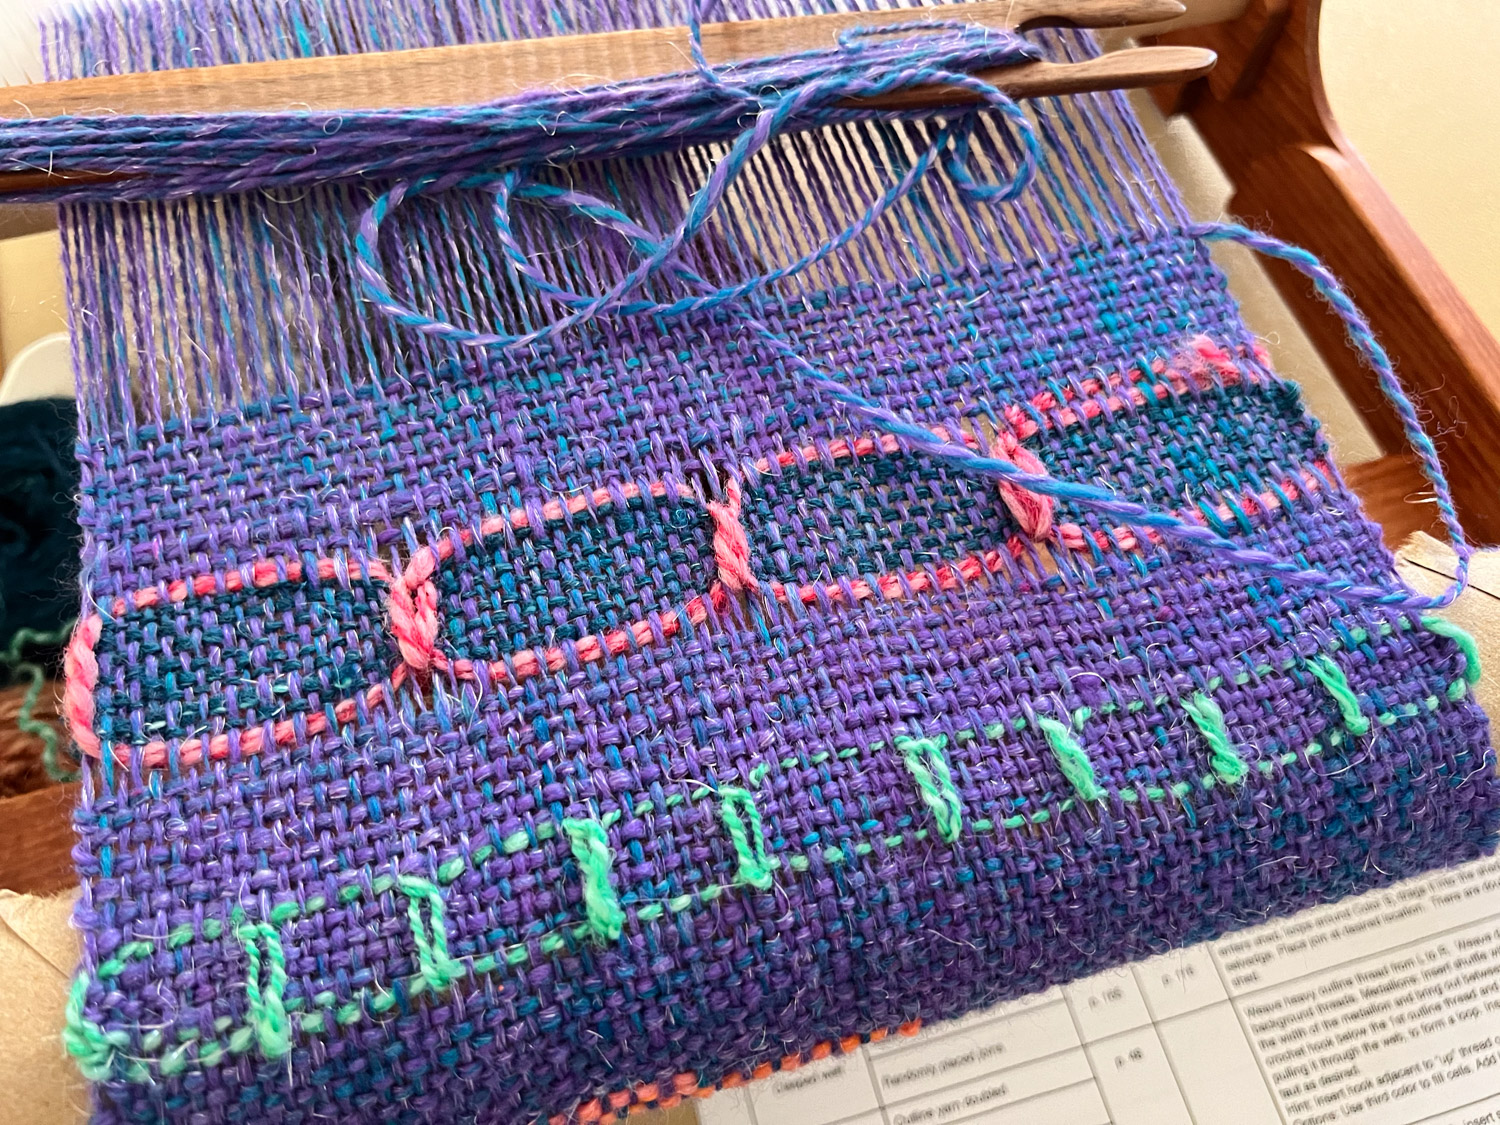
Danish Medallions.
Brook’s Bouquet, Leno, and Loops.
Friday was a full day as we harvested lambs first. A friend brought her lambs here for one of my customers and I salted the hides. We finished around 11 and went to the fairgrounds by noon.
Here is what the booth looked like by the time I went home.
The other half of the booth. It still needed tweaking, but it was mostly done, thanks to a couple of friends who spent the afternoon helping. We still needed to get the sheep here for the sheep exhibit so I went home to load sheep.
Dan and I drove back with sheep and Farm Club members met to figure out how to best set up a display.
This will be a multi-part story probably with other stories mixed in. This project began about 4 years ago when I taught a weaving class and we were talking about irrigation and field work. I was probably complaining about the difficulty of irrigating properly with our old worn out ditches and the uneven growth of the pasture. One of the students is an engineer with NRCS (Natural Resources Conservation Service) and she suggested that I ask for help (engineering and money) from NRCS because that is what they do.
NRCS personnel helped develop a plan to renovate the pasture and the irrigation. It doesn’t make sense to do one without the other. The proposal was submitted with high hopes that it would be selected. It was not. We tried the next year and just missed being included in that year’s funding. This spring our plan was approved, and is partially funded through EQIP (Environmental Quality Incentives Program).
Before work began there was a lot of preliminary work for us to do. That fell on Dan’s shoulders. First he took down all the internal fences.
Then he started mowing…and mowing…and mowing. That tall grass is mostly dallisgrass that has taken over a good part of the pasture. It can grow 5′ tall and the sheep can’t keep up with it once it takes off in the summer. The sheep can’t (won’t) eat it as it gets coarser through the growing season. It crowds out everything else and is dormant in the winter. Our tractor isn’t strong enough to mow it at ground level when it gets this tall. Dan has to go over each section at least a couple of times.
Another task was to make an opening in the fence along the road so the heavy equipment had access. That started with trimming back the tree here. The fence on the south half of field was built by the county when, in 1971 the canal was put in (or enlarged?), and Solano County was deeded the triangular sliver of land along the road. We weren’t going to take down that part of the fence.
Looking into the pasture from the road. That post is the corner of the county owned sliver of land.
We don’t have a chainsaw large enough to take the whole tree down, so the larger job had to wait until we could borrow a chainsaw from Matt. In the meantime Dan had to be careful about the lower part of the tree branches because there was a lot of fence wire embedded where the tree had grown around it.
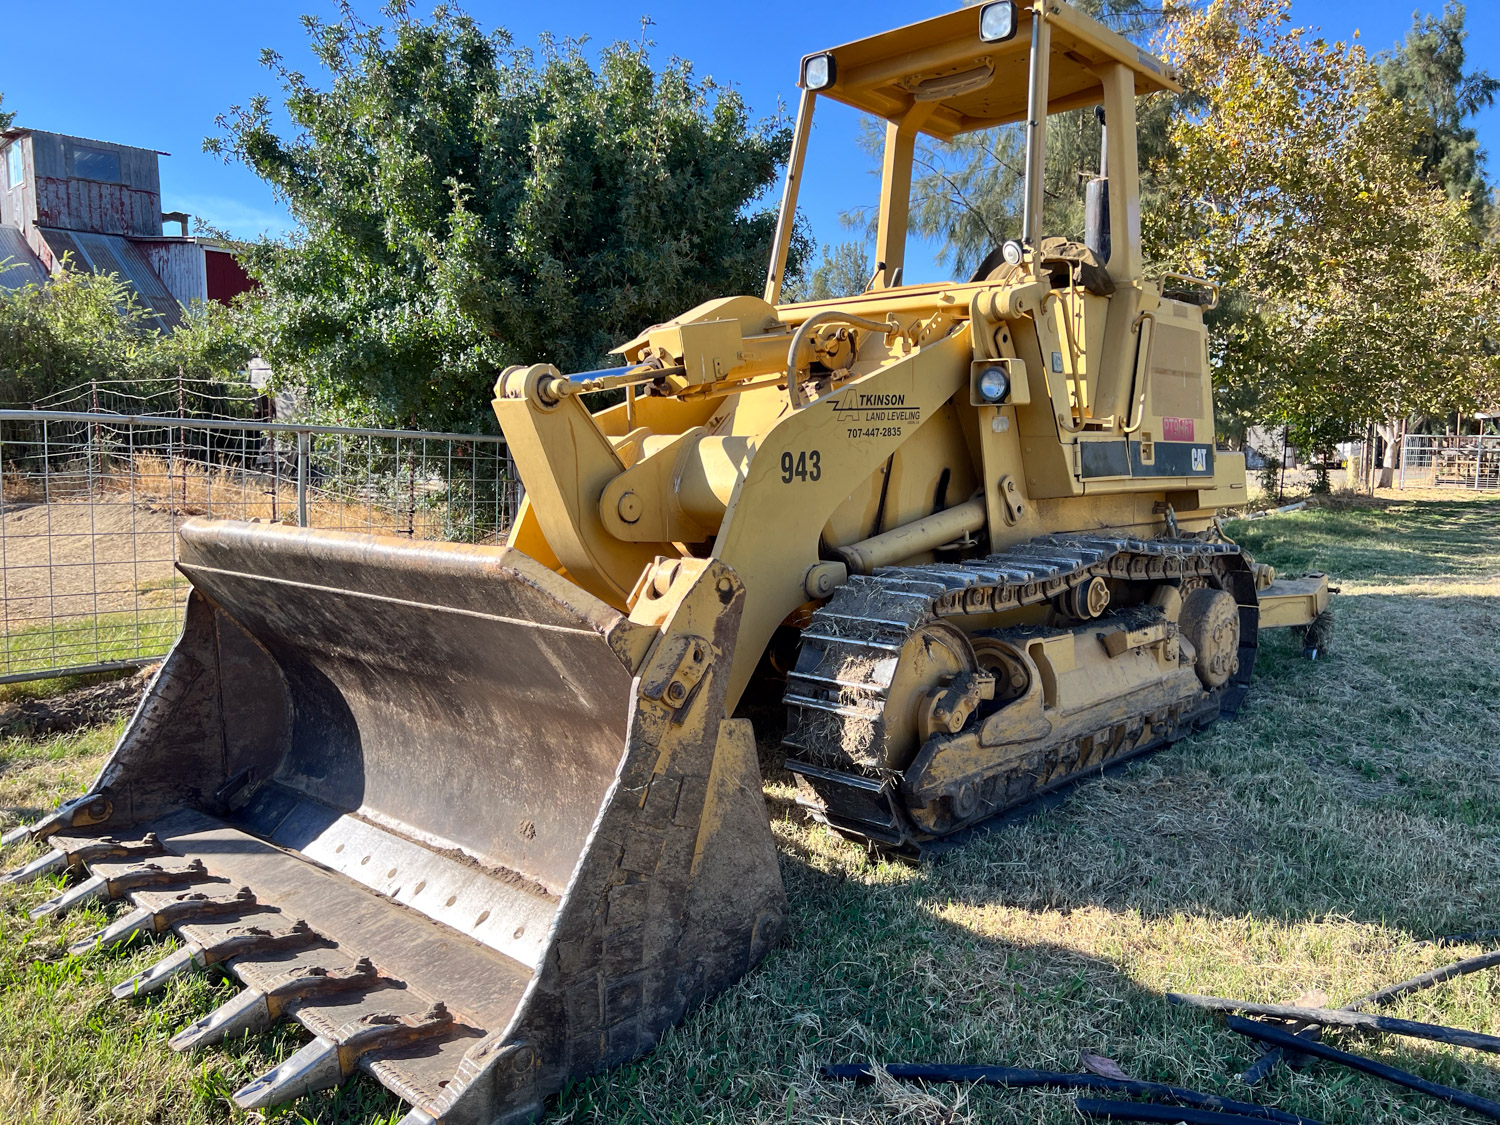
Brett, the contractor, was able to drive his truck in to start leaving equipment.
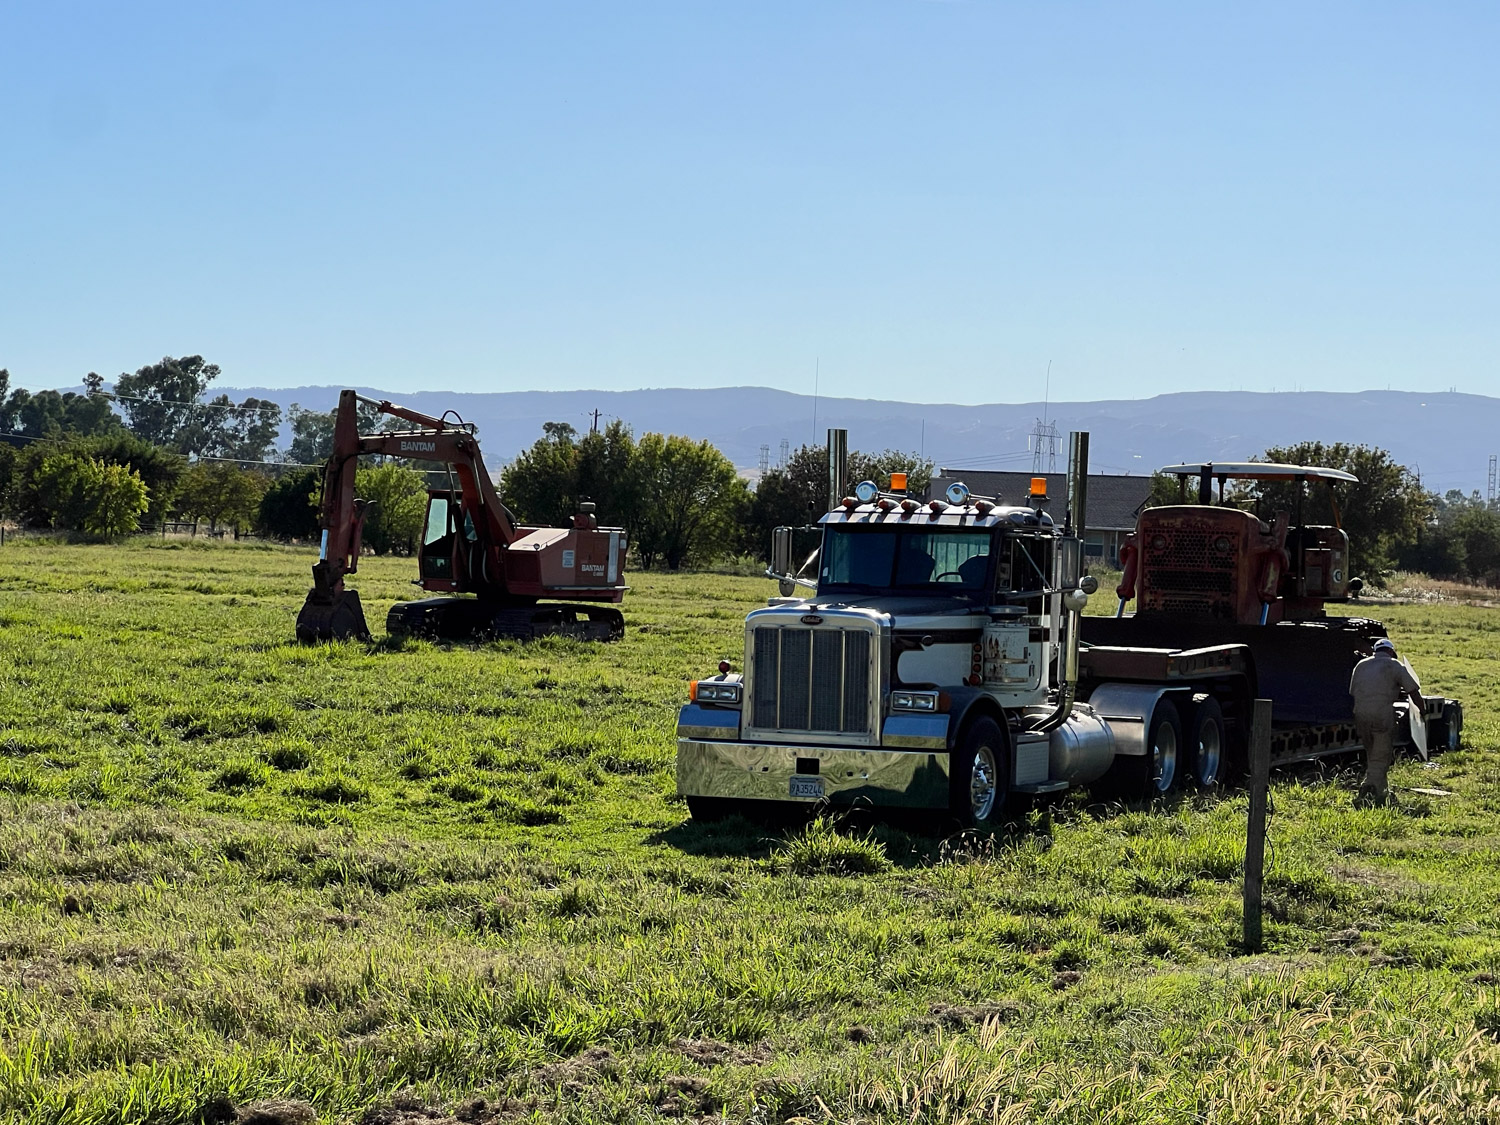
Our little Kubota tractor seemed dwarfed by some of the large equipment that eventually showed up.
Dan made a platform that fits on the front of the bucket so that he can carry more branches than he could without it. The tractor is hidden behind branches.
More equipment being delivered.
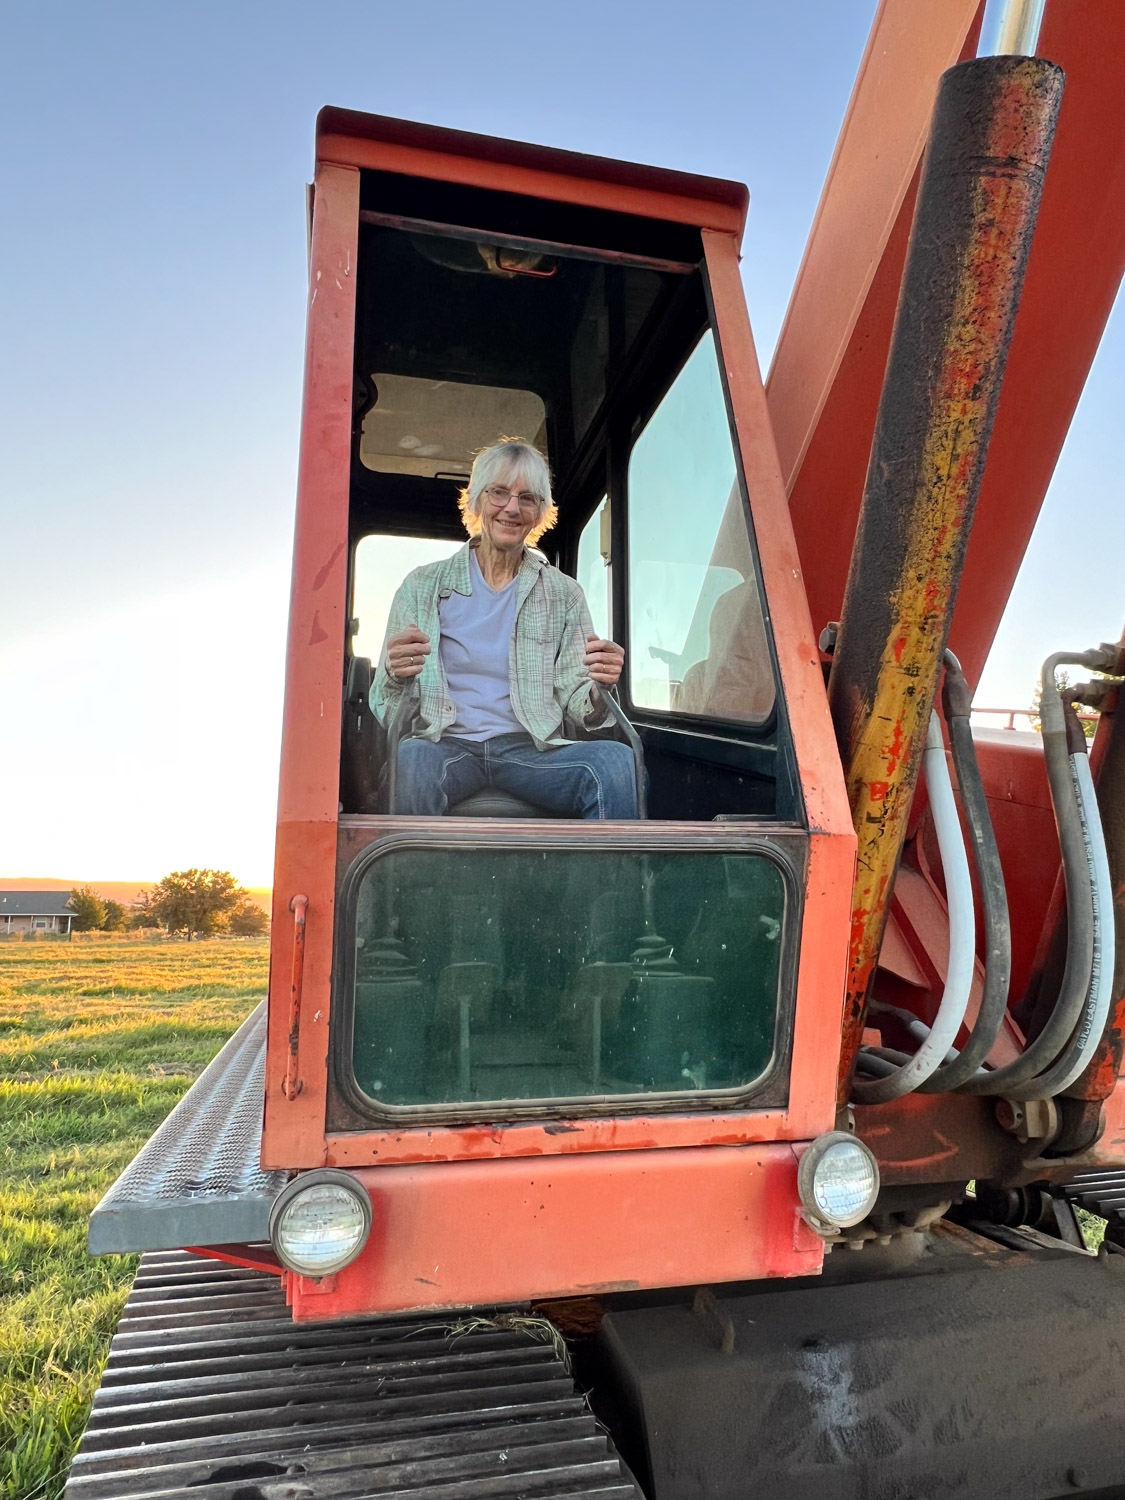
I thought I’d try out the equipment.
The equipment came in on a Friday and work would start Monday. We put panels where the fence was removed so we could let the sheep out for the weekend. Once work started the sheep would not have access to grazing for a very long time.
This was only three weeks ago and it seems like it’s been much longer. I have a lot of catching up to do for this blog.
To read the whole story go to the previous blog post. In that post I showed the whole process of producing buttons from one horn. That day I took photos of two more horns and want to share those too.
This is another horn and the buttons created from it.
With that last horn I put the photos in a “gallery”. With this one I’ll do it my regular way. There is a lot of trial and error in figuring out how best to share photos here. So I’ll check my computer and my phone later and see what seems best. Feedback from anyone reading is appreciated.
All the buttons that don’t sell at Lambtown will be on my website–at least the ones on the cards. If you visit here or at a show you can look through the bo with all those extras and make up your own set.
Each year many of the lambs produced here end up in someone’s freezer. I wouldn’t be able o breed sheep if there wasn’t a market for these lambs. There were 88 lambs born this year. I selected some to keep, but most are sold to other breeders or for meat. I want to use the WHOLE sheep and buttons are one of the products that I can make.
These are just some of the horns from the latest lambs. I did not photograph the first step because I can’t take a photo while using a Sawzall (just looked that up–a reciprocating saw) and my blog would probably get black-listed if I had a photo of cutting horns off a dead sheep head. The second step is to put the horns in a bucket of water in the sun for a few days. There is a bony core and the living tissue between the bone and the outer horn needs to degrade enough that I can get those horns off.
From Wikipedia: A horn is a permanent pointed projection on the head of various animals that consists of a covering of keratin and other proteins surrounding a core of live bone. Horns are distinct from antlers, which are not permanent.
Look at what you can learn about by reading my blog. I read about horns or horn-like features on a variety of animals from giraffes to triceratops.
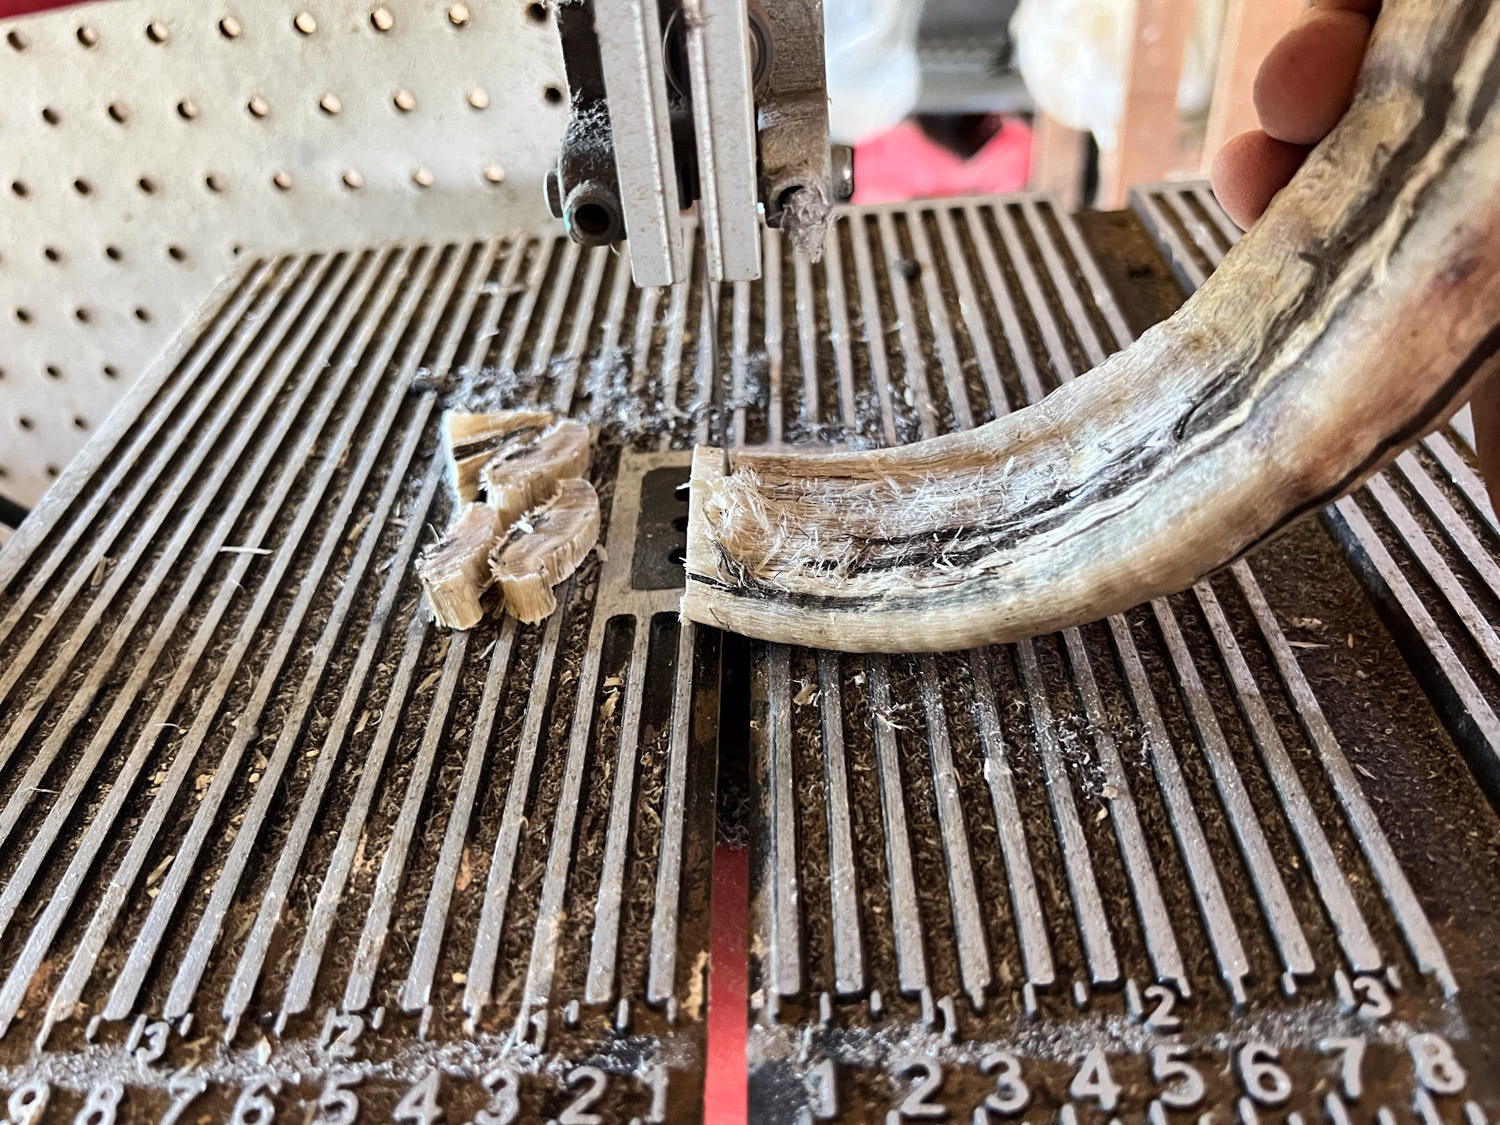
I took photos of the button making stages with three horns, but I think that’s too many photos to put in one post. I’ll start with this one which is unusual because it is mostly white.
The first step (beyond what I described above) is to cut the horn into button shapes. I use a band saw.
The solid core makes buttons of interesting shapes. most people think of horns as round but you can see that the shape of these horns are anything but round.
Here are all the pieces I cut from that horn. The squarish shapes come from the hollow part of the horn that surrounded the core. I often try to make a few pieces that can be used with a shawl pin. I was told that I could call it an annular although that usually refers to a medieval brooch with a pin attached.
The next step is drilling holes, another step that is difficult to photograph while in progress.
All pieces after drilling the holes.
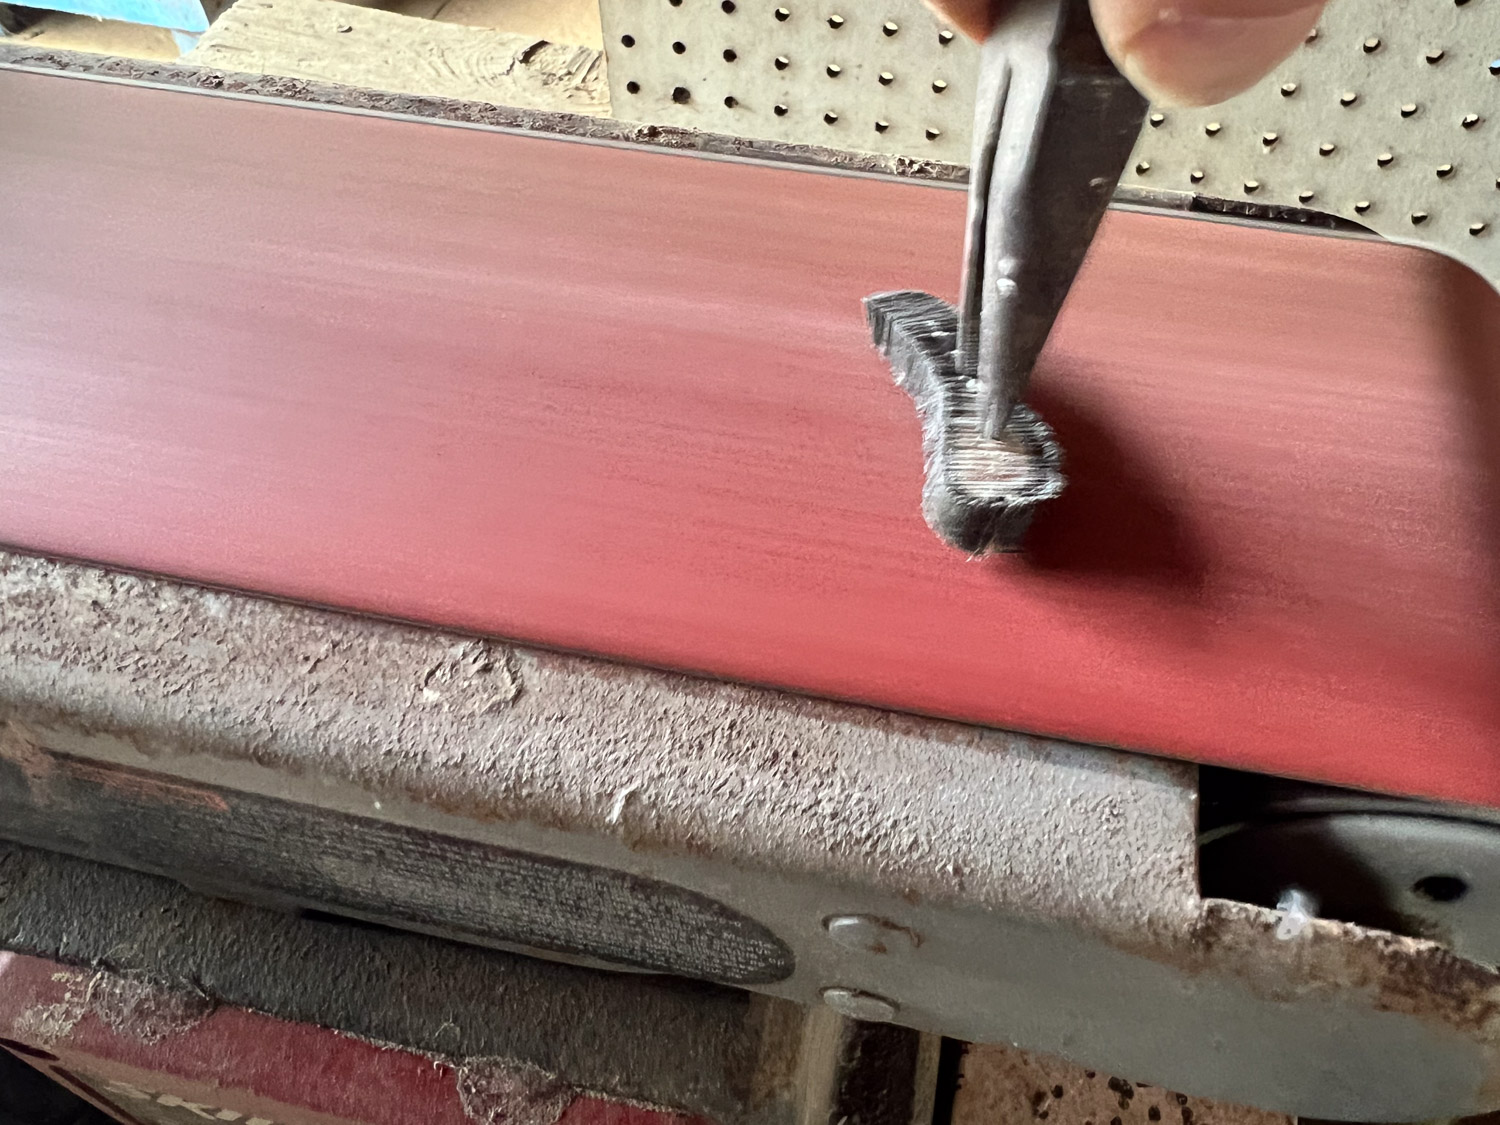
Then I move on to sanding using a belt sander. This is the step that takes me the longest. It’s difficult to get to all the edges.
I can’t use the pliers for all of it and I have been known to come away with nicely (completely) sanded fingernails.
Here are all the buttons from that one horn after sanding.
I have figured out the best way for me to apply a lacquer finish. I can put the buttons on wires that I dip in the lacquer and then I put poke the wires into styrofoam packing material saved from purchased items. These are the buttons made from three horns.
Throughout the process II keep track of the buttons that are from the solid part of the horns so I can match the up for sale. If I plan to sell buttons online I need to be able to identify individual buttons and sets. So the last step is to attach them to cards I have printed.
These buttons are not on the website yet because I’m going to wait until after Lambtown and post those that haven’t sold.