Unknown's avatar

About Robin

Owner of Meridian Jacobs, farm and fiber shop. I raise Jacob sheep, teach fiber arts classes, weave handwovens for sale, and manage the store.

More Product Photography

I shared a lot of photos in one of the latest blog posts of my trial and error to get good product photos with consistent backgrounds. I got some suggestions from a few of you and I welcome comments again. I worked on this again today.

I bought a roll of sturdy Manila paper. Do you know why it’s called Manila? I looked it up. Merriam-Webster: “a strong and durable paper of a brownish or buff color and smooth finish made originally from Manila hemp”. Wikipedia: “Manila paper was originally made out of old Manila hemp ropes which were extensively used on ships, having replaced true hemp. The ropes were made from abaca or Musa textilis, which is grown in the Phillipines; hence the association with Manila, its capital city. Abacá is an exceptionally strong fibre, nowadays used for special papers like tea bag tissue. It is also very expensive, being several times more expensive than woodpulp, hence the change to that fiber for what is still called Manilla—usually with two L’s. More recently new woodpulp has often been replaced with a high proportion of recycled fibers. True Manila hemp folders would have been much tougher and longer lasting than modern folders.” See what you learn by reading this blog?

I also have a piece of linen that is a nice color with an interesting texture. I thought I’d try both of those as background. The linen fabric is too small, but I can get more if it works. I just made a curtain for my office and that’s why I still have a piece here.

So I experimented with my phone and my camera with these different backgrounds. My goal is to take photos that don’t need much editing to make the products look like they do in real life.

This is the linen on top of the manila taken with my camera. I am not sure if the yellow/rose cast of the manila comes through the linen. Also, light is so important. I took all photos in the shade, but not all shade is the same. The place where I’m hanging the roll of paper is a different shade than if I drag the table over to the middle of the deck area and the roll of manila may affect the outcome as well.

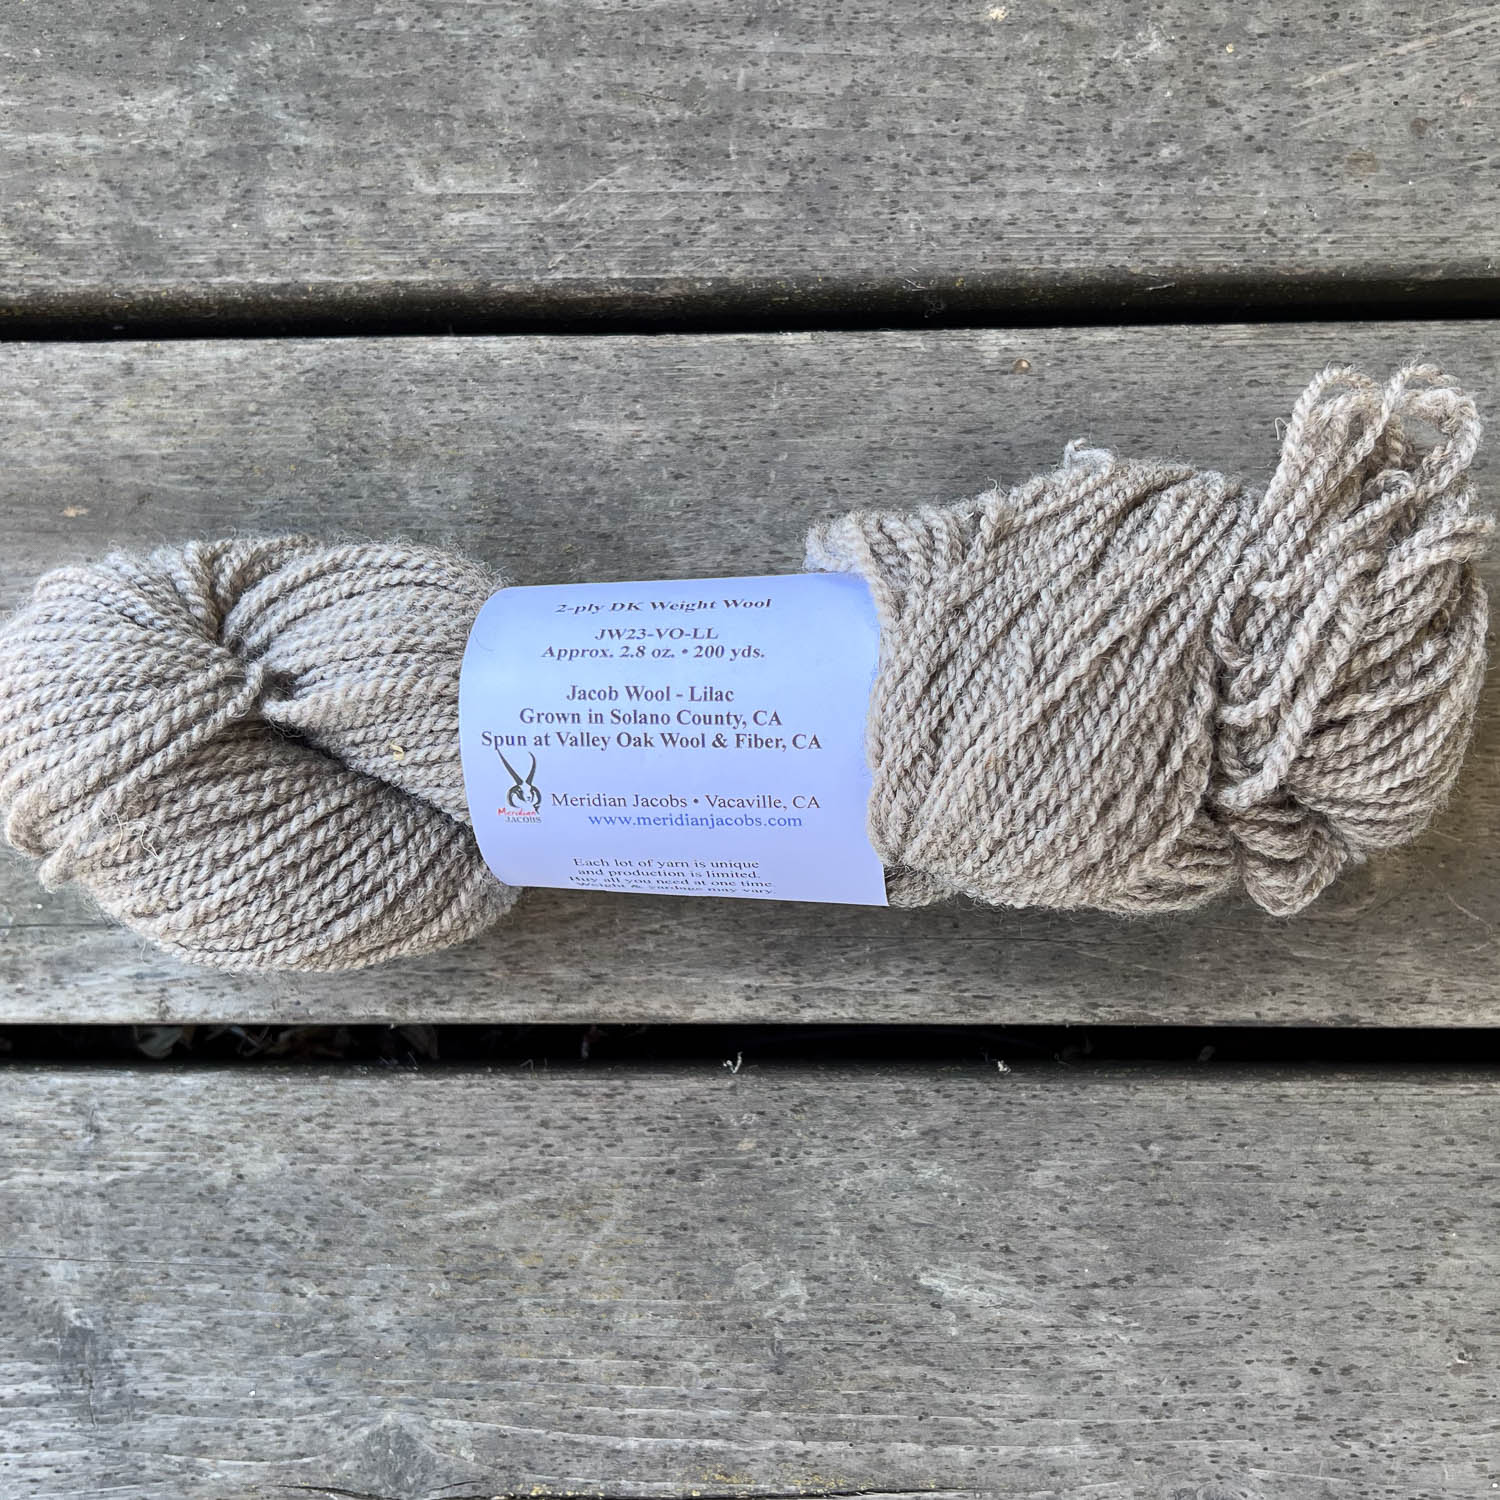
This is that manila paper taken with my phone.

Linen on top of manila taken with phone.

The photos I used here have been minimally edited–mostly to crop to square. This time I shot the photos with my camera on manual and adjusted shutter speed one or two stops. Most of the time the slower shutter speed (more light) gave a better exposure. I don’t think I’m having such an issue with white balance as in the last batch of photos.

Linen on top of manila, taken with Nikon.

The same as above but taken with the phone. Colors are close but not the same.

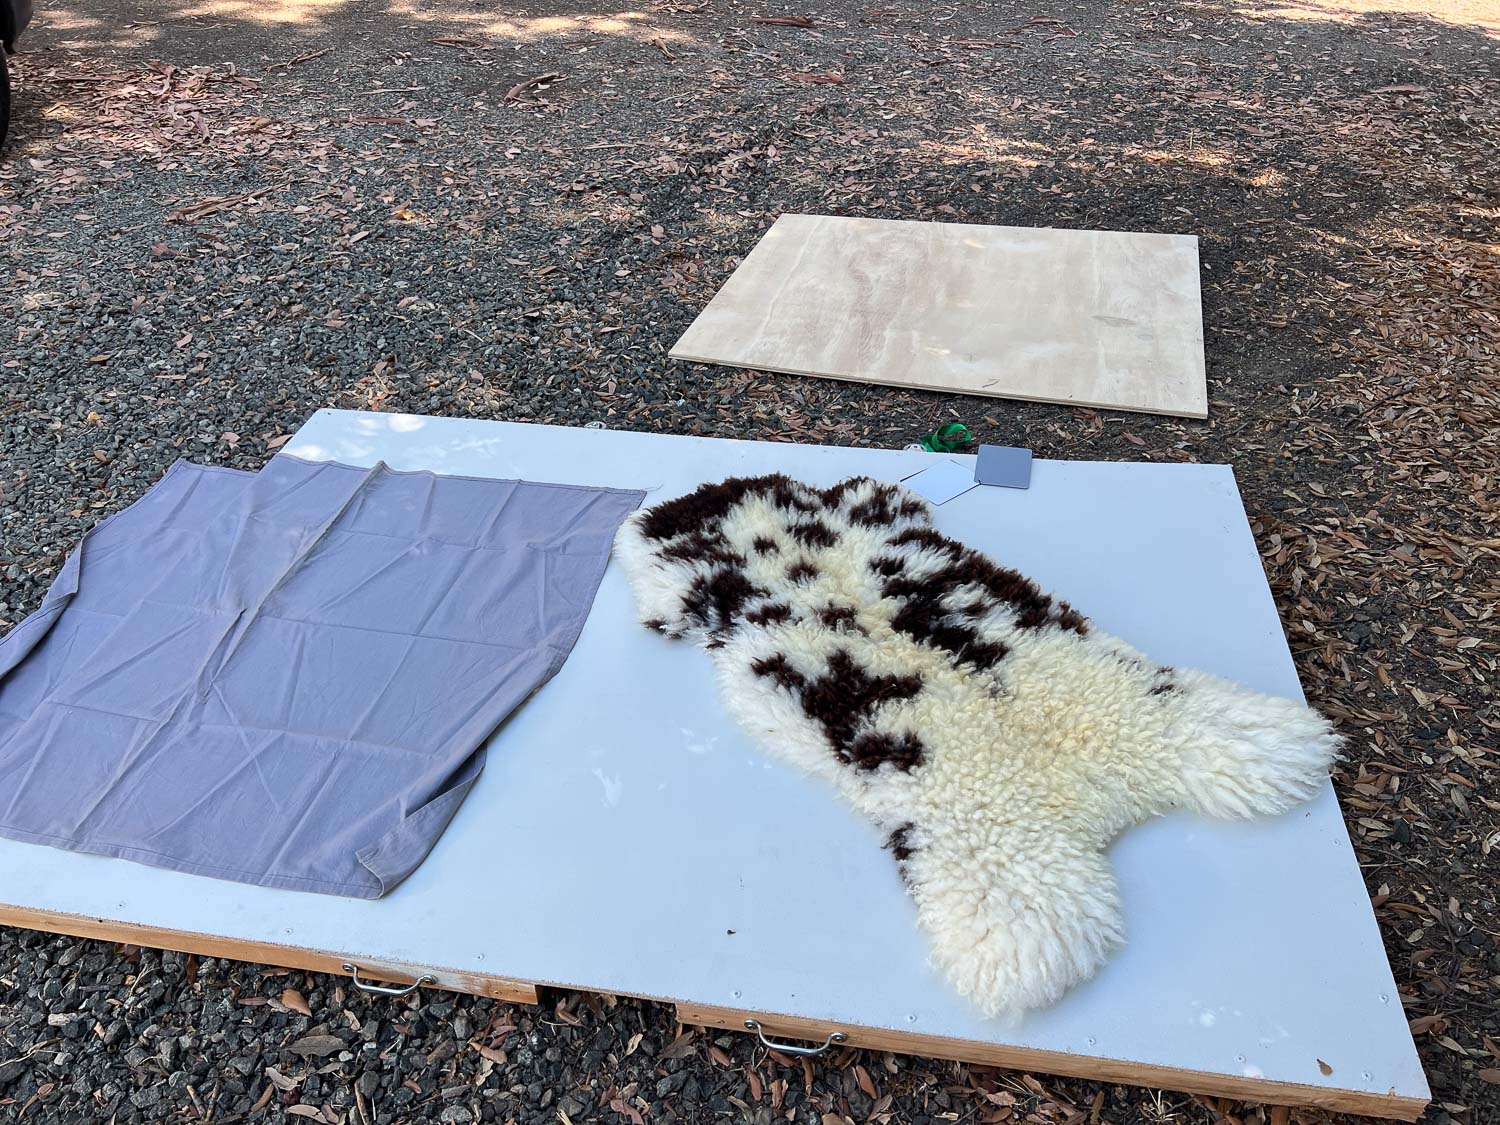
I moved the table away from the wall so the linen is resting on the table. There will be no influence from the mainla paper underneath or on the wall. This photo is taken with the Nikon.

Same thing, but taken with the phone. I see a blue cast to the background linen.

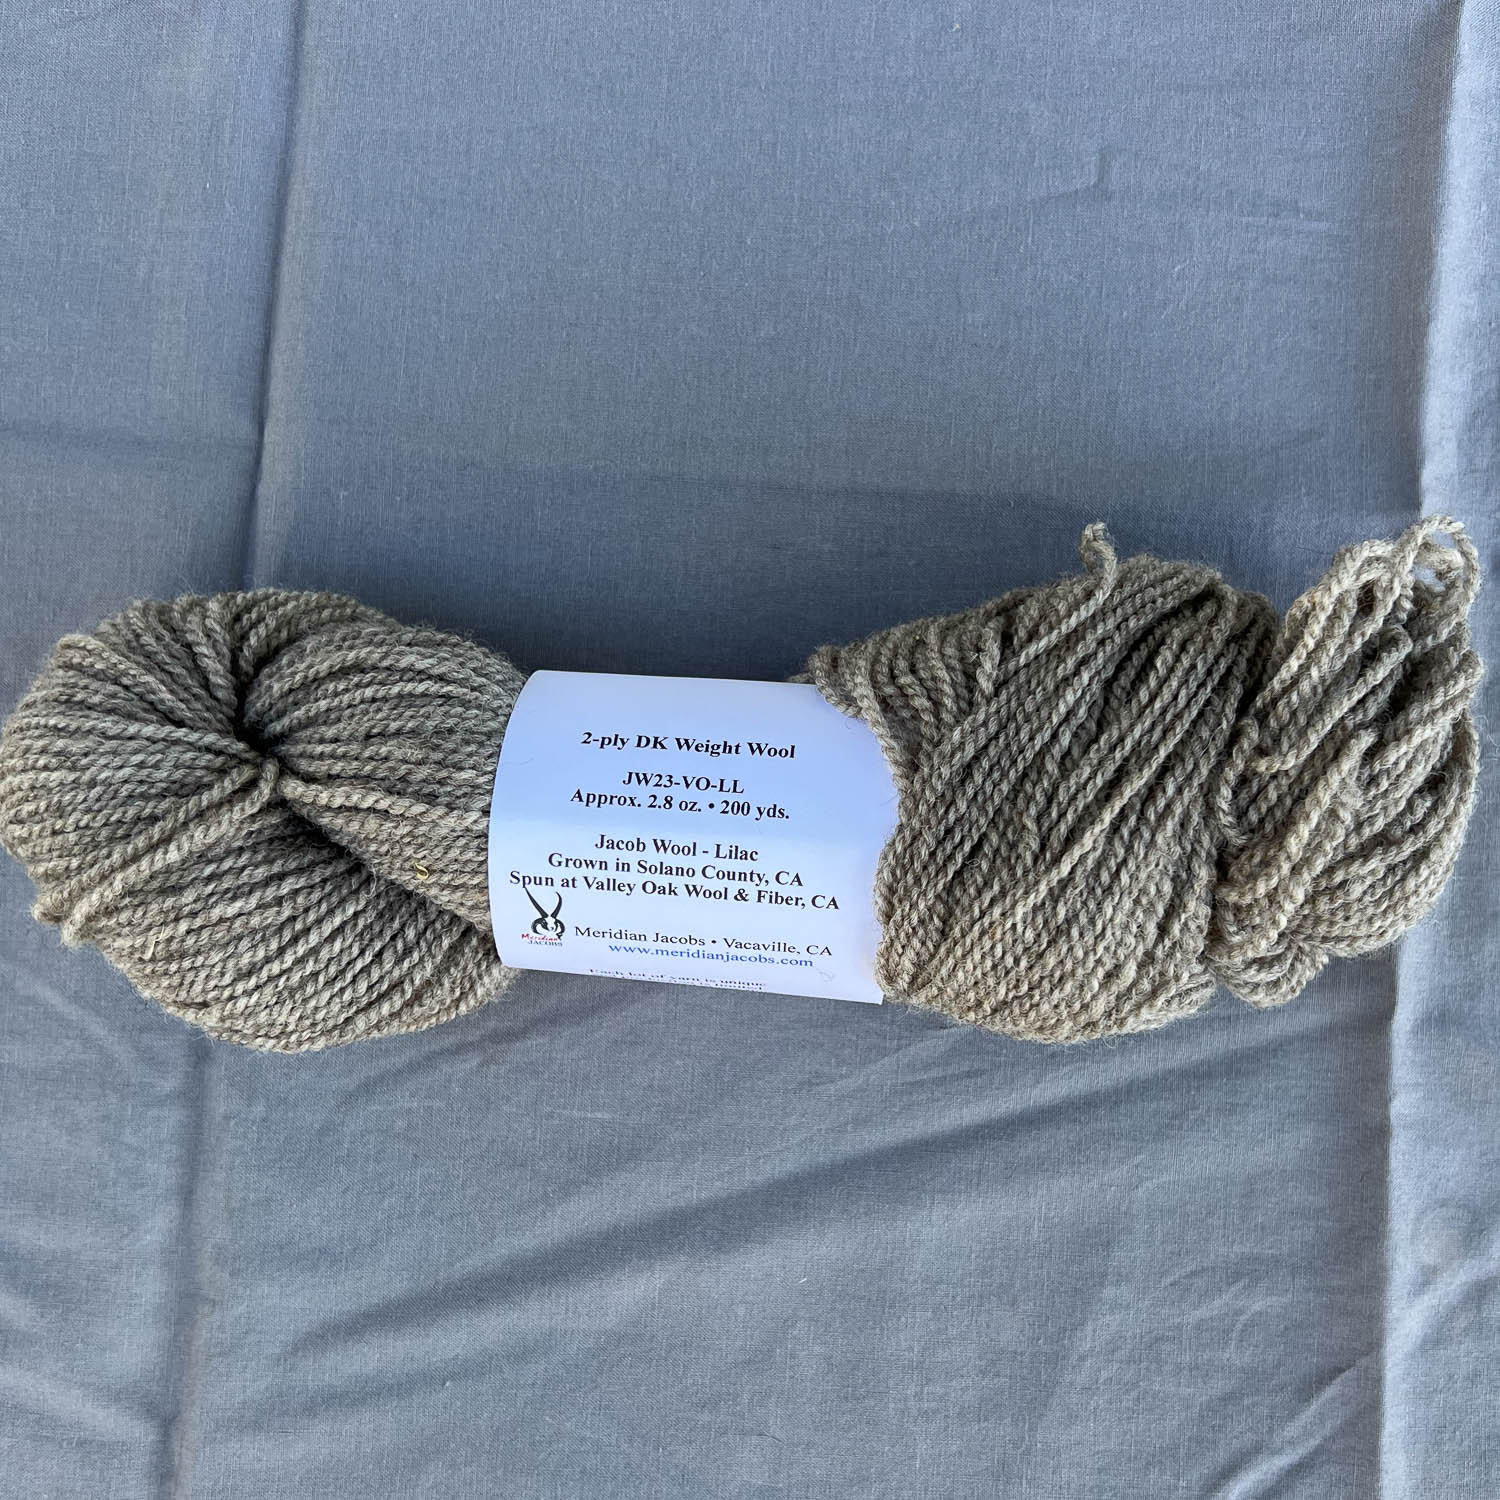
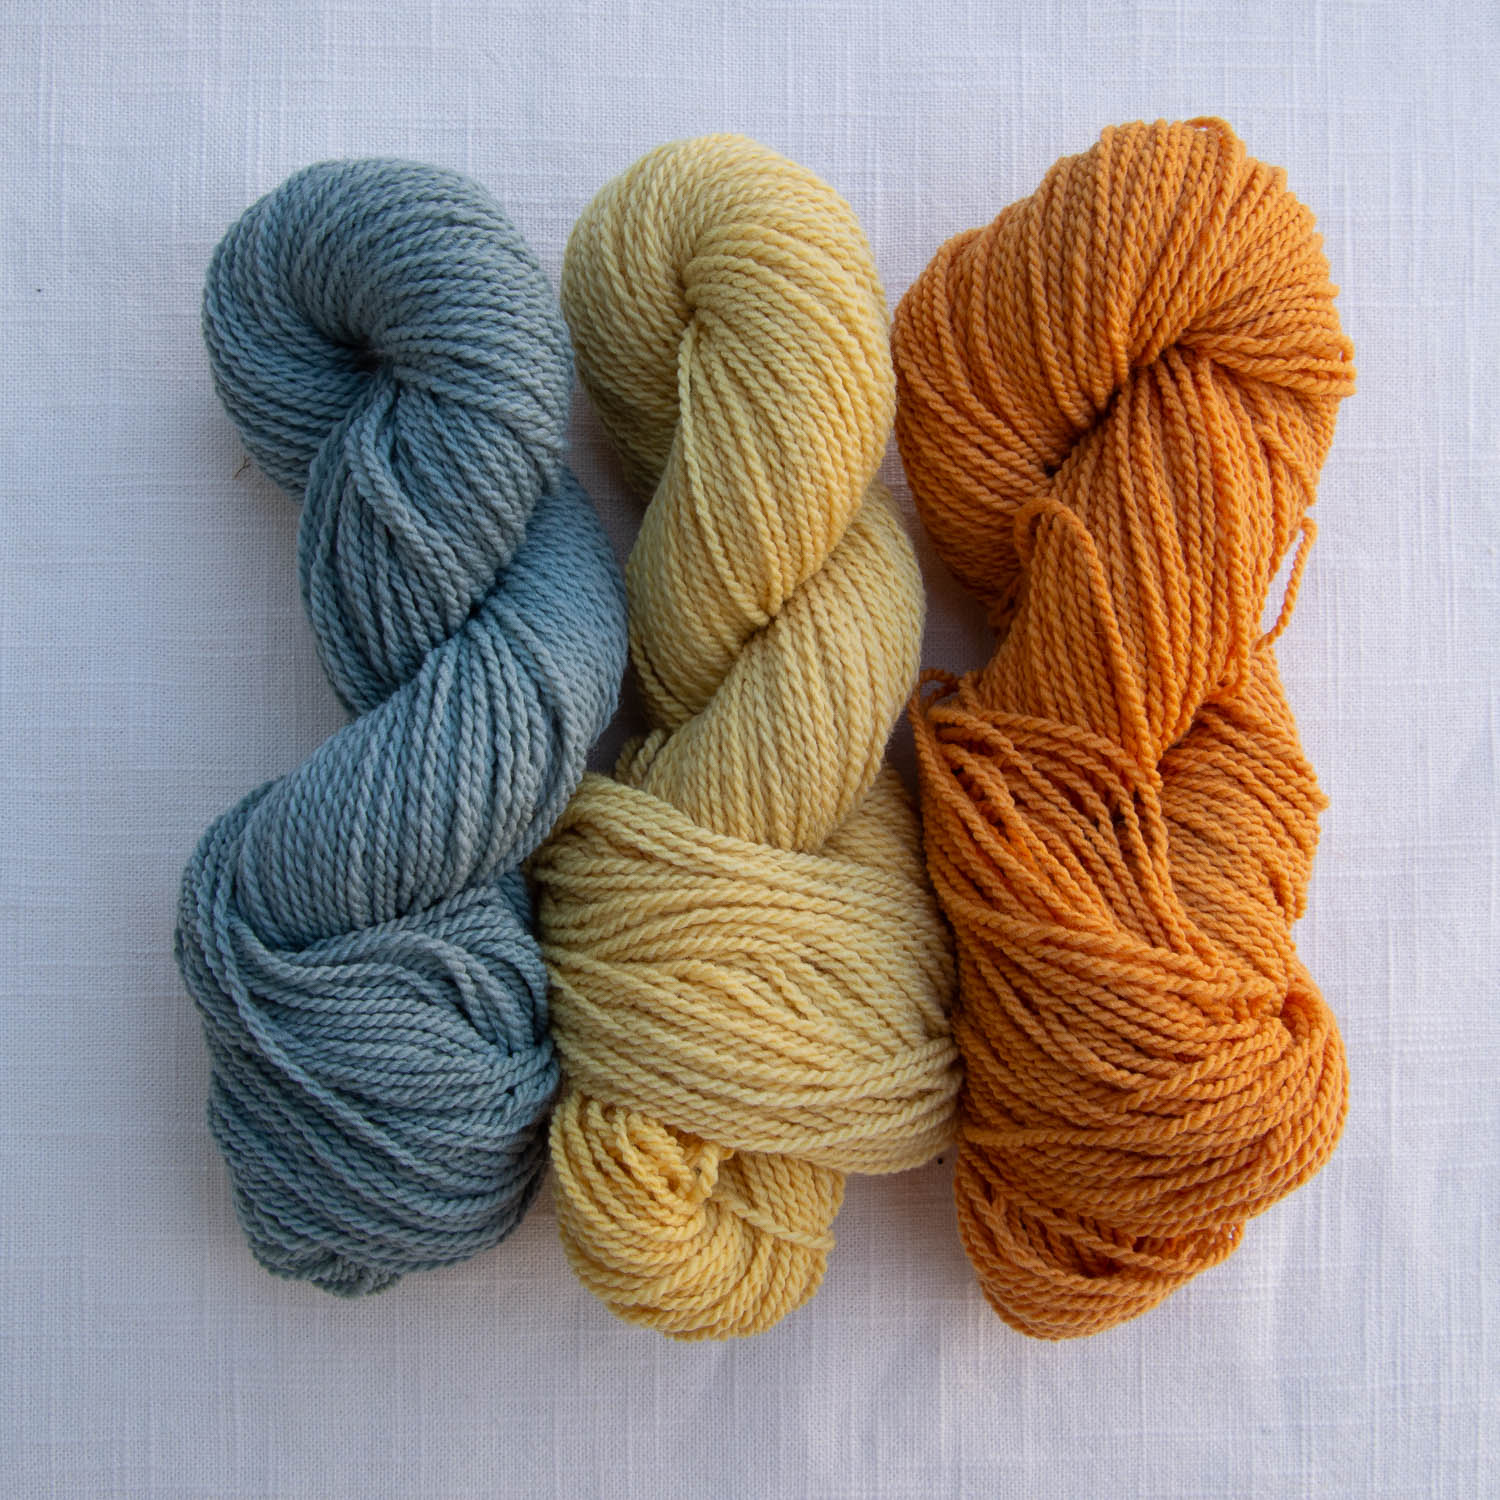
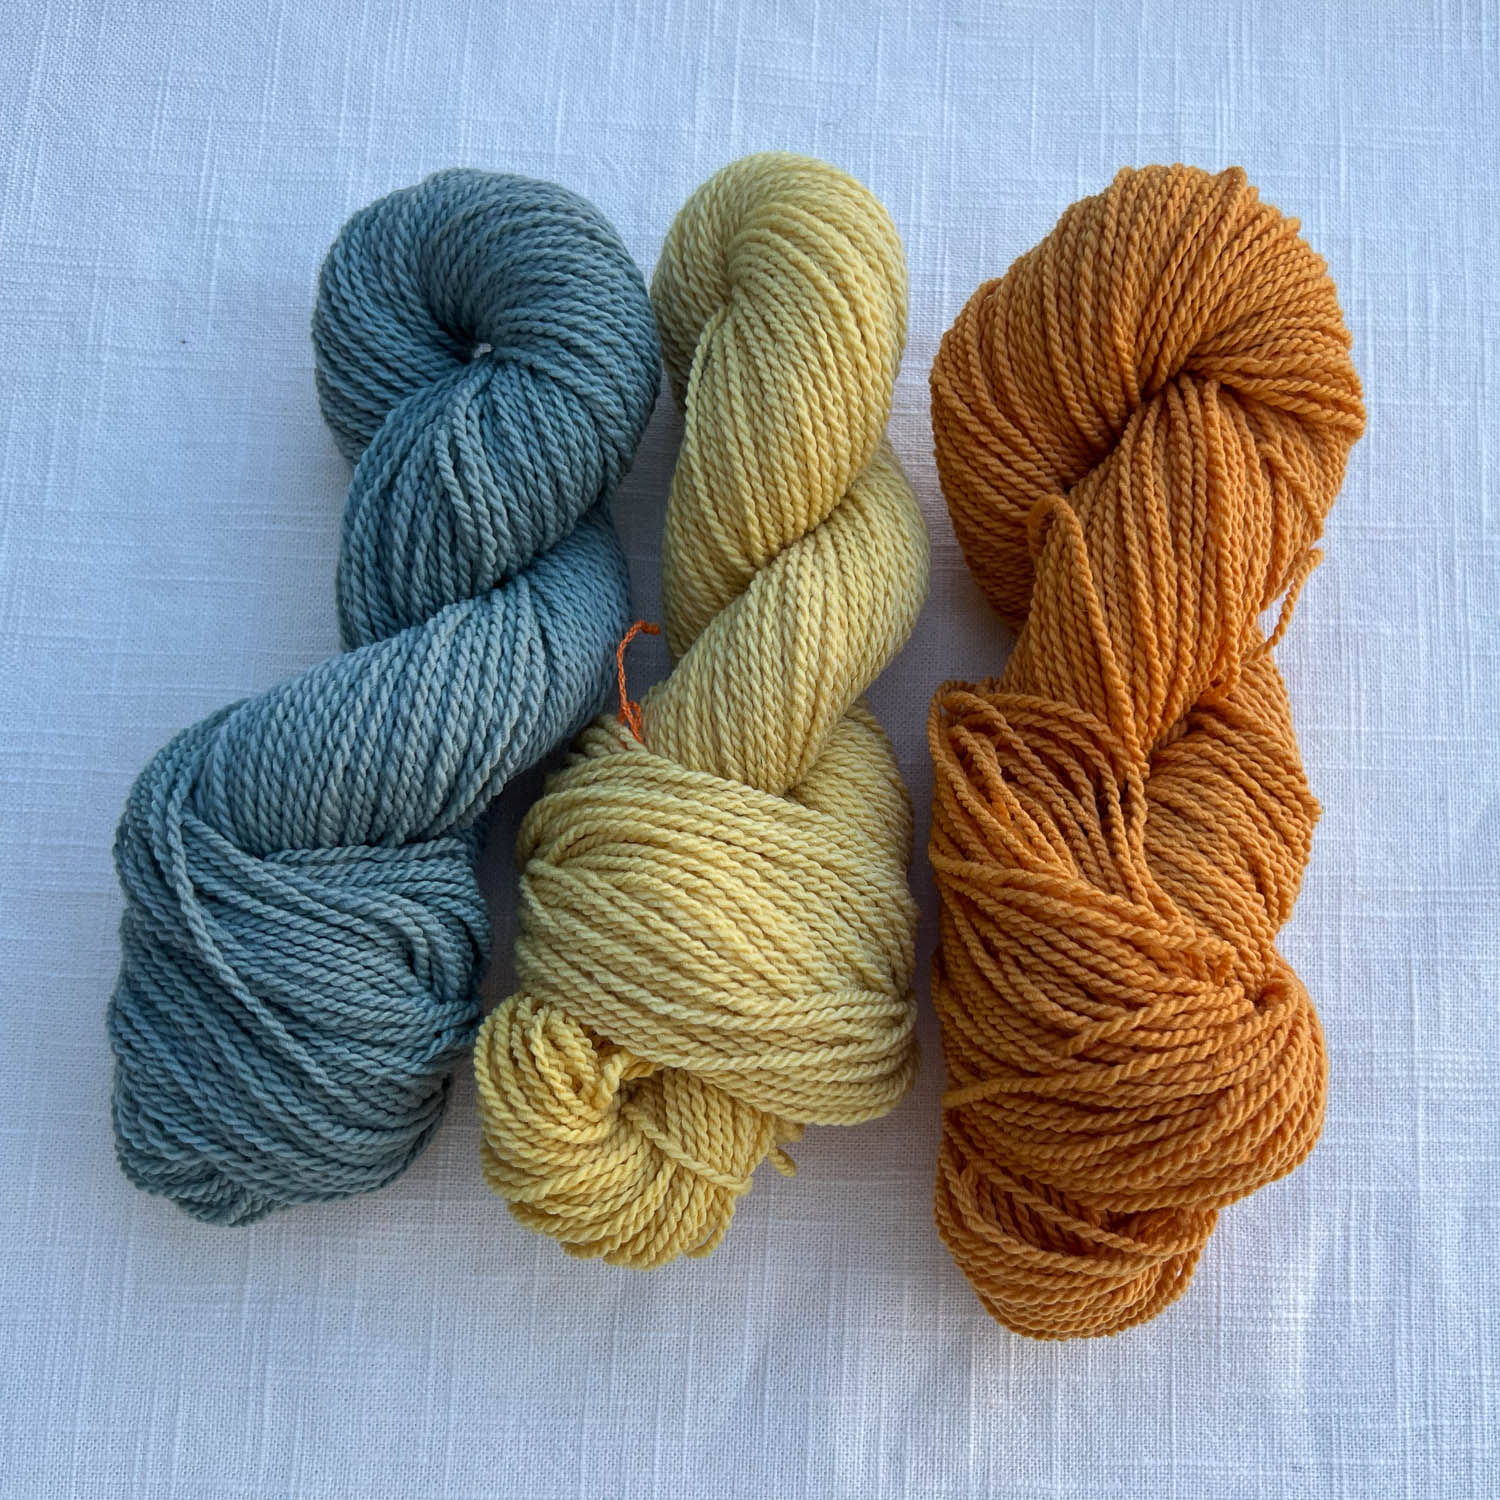
These photos are also taken on the table, on the linen cloth alone. This one is with the Nikon.

Same thing but with the phone. There is that blue cast again. I could probably adjust that in the phone, but I haven’t done any adjustments on these photos other than exposure on some of the Nikon ones.

Same place, table with linen cloth, taken with Nikon.

Same photo taken with phone.

I moved the table back to the position with the manila paper. So this is linen cloth on the paper, taken with the Nikon.

Same thing but taken with phone.

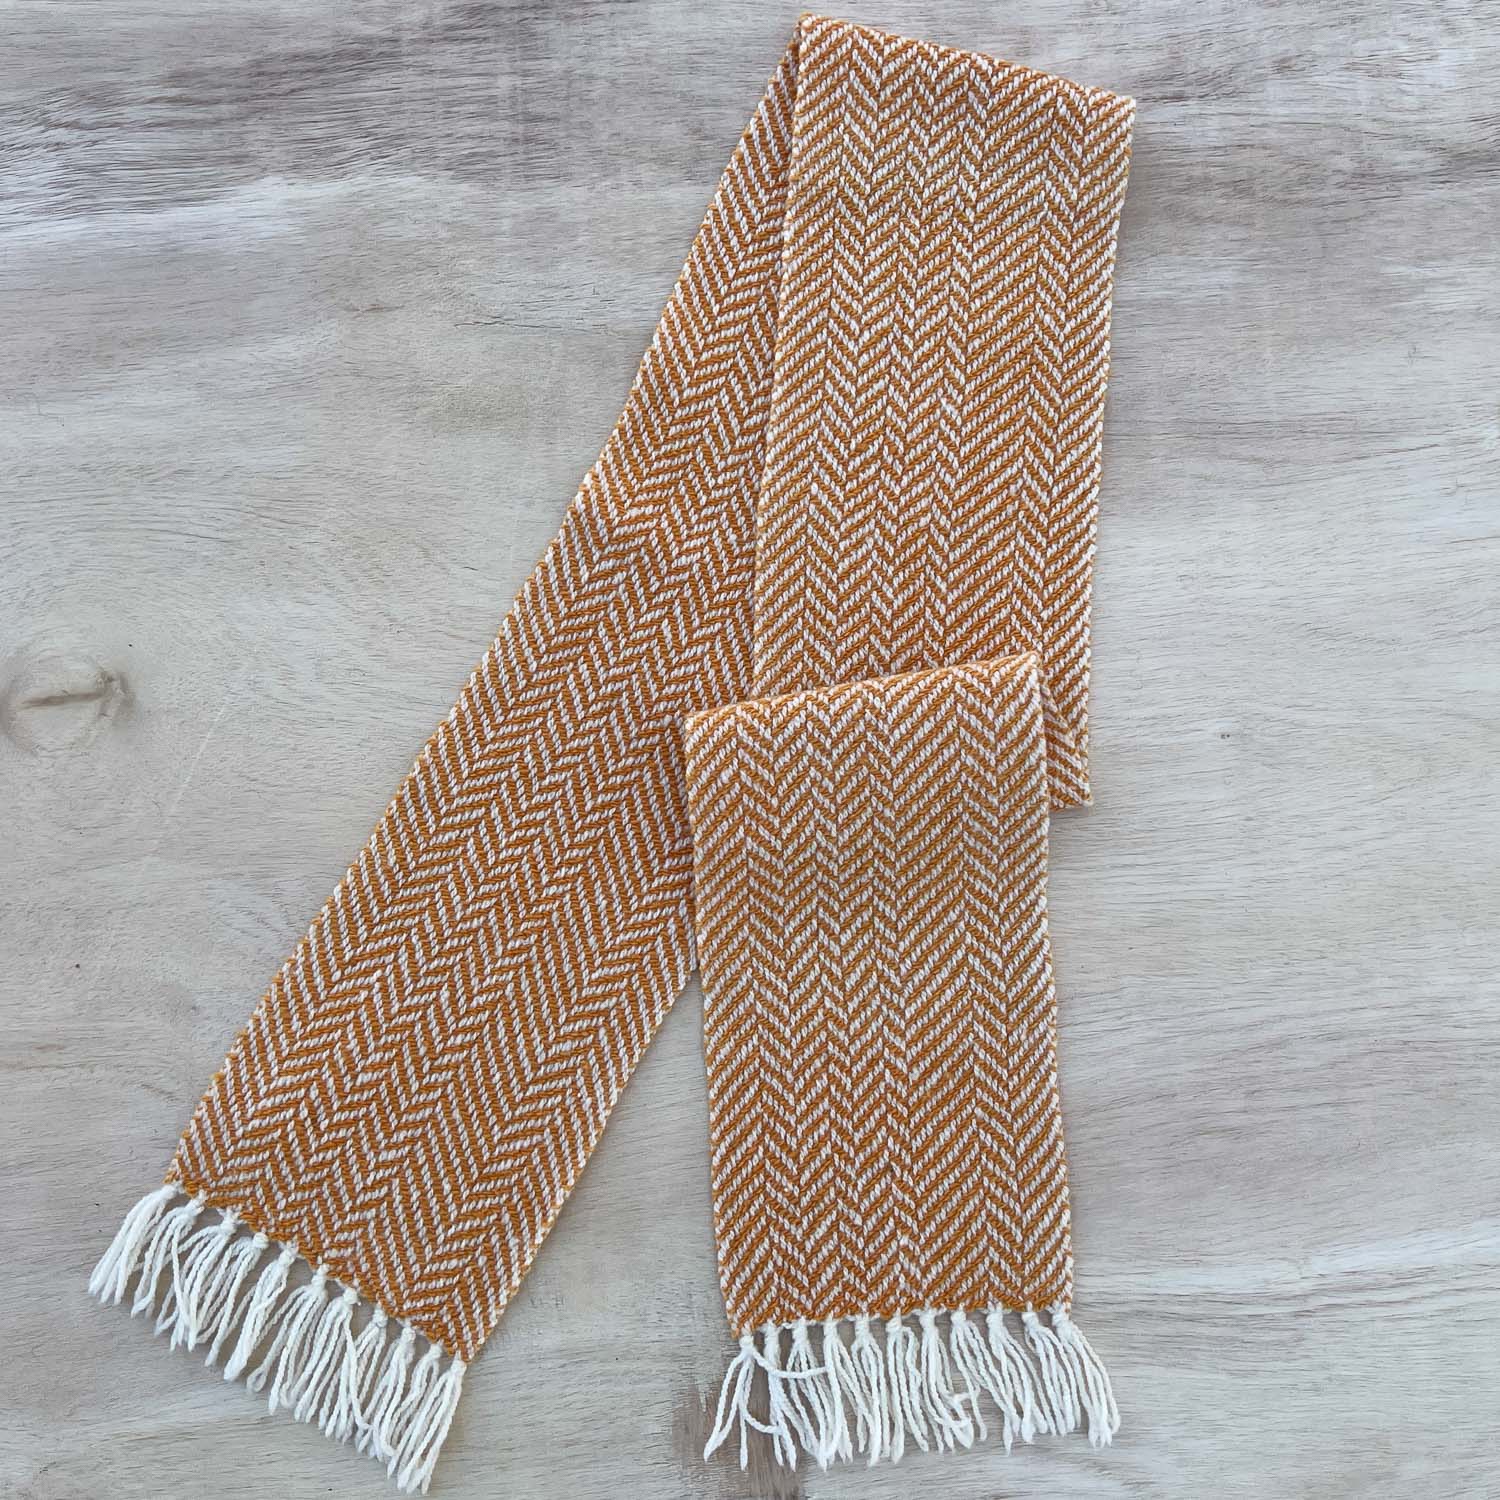
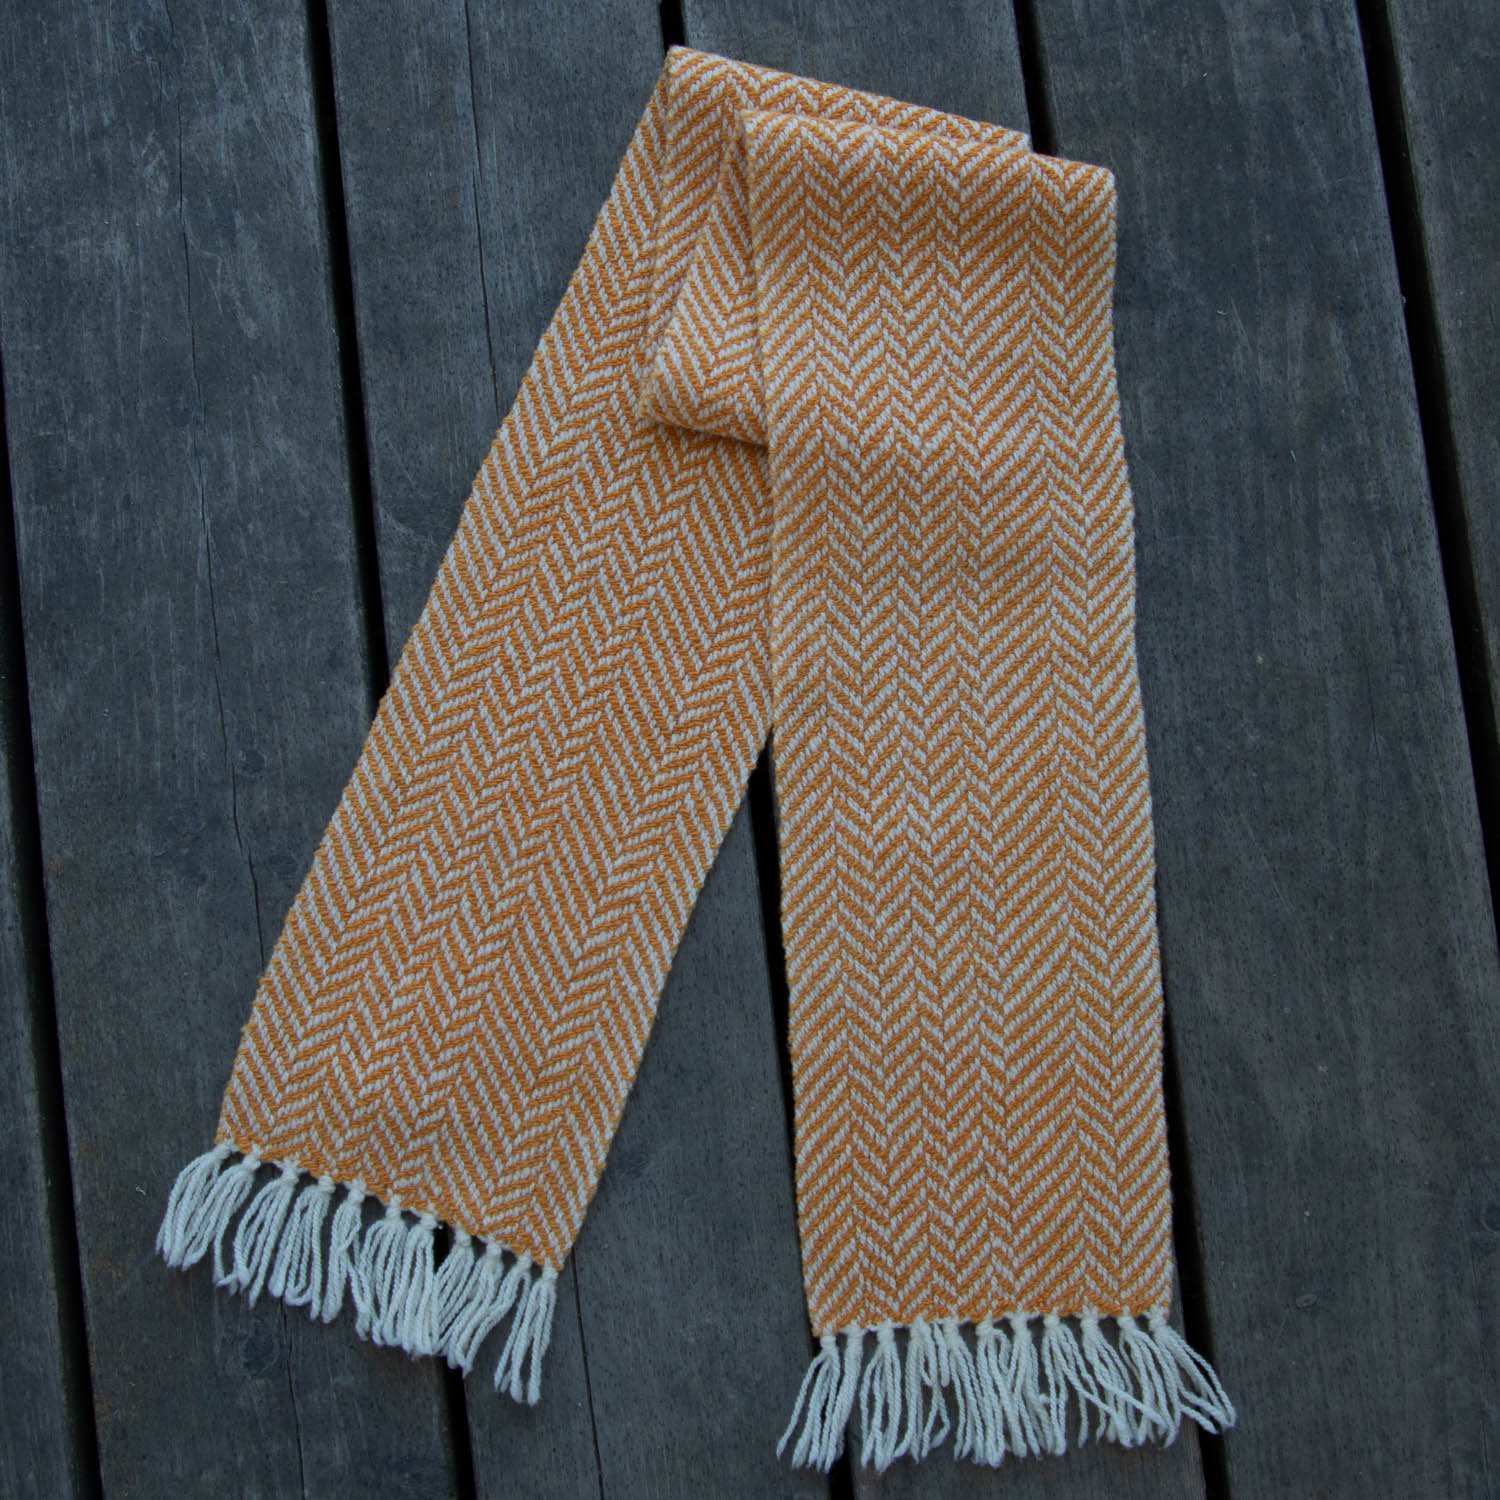
This is the scarf on manila paper alone using the Nikon.

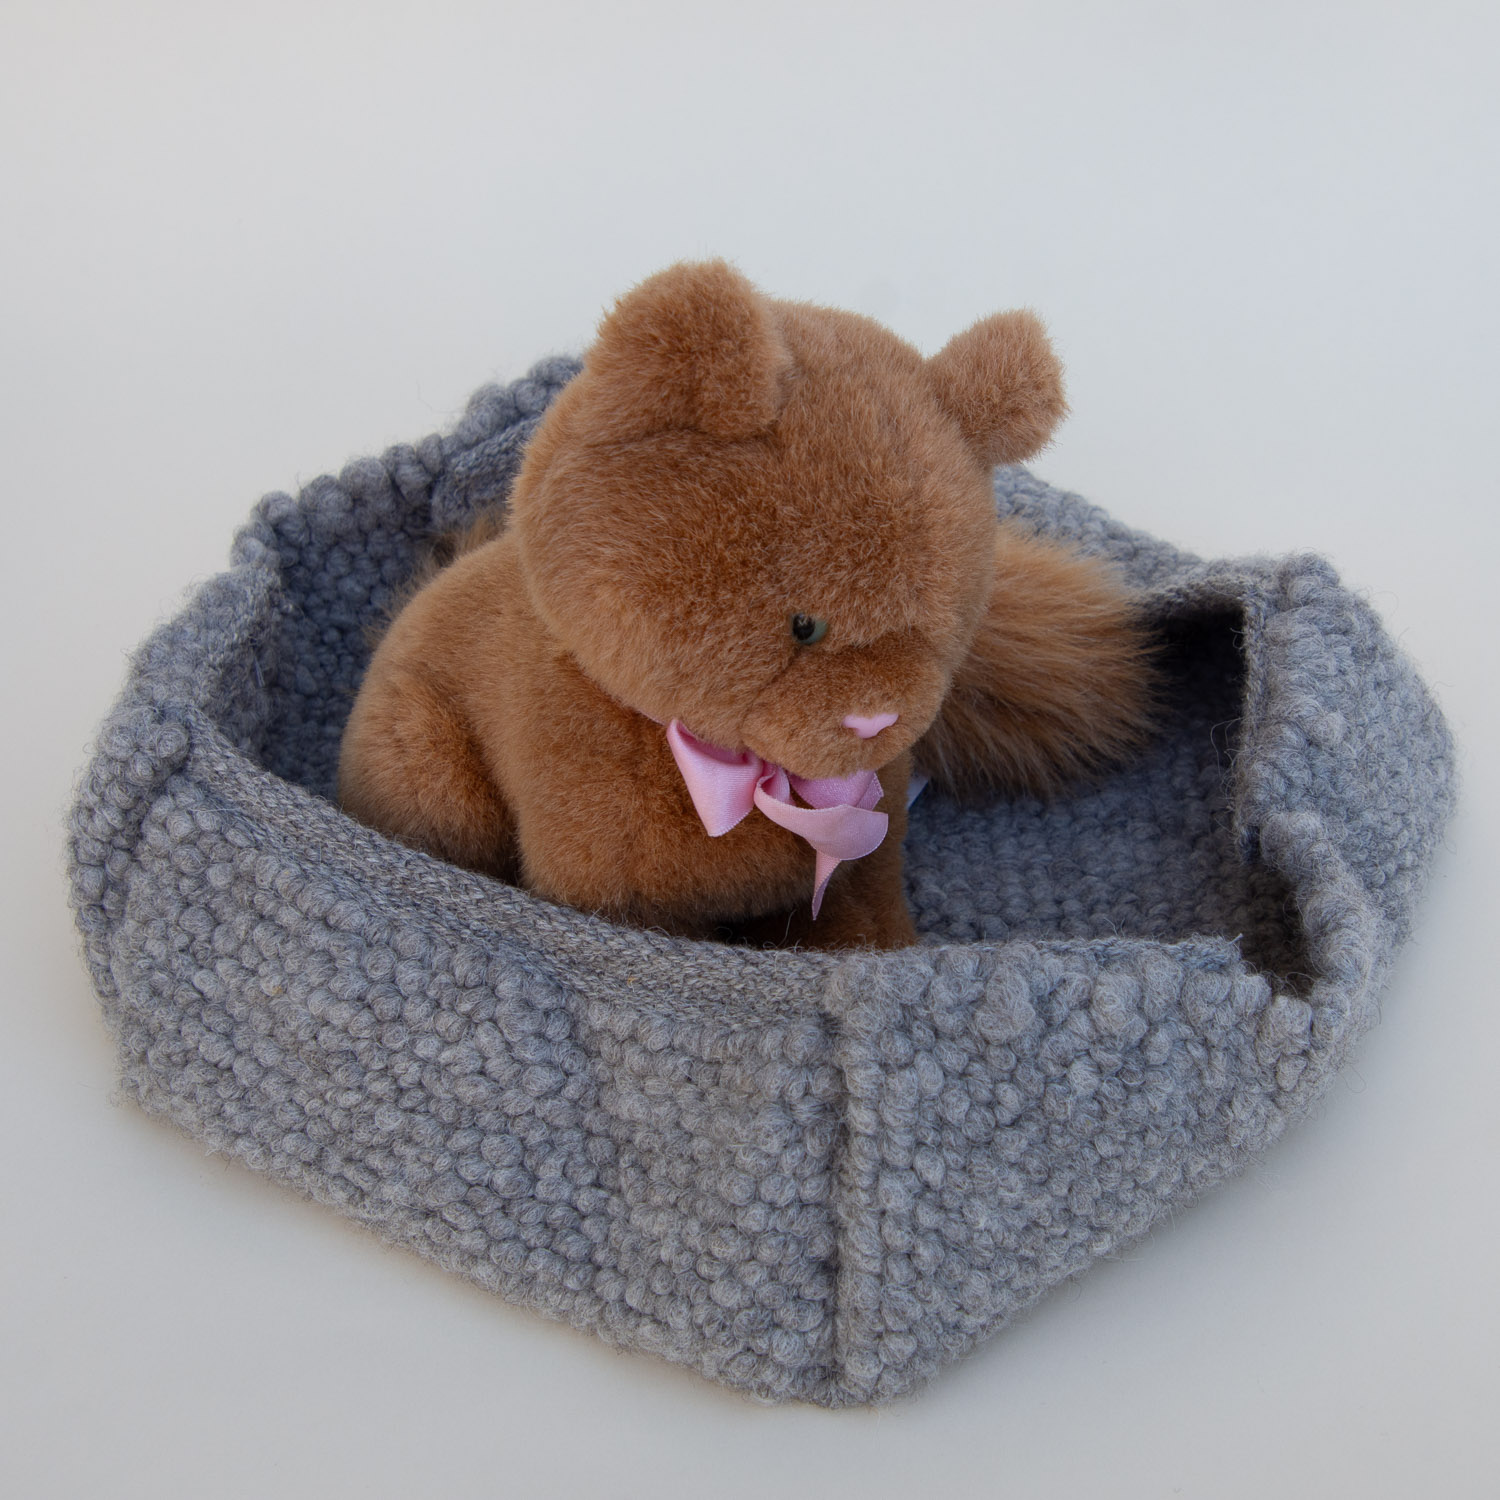
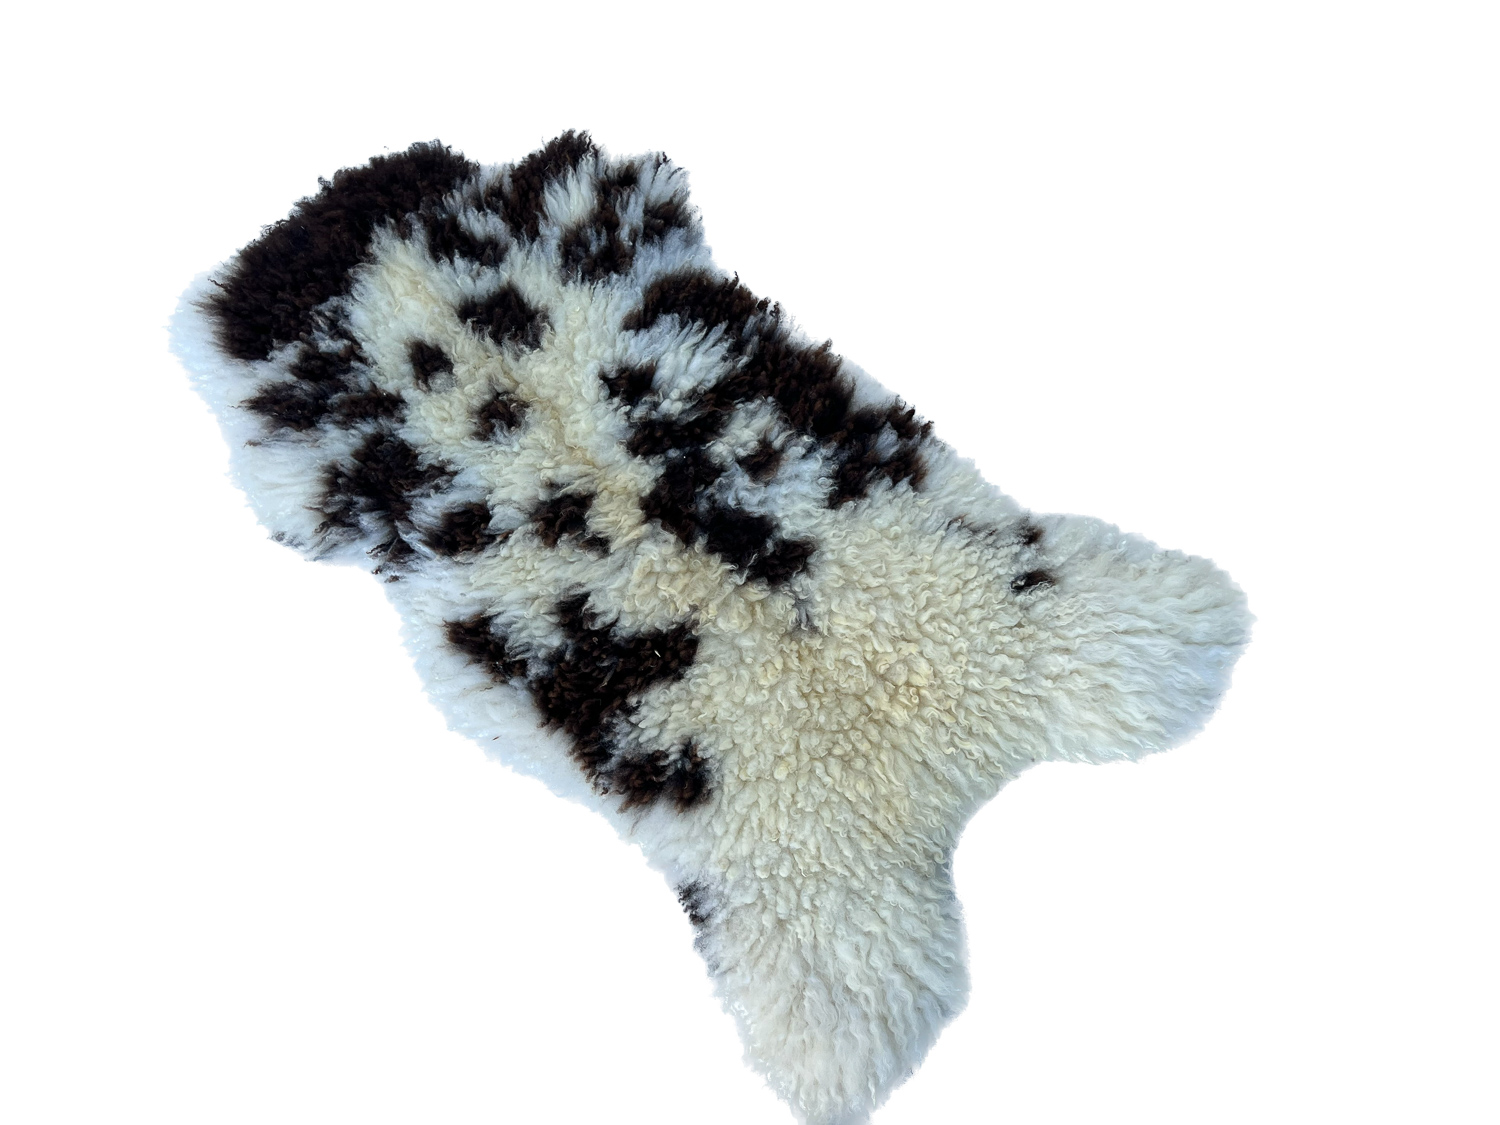
Cat basket on manila paper. Photo taken with Nikon.

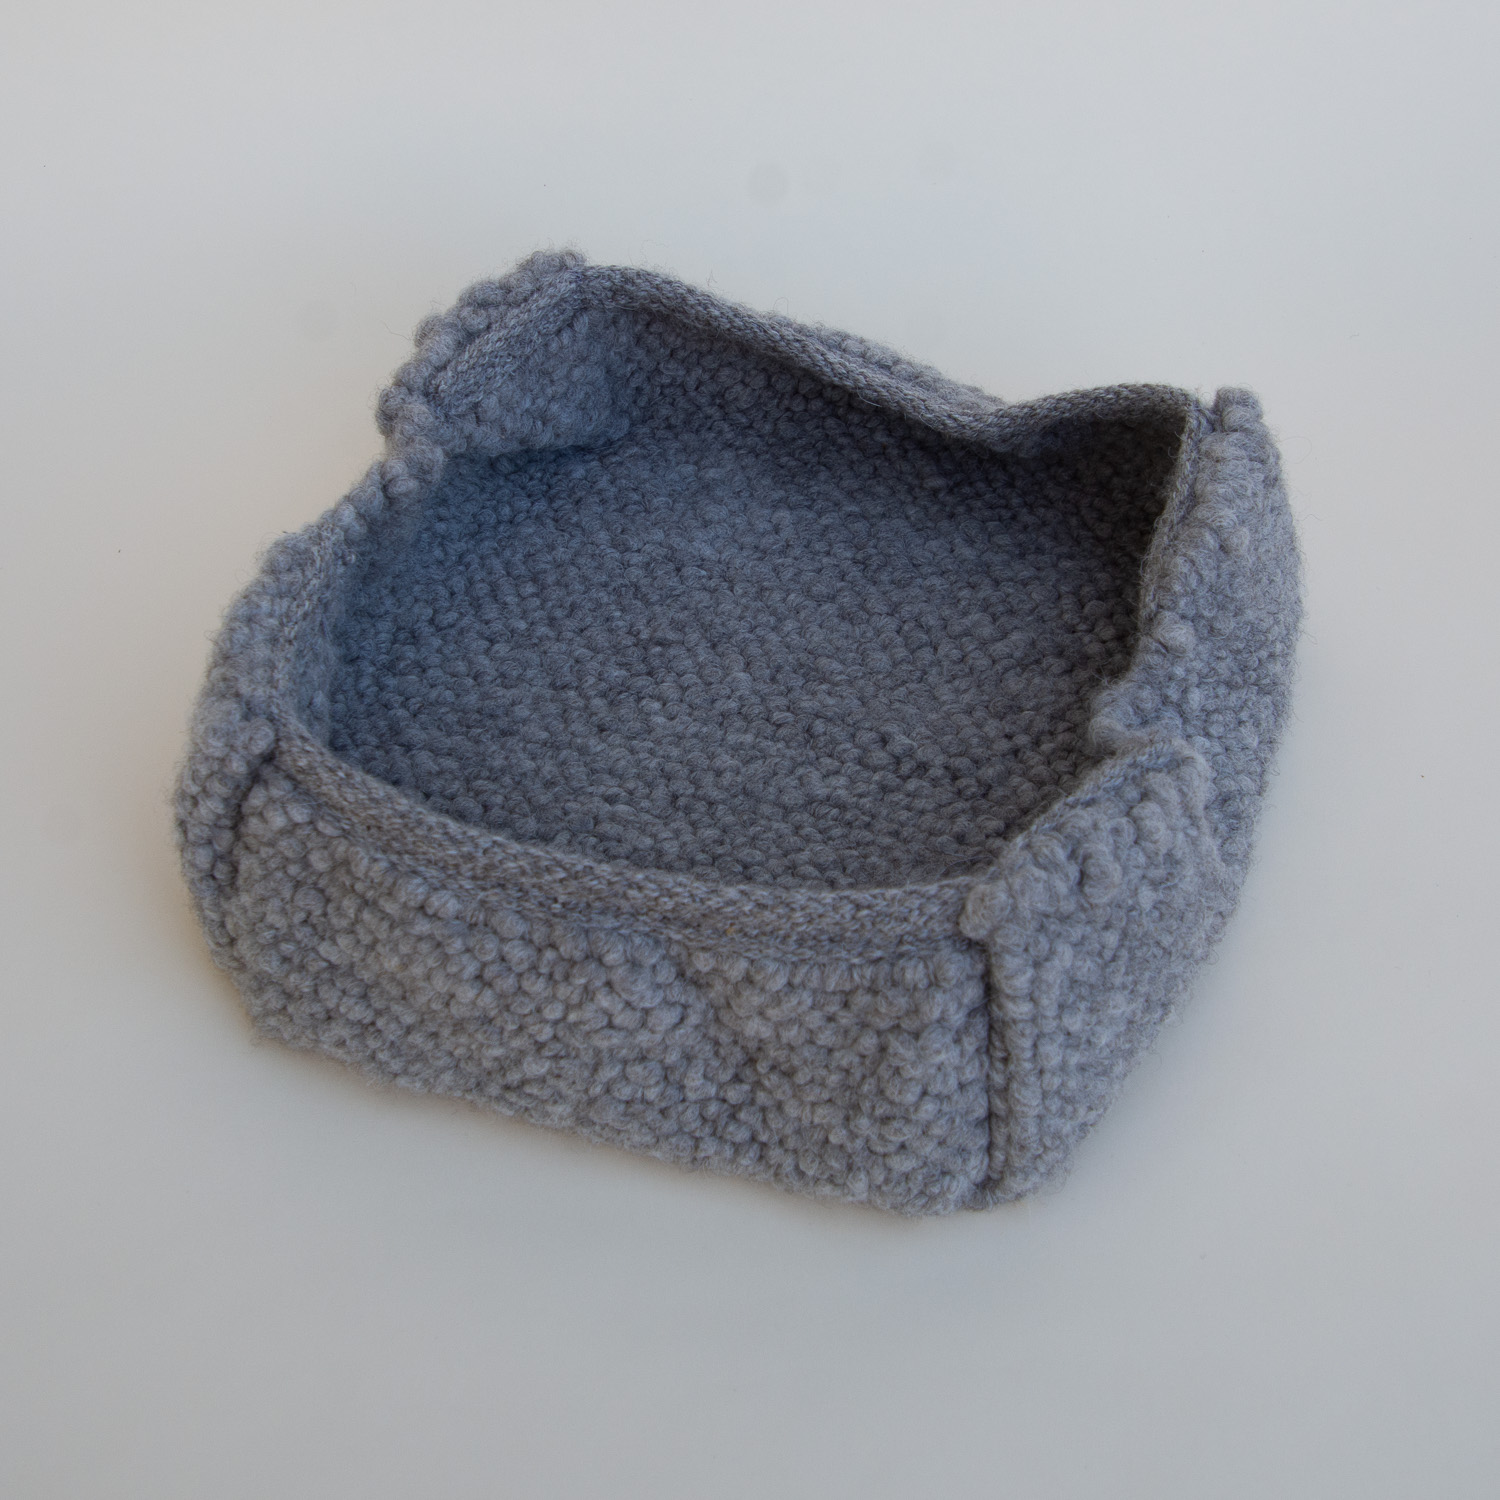
Same thing but no cat.

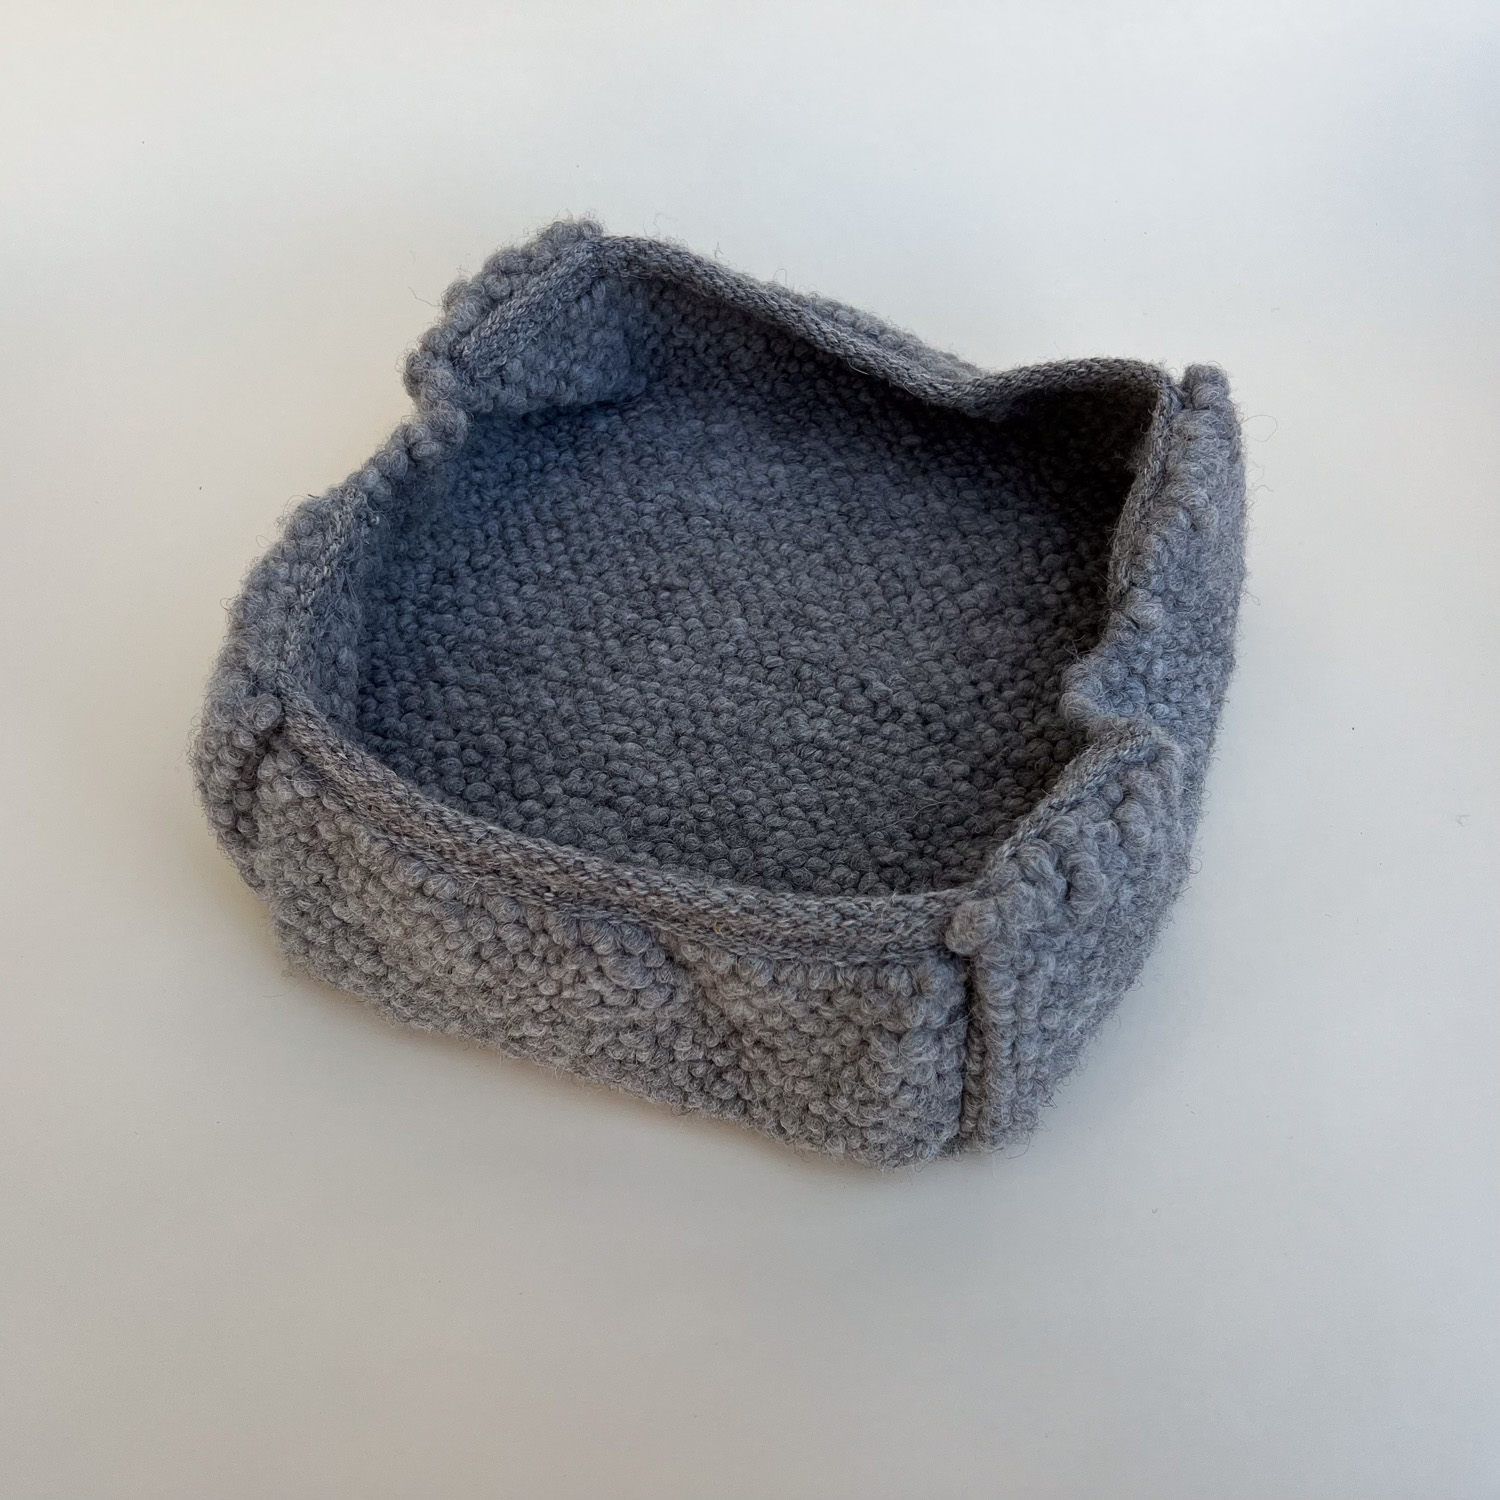
Same thing taken with the phone.

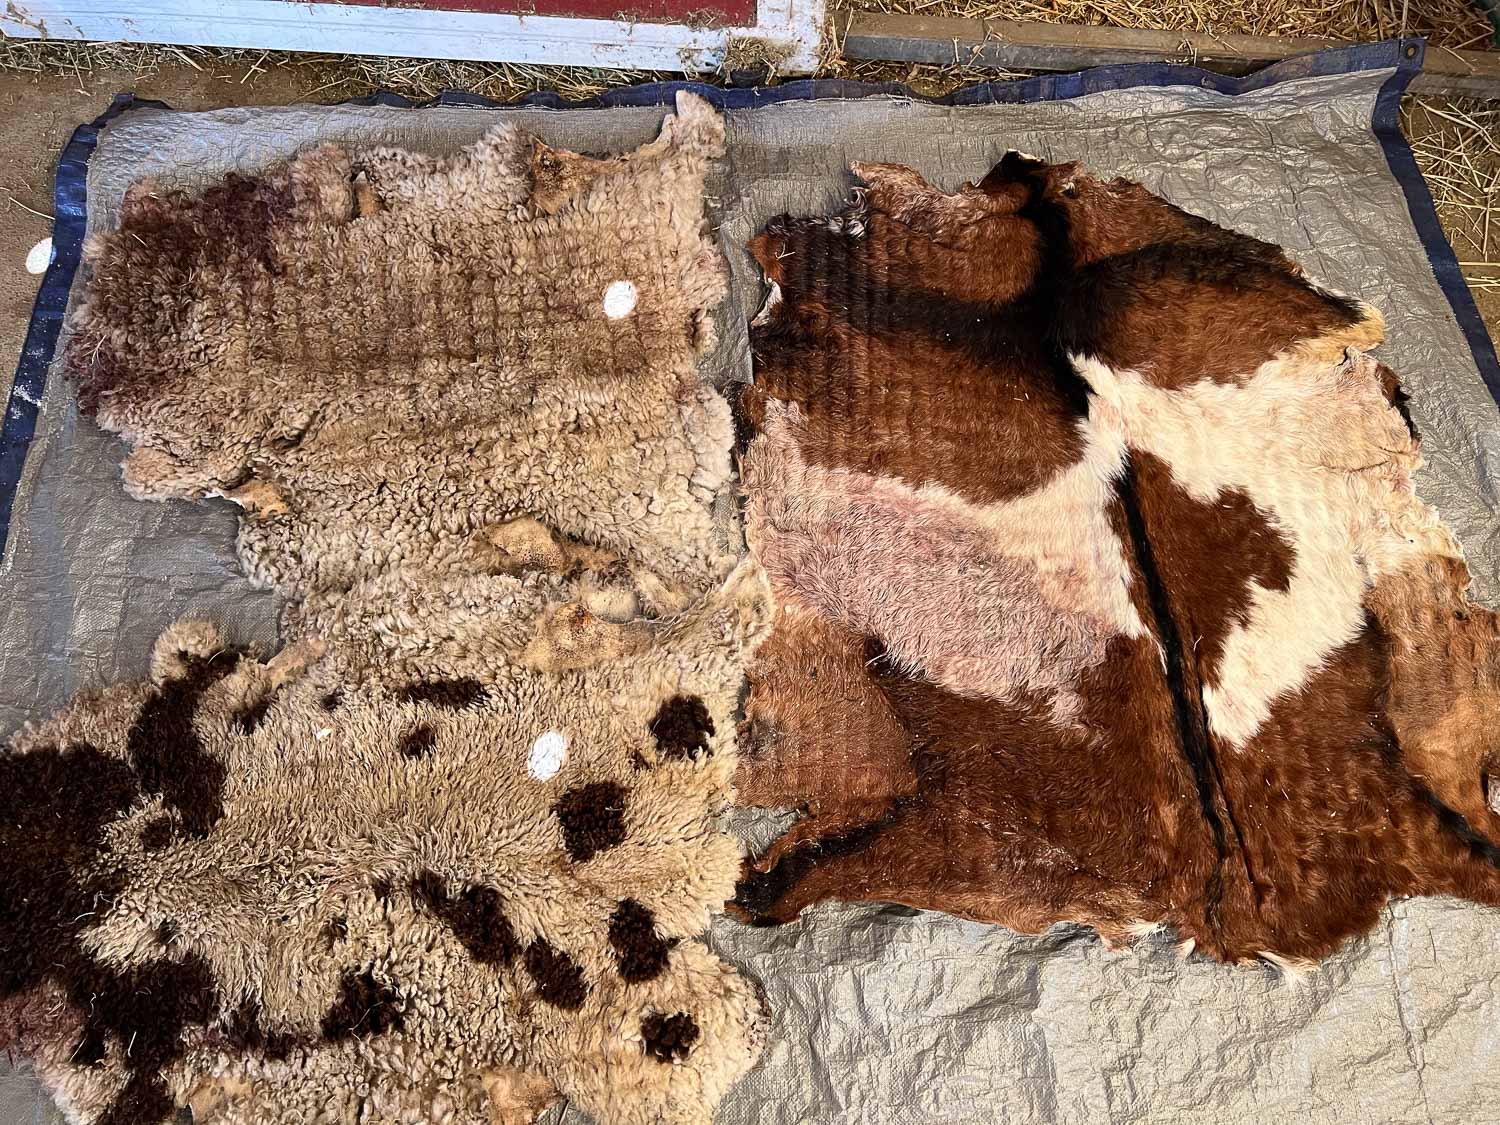
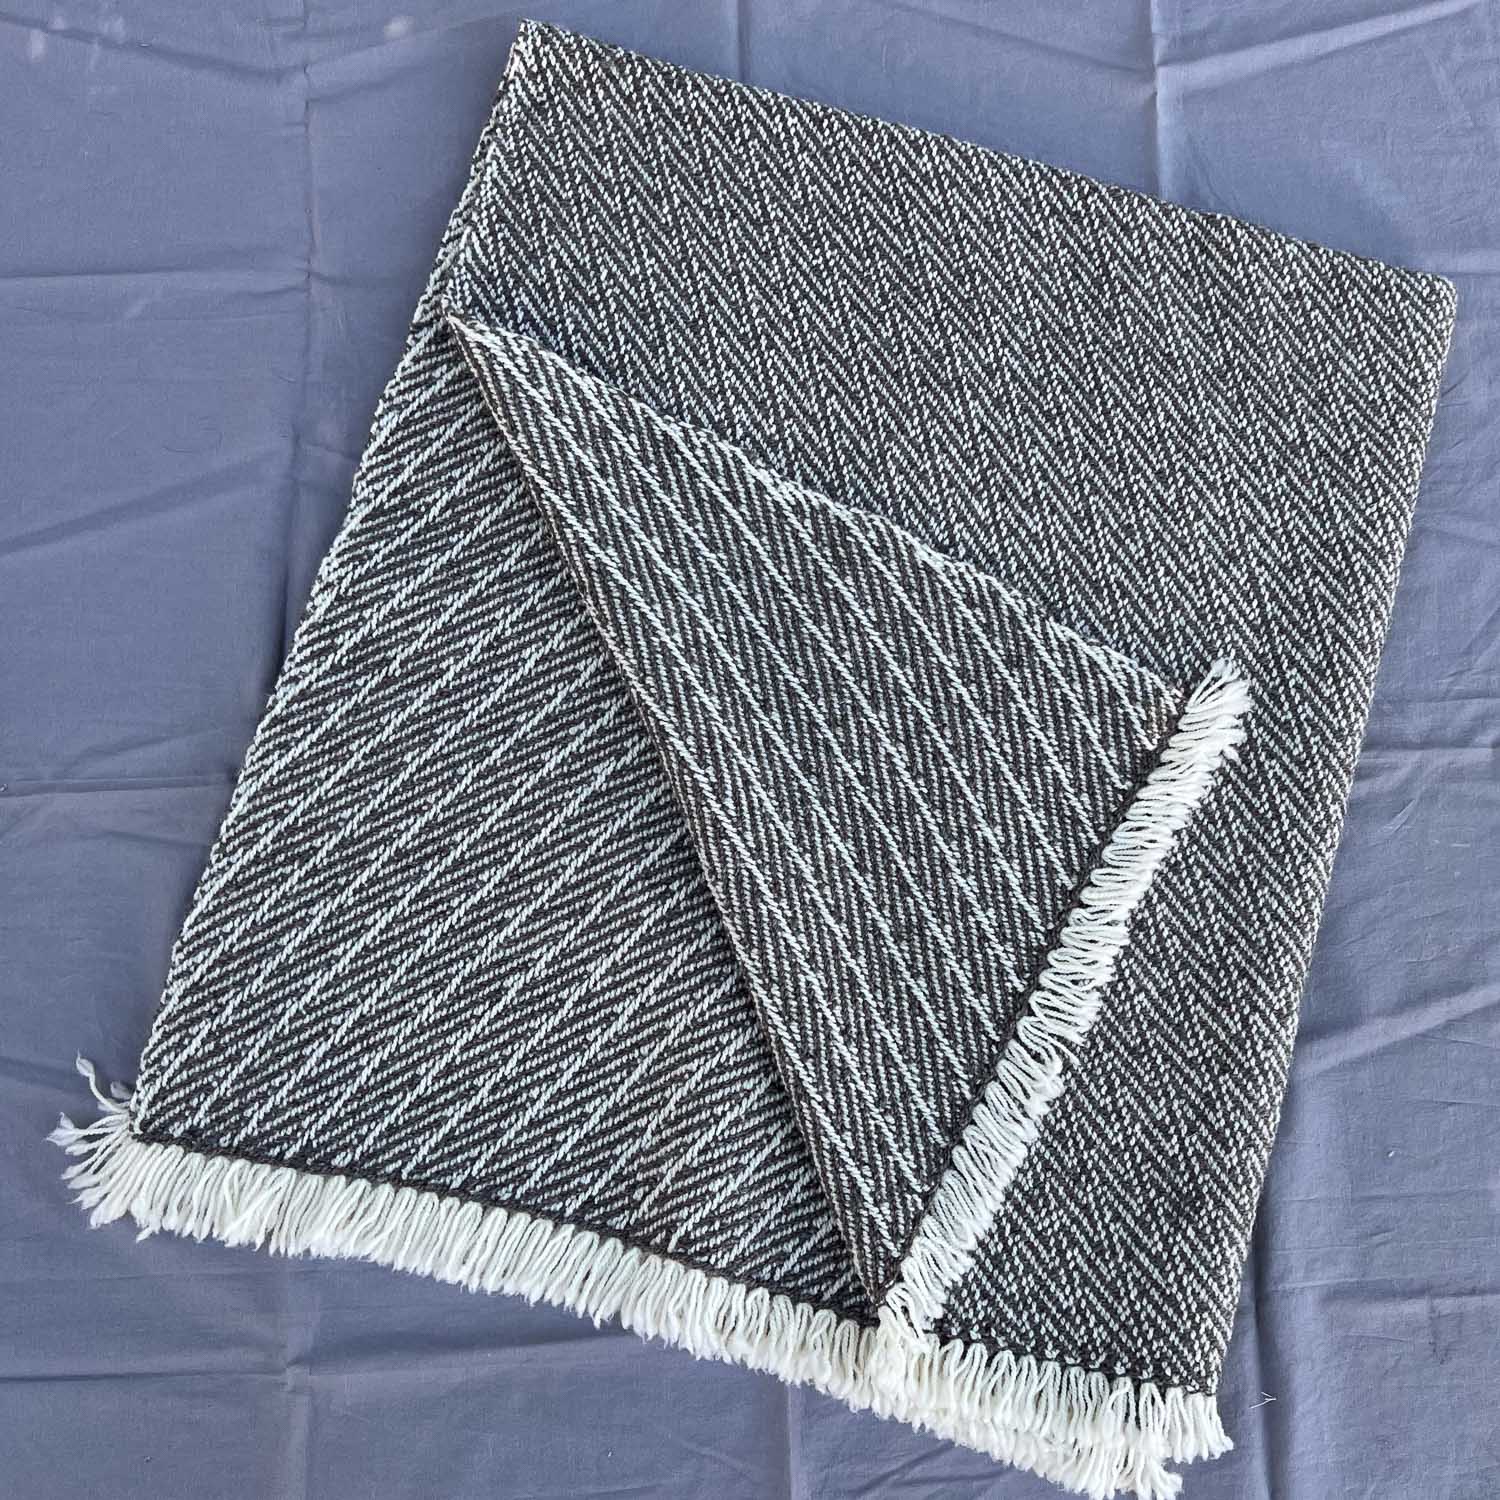
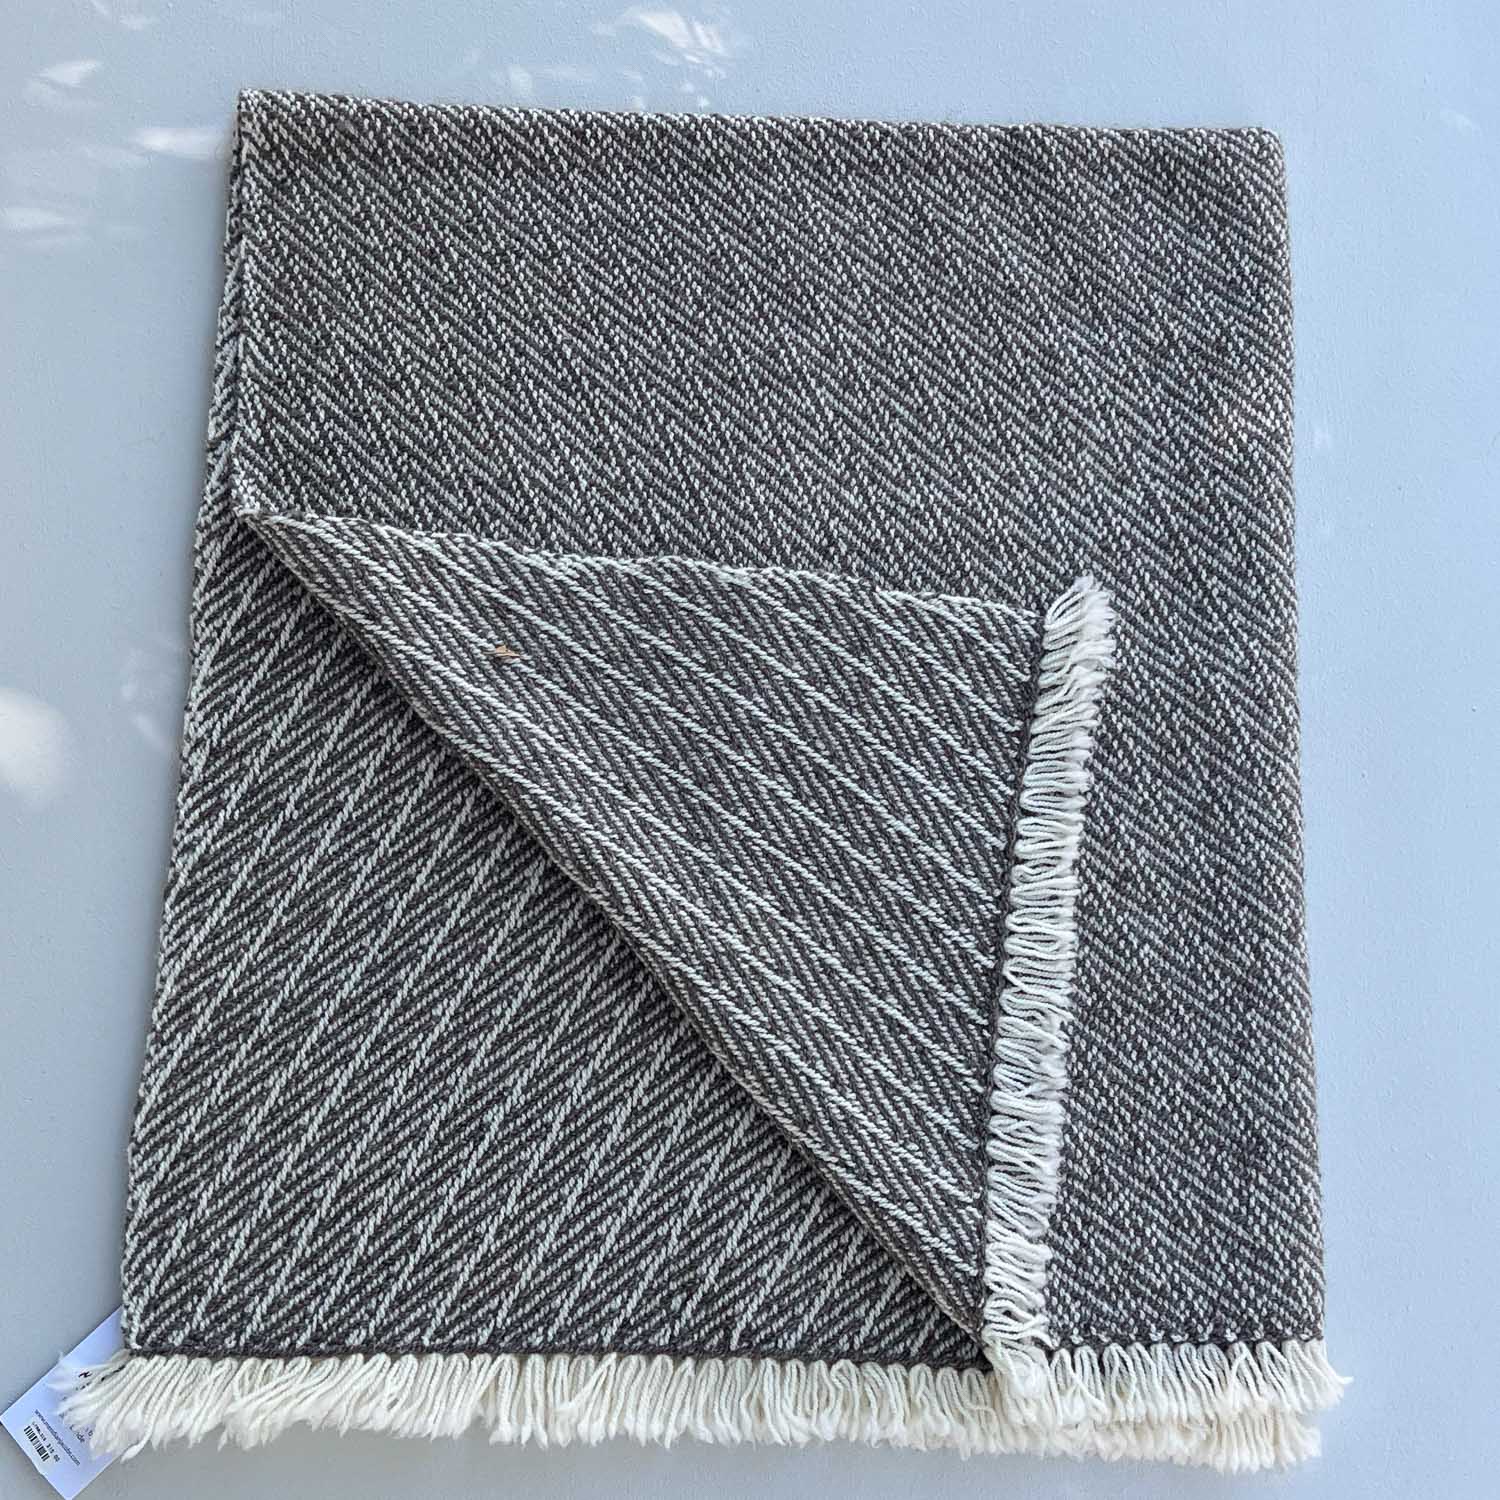
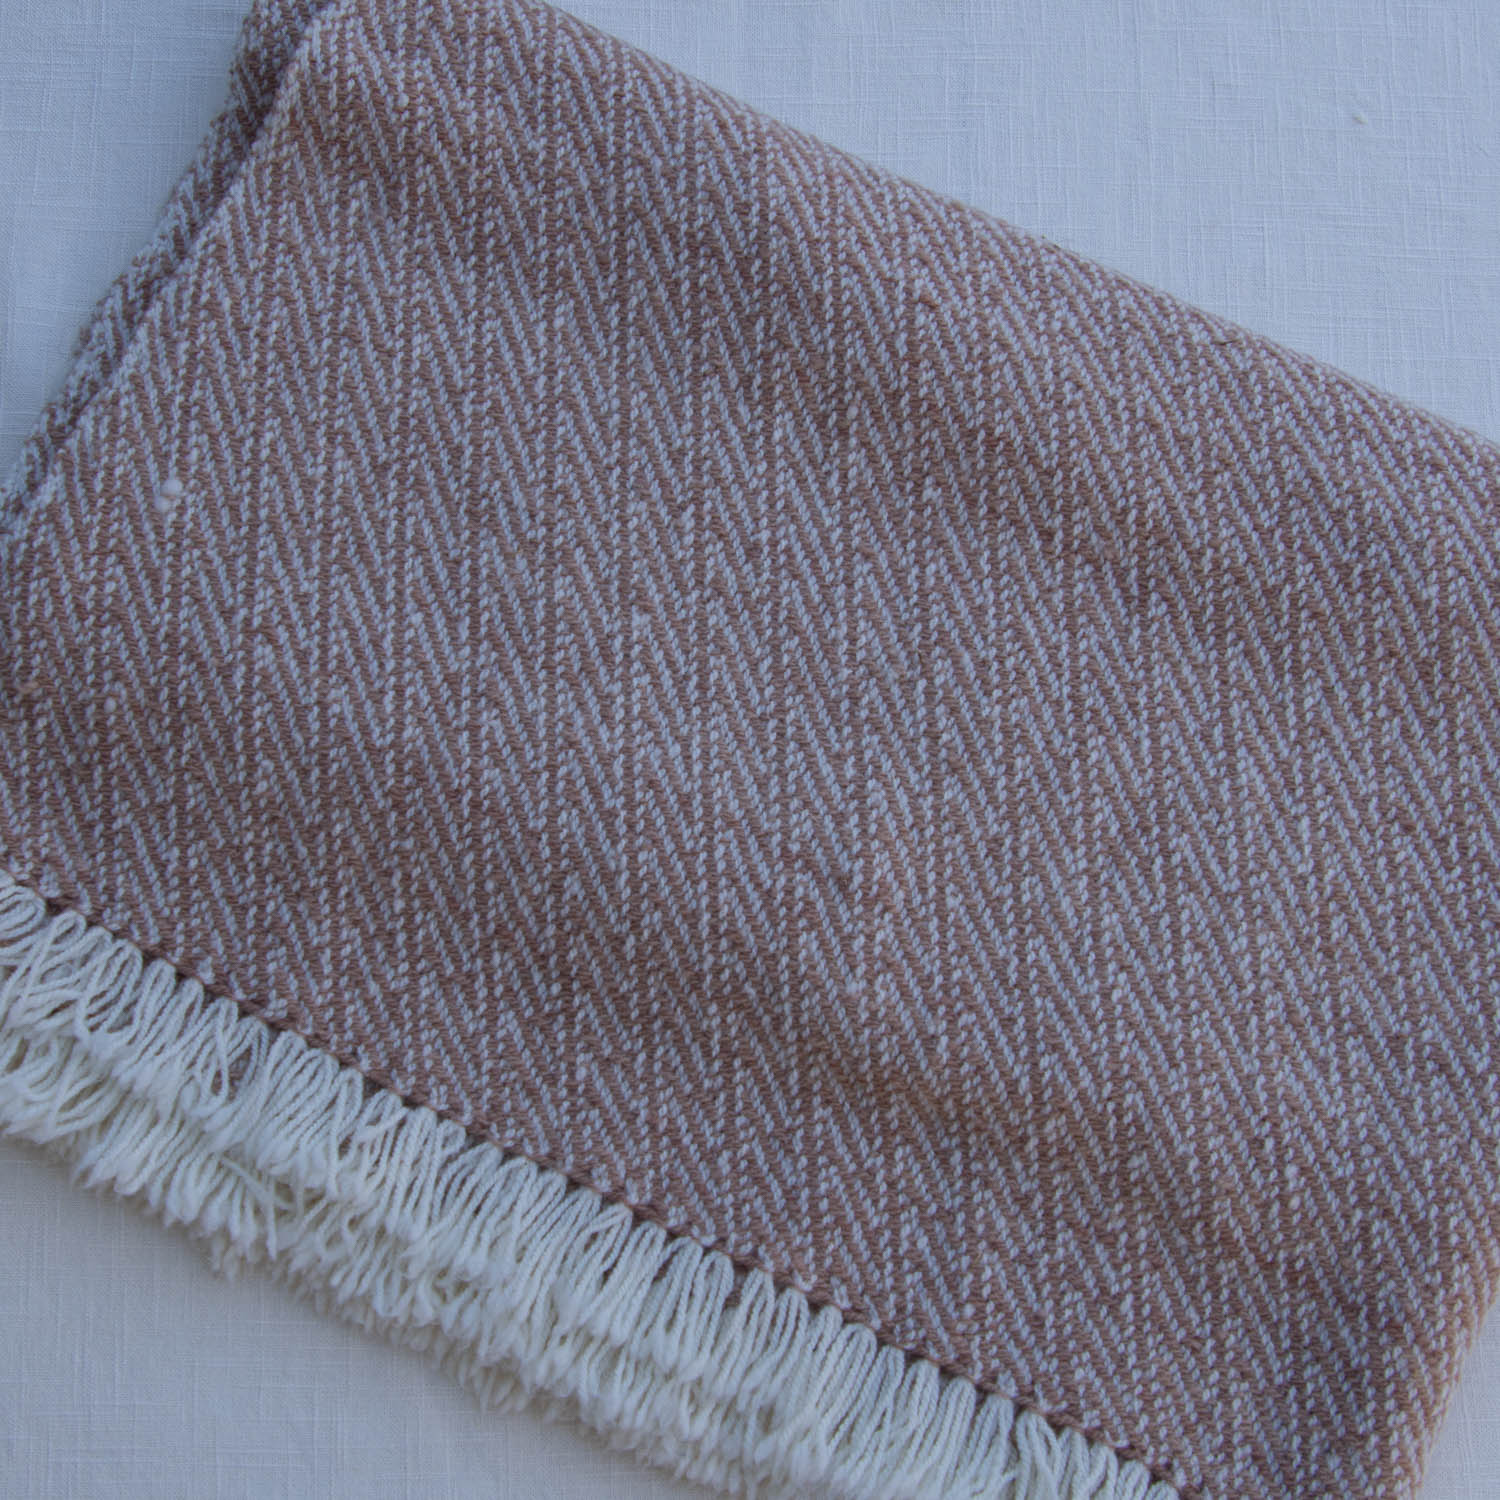
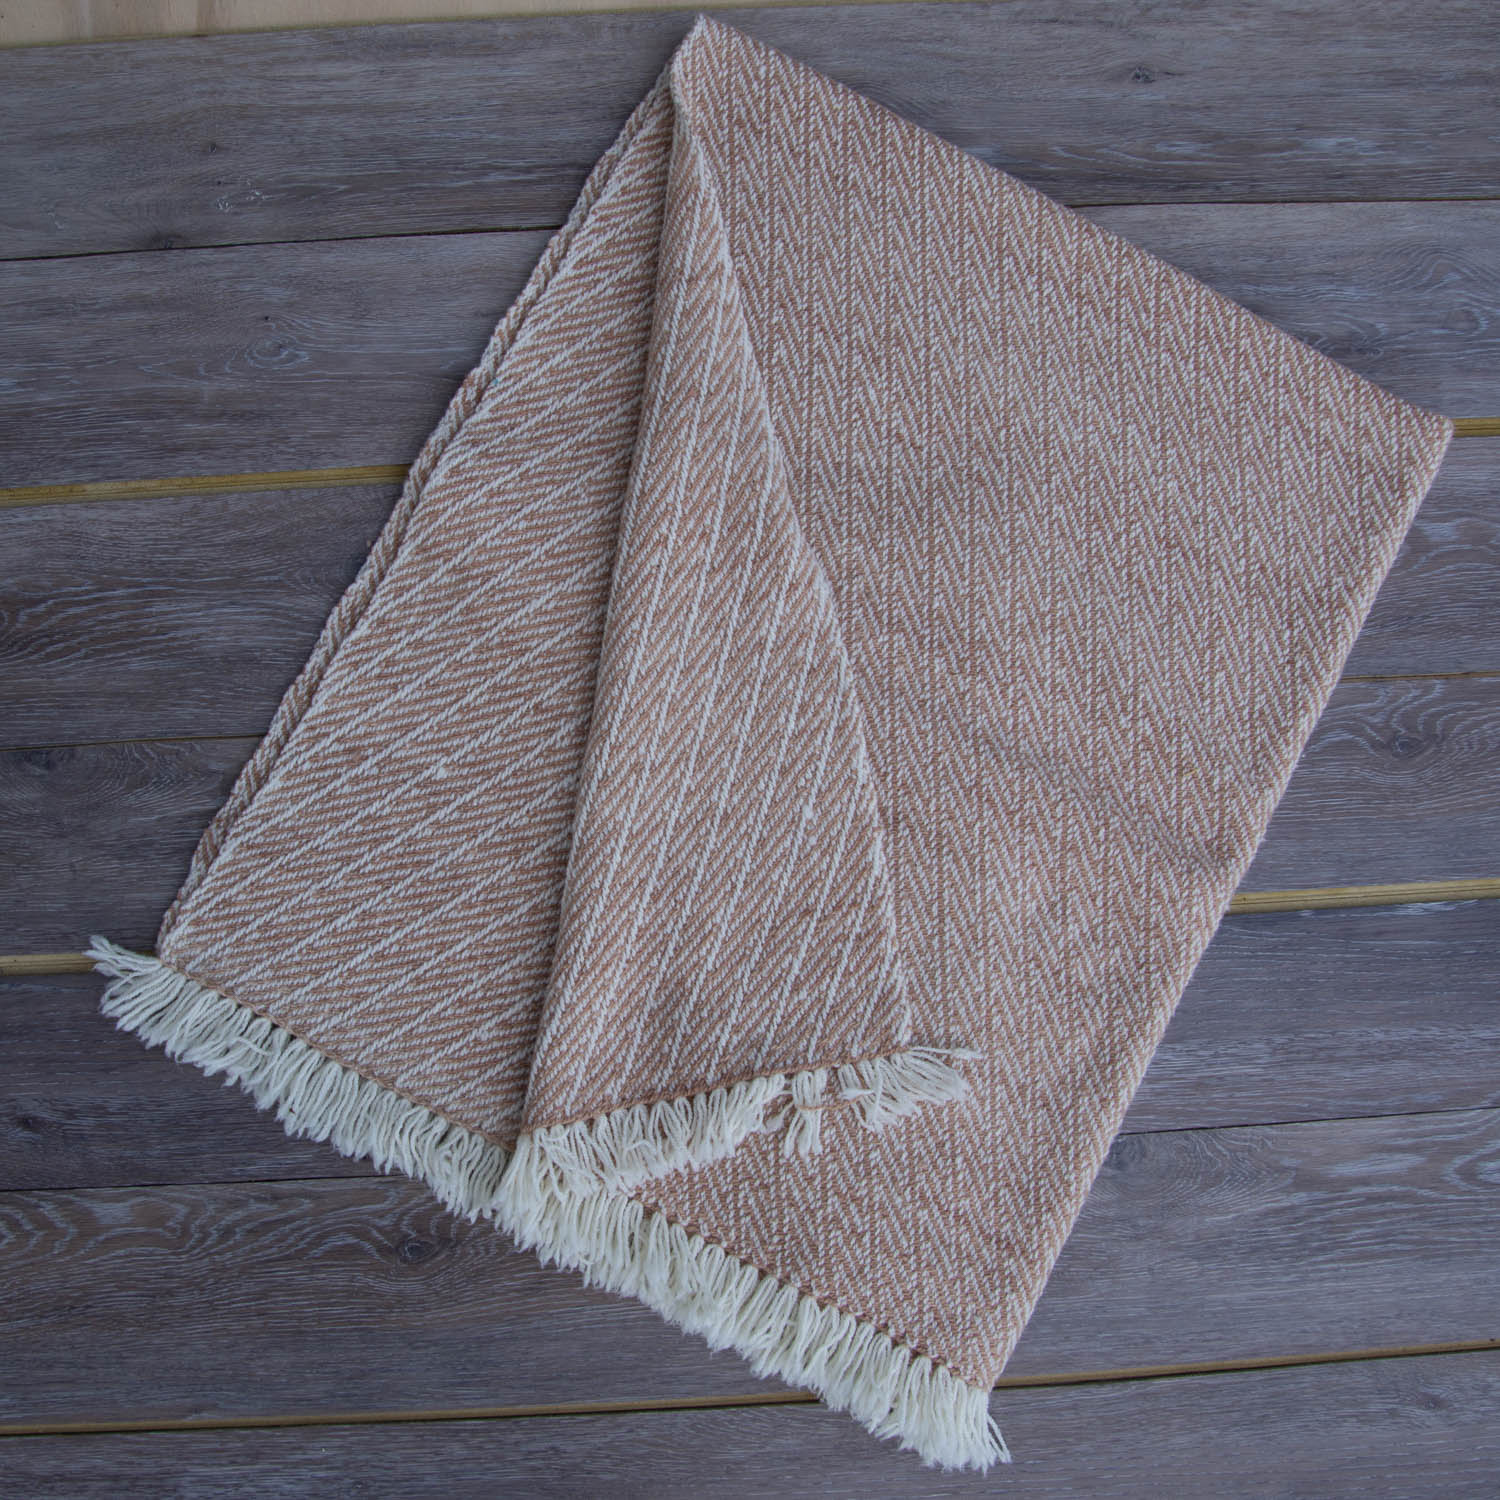
Here is a blanket on manila paper taken with the Nikon. I think this one could benefit from exposure adjustment.

Same photo taken with the camera. Color of the blanket is more natural.

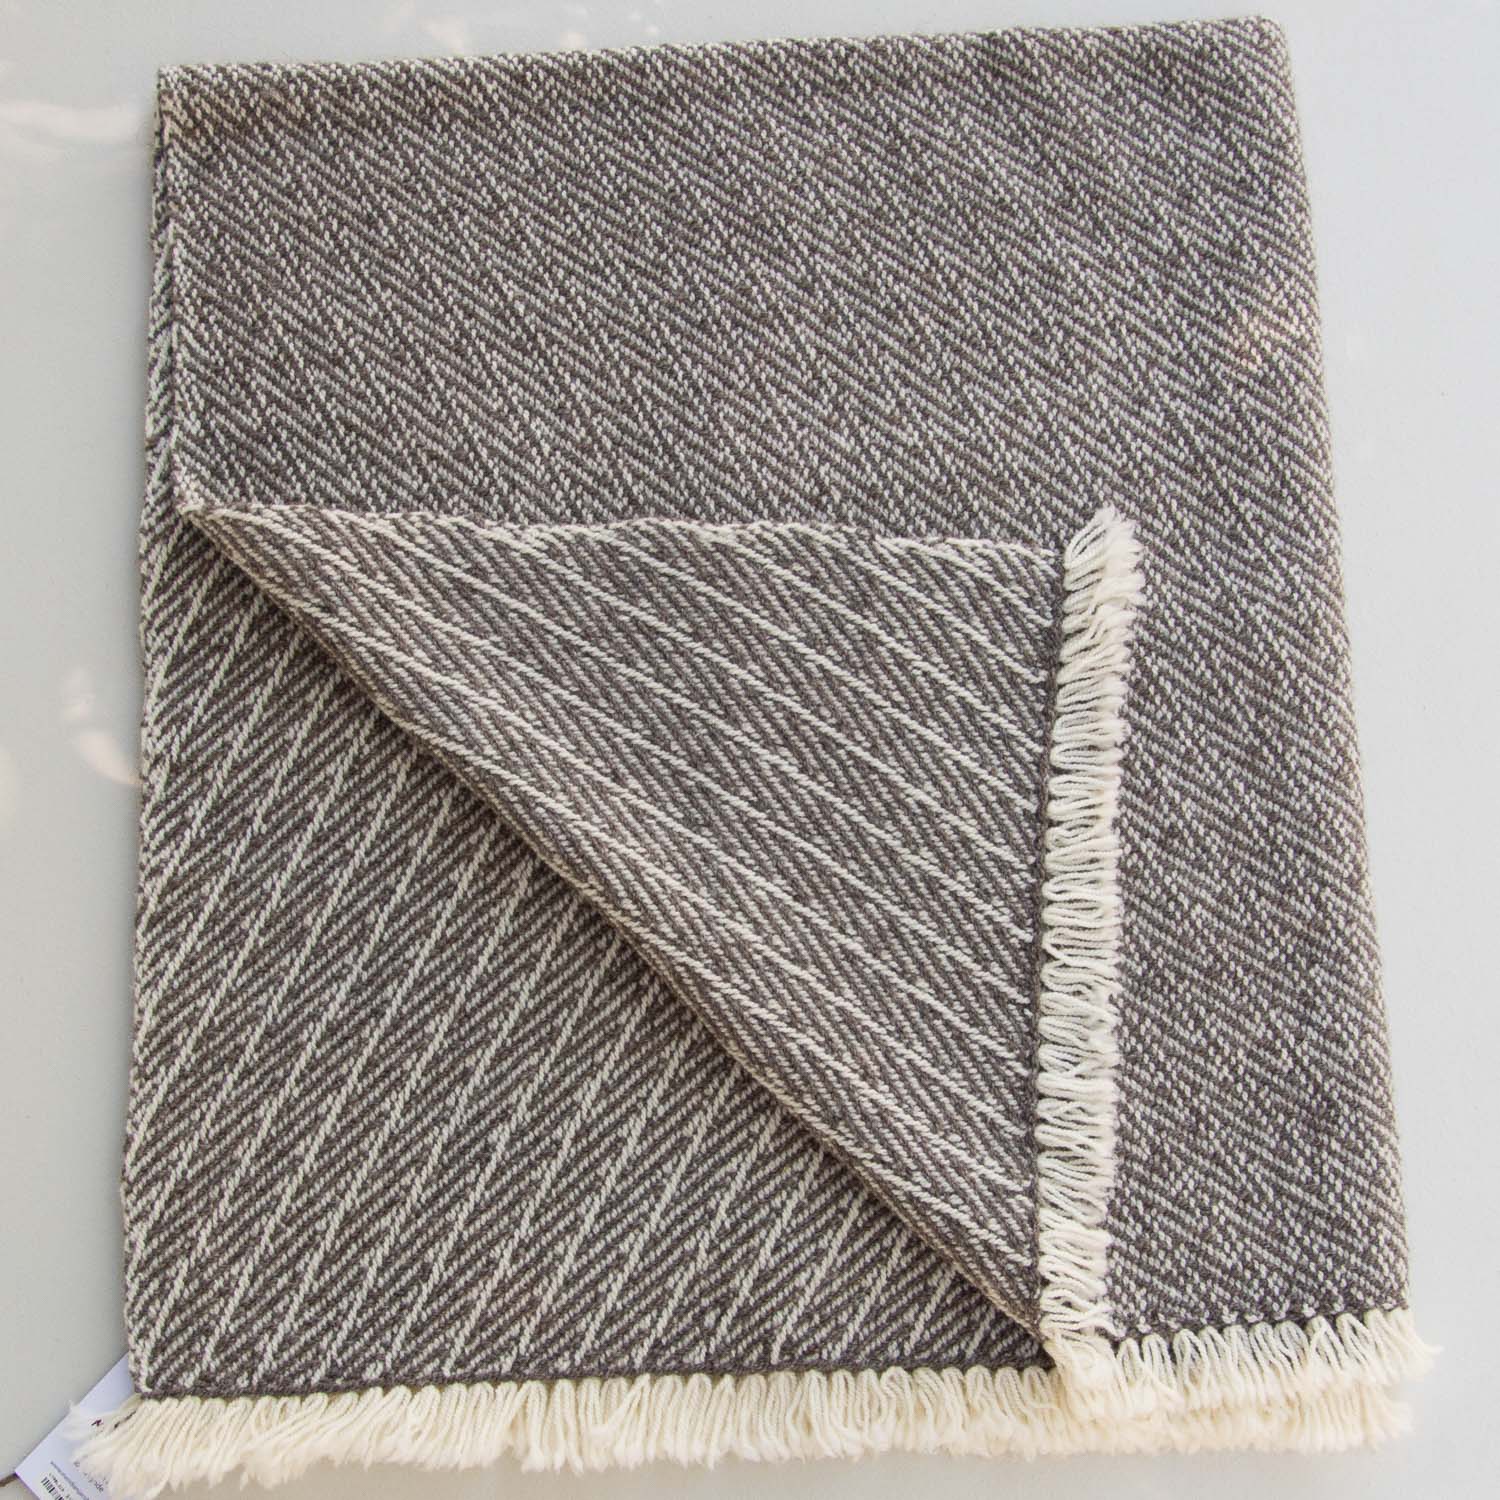
This is in the same place with the linen over the manila. Nikon photo.

Same photo taken with the phone. There is definitely a difference in the color in these photos.

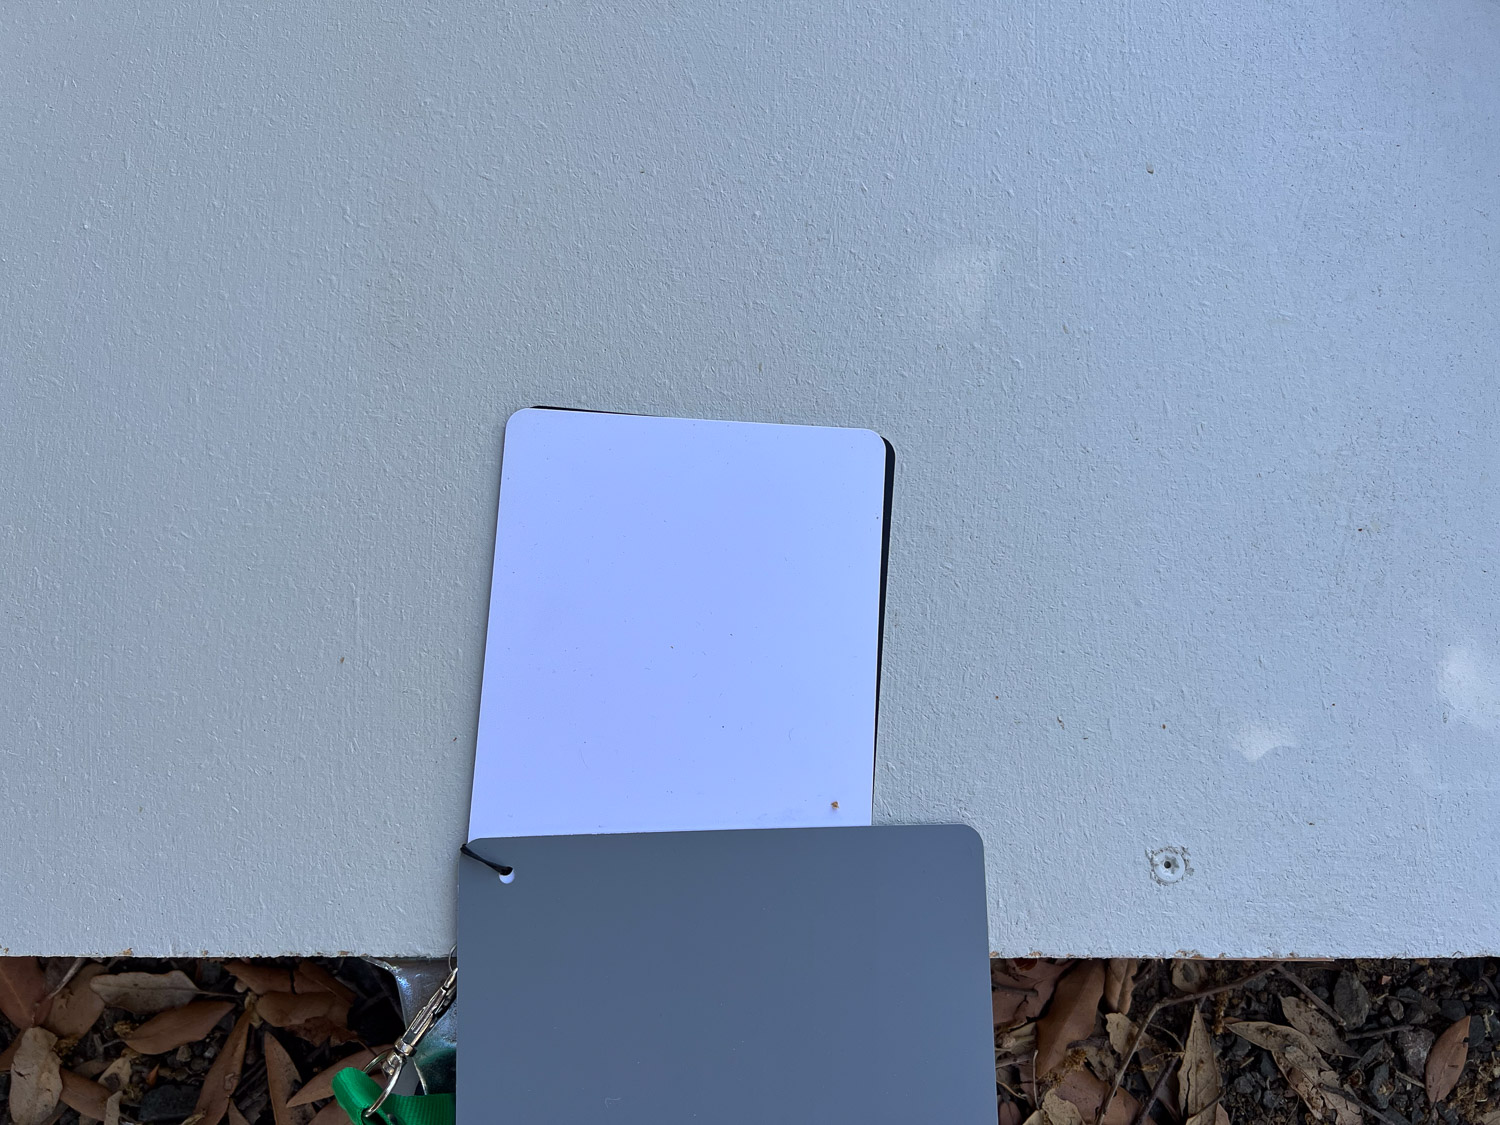
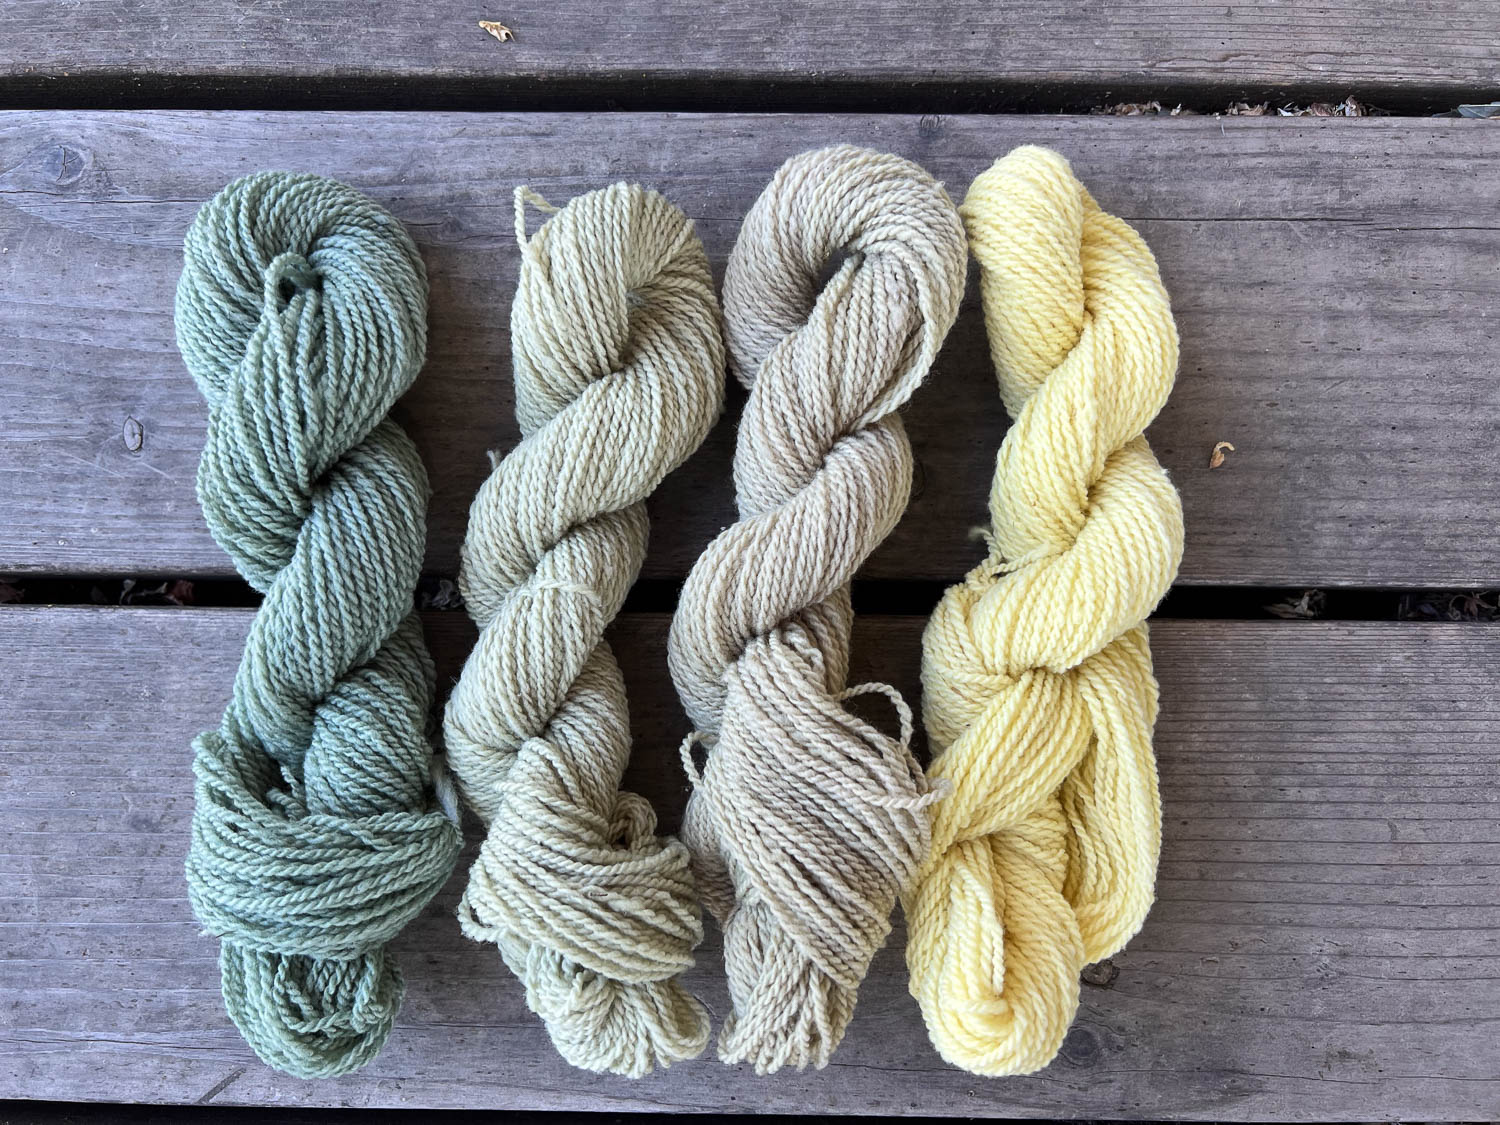
I liked the photos in the last post that were taken with a wood background but I don’t like the spacing between the planks that creates a dark line. We have some leftover flooring that in the house I think of as gray, but I guess they have a brown cast. These planks were left over after we finished the floors and the “groove” edges of “tongue and groove” have been trimmed off. If I want to use these I will trim that edge so there are no big yellow gaps.

I think the colors of the yarn and products are true, but is the background distracting even if the gaps are gone?

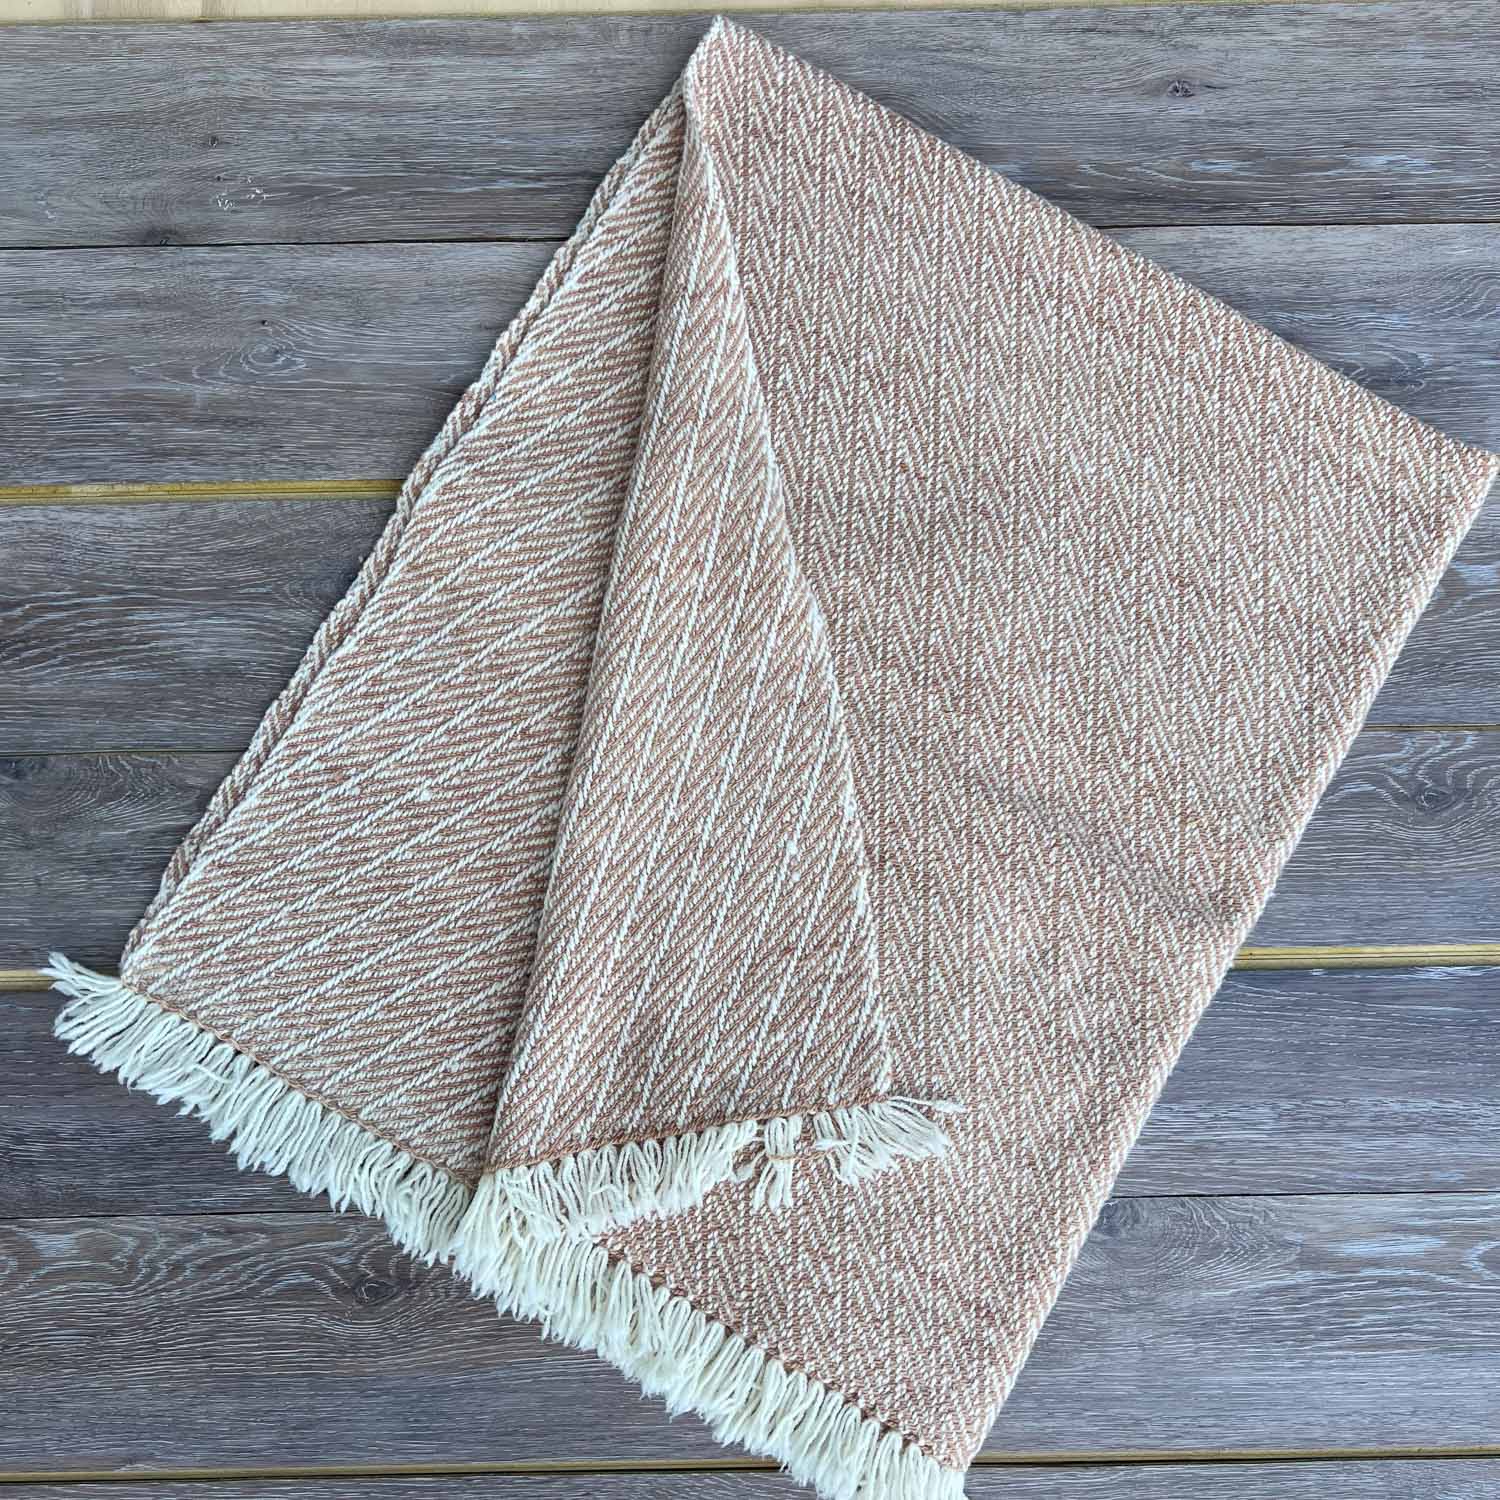
UhOh. Why does the white fringe on the blanket look green? Compare it to the scarf at the bottom. In this last series of photos I didn’t compare Nikon to phone photos, and they are all phone photos. I just added the Nikon photo of the blanket below.

Scarf using phone.

There is a lot to figure out. Tomorrow.

No Pretty Pictures Today

This is a post I debated not writing. But it is part of my life. These photos are mostly from Friday. which was a full day…as are most days.

One of my regular customers wanted 8 lambs for Friday. This is the rack that Dan built for drying salted hides. It’s far better than having 9 pallets spread out on the floor. And even better, that orange netting like they use for construction work was given to us by someone who was cleaning up a property and didn’t want it.

Two spotted lamb hides and one brown and white goat hide after salting.

I took these three hides off the rack so that I could fill it up with new ones. That is two Jacob sheep and the neighbor’s goat. One of my customers wanted to add a goat to the order and there happened to be one next door.

I have learned to take photos of hides before I send them to the tannery so that I can keep track.

This is the previous batch of hides…

…and the reverse side. This is what you get when a professional does the work. There are no holes and no big chunks of fat left on these. I sent these and the three above to Driftless Tannery in Wisconsin.

Three brown and four spotted sheepskins ready for tanning.

This batch went to Vermont. The tannery is up and running again after being sold. Why send these so far away? Tanneries are few and far between and I like the natural mimosa tan that is offered. There was a tannery in Idaho that did a great job for a year, but they moved and didn’t start up again.

Warning: dead sheep parts in the next few photos.

If I’m going to sell sheep for butcher then I want to use as much of the other parts as possible. The hide is an obvious option, but there is also a market for skulls with horns and horns by themselves. With the sheepskins all I have to do is salt them and then ship them to a tannery where all the work is done. I have to deal with the other parts. I’ll write a button post one of these days to explain the process I use to make buttons from the horns.

I have a hard time getting the skulls in shape to sell. I used to put the skulls out in back, wiring them inside a fence so they couldn’t be dragged off. After I retrieve them from “outback” there is still a lot of work to do. They are not completely cleaned and definitely not ready to list on the website.

One year I bought a “starter kit” of the kind of beetles that will do the work for you. But that is a whole other story and it’s not that simple. Also that was the year of my accident and I wasn’t able to keep the beetle colony working.

This is my new method which is not yet perfected. Last fall I buried several heads and left them for the winter. There was so much rain for so long, that there was plenty of insect and/or microbial action. When I dug the skulls up I found that they were still not perfect, but much better than the “outback” method. They mainly need some work on whitening, after turning brown in the dirt, and there is a risk of the horns deteriorating faster than the bone. I don’t know how long these need to stay in the ground and I don’t know how much difference it makes if I add water occasionally. There are some heads under the dirt pile in the middle of the photo and there are some under the black tub. There are some IN the black tub as well. The last few that are buried have baling twine tied to the horns so I know where they are. The new ones in the foreground have baling wire around the horns that sticks up through the dirt when they were covered.

When I make buttons I need just the horns so I cut them off the skull. There is a bony core that is attached to the skull. You have to soak the horn or otherwise allow the tissue between the horn core and the outer part to deteriorate or be eaten by something so that you can get the outer part off.

Top of sheep head after horns were cut off.

This was a ewe lamb with horns that tipped forward. One was so wobbly that it didn’t seem attached to the skull. You can see here that it wasn’t. I think that would be an example of a scur.

Sheep coats organized and spread out by size on barn floor.

Friday’s harvest was fast. The farm harvest guy dealt with all those sheep within two hours and did a great job with the pelts. After I finished salting hides I spent the rest of the morning sorting and organizing sheep coats. I don’t coat a lot of sheep, but usually have about five coated through the summer and up until shearing. These are usually the sheep that go to Black Sheep Gathering and/or State Fair. Right now there are only two with coats. I’d rather see my sheep without the coats and it adds work to keep up with changing coats as the fleeces grow out. You can see that there is also a lot of coat repair to keep up with.

The coats I have always used are those lined up in the middle and the left. I recently bought a new brand of coats that was recommended when I was at the Jacob show in Estes Park. My original coats are sized by number. The new ones have a color tab that indicates size. I matched them up to the old coats to figure out where they fit as far as size and I added the numbers to match the others. The coats on the right are the new ones. I guess I didn’t get the sizes I’ll need as the fleeces grow out.

Struggling with Product Photography

As you know I like to take photos. I think that most of them (at least the ones I share) are decent. I know the basics of photography and am familiar with the importance of exposure, focal length, white balance, etc. But its one think to know ABOUT the concepts. It’s another to put them into practice.

When you base most of your business on online sales, obviously the photos are very important. I really need to update all the products on my website and there is soon to be a launch of a new website with some of my pieces. I NEED to have decent photos.

I am writing this post as a tool to analyze what I’m doing and share the info with some people who might have advice. Comments are welcome.

I have used that white (but not really white) board for a couple of years. Dan put wheels on the edge so I could store it upright and roll it around to where I need it. It is cut the dimension to match the photos when I use my Nikon. That was very helpful since the template for my current website uses horizontal photos for the product pages. However I have had to provide square photos for other websites and that is what the new one will use. So I have to keep that in mind when I’m photographing products. The request for the new website is that all the main product photos have a consistent look as far as color. White? Gray? Wood? Purple??? I have to choose one. I have to choose one that will help me take good photos.

The part I struggle with is white balance. That means that the backgrounds look like what I’m seeing in real life and the products are represented properly. I am not going to try and include all the photos I took here. I tried four backgrounds with each product–the white (not quite white) board, a gray piece of fabric to decide if I want to paint something gray, a piece of raw plywood, and the deck in front of my shop. I took photos of each product on each background with my Nikon and with the iPhone. I am disappointed that I have a harder time getting the color right, at least on the white background, with my real camera. Most of these are with the iPhone. My goal is to take photos that are correct and not have to spend time with post-processing on the computer.

Orange herringbone patterned scarf on wood deck.

It would be simpler if I could put all these photos side-by-side or at least in a block of four, but I can’t make that work. Besides maybe when you look on a phone that would make it more difficult.

This herringbone scarf looks most natural on the wood of my deck. At least the color I see on my computer looks like the scarf. The background isn’t a good choice for smaller projects however. It’t the spaces between the boards that are the problem.

Herringbone scarf on light gray background.

My so-called white background. The whole thing looks dingy and the scarf is not the true color.

The color of the scarf is better here, but that gray looks darker than it should and there is a blue cast. (I know its wrinkled–it is a stand-in for a painted board.)

Herring bone scarf on light plywood.

The color of the scarf on the natural light plywood is wrong.

The next two photos are taken with the Nikon.

This is without editing. The exposure is too dark. I lightened it on my computer and it was OK.

I lightened the exposure and shifted the white balance in the computer on this one, also taken with the Nikon.

Skein of gray yarn on dark gray background.

Light gray yarn on the wood deck. The lines are definitely distracting as are the speckles that weren’t as noticeable in the photo that wasn’t as close.

Even without the wrinkled cloth, this color doesn’t do much for me as a background.

Gray yarn on light gray background.

It bothers me that the background looks dingy here. This is the same skein of yarn in all four photos. It sure looks darker here than in the first one, which is more correct.

Skein of gray yarn on light plywood background.

The yarn color looks even darker here. I thought about having several skeins of yarn in one photo–I think that would help with the color. However, it has to be really clear that a purchase is for only one skein of yarn, unless the customer chooses more.

This is the iPhone photo from above with exposure adjusted in Lightroom.

I think the color of the blanket is the best on the wood background.

The color is a little darker here and the gray fabric is darker.

The blanket looks more black white or at least dark gray than it really is.

Here is that “white” background. The blanket still looks darker and the background has a blue cast.

Wool blanket on white background.

This was taken with the camera. The exposure was wrong and the background looked dark gray. I lightened it and shifted the color temp from the blue side to the yellow side. But now this looks browner. The colors of the first photo in this series look more true, at least on my screen.

I have this set of grayscale cards, but just because I have it doesn’t mean that I can use it properly. That white one is true white, but I don’t think it looks true white in this photo. It does show how far off the board is. Some of that may be the photo though. If you look at the very first photo with the sheepskin you can see this set of cards on the board and it looks different there.

While mulling this over I saw my white truck right there. That is the truest white so far. This photo was taken in the sun and all the others were in shade.

So where does this leave me? I think that I should be able to use a white background but I’ve never felt successful with that. I think it’s easier to get true color on the wood deck. Is that because the camera is sensing more variety of color and contrast than when you use just a solid color? What if I stained a piece of plywood to have it lighter than the deck, but with some variation from grain?

Last night I experimented with ways to remove background from iPhone photos. I used one for which I didn’t have to use an app. Some look OK but it’s not foolproof.

The edges don’t look right here.

Definitely a problem here. It couldn’t distinguish the fringe yarns. I think that dark line is from the deck space.

As I type this my screen lags behind the keyboard. In addition to the photo issues my computer is full. Now what? I thought using iCloud would help but I don’t understand enough to set it up properly. As I’ve said before, where’s a millennial when you need one? Or even a 12 year old?

Kirby Says Goodbye

The day after I got back from Black Sheep Gathering in June my granddaughter started her visit with us. She had traveled to California from Texas with her other grandparents who live nearby and was with them for the first week. Since then she has mostly been here, but visited in town with the other grandparents and cousins periodically. Kirby was eight when she got here but had her ninth birthday last week during the fair.

It has been seven weeks that Kirby was here with us. I wrote about some of our adventures in previous posts, but most of the time was spent here at the farm.

Kirby had a birthday party with her cousins at the other grandparents’ house and got plenty of presents. But last week a birthday present came from Aunt Kaleena and Uncle Matt. It was a box of three Squishmallows. She had received one from her Great Grandmother a few days before. Kirby was thrilled. I was amused at how she used books and boxes and cloth napkins and towels to set up a dining table for the Squishmallows. She found small dishes in the kitchen and fed them all lettuce with ranch dressing. She spent quite a bit of time feeding them and the next couple of nights brought them to the dinner table to share her dinner.

It’s a good thing there is a queen size bed so they all could fit.

Matt told Kirby that if she left one here when she went back home he would take it on adventures for the rest of the summer and send her pictures. Matt supervises air attack watches over wildfires from the air so we will all look forward to hearing about these adventures.

The time came for Kirby to return home. It was a long wait while her dad was on the road.

We got in a couple more walks across the road.

She spent time with her favorite sheep. They are everyone’s favorites because they are so tame. That’s Jade in the middle. Her daughter, Hazel is near the gate and Hazel’s 2023 lamb, Harry, is in front. Harry was turned into such a pet by Farm Club members that I made him a wether. Kirby picked all the leaves she could reach to give them treats.

Even the goat, who can be somewhat intimidating, got goodbye scratches.

Hazel and Jade were joined by Lavender.

Now Harry is back in the mix.

A last hug for Jade.

Alice, one of the family dogs, made the trip from Texas.

Visiting the Marine Mammal Center

I don’t like that my blog posts are all out of order now, but that’s my life…out of order. Before the fair (the last three blog posts) I took Kirby to the Marine Mammal Center on the Marin Headlands.

Girl digging channels in the sand at the beach with surfers in the waves in the background.

I had signed up for a tour at 11:00. We got there early enough to spend about an hour at Rodeo Beach before the tour. Notice all the surfers spending their Sunday morning in the water.

Model sea lion on the wall that says Marine Mammal Center.

I have been to the Marine Mammal Center only once before. I found my blog post from 2011 when a few Farm Club members visited.

Girl hugging life-size sea lion model.

This same sea lion is in that first blog post. This time I learned that sea lions have longer flippers than seals and that is how they are more mobile on land.

Girl in front of life size model of elephant seal.

The elephant seal was also there earlier.

On this visit I had signed up for a tour. It was well worth the modest amount that cost. We had a good tour guide who has been volunteering at the center for years. She described how the Center began–three friends wanted to help the mammals they found (sea lions?) and started the effort in 1975 with bathtubs enclosed by a fence.The Center is entirely privately funded and has rescued over 24,000 marine mammals. The Center’s goal is not to keep animals but to rescue and release them back to the wild.

Fenced pens with sea lions in the back of the Marine Mammal Center

We had a look behind the scenes at the enclosures where animals are monitored and rehabilitated. The people in the pen are using a PVC and net contraption to move a sea lion out of the water.

Fenced pens for sea lions and a handler moving a sea lion in a wheel barrow labeled seal barrow.

They are moving the sea lion to a scale at the end of the pens and using a SealBarrow for transport.

Girl in front of background of an ocean scene with sea lion and otter cut outs.

Kirby wrote her name on a sea otter cut out and put it up on this wall.

Remains of whale skeleton in an outline of the whole whale.

After our tour we sought out a whale skeleton I’d read about. A blue whale washed up on Ocean Beach in 1988. It was buried and after five years arranged in this outline of a whale. This has not been maintained and there is no sign although I saw one at this link for the Park Service. The part at the front that looks like wood is baleen–the filter-feeding system of this whale.

The Golden Gate bridge shrouded in fog.

On the way back I took the one way loop road that provides views of San Francisco and the Golden Gate when its not foggy. The dirt road in this photo was below the paved road and was closed to traffic. If we’d had more time and energy we could have walked a couple of miles to Kirby Cove at the water’s edge. I told Kirby that she’d have to plan for that on another visit.

It was just a few days before that we had been to Fort Point which you can barely see at the south end of the bridge.

We were able to park on the edge of the road to walk out the path to the overlook. It was extremely windy and cold. On the path I was surprised to see two vendors selling some kind of hot sandwich or wrap. We passed them, to Kirby’s annoyance.

From a Google Search: Fort Baker, the final “Post-to-Park” conversion in the Golden Gate National Parks, is a 335 acre former 1905 US Army post located immediately north of the Golden Gate Bridge. There are more than 30 historic army buildings, many clustered around a main parade ground.” I was surprised that there were so many buildings and remnants of buildings throughout this area and they are left wide open. There is a lot to explore in the Marin Headlands and I hope that Dan and I will make it back for more exploration.

Golden Gate Bridge in fog viewed from the north end.

A final view of the bridge. This is as clear as it got while we were there.

Kirby walking through barn with sheep following.

Back home. Kirby is always followed by Jade and Hazel and a couple of others.

State Fair – One More Post

The story of the last day of the California State Fair, which was show day for us, is here. The other days are in this post. Now I’ll go back to the last day because one of my friends sent me photos of the last show and there are some others to share.

The Supreme Champion show was scheduled at 4:00. This is where the champion animals of each division compete together. The ram class is first followed by the ewe class. They enter the ring in order of the shows over the two days of showing. Kirby’s yearlings were given Champion ram and ewe earlier in the day, the second to last division in the sheep show. This photo shows the ilne-up of all the rams. From right to left Southdown, Dorper, White Dorper, Wether Sire/Wether Dam, Dorset, Hampshire, Suffolk, Montedale, AOB (All Other Breeds) Meat, Columbia, Natural Colored Wool, Primitive, AOB Wool.

Here is a closer view of our end of the line-up.

Two people wearing Meridian Jacobs shirts viewed from the back in the sheep show ring.

I like this photo (if I ignore my hair) from Beth.

I handled the yearling ram, Thorn, but Kirby led Rose into the ewe class. I was just back-up. It is rare that a breed like Jacob would win Supreme Champion. It did happen once! Here is a post from 2016 when Meridian Rotor won Supreme Champion Ram. I have the belt buckle and banner to prove it! The judge had spent so much time talking with Kirby in the show ring and praising her sheep that she thought she might win. She was somewhat disappointed when she didn’t.

Between the primitive breed show and supreme show Dan and I took the opportunity to walk up to the Expo buildings at the front of the fairgrounds.

One of the buildings was devoted to dragons.

Another was all about gaming…maybe. I don’t really know what it was about. We breezed through.

The one that I wanted to see was about Cannabis. I was amused when I first heard that the California State Fair would have a cannabis competition. You can enter a sheep, a woven blanket, a jar of jam, and your cannabis. Can’t you picture the judges sitting around a table sampling the entries? Not like that–this was all lab test results. This was a well done display, with lots of reading about the history, the time-line of cannabis culture in California, and the differences in all the varieties. Who knew? Back in the high school years it was just a baggie of leaves. I’ve been very far removed from this world for a long time. We didn’t have enough time to thoroughly read all the information there because we had to get back to the barn for the Supreme Show.

I have never been part of the gaming or dragon worlds and barely a participant in the early cannabis years so these exhibits made me feel old again.

Back to the barn. Farm Club members were holding down the fort. Yay for Farm Club!

After the Supreme Show they gave out the awards for Marketing and Herdsman. Usually those awards are presented between the Supreme Ram and Ewe shows, but they weren’t announced until after the ewe show and after the photos were taken. It was rather anticlimactic since all the spectators had left and I was the only exhibitor there to pick up the award. See the first State Fair post linked above for photos.

When it was time to take down the display and load sheep I let Kirby watch the last horse event of the fair. When we were finished I joined her. When this show finished we left for home.

State Fair – the other days

In the last post I wrote about Day 4, but now I’ll back up and share photos of some of the other days at the fair.

Farm Club member, Siobhan, is one of Kirby’s favorite people. They wandered around the fair for awhile and came back with snacks. Siobhan’s hands aren’t always blue but she has been dyeing with indigo lately!

Naturally dyed yarns labeled and hanging in display at the fair.

My dye garden was the focus of the display this year. Each of the 4-skein groups of yarn (except for the hollyhock-dyed yarn) used the same white and gray yarns as on the left. It is fun to get so many different colors from the same dye pot.

The Touching Table is always popular with visitors.

Outline of sheep with spots and horns drawn in using a pencil.

Many people don’t take this home, and we get some interesting sheep patterns.

Girl blowing out birthday candles on muffins.

Saturday was Kirby’s ninth birthday. We had zucchini muffins for breakfast before going to the fair.

Girl washing horned ram that is tied in the wash stall at the fair.

Kirby helped wash sheep. We don’t wash the whole sheep but like to clean up the legs and scrub the horns to get the year’s accumulated dirt off them. We didn’t finish with the sheep…

Young children in a stroller being pushed by a girl with two women.

…because we were distracted by my sister-in-law and niece and her kids. They took all the kids on the rides in the little kid side of the fair.

Kirby was thrilled. I had told her I’d let her do this ride, but I changed my mind when I found that you had to buy at least $20 worth of tickets. This elephant ride was the one that she’d been watching from the barn since Thursday.

They all went on the carousel.

Back at the barn Lisa gave Kirby the long-necked bottle that she’d bought the day before. Kirby got a ride back to Dixon about 1 p.m. for a birthday party with cousins arranged by her other grandmother.

The Farm Club crew continued to entertain / educate fairgoers.

That night, Aunt Meryl, visiting for a few days from Boise, picked Kirby up from town and brought her to our place just after I got home. She brought her a Taylor Swift shirt, bracelets, and tattoos. This was a very busy day for this nine-year-old.

State Fair – The 4th Day

No, you didn’t miss the first, second, and third days. I haven’t had time to sort photos or write anything. So I’ll start with the last day which was our show day.

Row of Jacob sheep tied to blue fence panels at fair.

We tied our sheep to the outside of the pens while waiting our turn so we could get the straw off the bellies. We had 11 sheep at the fair this year. I was missing a yearling ram because I sold Turbo at the Estes Park show. My show string consisted of 2 ram lambs, 2 yearling ewes, and 2 ewe lambs. Kirby has sheep that are the descendants of the ewe I gave her in 2019–I don’t give her sheep each year for the show. Kirby had twin yearlings (ram and ewe), and three lambs (two ewes and a ram) to show. I just looked at the blog post I wrote after the 2019 State Fair. There are some of my favorite photos of Kirby there, and you’ll see some of the same other characters in 2019 as in this post.

Two people in green shirts with two horn ram at fence.

Kirby with the yearling ram, KJ Royalty Thorn, twin to KJ Royalty Rose. It’s the breeder’s prefix that is part of a registered sheep’s name, and Kirby’s prefix is KJ Royalty. She was the owner of Meridian Belle when she was bred. Now all the offspring of Belle and Belle’s offspring will have that prefix. There is a theme here for some of the sheep names. You’ll pick up on that if you’re a Disney fan.

Thorn was the only entry in the Yearling Ram class and the judge gave him high praise for conformation and fleece.

It is too bad that there are no other breeders showing up for the Primitive Breeds sheep show now. Pre-pandemic we had some Shetlands, Icelandic, and other breeds so there was competition. Now it’s just Kirby and me as separate breeders. This is the Champion drive for rams. That’s Thorn as the yearling. My ram lamb, Meridian Cyclone (weather theme for 2023 lambs) was first place ram lamb and Kirby’s Gusgus was second. Thorn was given Champion Ram and Cyclone was Reserve.

There were three Farm Club members helping on this day and it took all of us to make sure the sheep were where they were supposed to be and Kirby had an adult helper so we don’t have more photos of the show. But we have photos of After. Thorn’s sister, Rose was awarded Champion Ewe so Kirby made out with the banners.

Fair week is always exhausting and Kirby’s four fair days were at the end of being away from home for six weeks. Her birthday was the previous day, and there was a lot going on then as well.

After the show we were back to educating (entertaining / enlightening?) the public. I am grateful to the Farm Club members who came to help. Siobhan was there Thursday and brought a local friend to help also. Lisa came Friday and Saturday. Marina, Beth, and Doris were there Saturday and Sunday. I couldn’t have done this and stayed sane without them there.

This entertainer showed up in that 2019 post.

He rides all over the fair and makes balloon characters for kids. This is a dinosaur that Kirby plans to take home to her brother. Hopefully it will survive a road trip back to Texas.

The last event of the day was the Supreme Champion show. Both of Kirby’s Champion sheep needed to be in their respective classes. This photo shows Rose and Thorn together. I don’t have photos of the Supreme show because I was in the show ring with Kirby. Afterwards they announced the Herdsman and Marketing awards.

We did it! First in Herdsman and first in Marketing. These awards have more meaning for me than the sheep show awards because there wasn’t competition in the sheep show ring. Actually there wasn’t that much competition this year for these, but there was some and we really worked for it.

If you look at that 2019 post you’ll see that this is the same crew as then, with the addition of Kirby.

While we were loading the trailer and my car I let Kirby watch one last horse performance if she stood at the corner where I could see her (easy in the bright green shirt). When we finished loading I joined her.

Under the Golden Gate Bridge

We decided to take Kirby to the beach and check out some of the Golden Gate National Recreation Area. There is so much to see and it is so close to home, but I have never taken time to explore it.

We had some good advice from a friend who works in San Francisco and started at Ocean Beach.

After the 105+ days we’ve had at home, the overcast windy beach was a welcome change.

We chose the beach at Fort Funston for our second stopping point. Dan and Kirby are sitting on an old gun mount.

I was surprised at the old military structures that have fallen from eroded cliffs and are left in place. Usually I expect to see signs–either informational and educational signs (because this is part of the National Recreation Area) or warnings. But there is none of that–just remnants of what used to be there.

The hike up from the beach.

After a couple of hours at the beaches we drove to a parking lot between the Golden Gate entrance and Fort Point. We followed the trail that took us down to the Bay and to Fort Point.

The Fort itself is just under the bridge, but of course there was no bridge there when it was built in the 1850s.

That’s a huge cargo ship sailing to the Pacific.

I am fascinated by the history here and amazed that I’ve lived most of my life nearby (and was born in SF) and knew nothing about any of this.

According to the info on the NPS site a special arch was designed so that the bridge could be built without destroying Fort Point.

We climbed the spiral staircase to access the second and third floors.

Some of the rooms are open with historical displays.

The spiral staircase goes all the way to the top of the fort. It interesting to be right under the Golden Gate Bridge. It was also extremely windy and cold. (I thought about how we looked as grandparents supervising a child wearing shorts and flipflops.)

There was originally a lighthouse in use, but after the bridge was built it was no longer necessary.

View of the bridge on the way home. This was the first time since we’d been in San Francisco that the towers weren’t shrouded in fog.

Hollyhock Dyes

A few years ago I planted the very dark purple, almost black, Hollyhock, Alcea rosea ‘nigra’. By now I’ve lost track of which were the original plants. I don’t know if some flower stalks are from the same plant as previous years or if they are entirely new plants grown from the dropped seeds. I also don’t know if they hybridize. I decided to keep the flowers separate and see how they dyed my yarn.

I have plants with very dark flowers.

One is a bright pink.

Another is a red purple.

Here is the white one.

This is a comparison of them all side-by-side.

When dyeing I followed the instructions in Harvesting Color by Rebecca Burgess, using the proportion of 20 dried flowers to dye 2-1/2 ounces of yarn. I soaked the flowers overnight and then kept at the dye bath at 160-180 degrees for an hour before adding yarn.

I think I kept the second and third in order here. The very dark flower yields green. I was surprised to see the lemon yellow color from the white flowers. These are one-ounce skeins of Timm Ranch yarn.

These are two-ounce skeins in new dye baths. Look at the photo below to see the slightly different shades resulting form the different batches of dye.

This photo has the two different batches side-by-side and you can see some subtle differences. I will have some of these yarns for sale on Saturday at the Fibershed Market at Fibershed’s Pt. Reyes Station Learning Center.