Using the Whole Sheep – Sheepskins

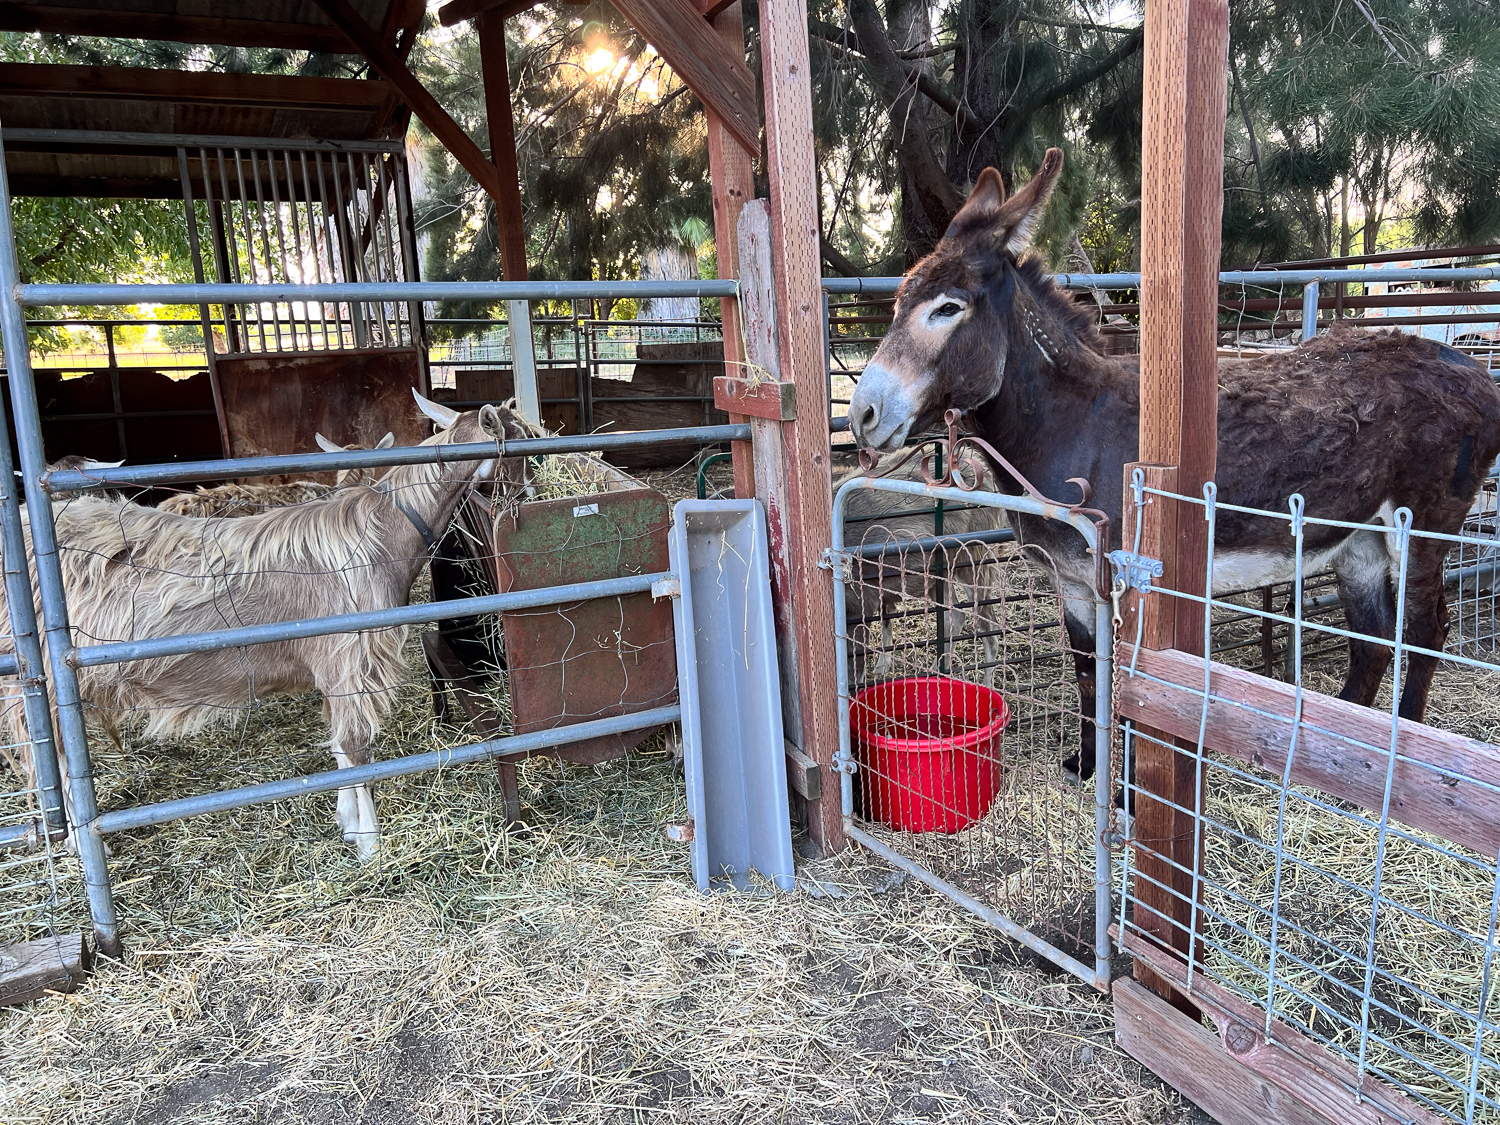
I started raising sheep because I wanted to produce wool. For me lamb meat (Gourmet Lamb on my website) is a by-product of my wool and fiber business, although for most sheep raisers wool may be the by-product. I make a point to use as much of the sheep as possible. Sheepskins are a major by-product of the lamb business. I thought I’d show what goes into producing a beautiful sheepskin.

I don’t have photos of the process of getting the sheepskin from the sheep. That is not something I should put here, but I will say that the person who harvests the sheep is very fast and does an excellent job of getting the skin off the carcass in good shape. My job is to cut off extra skin that came from the legs and salt the pelts as soon as possible to prevent them from decaying.

I ran into trouble this year getting the right salt. You need to use fine salt to cover the most surface area. The one on the left is what I usually use, but it was out of stock for part of the summer. You’d think that the one on the right would be OK since it’s labeled “fine”, however it is not nearly as fine as the “solar mixing salt”.

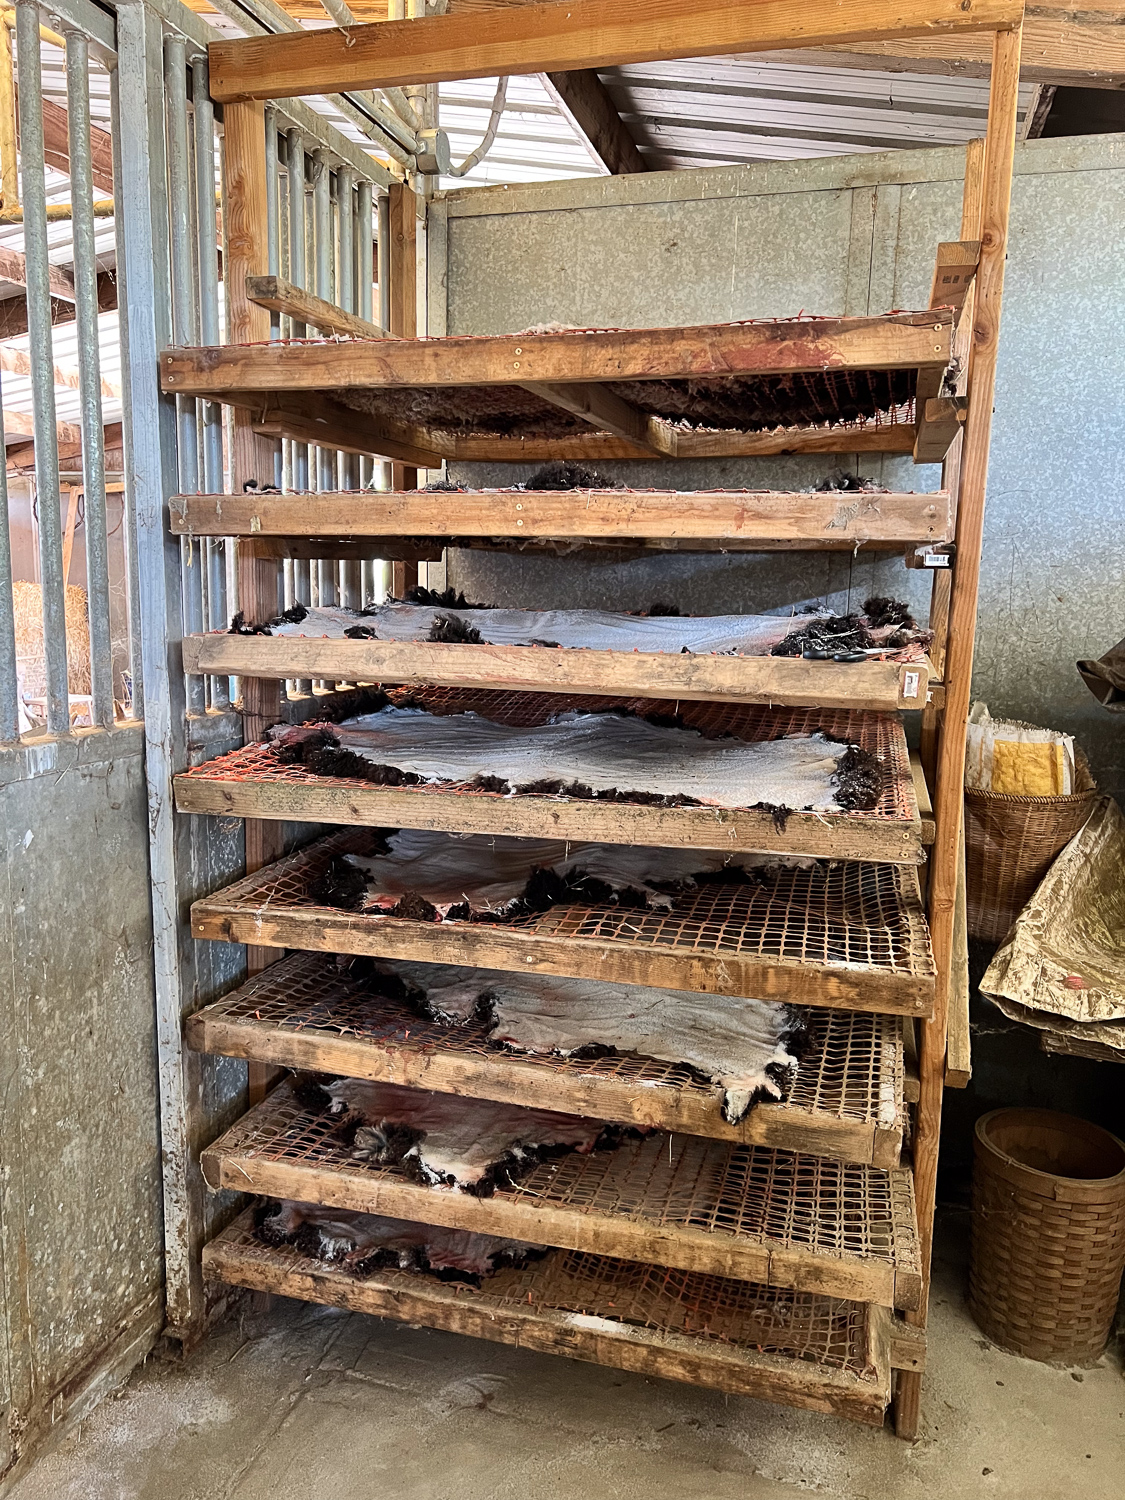
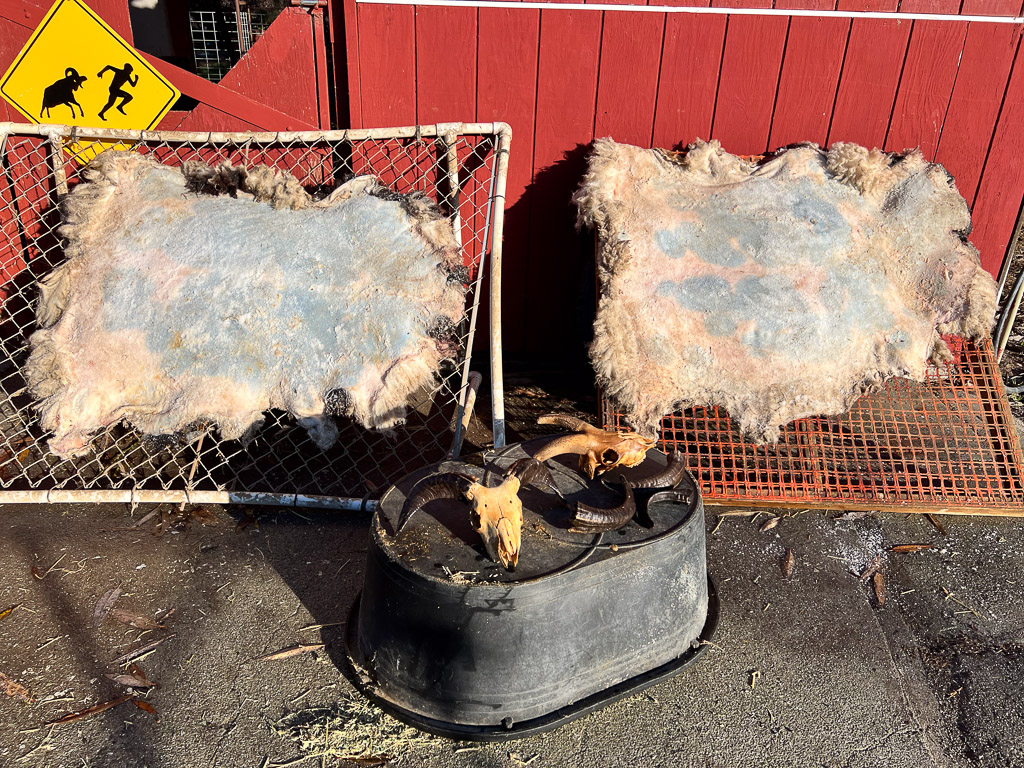
Dan built this rack a couple of years ago so the hides won’t take up as much room as if they were spread out. I have covered hide with a layer of salt, making sure that all parts of the hide are covered.

Even though I had the rack I had to spread some hides on pallets when there were too many to fit. It the middle of the summer they dry enough within a week to move to a stack. If the weather changes and there is moisture in the air sometimes the pelts still feel damp.

You’re not supposed to dry the pelts in the sun, but I after the initial drying and before shipping I may spread them out for a few hours. After the salt has done its job of drawing the moisture out of the skin it sometimes draws moisture from the air and I don’t want there to be extra moisture when I ship them to the tannery.

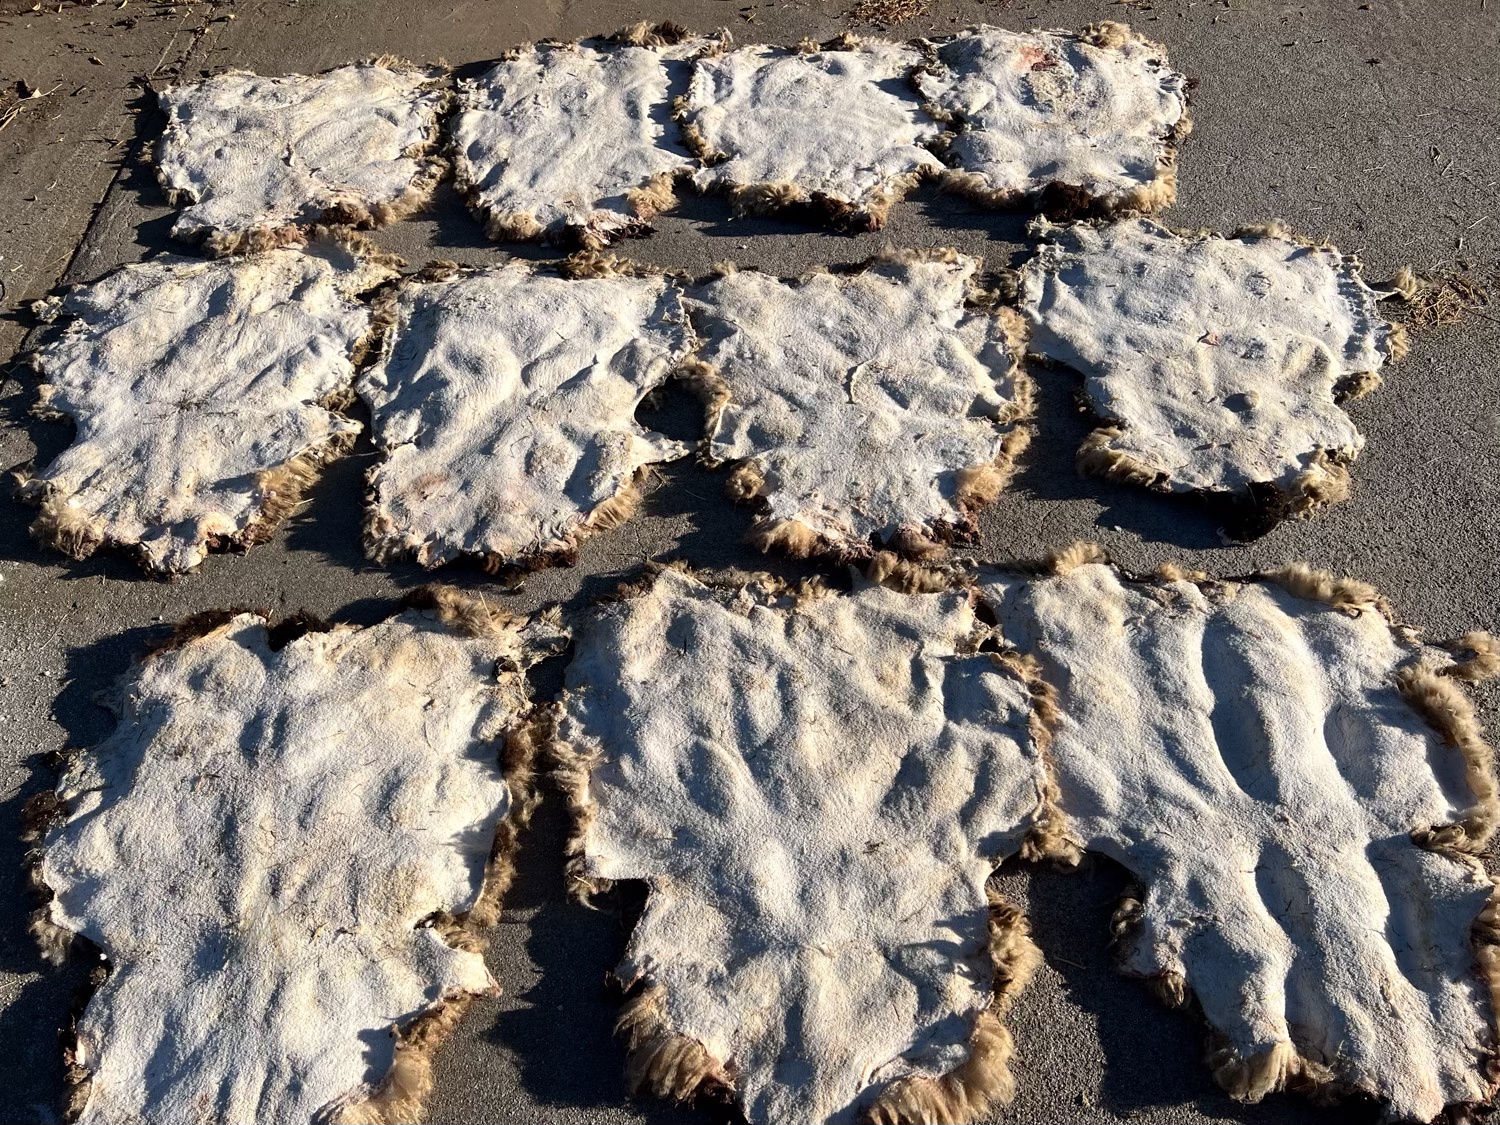
I flipped them over and dried both sides.

A stack of pelts. The next job is to find an adequate box. I sold a couple of looms this year and still had the boxes. I’m trying to remember now if I was able to fit ten pelts in a loom box.

I take photos of the hides before boxing them. With the two tanneries I am using now I don’t think I have to worry about this step. Over the last few years I have tried three other tanneries. One is now out of business. One is all the way across the country and takes a longer time. The other (in California) sent hides back that were definitely not mine. That’s what prompted me to start taking photos before shipping.

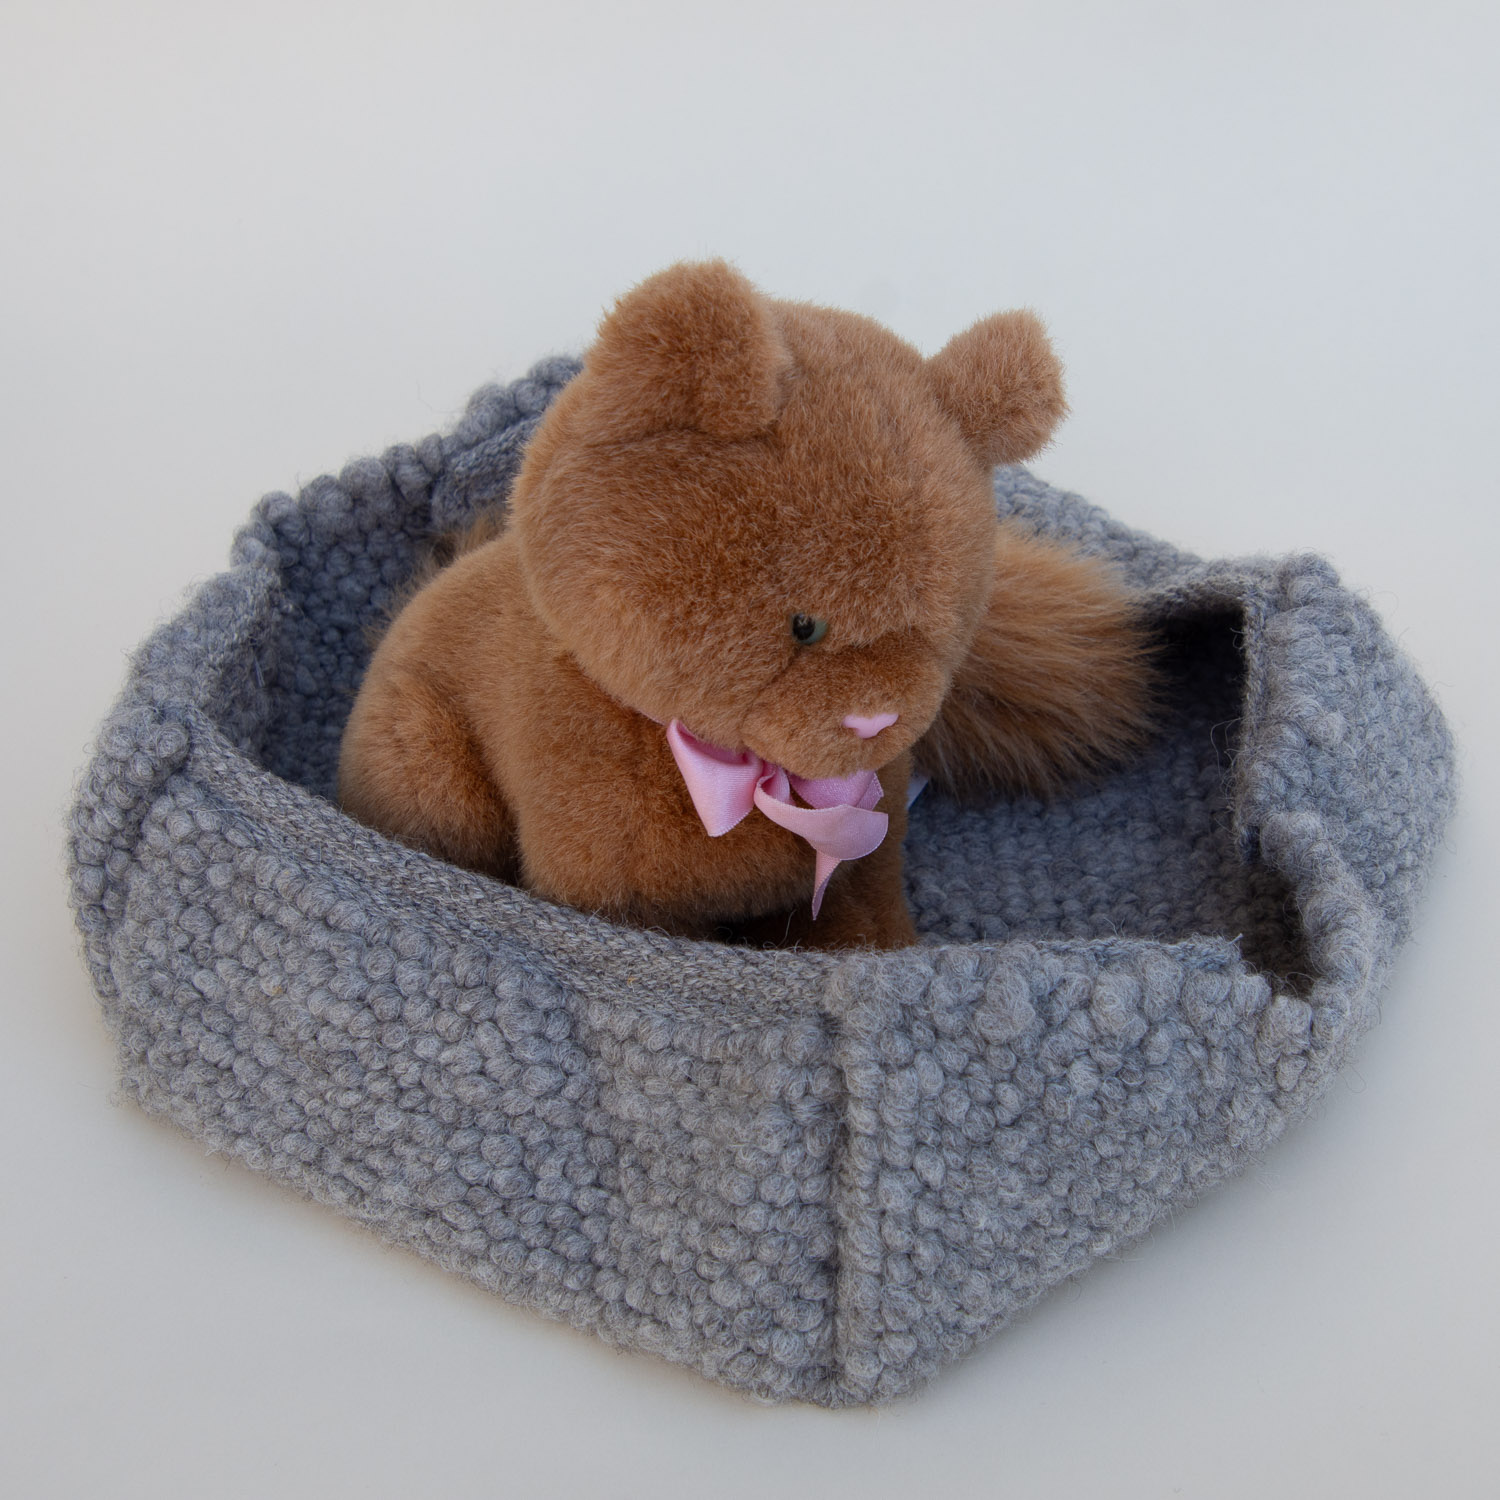
I am satisfied now with the two tanneries I will continue to use. Driftless Tannery is in Wisconsin. Living Sky is in Idaho and last year I was able to deliver hides when I visited my son and DIL in Boise. This year I shipped them all. Both tanneries use mimosa bark for their tanning process. This is a more environmentally friendly alternative than methods that some tanneries use. I also like the resulting leather–it is flexible, yet sturdy.

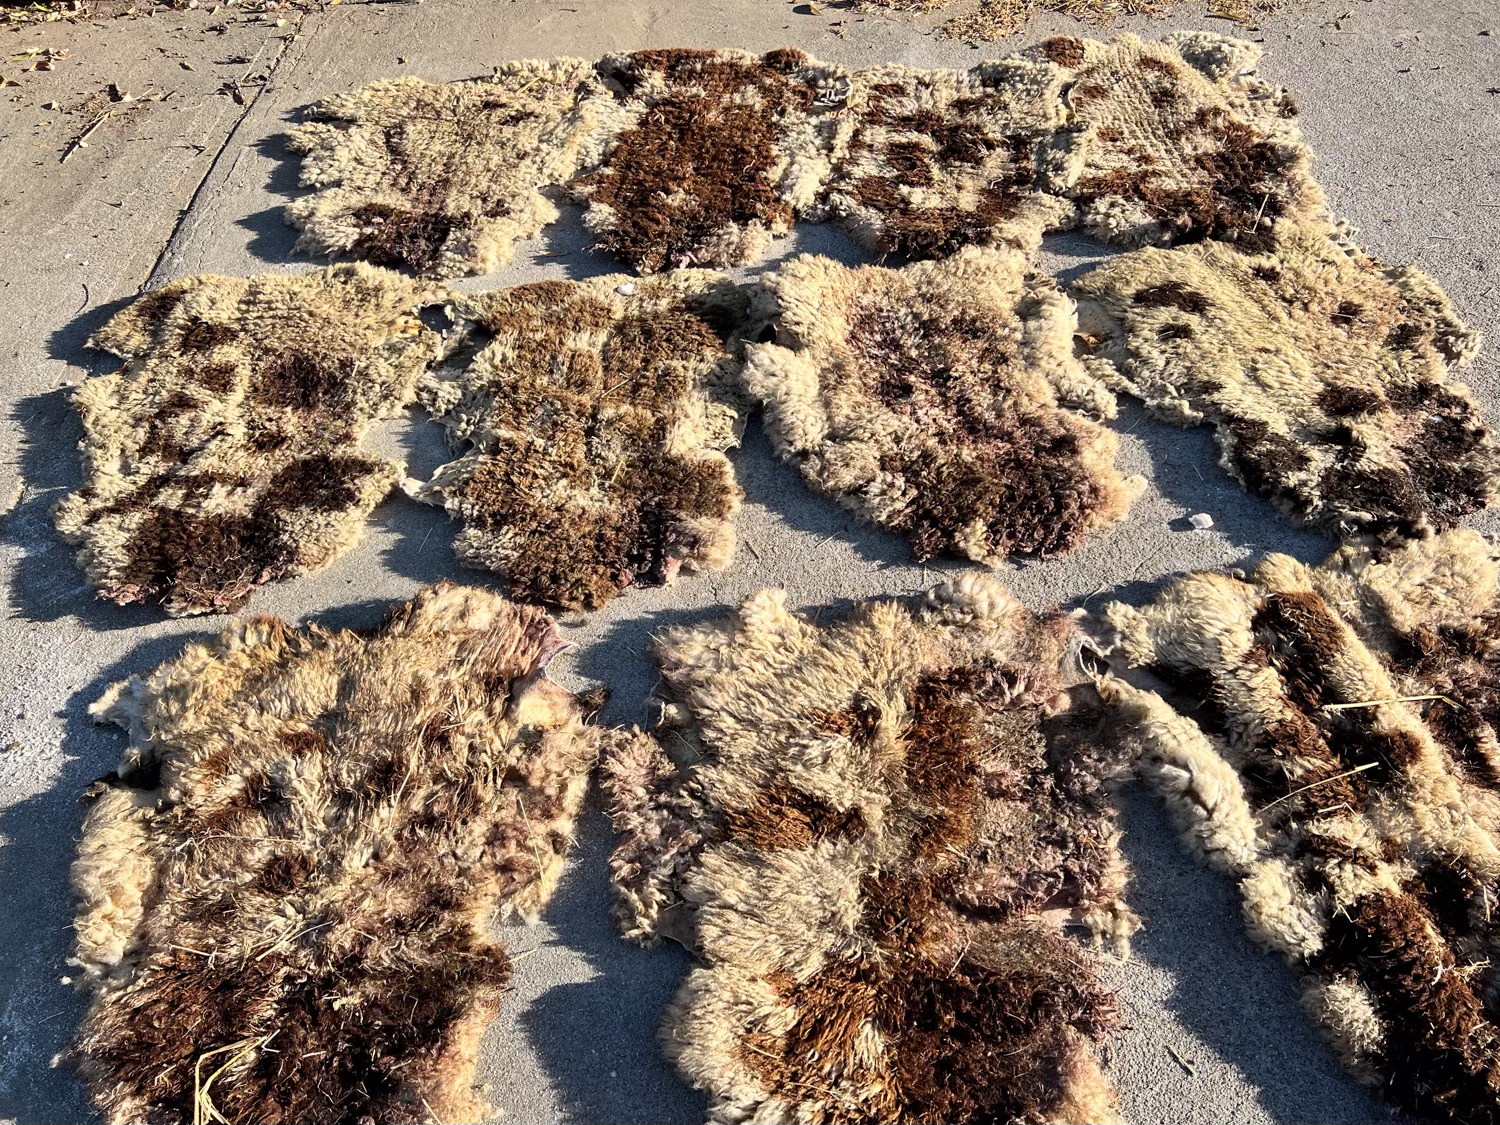
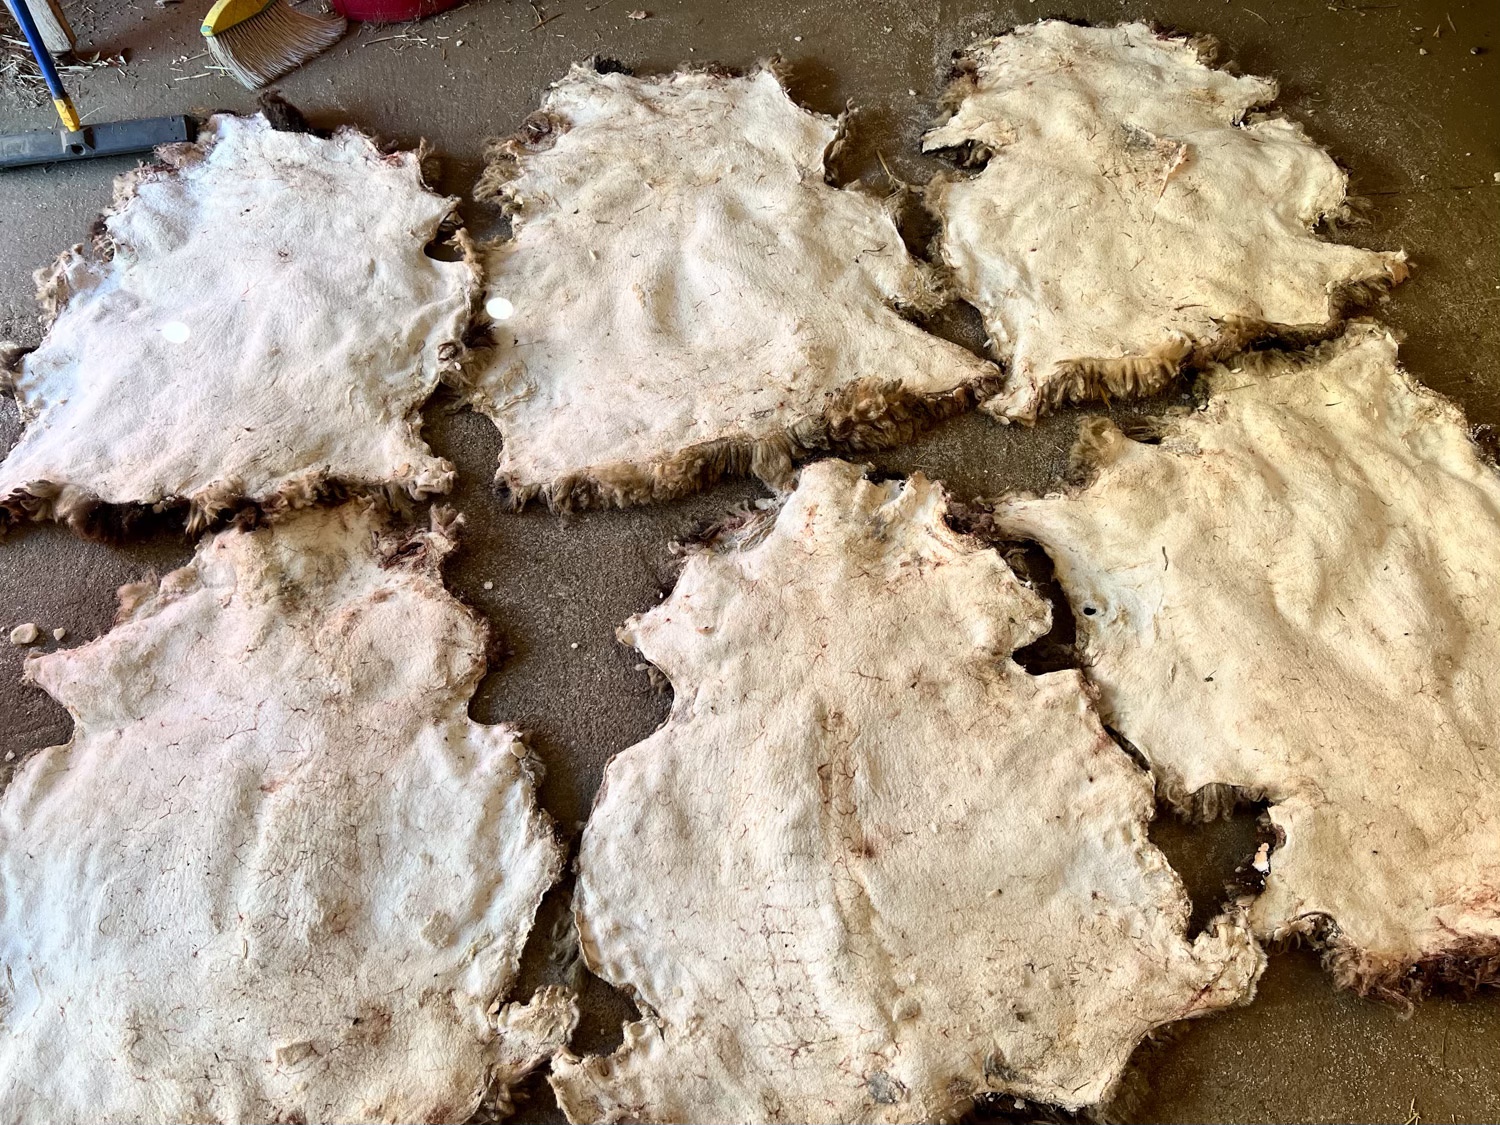
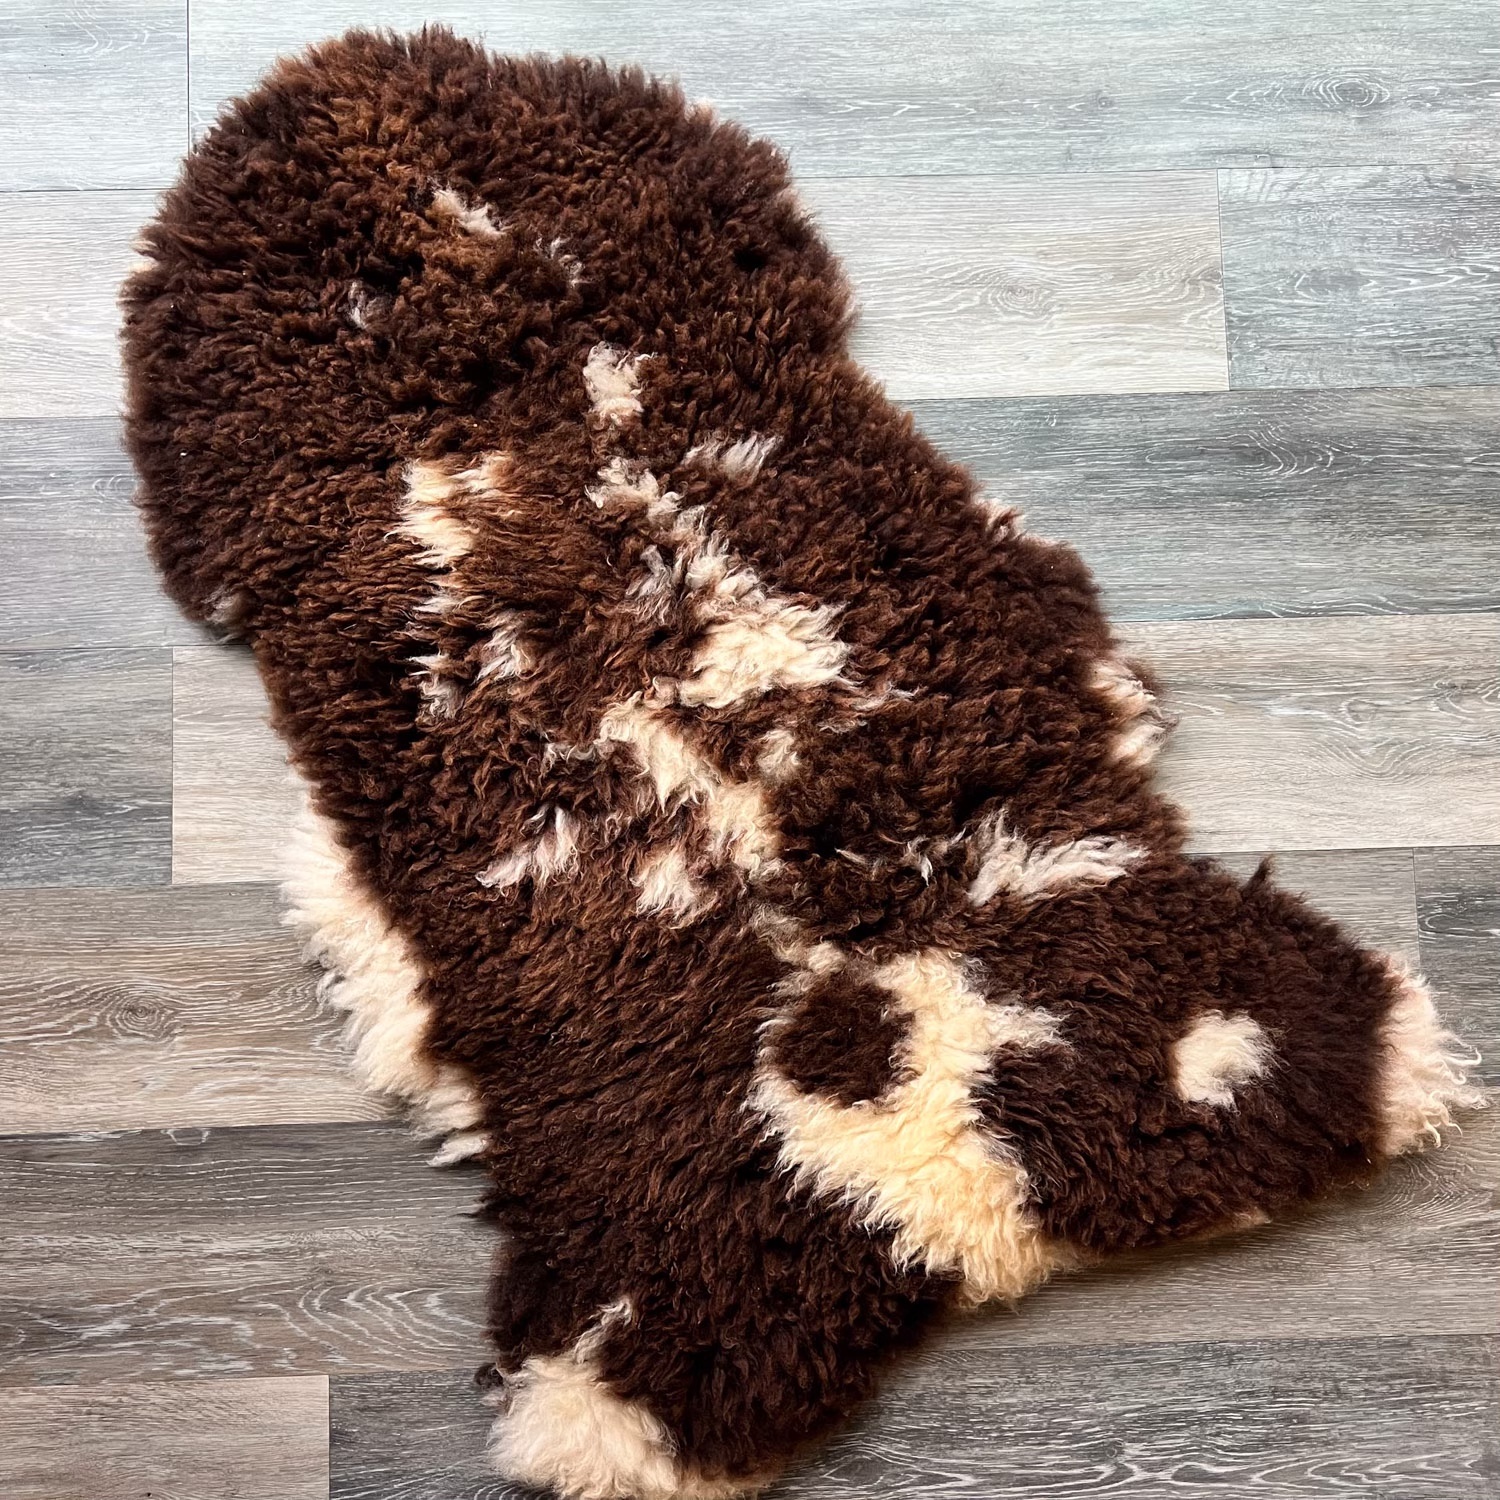
I have photos of the front and back of each hide. People ask me how the hides are tanned. My answer is that it is magic. The photos don’t show how bad these hides look when I ship them. They are stiff and the wool is dirty, including hay, grass, and blood. The tanneries work magic and the hides are returned clean and fluffy.

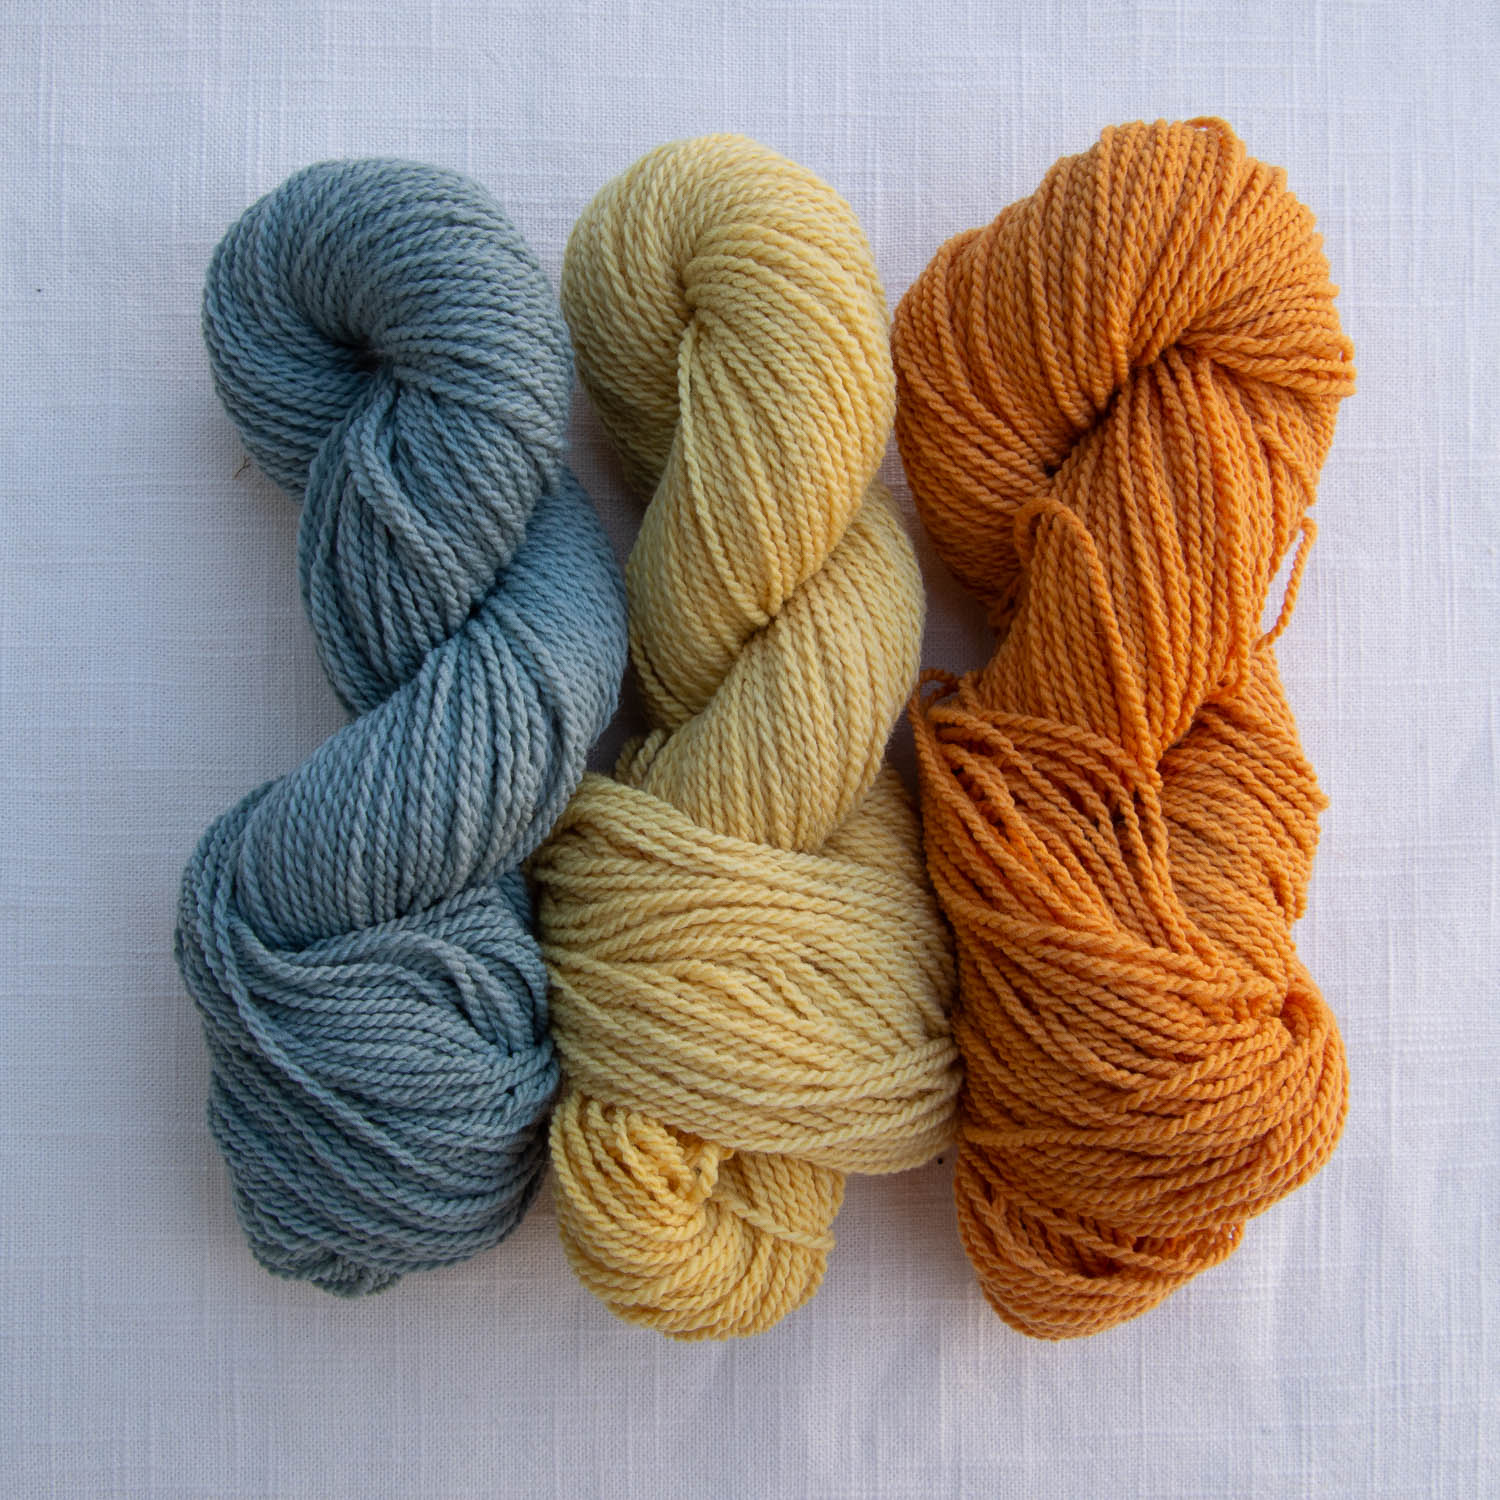
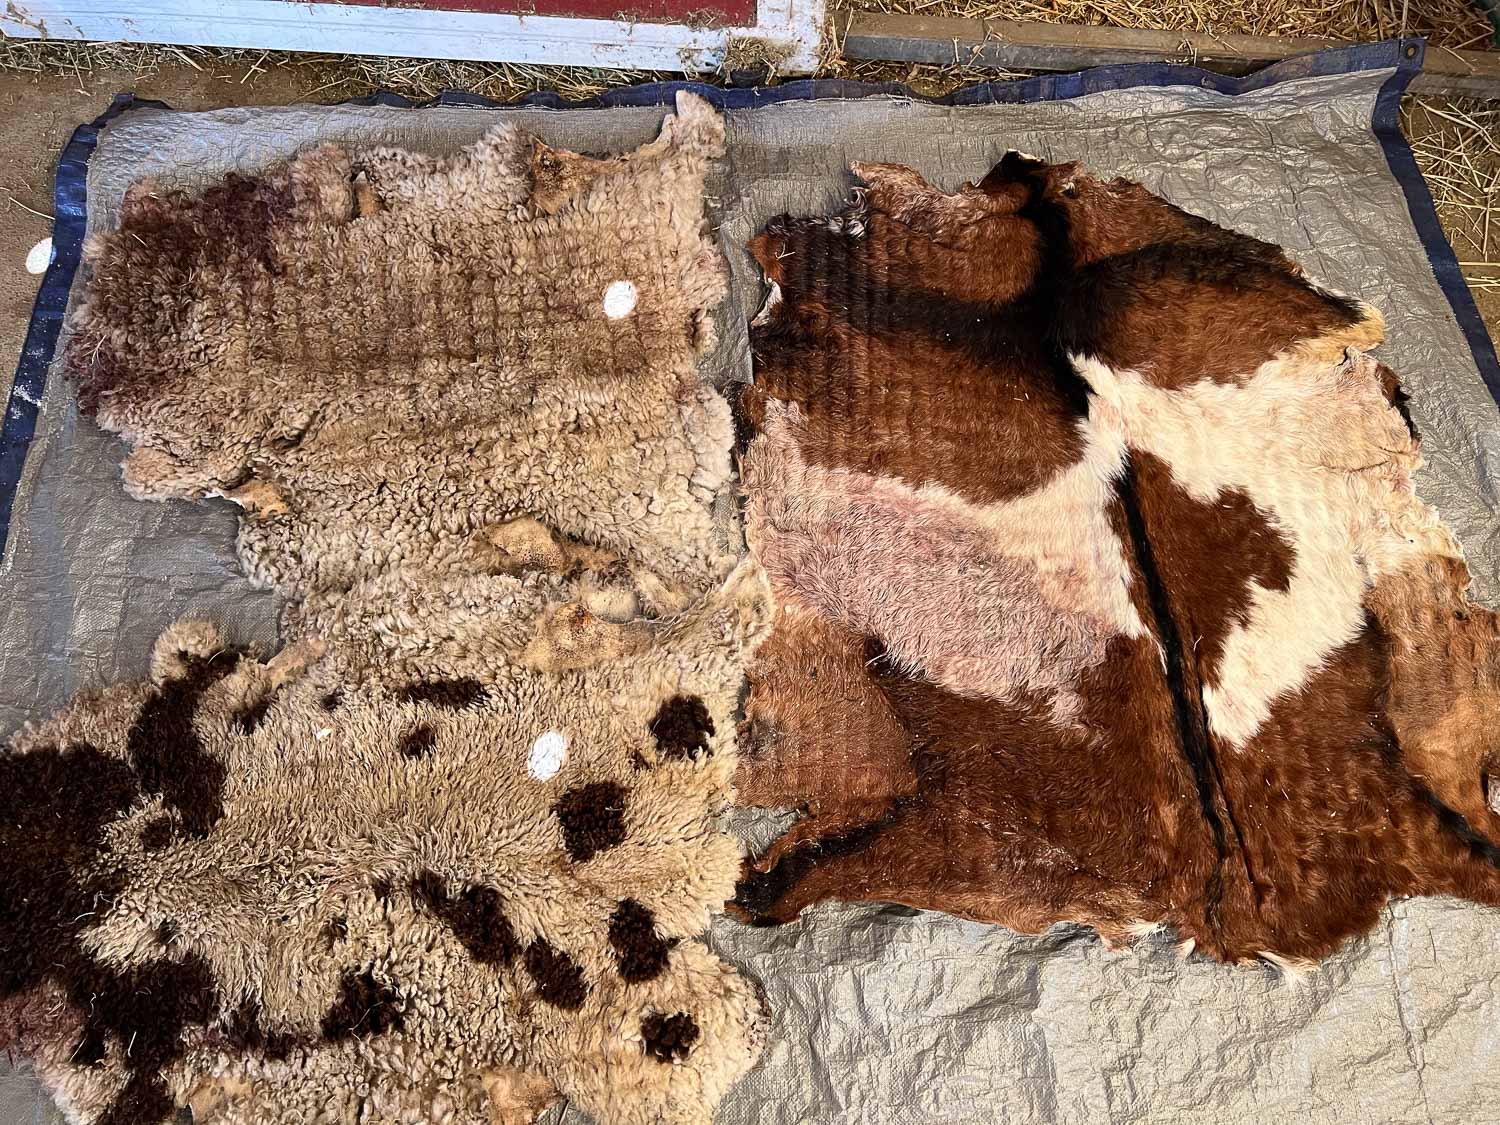
I went through my photos and found some that I could match up with the finished sheepskins.

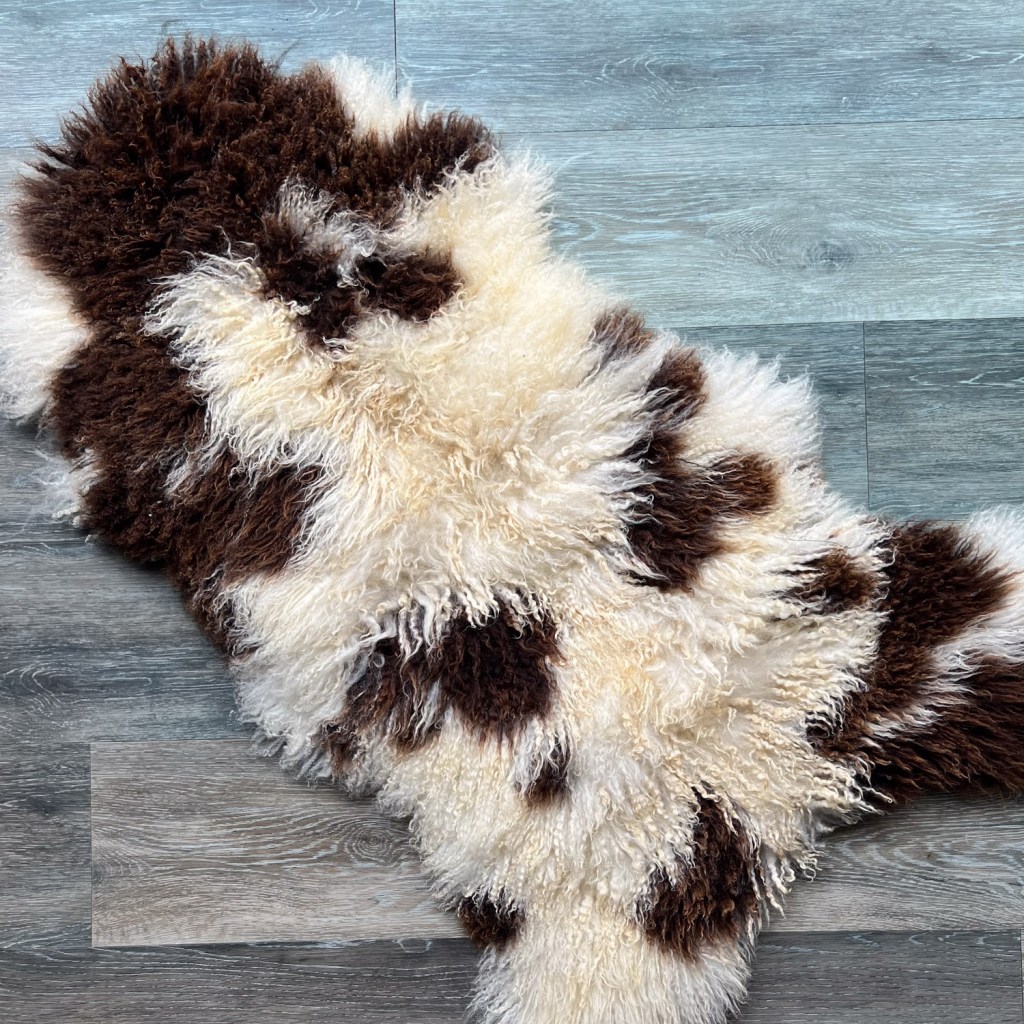
These are three of the hides that came back from Idaho. Can you match the first two up to the photo above? The middle sheepskin is the one on the top right in the photo above. I think the sheepskin on the left is the one in the lower left of the photo with six. Magic!

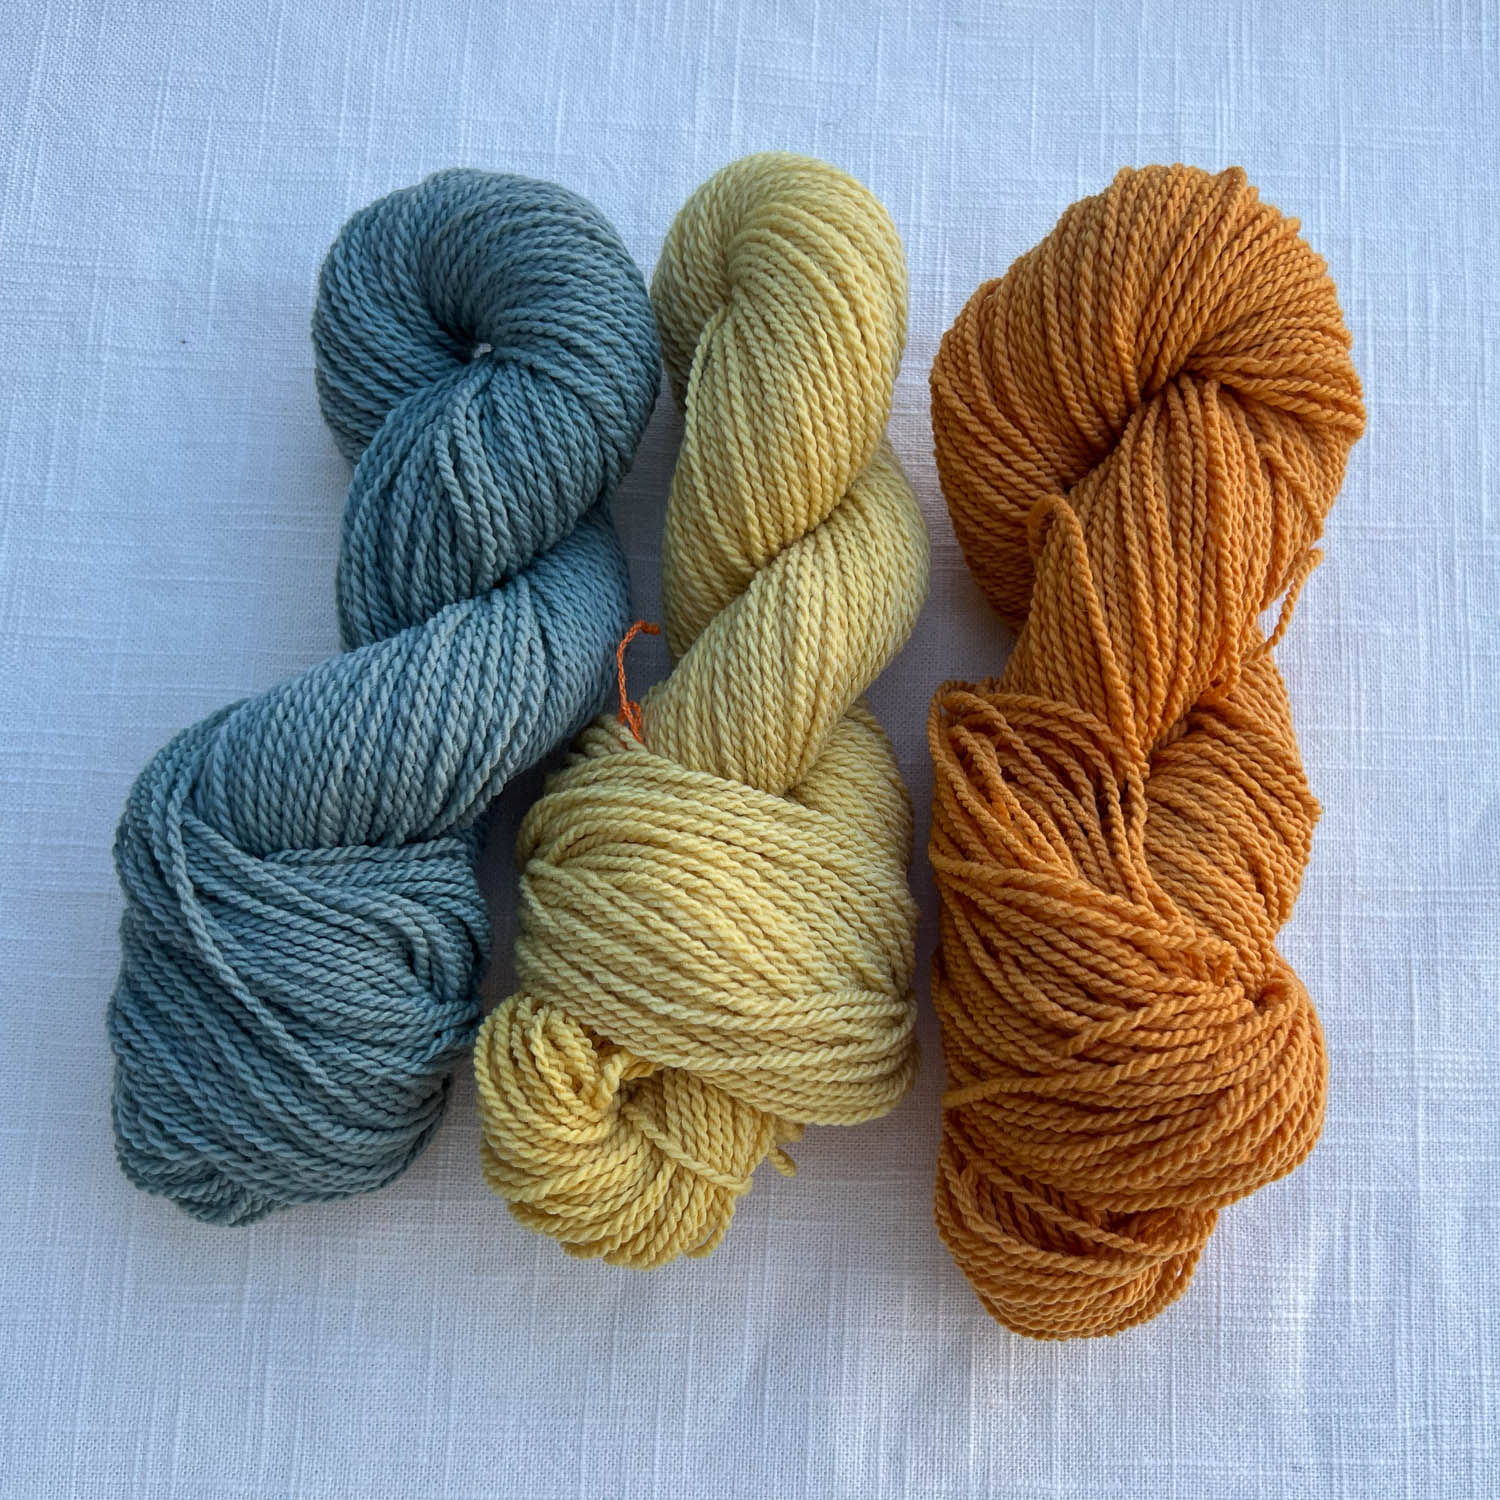
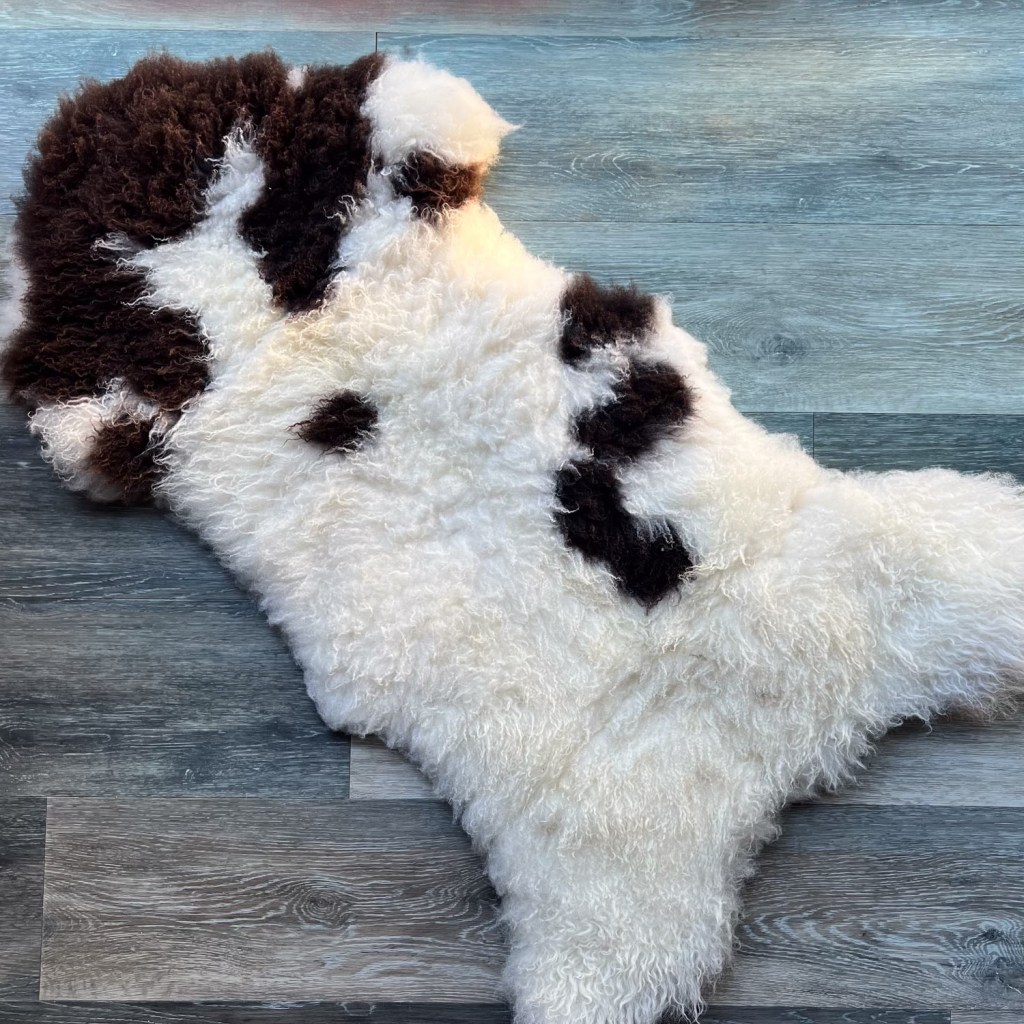
This is from the batch I sent to Wisconsin.

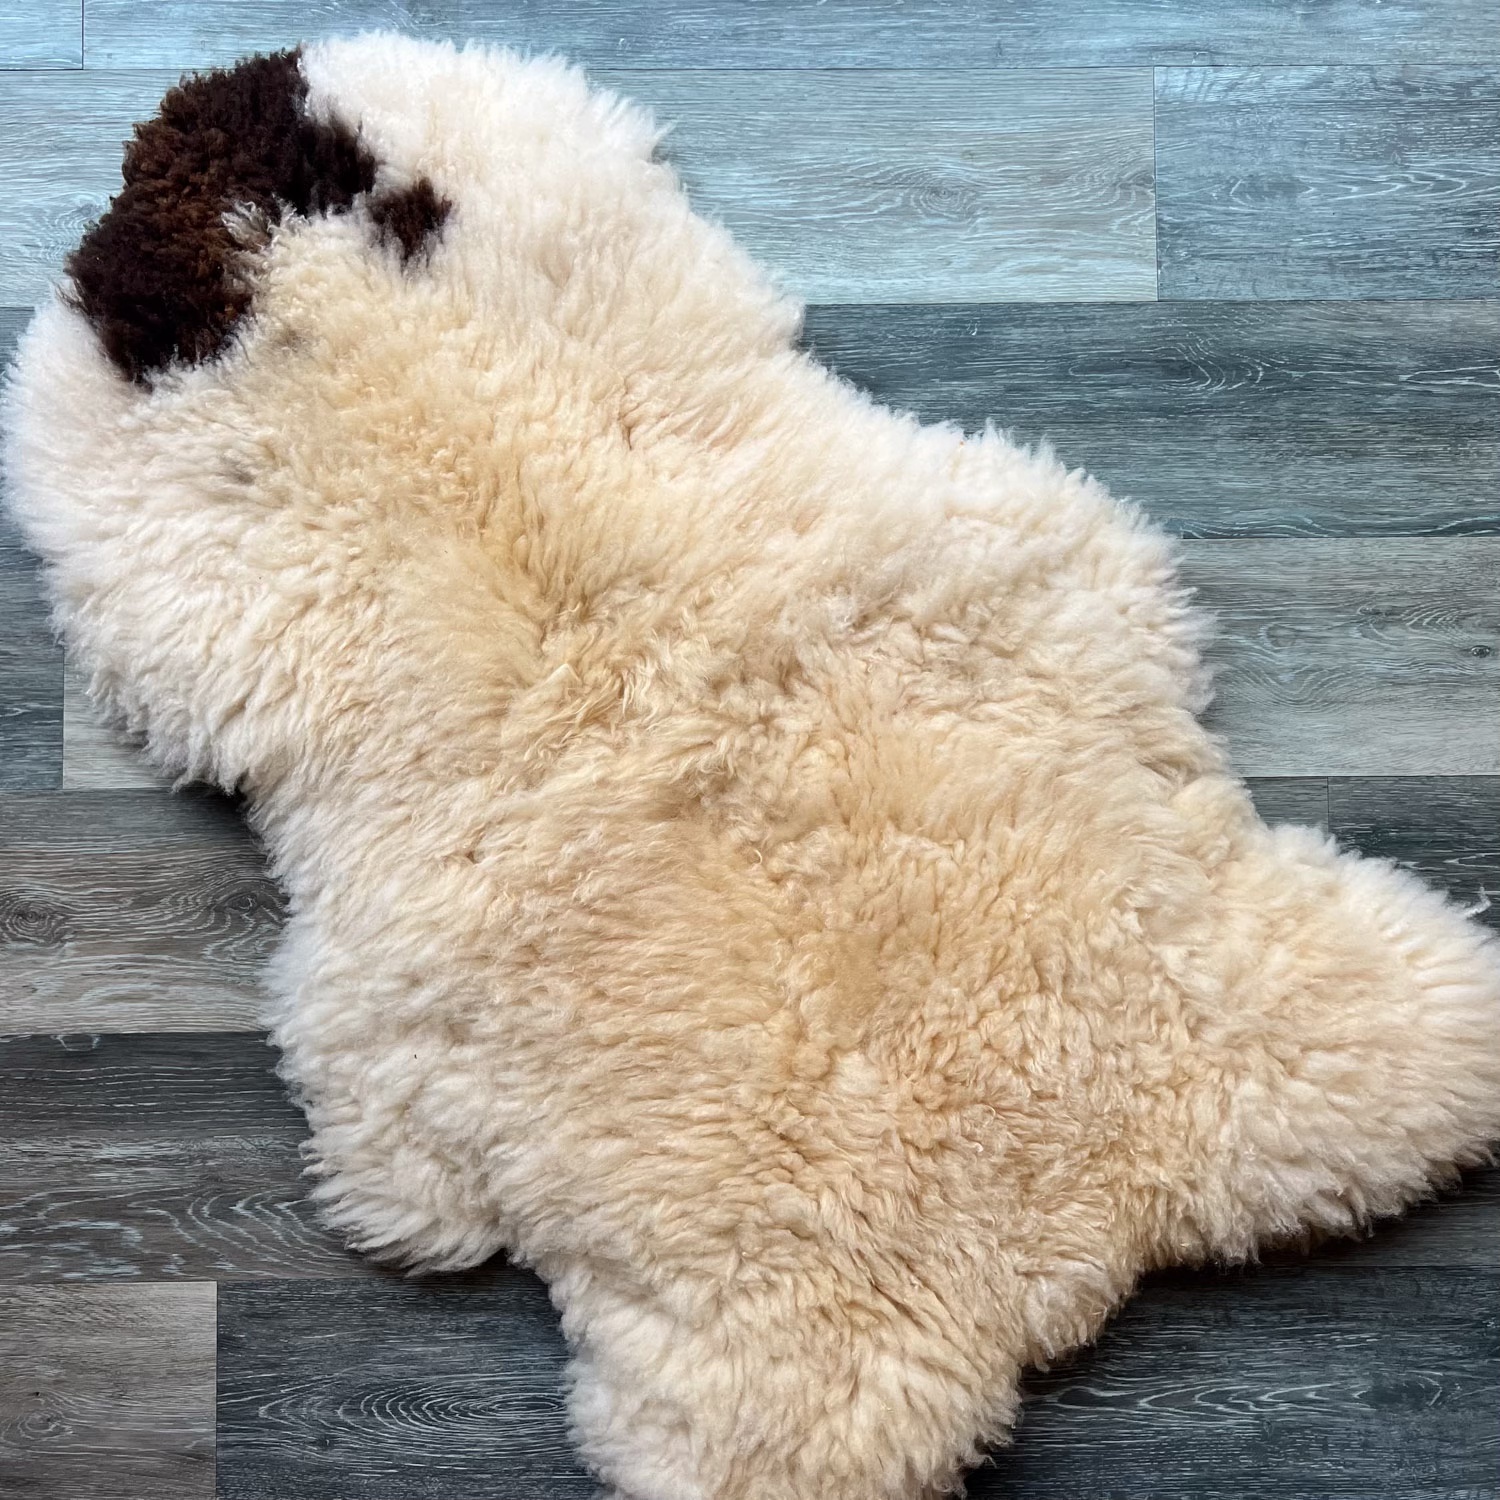
The sheepskin on the left is the middle one on the bottom row in the photo above. The middle sheepskin is middle, top row above. The one on the right is in the lower left corner above. More magic!

When I get the sheepskins back I need to measure and photograph each one so I can put them on the website. See this page for all that I have listed.

Using the Whole Sheep – More Buttons

To read the whole story go to the previous blog post. In that post I showed the whole process of producing buttons from one horn. That day I took photos of two more horns and want to share those too.

This is another horn and the buttons created from it.

With that last horn I put the photos in a “gallery”. With this one I’ll do it my regular way. There is a lot of trial and error in figuring out how best to share photos here. So I’ll check my computer and my phone later and see what seems best. Feedback from anyone reading is appreciated.

All the buttons that don’t sell at Lambtown will be on my website–at least the ones on the cards. If you visit here or at a show you can look through the bo with all those extras and make up your own set.

Using the Whole Sheep – Buttons

Each year many of the lambs produced here end up in someone’s freezer. I wouldn’t be able o breed sheep if there wasn’t a market for these lambs. There were 88 lambs born this year. I selected some to keep, but most are sold to other breeders or for meat. I want to use the WHOLE sheep and buttons are one of the products that I can make.

These are just some of the horns from the latest lambs. I did not photograph the first step because I can’t take a photo while using a Sawzall (just looked that up–a reciprocating saw) and my blog would probably get black-listed if I had a photo of cutting horns off a dead sheep head. The second step is to put the horns in a bucket of water in the sun for a few days. There is a bony core and the living tissue between the bone and the outer horn needs to degrade enough that I can get those horns off.

From Wikipedia: horn is a permanent pointed projection on the head of various animals that consists of a covering of keratin and other proteins surrounding a core of live bone. Horns are distinct from antlers, which are not permanent. 

Look at what you can learn about by reading my blog. I read about horns or horn-like features on a variety of animals from giraffes to triceratops.

I took photos of the button making stages with three horns, but I think that’s too many photos to put in one post. I’ll start with this one which is unusual because it is mostly white.

The first step (beyond what I described above) is to cut the horn into button shapes. I use a band saw.

The solid core makes buttons of interesting shapes. most people think of horns as round but you can see that the shape of these horns are anything but round.

Here are all the pieces I cut from that horn. The squarish shapes come from the hollow part of the horn that surrounded the core. I often try to make a few pieces that can be used with a shawl pin. I was told that I could call it an annular although that usually refers to a medieval brooch with a pin attached.

The next step is drilling holes, another step that is difficult to photograph while in progress.

All pieces after drilling the holes.

Then I move on to sanding using a belt sander. This is the step that takes me the longest. It’s difficult to get to all the edges.

I can’t use the pliers for all of it and I have been known to come away with nicely (completely) sanded fingernails.

Here are all the buttons from that one horn after sanding.

I have figured out the best way for me to apply a lacquer finish. I can put the buttons on wires that I dip in the lacquer and then I put poke the wires into styrofoam packing material saved from purchased items. These are the buttons made from three horns.

Throughout the process II keep track of the buttons that are from the solid part of the horns so I can match the up for sale. If I plan to sell buttons online I need to be able to identify individual buttons and sets. So the last step is to attach them to cards I have printed.

These buttons are not on the website yet because I’m going to wait until after Lambtown and post those that haven’t sold.

Harvest

I thought I wrote about my mulberry harvest but I can’t find that post so I’ll include it here. I was going to tell the story about harvesting mulberries and dropping the bowl after touching the electric fence and then trying again only to have a sheep tip the bowl over. I’m sure I wrote this post–maybe its the one that as I as writing I ran out of room in my 15 year old free WordPress account and had to figure out what to do. Here’s that story.

The mulberry tree.

I have learned that mulberries ripen over time and you can continue to harvest for quite awhile. The berries fall off very easily when ripe, but that also means that a lot fall simply because it’s windy. Also, this tree is very tall. If I wanted to be serious about the harvest I’d need to put down a clean sheet or tarp and then try hitting the branches with a long tool of some kind. This is not in a convenient spot for that since the branches hang over either side of a fence and the irrigation ditch is under part of it. And don’t forget the electric fence.

I did end up with a couple of pies after two different harvest times.

The idea for this post started because of thinking ahead to the blackberry harvest. I know that the blackberries are usually ripe during State Fair. It looks like we’re right on track for that because they aren’t ready yet. State Fair is at the end of the month.

Look at the harvest that we’ll have–although I can’t reach a lot of those. There happens to be an irrigation ditch in front of this too. It’s dry most of the time, but it still makes it more difficult to reach the top half of these. We’ll be gone for up to a week after the fair so my farm sitters may benefit most from this harvest.

Here’s an unusual harvest. I list puncture vine seedpods on the website for use in craft projects.

There was an order today so I had to go find some more outside the pasture fence.

Dye plant harvest is beginning. I don’t have time to do any trying right now so I’m weighing the fresh flowers and drying them. This is Cosmos. Some of this is for sale here on the website. That is from last fall, but the dried flowers dye just as well as the fresh ones.

Dahlia flowers are also ready to harvest. They will continue to bloom if I can keep up with watering during this heat wave.

Another Busy Day at the Farm

Yesterday was the first harvest day of the season. Some lambs are 4 months old now. The BFL cross lambs are bigger than the 100% Jacob lambs and some are ready for customers who like lighter lambs. I have a customer who likes the black lambs. I asked if he wanted both of these because they are twins. If they were 50:50 crosses they would both be black, but these are 3/4 Jacob. There are two 50:50 ewes here and when bred back to a Jacob you never know what you’ll get. One is black with very short horns and one is white with some Jacob markings and large horns.

While I was sorting and weighing sheep I heard Ginny barking at something at the other end of the barn. This is a fancy trap that I bought several years ago and sort of forgot about. It is a live trap where the animal drops in from the top. It was in the back of the barn on a woodpile. We caught a young opossum! The opossums aren’t a problem here. I took this one out to a brush pile and let it go out there.

After sorting all the sheep I let the rest out to the pasture. This is a view of the property from the south.

This yearling is KJ Royalty Cindy. KJ Royalty is the flock name of my granddaughter and her sheep are the progeny of the ewe lamb I gave her in 2019. Kirby will be here next month to work with the new lambs and show at State Fair. I’m glad that Cindy is getting more friendly.

The person who harvests lambs is very fast and does a good job with the skins. I try to use all the parts of the sheep I can. I salted these hides and will ship them to a tannery when they are dry enough. The beautiful lambskins will be for sale when I get them back from the tannery–hopefully by early fall (but no guarantees). This page gives you an idea of what I will have for sale then, but these are all gone. I recently got back a dozen lambskins that were the first I sent off last year–a whole year ago. I haven’t had time to photograph and list them yet. Next week.

Harvest was over within two hours, but the rest of the day was busy with customers and computer stuff. Never ending computer deadlines. Late in the day we had a new kind of visitor.

I am caring for these goats for a couple of weeks until their new property is ready for them. There are seven pet goats here and most of them originated from goats that my son Chris raised in his FFA project.

The goats came with a donkey! This makes me want a donkey again, but my irrigated pasture is not a good fit for a donkey. I can hear her braying right now even from the house!

Today on the Farm – February 16

Sunrise while I was in the pasture.

This is the opposite view. It looks as though there is a lot of grass but we have to be strategic about grazing right now. The ground is wet and I don’t want to cause compaction. And much of the pasture is not fresh grass, but still-dormant dallisgrass with only a little annual grass growing through. The bulk of the green grass right now is annual, not perennial. There are clovers in here too and we want to maximize their vigor by not overgrazing them.

We first set the net fence up along the lane so the sheep could graze that down before it became so tall all they would do is trample it. The grazed part is where I had the sheep yesterday using a short bit of net fence. This morning I switched to a longer section of net fence and gave them a bit more of the grass.

Ginny came to the barn eventually with a ball. Whose ball is this? Chicken or dog?

Trista was in last night because I thought she was next to lamb. I was right, but she sure took her time with it. It was a long time before this labor became anything that was visible.

Back at the Weaving House, one of the things on the list was to photograph the latest v-shawls to promote the class that I will teach at CNCH in April. There is still room!

On my many trips back and forth between the barn and the house I always admire my daffodils.

It was about 1 p.m. that Trista finally lambed. It took another hour before she had the seccond lamb. Look at the horns on this ram!

Back at the Weaving House. Jacob shawls are on the loom now. I hope to finish these tomorrow.

We have seen a skunk twice in the last week around the shop. It seems to be living under the shop. Ginny has confronted it. I There is a distinct “eau de skunk” in the air, even in the shop. There are many reasons why it’s not a good idea to have a skunk around. Fortunately it was not under the shop tonight we we could deal with it.

Back to the barn. This is Coco with the first of twins.

Jade came in tonight because…well, because she is Jade. She doesn’t look particularly ready but she sure looks as though she should be. She was due yesterday I think.

Just Another Day (or Two) on the Farm

I can’t think of a title for this post. Unplanned Tasks. Distracted by Other Stuff. Digging up Bones. What I did instead of weave or wrap presents. Sheep Skulls.
This is from two days ago. I remembered these sheepskins in the barn. We had three rams harvested in early December. I salted the hides and they cured like they are supposed to. But then I forgot about them. Last week we had a significant amount of rain and dampness for several days. The hides were in the barn and weren’t rained on, but the salt absorbs moisture from the air. These were very wet, including puddles of water on the skin where it wasn’t well supported. I took them outside and put them on racks that I tilted to help water drain. I knew if I put them back in the barn they’d be wet again overnight. I brought them to the house. Fortunately I have “the weaving house”, another house on the property that I have taken over for my projects. I spread them out there, and turned on the heater and the ceiling fan. I was going to box them and ship them yesterday, but decided that they weren’t quite dry enough to pack into a box since over the Christmas holiday there would be a delay before the box was open. I spread them out in the house again, but moved them into my sewing room (second bedroom) because my son and DIL just arrived from Idaho with their cats and dogs. They’ll be here a week. I’ll ship these hides the day after Christmas. The skulls on the upside-down tub are another story (below).

That evening I found a scrap of a sheep coat on the barn floor and knew that there must be more of the coat somewhere–hopefully not entangling a sheep with a fence or branch. I found SilverSun, the same lamb who featured in this post from December 6 with the same problem. The coat was around her middle so tight that it was difficult to get her front leg back through even bent at the knee. Eventually I got her out of the coat.

This one is not going on the repair pile. It’s not worth it.

I debated leaving her without a coat, but with only four weeks until shearing I hate to do that. None of the sheep are coated all year but she has worn a coat for several months.

I put this coat on her. I think it is a little snug and I hope that I don’t regret that, but I don’t want to risk her getting stuck in one again.

The skulls on the tub in the first photo are from the many skulls in the barn waiting for me to do something with them. I hosed those off and was letting them dry. Yesterday I decided to soak them in a peroxide solution to see if they would lighten up. That led to thinking about all the other skulls around. I have an email from someone who wants to find out about skulls AS IS without me trying to do all the extra work. I needed to figure out what I have and take photos.

I didn’t go into detail but this post of August 27 says that I found the ram, Townes, dead two days prior. There is a photo of him (alive). To be realistic about the farm as a business I need to try a salvage what I can from the sheep. A skull with four horns that size has real value–if it’s cured and cleaned properly. By the time I found Townes, it was too late to take his hide. We didn’t take the head at that time because it was so swollen I wondered if it would explode if I used a knife or saw. We buried the whole ram. I tied baling twine around a horn so I could keep track of where to dig later. I don’t have enough experience to know for sure how long bones should be in the dirt. I’m sure conditions of heat, moisture, and type of soil all have an effect. And this was more than bones–it was the whole sheep with skin and wool all intact. So that was four months ago.

Here is what the skull looks like after hosing it off. I was able to pull the outer horn off the bone. Now I have to figure out how best to thoroughly clean the skull. I have saved several recommendations. I think the first step is to make sure there is no more tissue–that may mean simmering (but paying close enough attention so it doesn’t come to a boil) for awhile first. That’s always challenging because I get distracted by doing other things. Even with a time set I may not pay close enough attention. This is the kind of thing that I’d be simmering outside and not on the kitchen stove. If that is successful, then there is degreasing in soapy water, then soaking in a peroxide solution. All of it will have to wait at least a week.

Then I decided to dig up the rest of the skulls I’d buried after harvest days throughout the summer. Many may have been in the ground too long. At least I should have pulled off the outer horns because they deteriorate faster than the skull. There is still tissue on some of these especially at the base of the skull. Some of the bones on the front of the face are missing. This is why I may sell them AS IS if someone else wants to tackle them. I feel like this is something that I should be able to do, but there is always something else I want to do too.

These two aren’t bad and I think I’ll experiment to see how well I can clean them.

Here are two more that are in worse condition.

I have many more in the barn from earlier in the year and there are still a few out back that I did not bury. I guess I should check on those.

Decisions…This Time it’s a Banner

How much time and energy do you spend making decision? Sometimes it seems overwhelming and it’s often about something trivial.

I’m helping with a new website. I’m not really helping, but being a guinea pig about how it all works for a non-tech person to enter things and helping to find glitches and things that are confusing. Is that a beta-tester? Or do you have to know more to have that title?

There is a place that asks for a banner across the part that will have Meridian Jacobs info. How to decide what photo? Sheep? Weaving? Yarn? The point of the website is to sell things. How do I choose one? The photo needs to fit the banner space. The software will supposedly take the appropriate size piece out of whatever photo you send, but I thought I should start with something the right size. I started with these below. Some were just experimental to see how they would fit the space.

A sheep photo? This is an older photo but I suppose that doesn’t matter as long as the quality of the photo is good enough.

I wanted to try something with more sheep and a background. This is not a good background.

This photo looks a bit washed out–maybe I can adjust that but at this point I was looking for any photo that fit the sheep into the landscape with a bit of horizon.

What about yarn or weaving? I’d sure like to sell blankets. Version 1.

Version 2.

Version 3.

I have a series of these photos that I have always liked.

I have used this photo (full size) a lot because it shows the difference between black and white sheep and lilac sheep. Townes, the lilac on the right, got the tips of the top horns caught in a fence two days ago and I found him dead.

Back to landscape photos. Here is one with a horizon and a lot of sheep and lush grass. The sheep are pregnant and recently shorn.

I walked across the road this morning and had just changed the fences so the sheep have this field near the road. That’s the view I was after. It is a narrow band but it shows sheep and the horizon. I like that this one shows our position in the Sacramento Valley. That notch you see in the hills is where the road goes to Lake Berryessa. Its a landmark for me.

This is a little different cropping of this morning’s photo.

A closer up view makes the sheep and the barn more prominent and removes the white fence on the right but cuts off the trees and my notch on the hills.

Back to yarn. This is what I did the last few days. Indigo on the left and Cosmos and Dahlia on the right.

But maybe I need black and white.

No decision made yet. Any suggestions are welcome…

More Product Photography

I shared a lot of photos in one of the latest blog posts of my trial and error to get good product photos with consistent backgrounds. I got some suggestions from a few of you and I welcome comments again. I worked on this again today.

I bought a roll of sturdy Manila paper. Do you know why it’s called Manila? I looked it up. Merriam-Webster: “a strong and durable paper of a brownish or buff color and smooth finish made originally from Manila hemp”. Wikipedia: “Manila paper was originally made out of old Manila hemp ropes which were extensively used on ships, having replaced true hemp. The ropes were made from abaca or Musa textilis, which is grown in the Phillipines; hence the association with Manila, its capital city. Abacá is an exceptionally strong fibre, nowadays used for special papers like tea bag tissue. It is also very expensive, being several times more expensive than woodpulp, hence the change to that fiber for what is still called Manilla—usually with two L’s. More recently new woodpulp has often been replaced with a high proportion of recycled fibers. True Manila hemp folders would have been much tougher and longer lasting than modern folders.” See what you learn by reading this blog?

I also have a piece of linen that is a nice color with an interesting texture. I thought I’d try both of those as background. The linen fabric is too small, but I can get more if it works. I just made a curtain for my office and that’s why I still have a piece here.

So I experimented with my phone and my camera with these different backgrounds. My goal is to take photos that don’t need much editing to make the products look like they do in real life.

This is the linen on top of the manila taken with my camera. I am not sure if the yellow/rose cast of the manila comes through the linen. Also, light is so important. I took all photos in the shade, but not all shade is the same. The place where I’m hanging the roll of paper is a different shade than if I drag the table over to the middle of the deck area and the roll of manila may affect the outcome as well.

This is that manila paper taken with my phone.

Linen on top of manila taken with phone.

The photos I used here have been minimally edited–mostly to crop to square. This time I shot the photos with my camera on manual and adjusted shutter speed one or two stops. Most of the time the slower shutter speed (more light) gave a better exposure. I don’t think I’m having such an issue with white balance as in the last batch of photos.

Linen on top of manila, taken with Nikon.

The same as above but taken with the phone. Colors are close but not the same.

I moved the table away from the wall so the linen is resting on the table. There will be no influence from the mainla paper underneath or on the wall. This photo is taken with the Nikon.

Same thing, but taken with the phone. I see a blue cast to the background linen.

These photos are also taken on the table, on the linen cloth alone. This one is with the Nikon.

Same thing but with the phone. There is that blue cast again. I could probably adjust that in the phone, but I haven’t done any adjustments on these photos other than exposure on some of the Nikon ones.

Same place, table with linen cloth, taken with Nikon.

Same photo taken with phone.

I moved the table back to the position with the manila paper. So this is linen cloth on the paper, taken with the Nikon.

Same thing but taken with phone.

This is the scarf on manila paper alone using the Nikon.

Cat basket on manila paper. Photo taken with Nikon.

Same thing but no cat.

Same thing taken with the phone.

Here is a blanket on manila paper taken with the Nikon. I think this one could benefit from exposure adjustment.

Same photo taken with the camera. Color of the blanket is more natural.

This is in the same place with the linen over the manila. Nikon photo.

Same photo taken with the phone. There is definitely a difference in the color in these photos.

I liked the photos in the last post that were taken with a wood background but I don’t like the spacing between the planks that creates a dark line. We have some leftover flooring that in the house I think of as gray, but I guess they have a brown cast. These planks were left over after we finished the floors and the “groove” edges of “tongue and groove” have been trimmed off. If I want to use these I will trim that edge so there are no big yellow gaps.

I think the colors of the yarn and products are true, but is the background distracting even if the gaps are gone?

UhOh. Why does the white fringe on the blanket look green? Compare it to the scarf at the bottom. In this last series of photos I didn’t compare Nikon to phone photos, and they are all phone photos. I just added the Nikon photo of the blanket below.

Scarf using phone.

There is a lot to figure out. Tomorrow.

No Pretty Pictures Today

This is a post I debated not writing. But it is part of my life. These photos are mostly from Friday. which was a full day…as are most days.

One of my regular customers wanted 8 lambs for Friday. This is the rack that Dan built for drying salted hides. It’s far better than having 9 pallets spread out on the floor. And even better, that orange netting like they use for construction work was given to us by someone who was cleaning up a property and didn’t want it.

Two spotted lamb hides and one brown and white goat hide after salting.

I took these three hides off the rack so that I could fill it up with new ones. That is two Jacob sheep and the neighbor’s goat. One of my customers wanted to add a goat to the order and there happened to be one next door.

I have learned to take photos of hides before I send them to the tannery so that I can keep track.

This is the previous batch of hides…

…and the reverse side. This is what you get when a professional does the work. There are no holes and no big chunks of fat left on these. I sent these and the three above to Driftless Tannery in Wisconsin.

Three brown and four spotted sheepskins ready for tanning.

This batch went to Vermont. The tannery is up and running again after being sold. Why send these so far away? Tanneries are few and far between and I like the natural mimosa tan that is offered. There was a tannery in Idaho that did a great job for a year, but they moved and didn’t start up again.

Warning: dead sheep parts in the next few photos.

If I’m going to sell sheep for butcher then I want to use as much of the other parts as possible. The hide is an obvious option, but there is also a market for skulls with horns and horns by themselves. With the sheepskins all I have to do is salt them and then ship them to a tannery where all the work is done. I have to deal with the other parts. I’ll write a button post one of these days to explain the process I use to make buttons from the horns.

I have a hard time getting the skulls in shape to sell. I used to put the skulls out in back, wiring them inside a fence so they couldn’t be dragged off. After I retrieve them from “outback” there is still a lot of work to do. They are not completely cleaned and definitely not ready to list on the website.

One year I bought a “starter kit” of the kind of beetles that will do the work for you. But that is a whole other story and it’s not that simple. Also that was the year of my accident and I wasn’t able to keep the beetle colony working.

This is my new method which is not yet perfected. Last fall I buried several heads and left them for the winter. There was so much rain for so long, that there was plenty of insect and/or microbial action. When I dug the skulls up I found that they were still not perfect, but much better than the “outback” method. They mainly need some work on whitening, after turning brown in the dirt, and there is a risk of the horns deteriorating faster than the bone. I don’t know how long these need to stay in the ground and I don’t know how much difference it makes if I add water occasionally. There are some heads under the dirt pile in the middle of the photo and there are some under the black tub. There are some IN the black tub as well. The last few that are buried have baling twine tied to the horns so I know where they are. The new ones in the foreground have baling wire around the horns that sticks up through the dirt when they were covered.

When I make buttons I need just the horns so I cut them off the skull. There is a bony core that is attached to the skull. You have to soak the horn or otherwise allow the tissue between the horn core and the outer part to deteriorate or be eaten by something so that you can get the outer part off.

Top of sheep head after horns were cut off.

This was a ewe lamb with horns that tipped forward. One was so wobbly that it didn’t seem attached to the skull. You can see here that it wasn’t. I think that would be an example of a scur.

Sheep coats organized and spread out by size on barn floor.

Friday’s harvest was fast. The farm harvest guy dealt with all those sheep within two hours and did a great job with the pelts. After I finished salting hides I spent the rest of the morning sorting and organizing sheep coats. I don’t coat a lot of sheep, but usually have about five coated through the summer and up until shearing. These are usually the sheep that go to Black Sheep Gathering and/or State Fair. Right now there are only two with coats. I’d rather see my sheep without the coats and it adds work to keep up with changing coats as the fleeces grow out. You can see that there is also a lot of coat repair to keep up with.

The coats I have always used are those lined up in the middle and the left. I recently bought a new brand of coats that was recommended when I was at the Jacob show in Estes Park. My original coats are sized by number. The new ones have a color tab that indicates size. I matched them up to the old coats to figure out where they fit as far as size and I added the numbers to match the others. The coats on the right are the new ones. I guess I didn’t get the sizes I’ll need as the fleeces grow out.