Back to my regular blog posts. It’s time to pay attention to the dye garden.
The weld appeared on its own where I grew weld last year. No work on my part except to clear out the old and dried out plants from last year. I didn’t pay any attention to the weld bed until the plants started to dry out. That happens after it flowers and produces seeds. I’ve never paid much attention to the specifics of growing weld (it is so easy!) and was thinking that it was all annual growth. I just looked up “growing weld” and read that it is a biennial. How did I not know that? I think I’ve had first and second year plants in the same bed and wasn’t paying attention. All I know is that it makes a great dye.
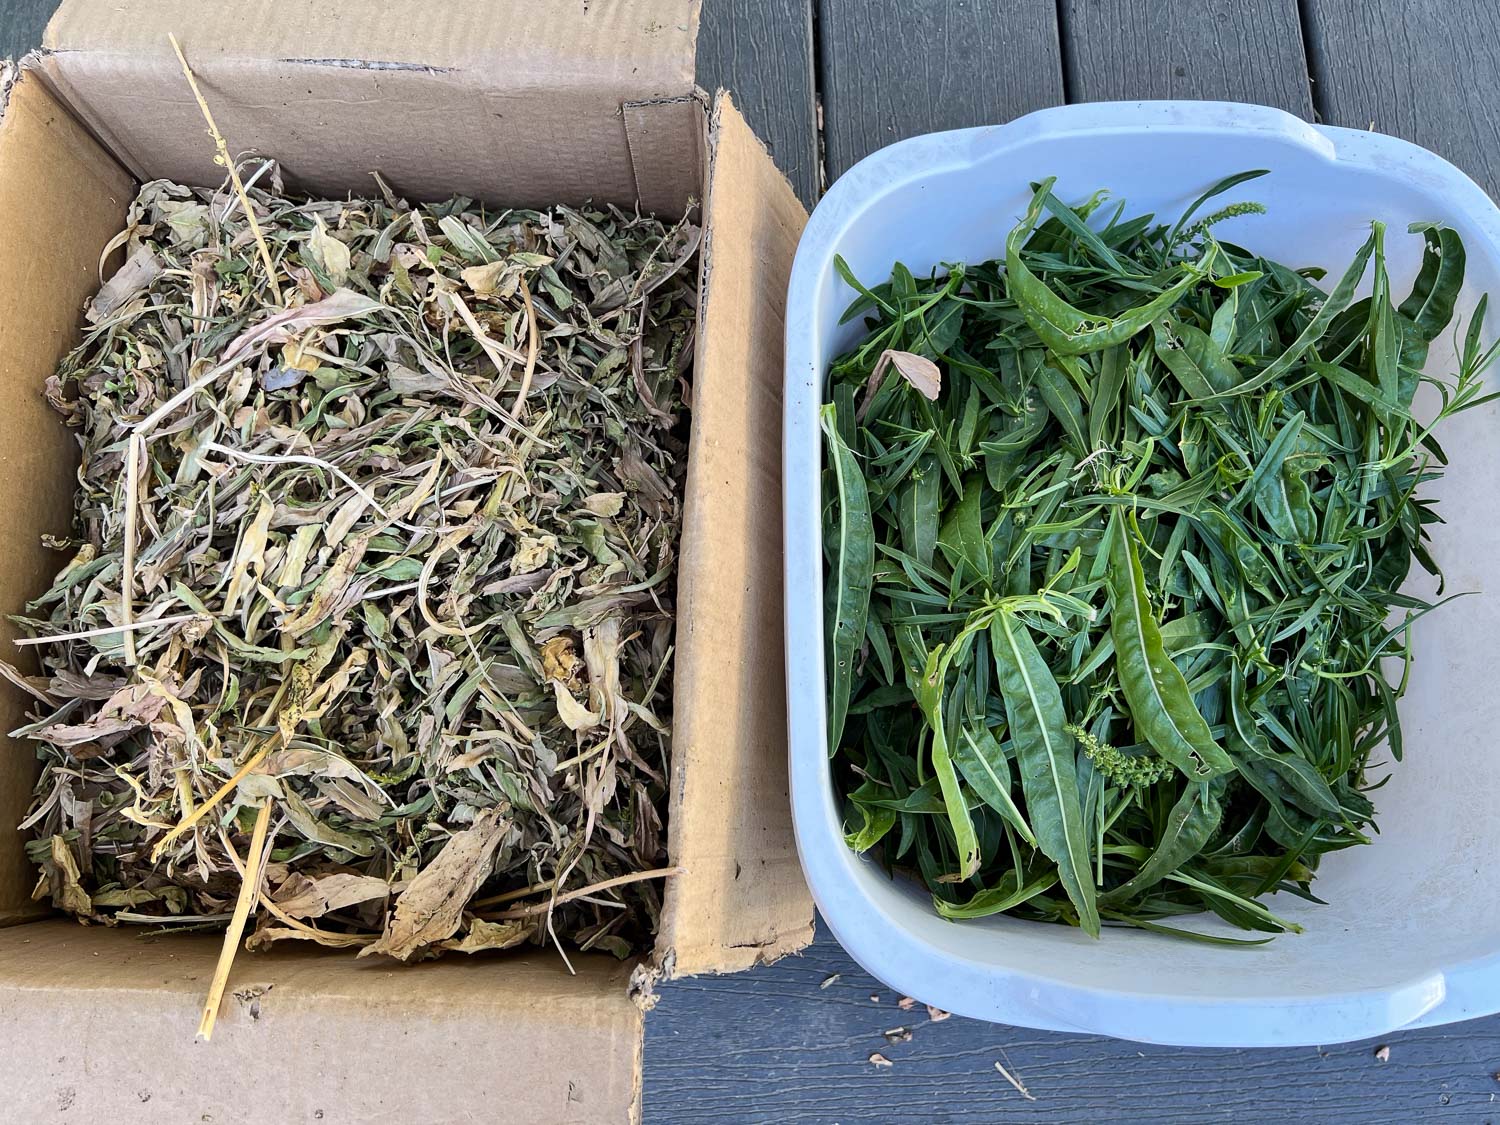
As the plants dry out the leaves fall off the stems. I pulled out some of the dead plants and then scooped up what leaves I could. I also harvested fresh leaves from stems I cut off green plants. I was thinking that the leaves make the best dye, but looking up weld again I realize that people use the stalks and flowers too. This experiment used just leaves.
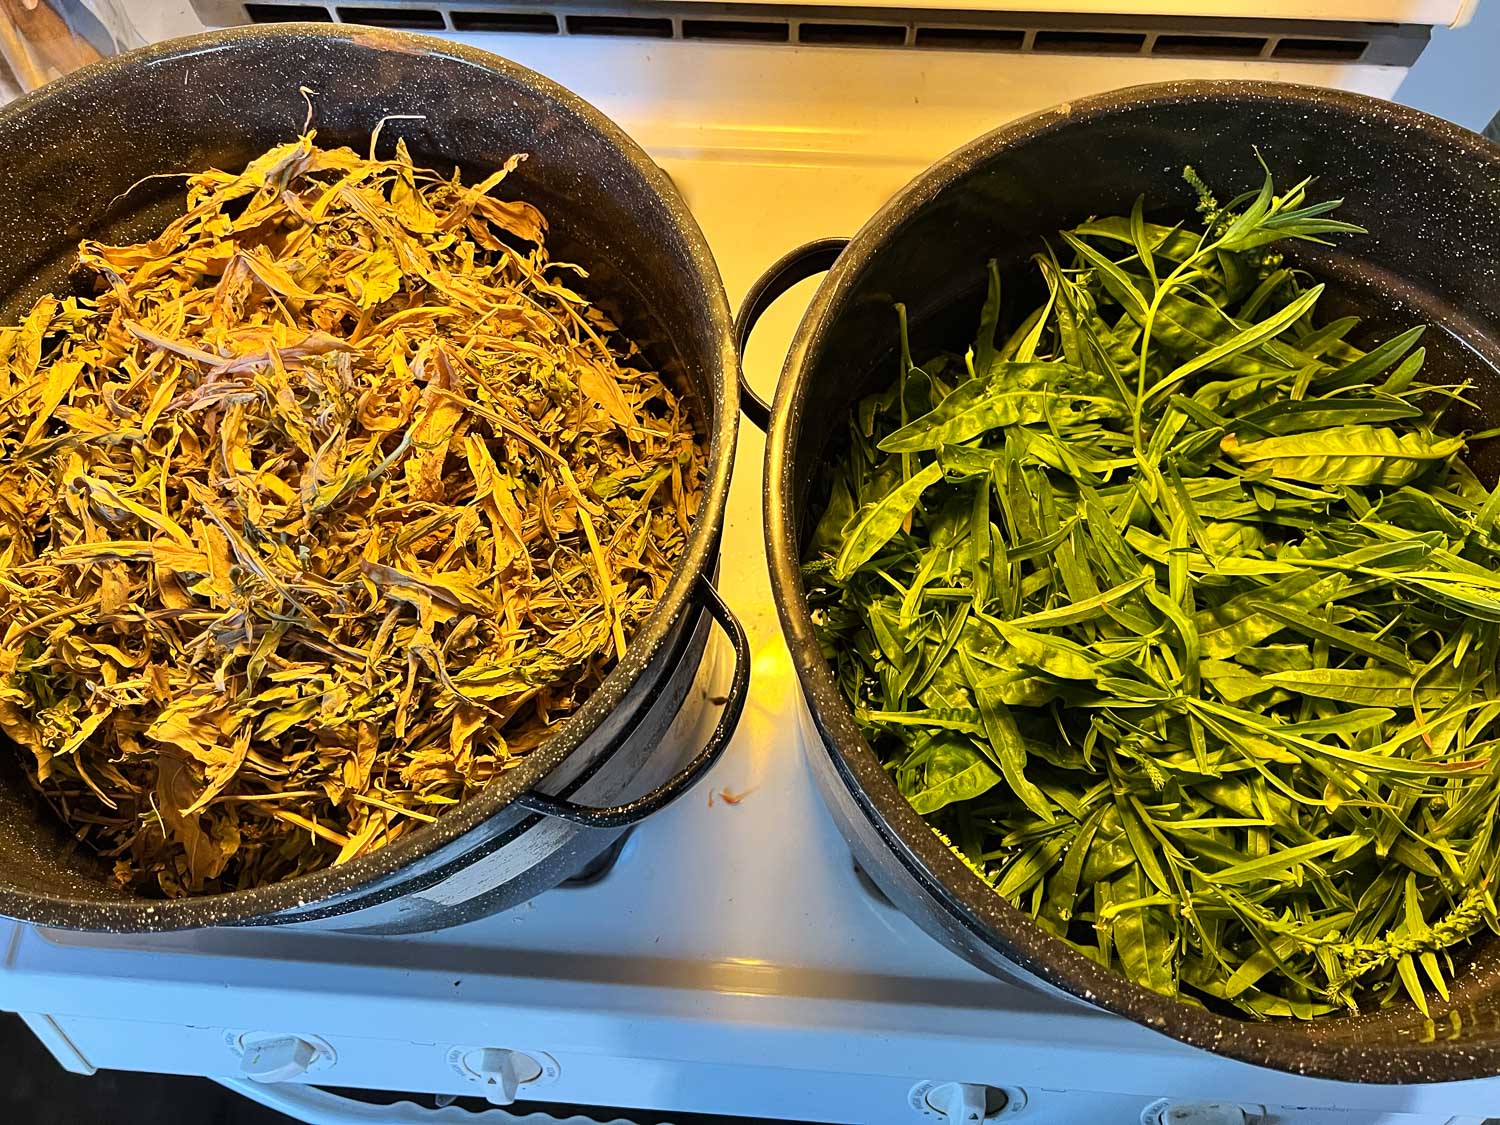
Two dye pots ready to go. I had two batches of yarn, each 12 ounces So I weighed 12 ounces of fresh leaves and guessed at using 4 ounces of dry leaves. The yarn I usually dye is my Timm Ranch yarn since I have more of it than the Jacob yarn.
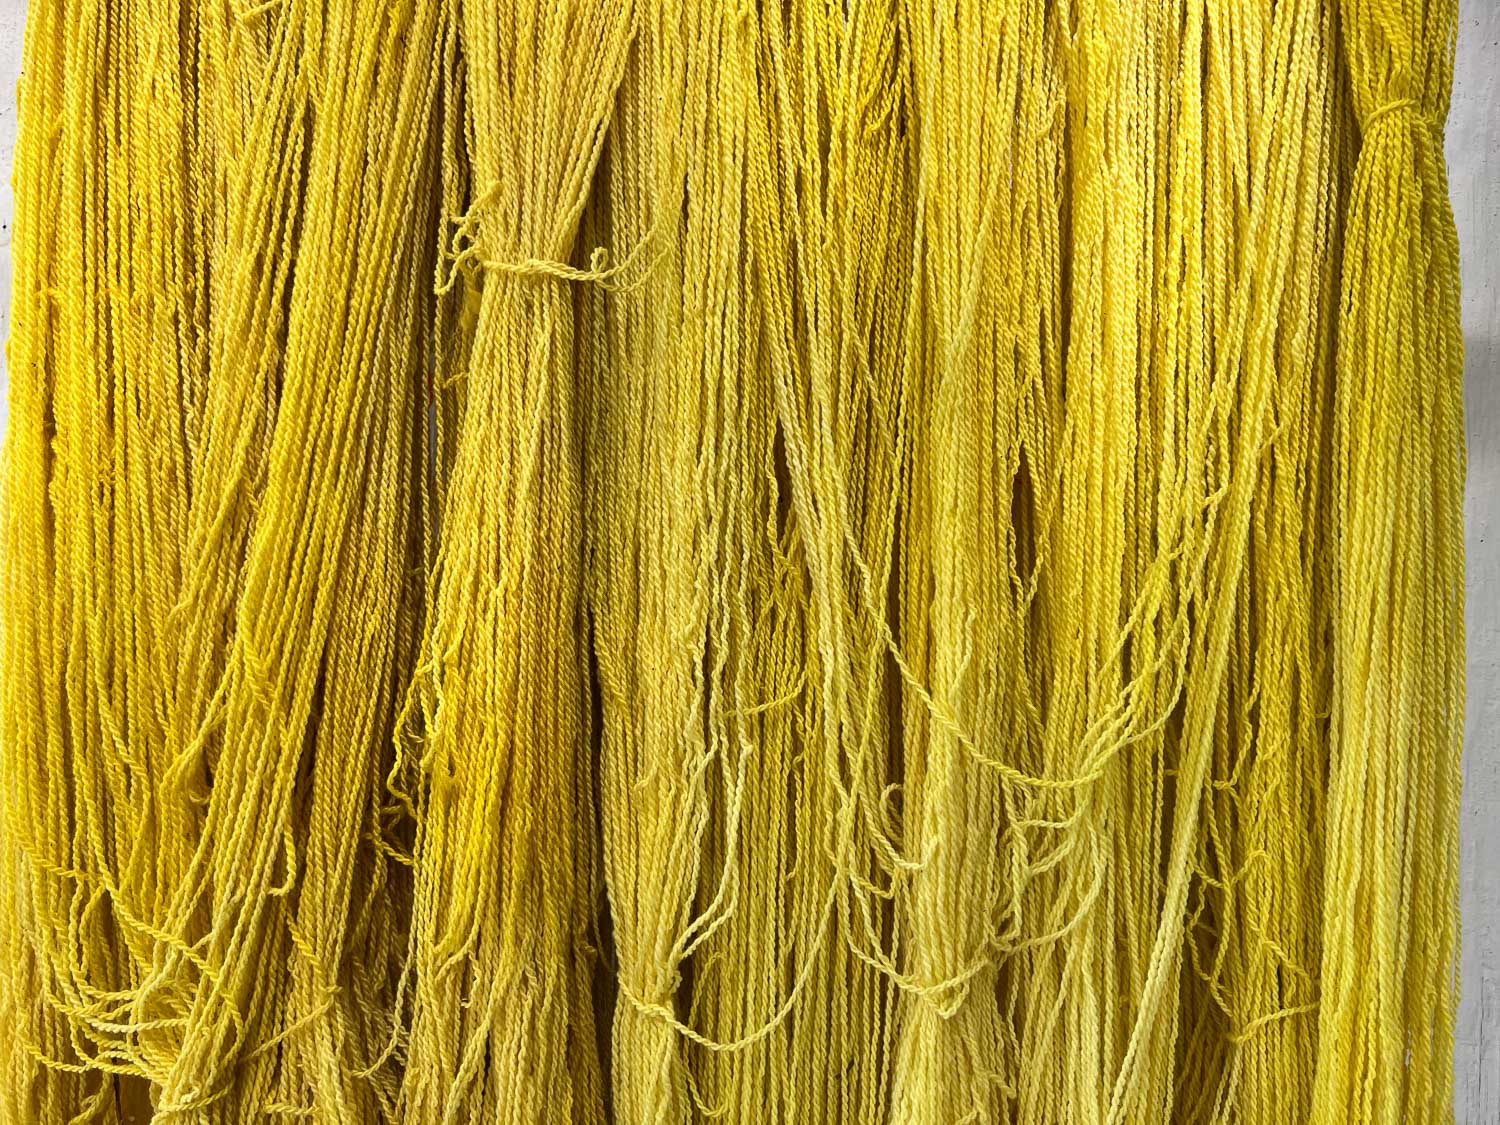
Here is the result. I can’t tell the difference between using dry and fresh leaves. That’s good to know. I need to get out there tomorrow and cut a lot of the stalks so I can put them in a safe place to finish drying before all the leaves fall off.
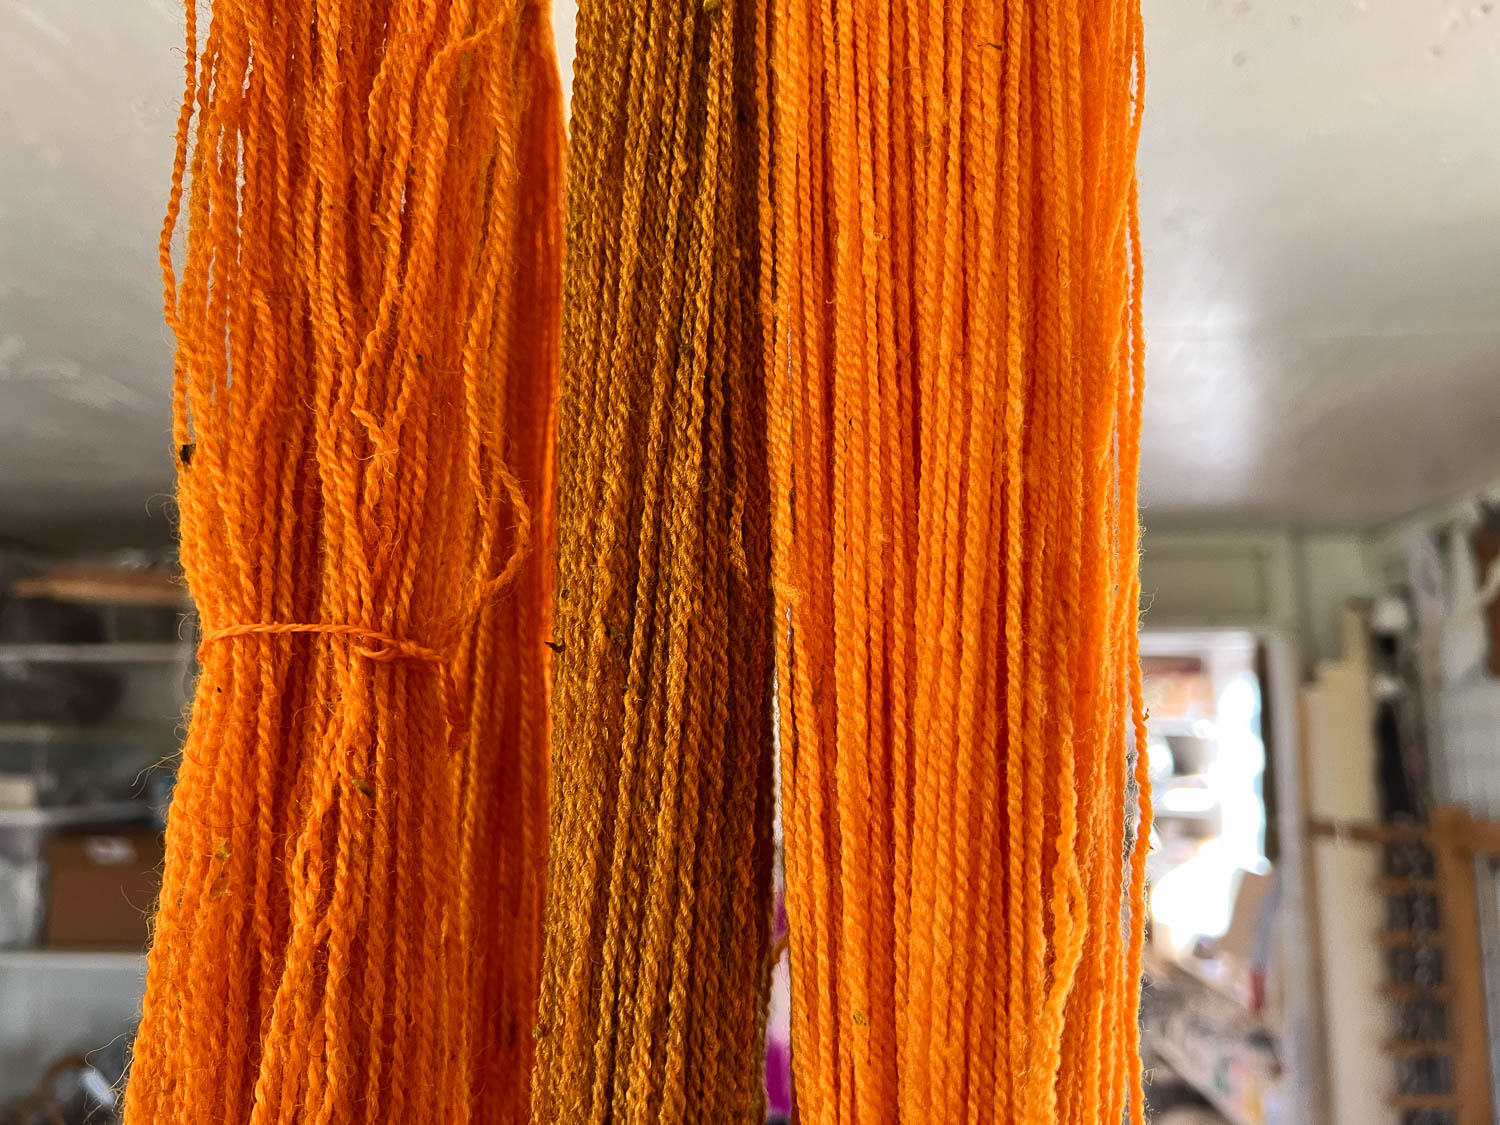
Putting these photos together reminded me that I had done some dyeing earlier in the year. I gathered what was left of the oxalis flowers just before I left for my Texas trip in early April and did a quick dyepot.
Here is the brilliant result, on white and gray yarn.
Next up may be madder. because I finally hacked away most of the tops of plants that have been growing for two or three years. That’s when the roots are ready for dying. I just have to dig them up and then chop them.
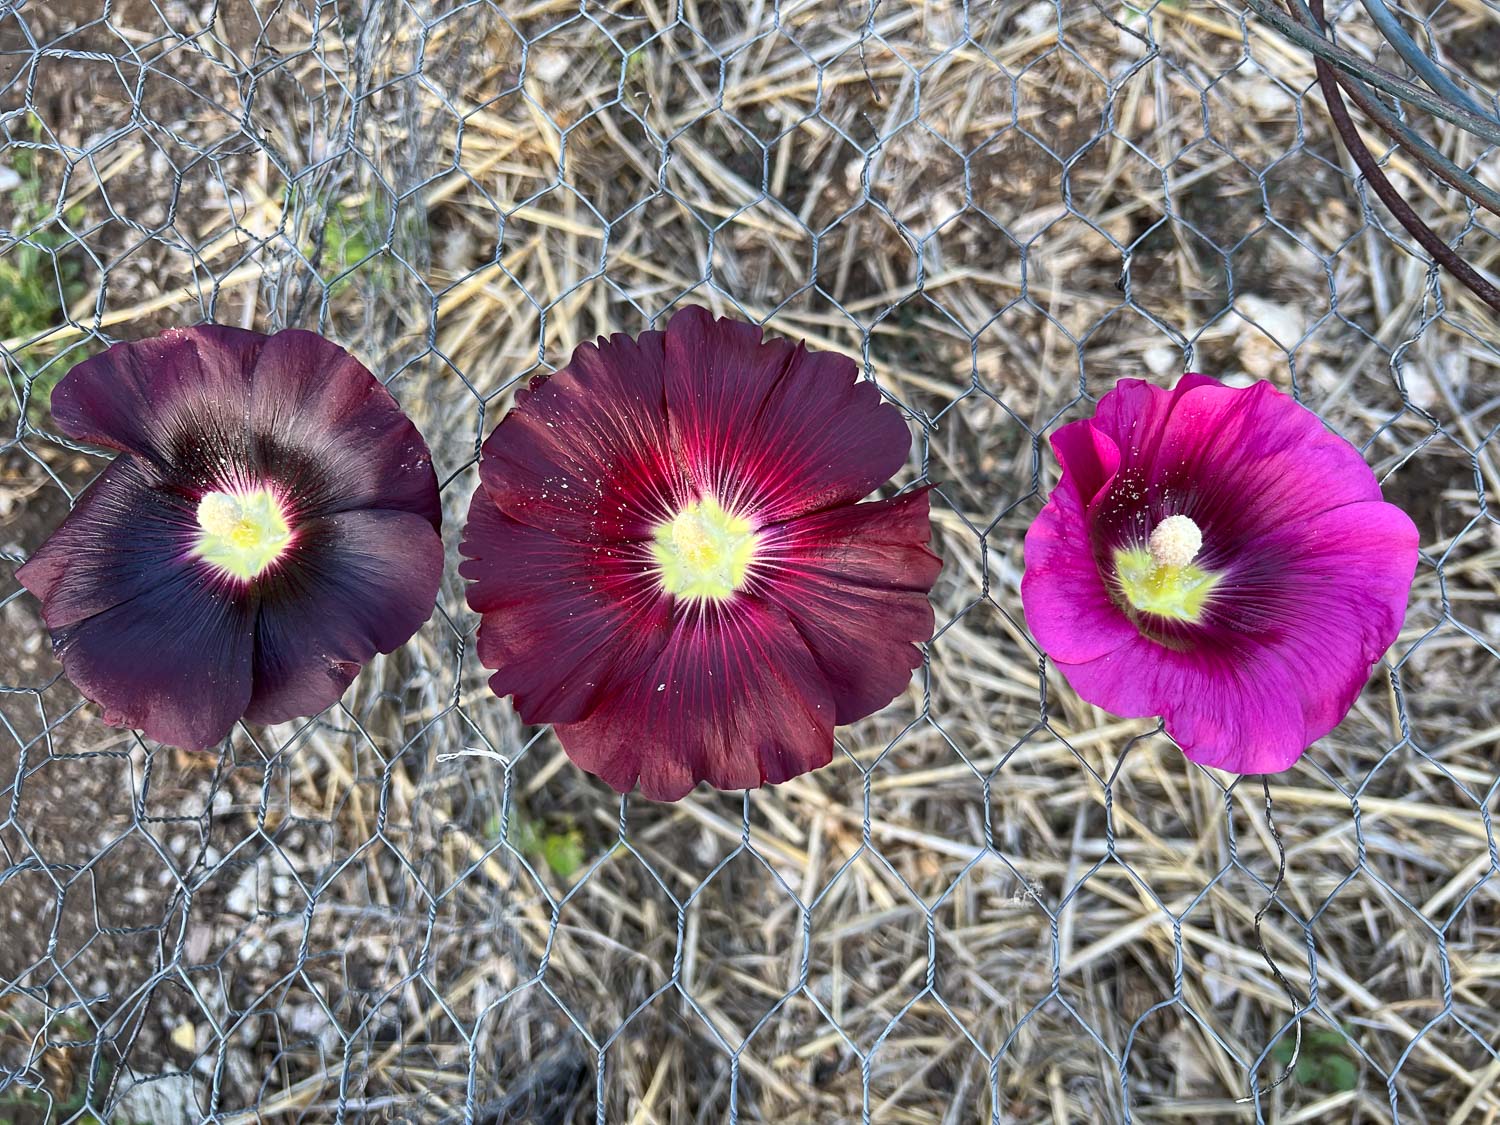
Yesterday’s post was all about vibrant orange of Cosmos! Today it’s Hollyhocks. Guess what color the deep purple, almost black hollyhocks give to yarn!
This is the traditional hollyhock I have grown for a long time.
This year two friends gave me a few hollyhocks that look like this. Even the leaves are different. I’ve been calling these “frilly” to differentiate the two batches. These were started later so didn’t flower until later in the season. I’ll get back to this.
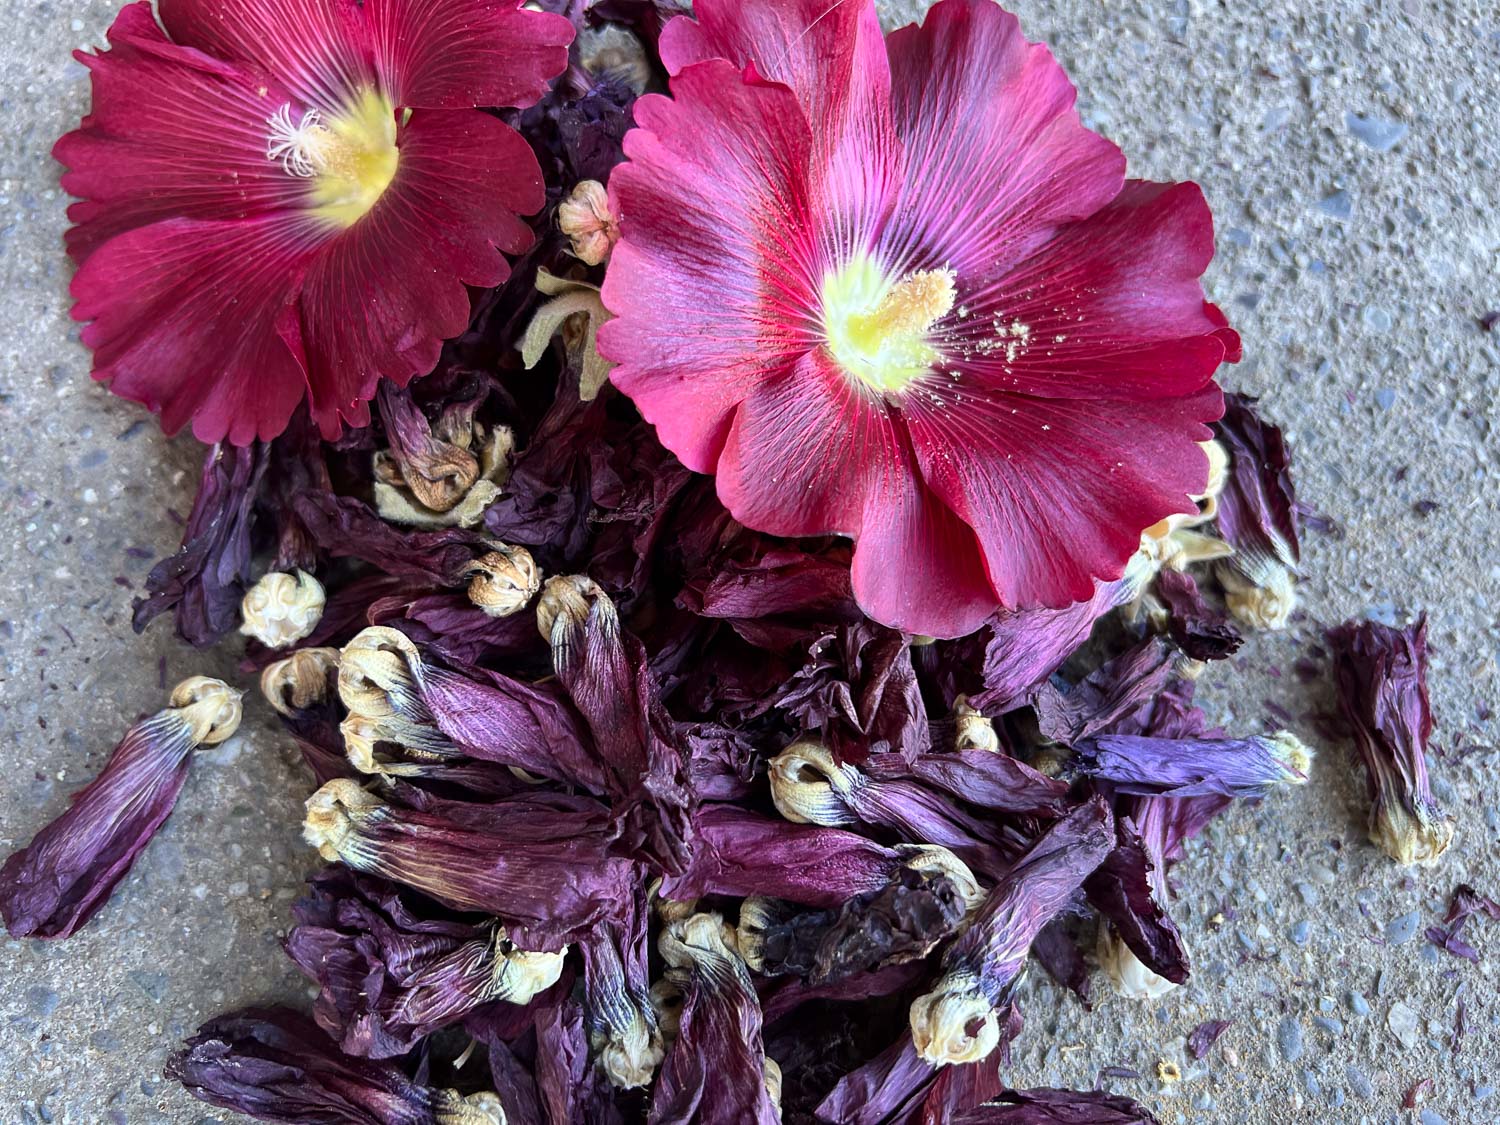
Before the frilly flowers were blooming I was paying attention to the hollyhocks growing in the front dye garden. These hollyhocks had come back from last year’s plants or had grown from seed dropped from the previous year. I didn’t pay much attention at first, but it became obvious that the flowers were not all the same color. It’s known that its the dark purple, almost black flowers that dye yarn. But I thought I’d experiment with the others.
I worked methodically to keep the dried flowers separate as they were ready to pick or had already fallen.
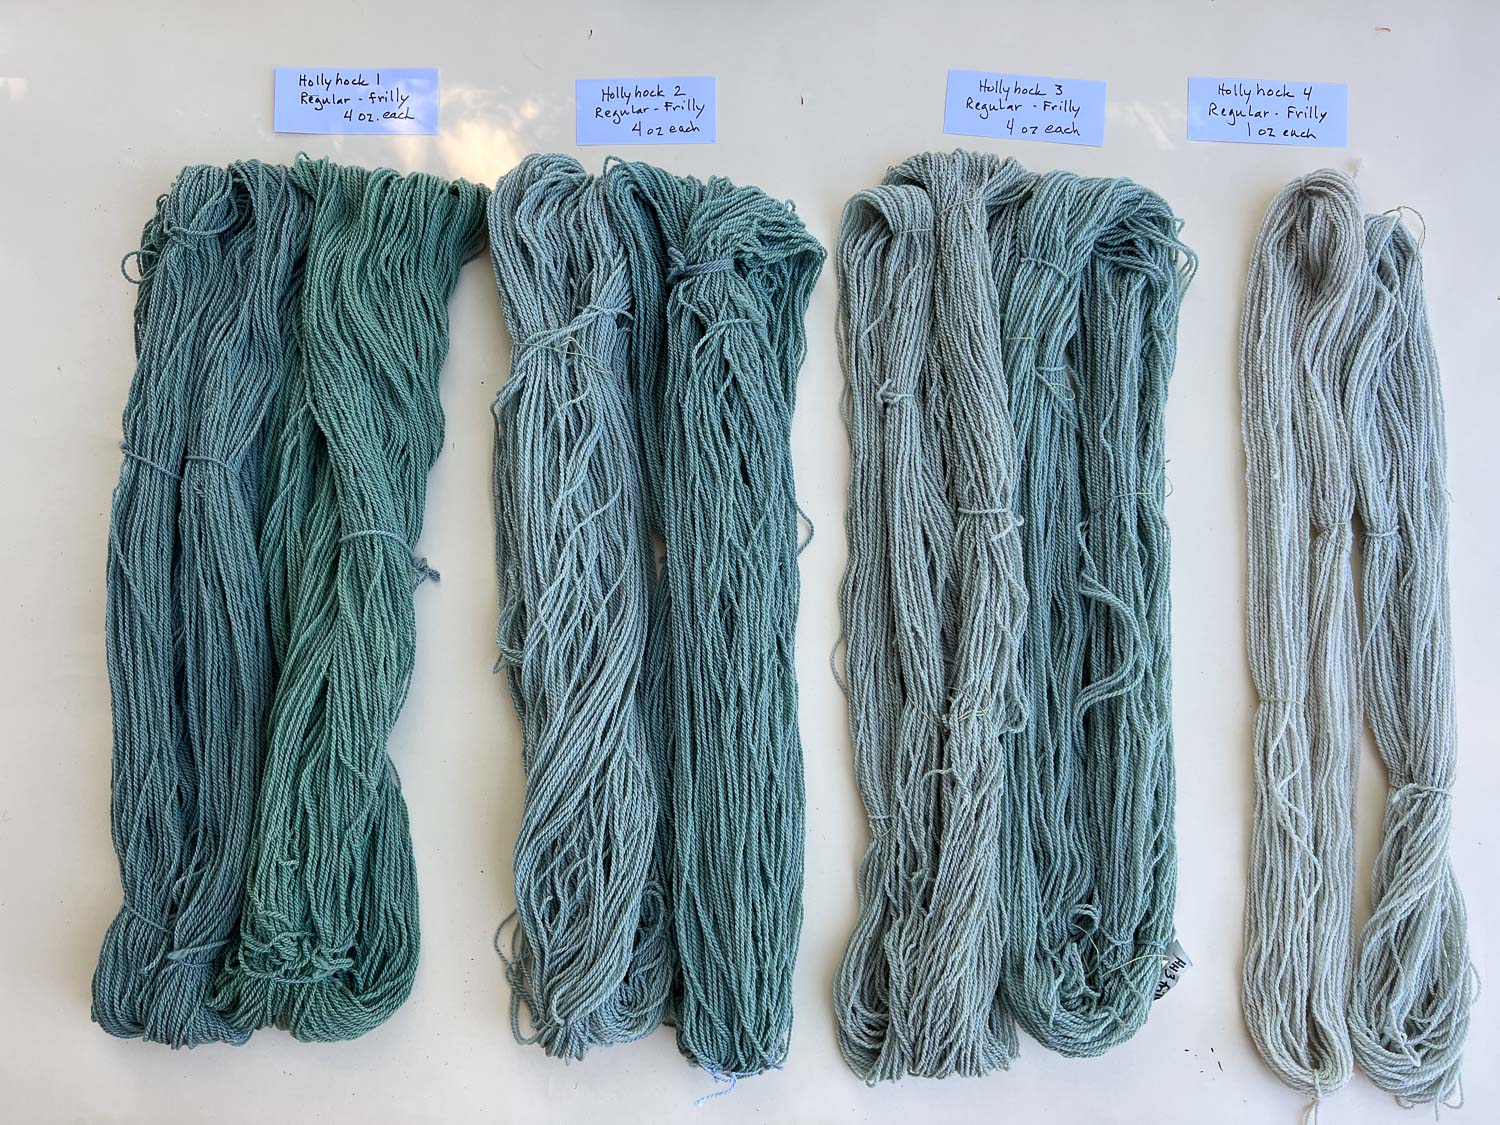
I dyed in four separate pots and got these colors.
Then I dyed another four pots. This photo shows yarn from the first batch and the second. The shades are close, but not exactly the same.
Now to the frilly flowers. Would there be a difference? As I did with the Cosmos I figured out weight in grams to use to dye 4 ounces of yarn. I based this calculation on the recipe in Harvesting Color by Rebecca Burgess. She suggests 20 flowers for 2-1/2 ounces of yarn and that recipe has worked well for me. I get a strong dye and there is enough color left to dye another yarn in the same pot. I calculated how many flowers I would need for four ounces and the weight of the flowers when dry. Yes, I counted flowers as I harvested and then weighed them after they were dry.
These are handy pots for small batches of dye. Notice the one on the left says R. Pratt 308. That was my dad and his lab was room 308 at UCSF Medical Center back in the 50’s and 60s. These are stainless steel and I use them all the time for my fiber activities.
Here are the results. I used these dye pots four times. The color lessened each time, but there was plenty of dye left until I got to the fourth time. The first three times I put four ounces in each pot. It was only at the last one that I put in just one ounce. There is a bit of difference in the regular and frilly flowers, but I don’t know that it would be repeatable. I think there is enough variation among different batches that I wouldn’t say it’s due to the frilly versus regular flowers.
Before I dyed the frilly/regular samples I had run a similar test with successive batches of yarn. The first pair here was putting a gray skein and a white skein in the same pot.
No matter how many times I have dyed with plant material I feel as though it is always an experiment. There are a lot of variables. After I decided to sell dye material I wanted to be able to almost guarantee an outcome. So I experimented.
Isn’t Cosmos a cheery plant?
Earlier in the year I saw a lot of swallowtail butterflies on the flowers. Now they are full of bees.
These plants have grown as tall as me. I pick the flowers every three days and there are always more. It’s amazing.
Here is one day’s crop drying in the sun.
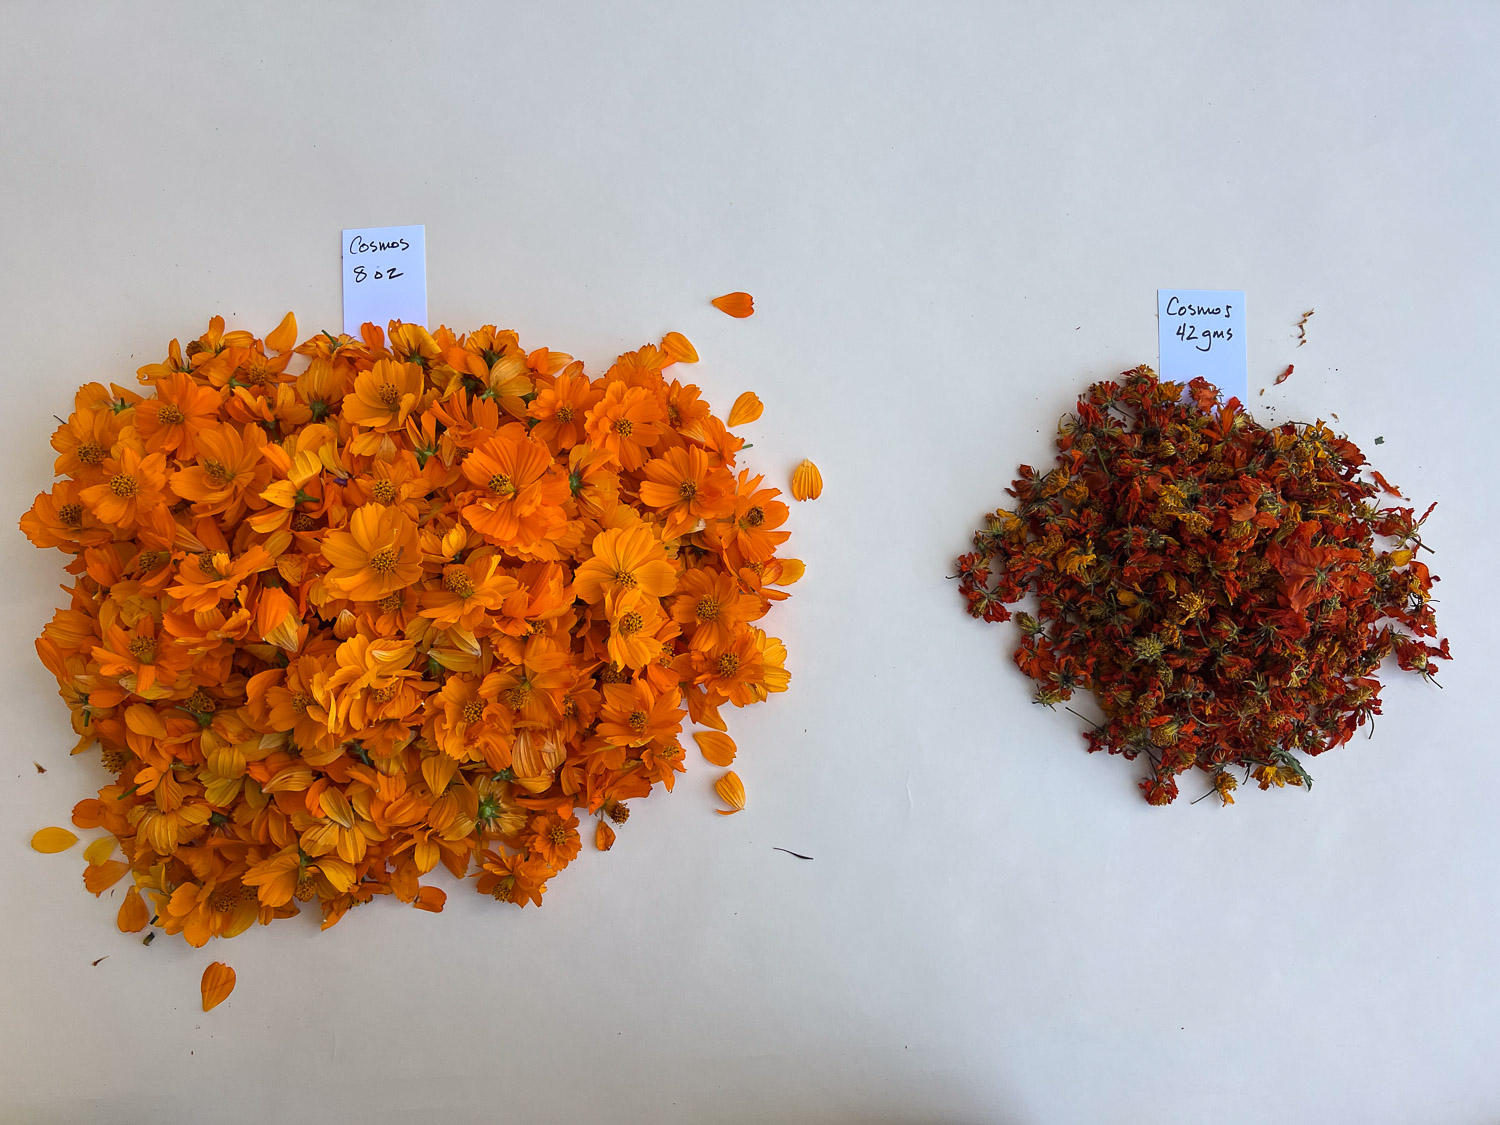
Every time I picked flowers I weighed the fresh flowers and the dried flowers. I calculated that the dried flowers weighed 19% the weight of the fresh flowers. I found my gram scale so I could be more accurate than trying to work in fractions of ounces.
I did some calculations based on a 1:1 weight ratio of fresh flowers to fiber. I could use 4 ounces (112 gms) of fresh flowers or 21 gms of dried flowers to dye 4 ounces of yarn. I wanted to find out if there was a difference in the yarn color if I used fresh or dried flowers. The first step is to heat the flowers. I heat to 160 degrees, trying to not go over 175 degrees.
After 30 to 60 minutes I add yarn that has been mordanted with alum. I keep the dye pot at about the same temperature for another hour. I find the easiest way to do that is to put a lid on the pot and turn it off. I check the temperature in about 20 minutes and if it is going under 160 degrees I turn the stove on for 5 minutes, bring the temperature up, and then turn it off again. Using this method I don’t have to worry about it getting too hot and boiling. I let the yarn cool in the pot overnight before removing it. Then I can the next batch in the pot. I used these two dye pots three times before discarding the liquid in the garden.
This shows the results of those dye pots. In each pair, the yarn dyed with fresh flowers is on the left and yarn dyed with dried flowers is on the right. There is not a significant difference.
Here is an earlier experiment using the same dye three times. In the first pot one skein was gray yarn and the other white.
Lots of Cosmos dyed yarn.
The result of all this is not only yarn that I can use in weaving but dye products for sale. These are on my website.
I should be weaving. I planned to listen to a new book and weave today. This is what I did instead.
Anytime you have a sheep in for medical care it takes a little more time. Hazel spent Thursday night at UCD VMTH (Should I to spell it out? U.C. Davis, Veterinary Medicine Teaching Hospital). I took her in because the night before and Thursday morning she looked like the photo below.
I had texted the veterinarian I usually use and she thought that Hazel should go in. She never acted sick other than not wanting to eat because her mouth was so sore. We still don’t have a diagnosis because we’re waiting on blood tests. No matter which, if any, come back positive, the care would be the same. Isolation and TLC. Hazel is not happy about being locked in. I put a couple of sheep across the aisle from her so that she’s not totally alone. She is getting meloxicam and a slurry of something that includes lidocaine to coat her mouth to reduce the pain so she’ll eat.
After cleaning the barn and dealing with other sheep I faced the two skirting tables holding skulls in various states of cleaning. I am not very good at this but there is a value to the skulls and I need to make it work.
I had planned to boil some of them and see if I could get them cleaner that way. I brought two up to the garage and started a pot.
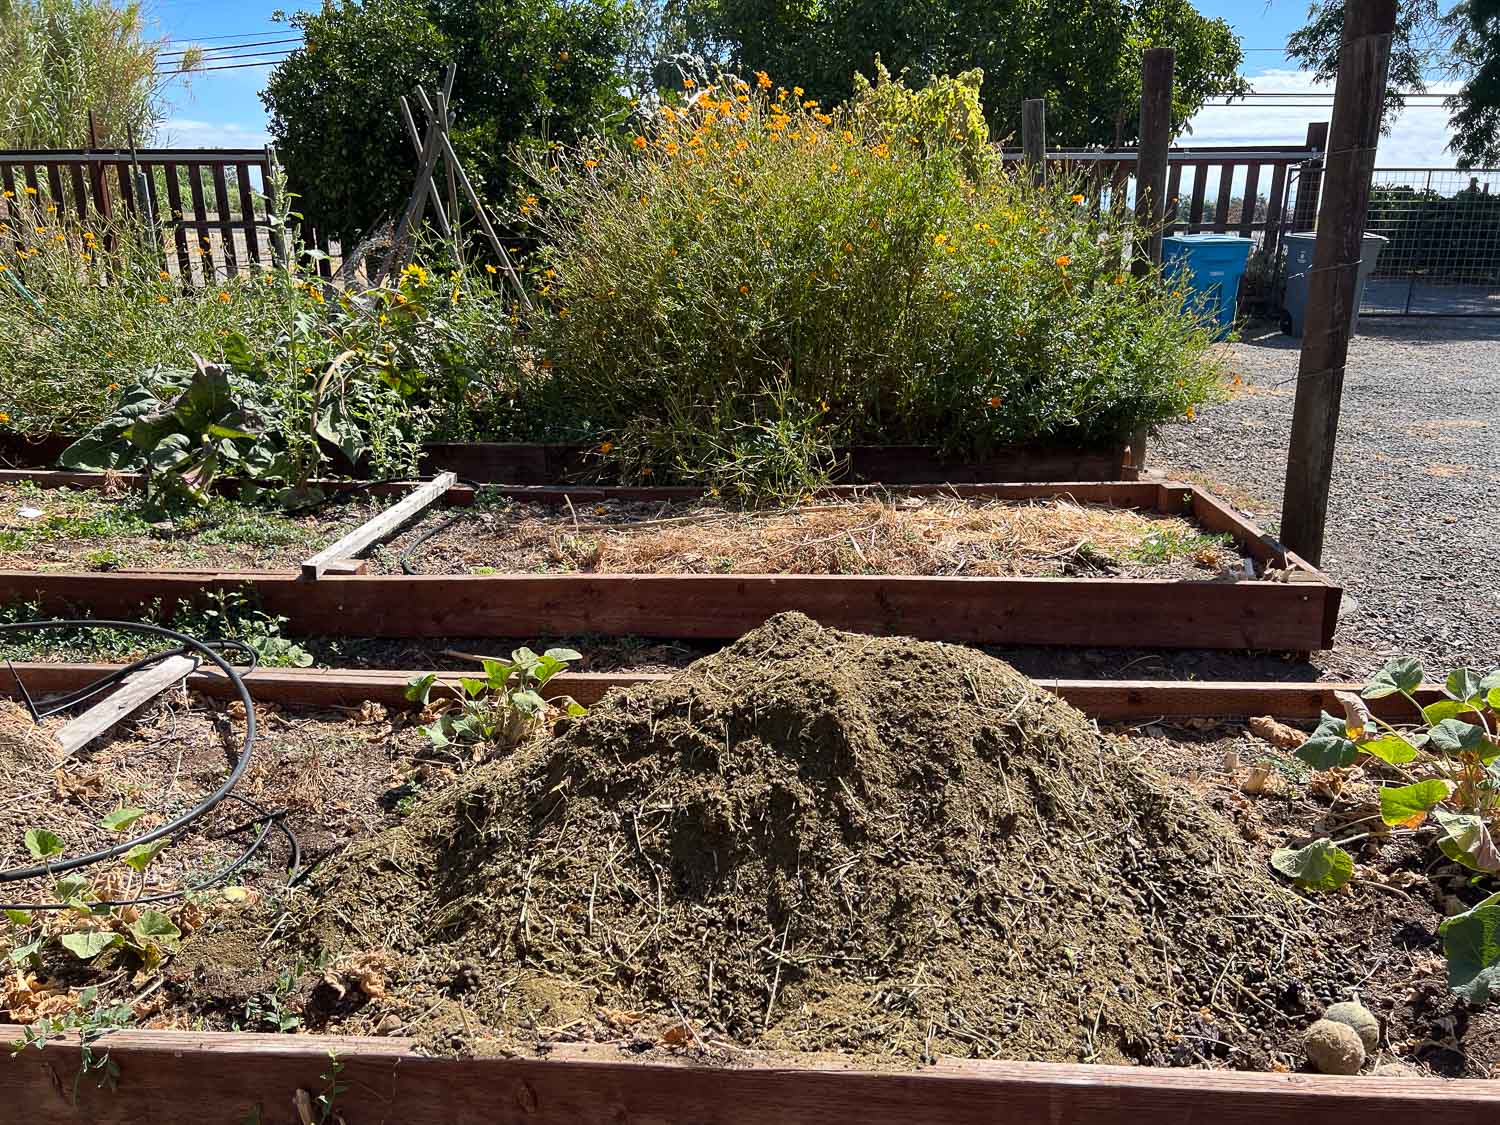
After I got that started (and started the timer on my phone so I wouldn’t forget) I dumped the wheelbarrow load in the dye garden where I had cut out the old dead hollyhock stalks.
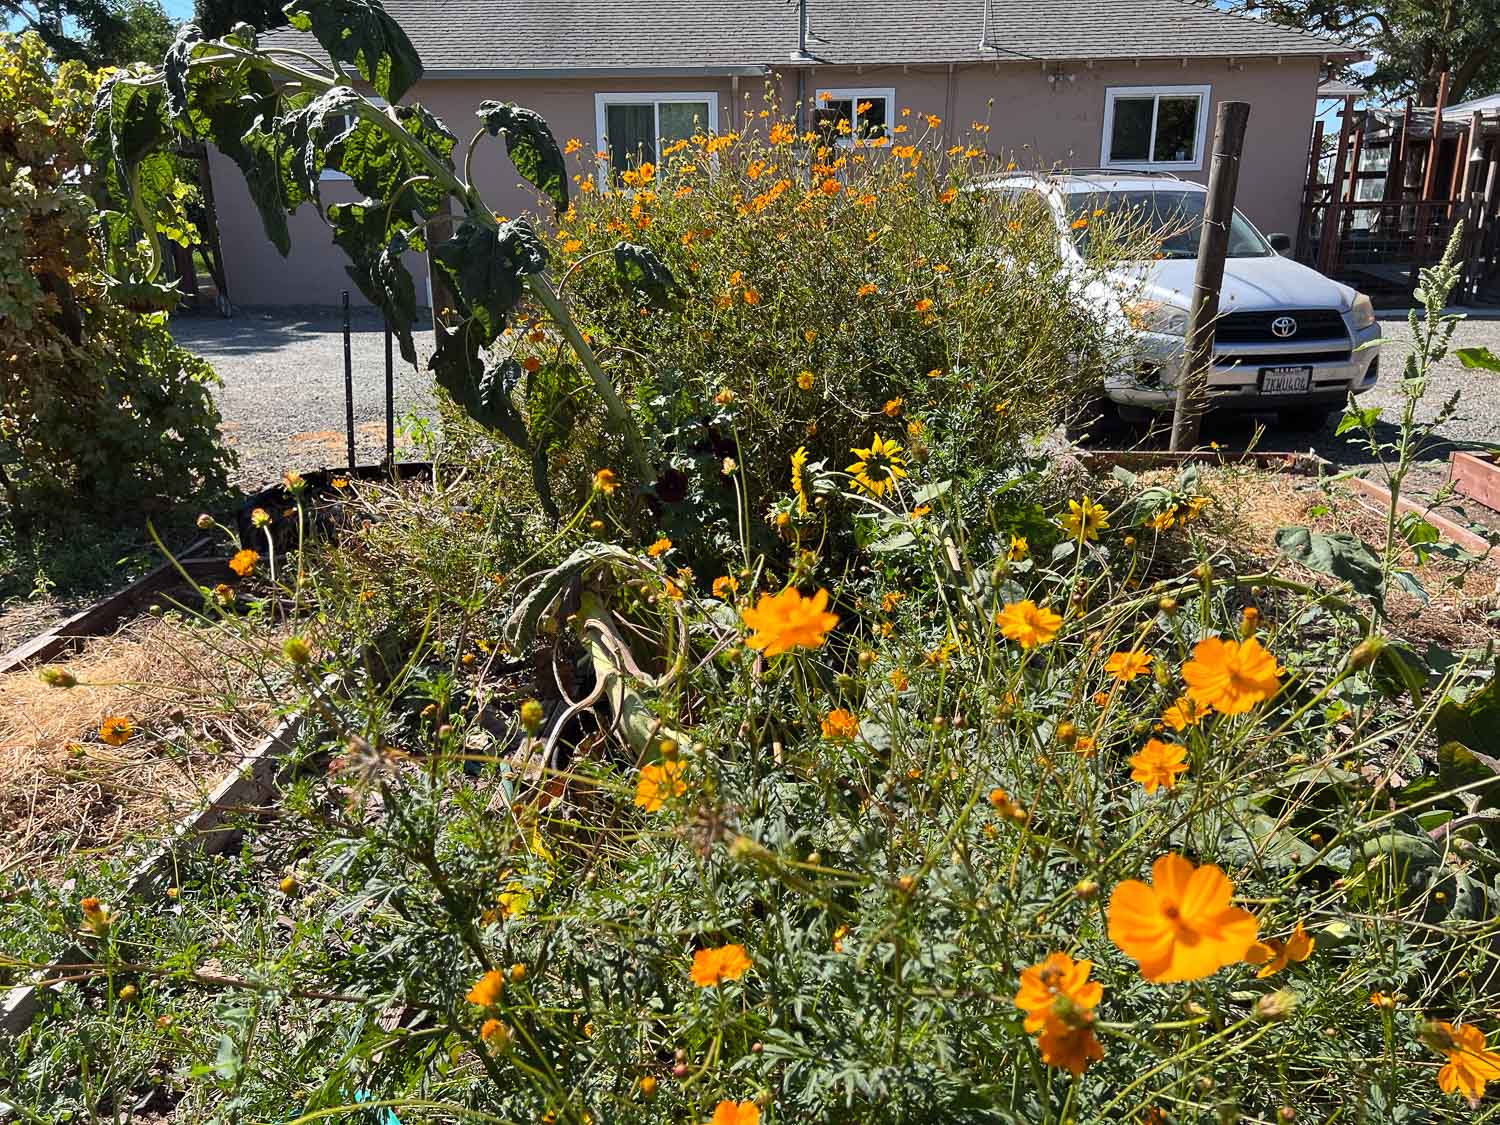
This is a different view of the cosmos that you can see in the photo where the hollyhocks were. I took this after I picked cosmos today…or maybe while I was in the middle of it. It still seems like there are a lot, but not as many as earlier. Notice the sunflower that came up from last year’s seeds. It’s hard to tell in this photo but it is massive. There are two branches at the bottom. One is leaning left and the top is bent over. You can barely make out the head of the sunflower just above where you see the gravel driveway in the photo. The other fell over very early in the season and that is what looks like a big branch coming toward me in the lower half of the photo. If you look to the right of that between the close cosmos and the big stand of cosmos you can pick out smaller sunflower heads. Those are growing off that big branch that goes all the way to the right side of the photo. I took this photo to show the hollyhock that was planted just behind the row of cosmos. It is now flowering but you can only see if if you know where to look right at the base of that leaning sunflower. This was a lot of writing to explain a not very interesting photo. This is one of my dye garden plots.
One of my goals today was to photograph more products for my website and for the website that will be for Fibershed producers nationwide. (!!) I’ve been weighing fresh cosmos as I pick the flowers and after they are dried so I can sell dried flowers with a recommendation of how much you need to dye a give amount of yarn. I have dyed enough yarn with these flowers now to know that you can start with a 1:1 ratio (weight of fresh flowers to yarn) and have plenty of color left in the dye pot for more. I wanted to do another batch after I found my gram scale. I don’t want to try and measure smaller quantities in tenths of ounces. At that 1:1 ratio this should dye 4 ounces of yarn (oops, I just recalculated and it should be 113.4 gm.
I have been keeping a spread sheet and have seen that the weight of dry cosmos is .19 that of fresh cosmos. So here is enough dried flowers to dye 4 ounces of yarn. I need to continue to take photos of the process to add these to the two websites.
I set up two dye pots and turned them on low figuring that I could keep track of those while I took more photos.
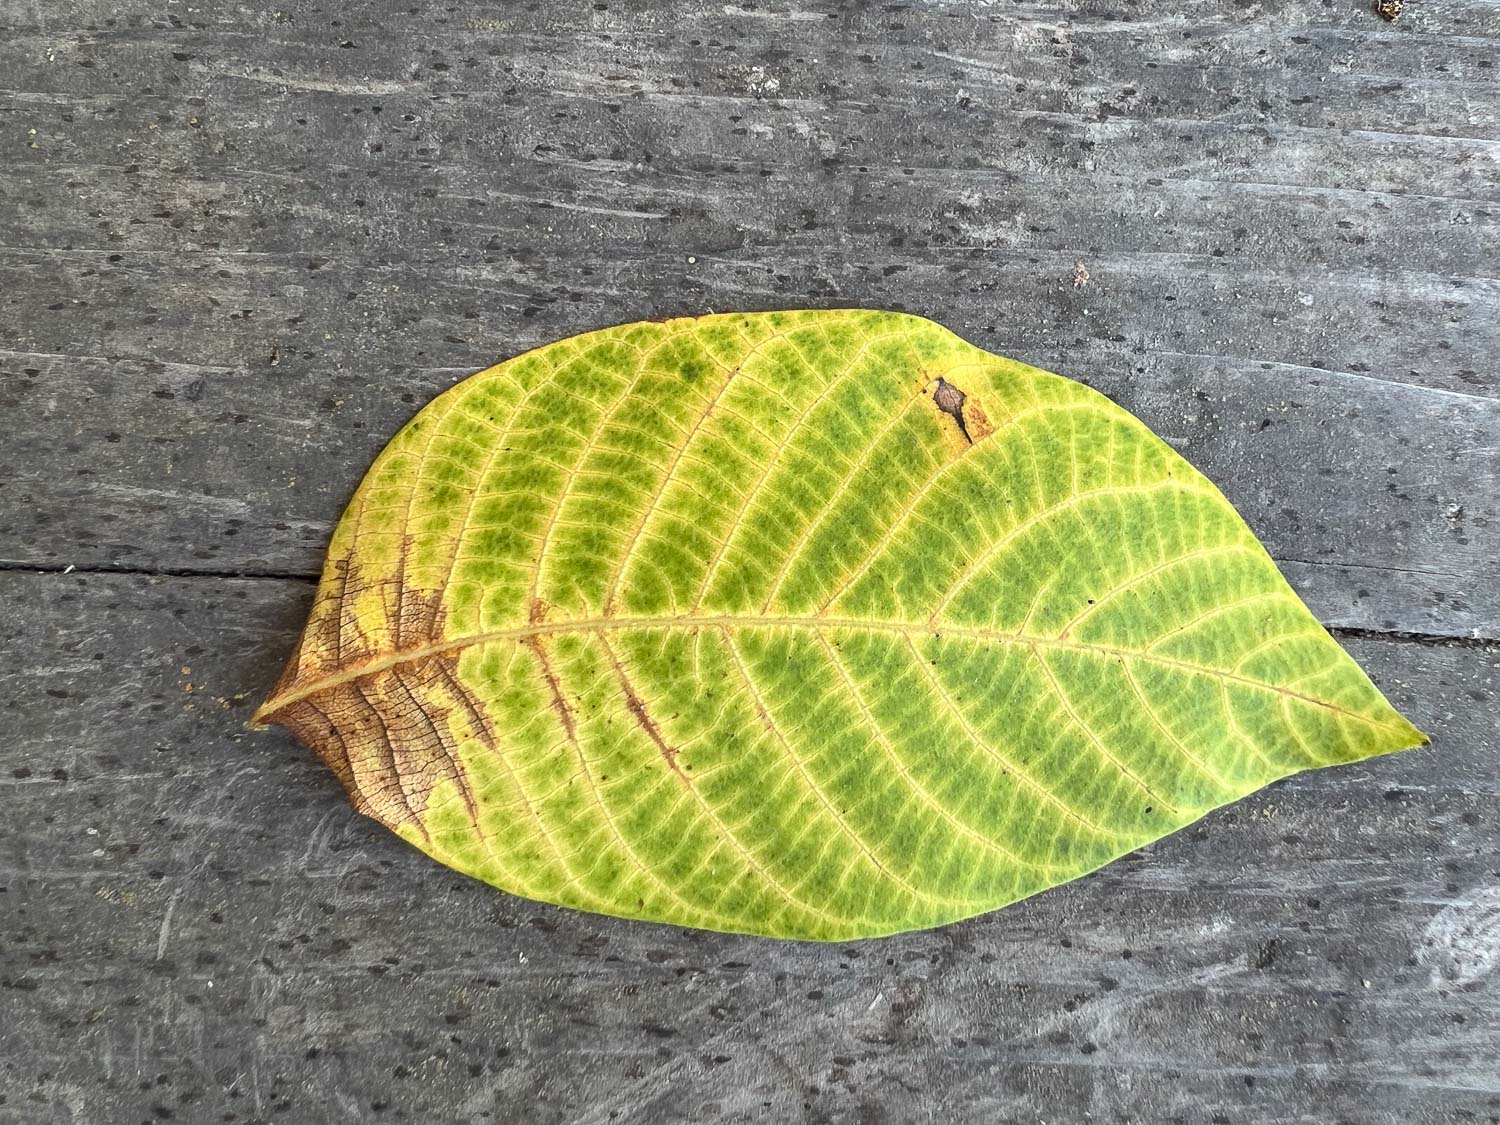
In the meantime I got distracted by this interesting leaf! Great weaving pattern and colors!
Moving on to buttons. I need to update what I have on my website and add them to the new website.
The template for the sale products on my website uses horizontal photos. If I use a square photo it is cropped. That is why some of the weaving tools, looms, etc are not the way they should be –I used photos provided by Schacht and Ashford. But the new website, as well as that of the Artery, which I’m helping with, needs square photos. So I am taking two sets of photos or taking the horizontal photos with enough room around them that I can also crop to square. Very annoying. I know I could change the template I use on the Squarespace platform but do I have the energy to figure it out without having to change all the other stuff I have on there? Not right now. Maybe never.
My goal is to get these listed on my website before I send this blog post so that I can include a link, but that may not happen tonight. [I am proof-reading now and know that I won’t get to that. If you’re interested in some check back or see me at Lambtown next month.]
We’re trying to have a consistent background for photos and I’m using this manila paper. (Want to know about Manila paper? Read this blog post.)
More distractions. These sheep were looking through the fence near where I’m taking photos. I really need to figure out the breeding line-up. This is a topic for another post (as are most of the topics in this one). But this introduces one of the contenders for breeding in two weeks. This should be another post because I’ll explain why I don’t have any adult 4-horn rams to use now and have only a couple of choices here and it’s really too early to know for sure. Back to photos.
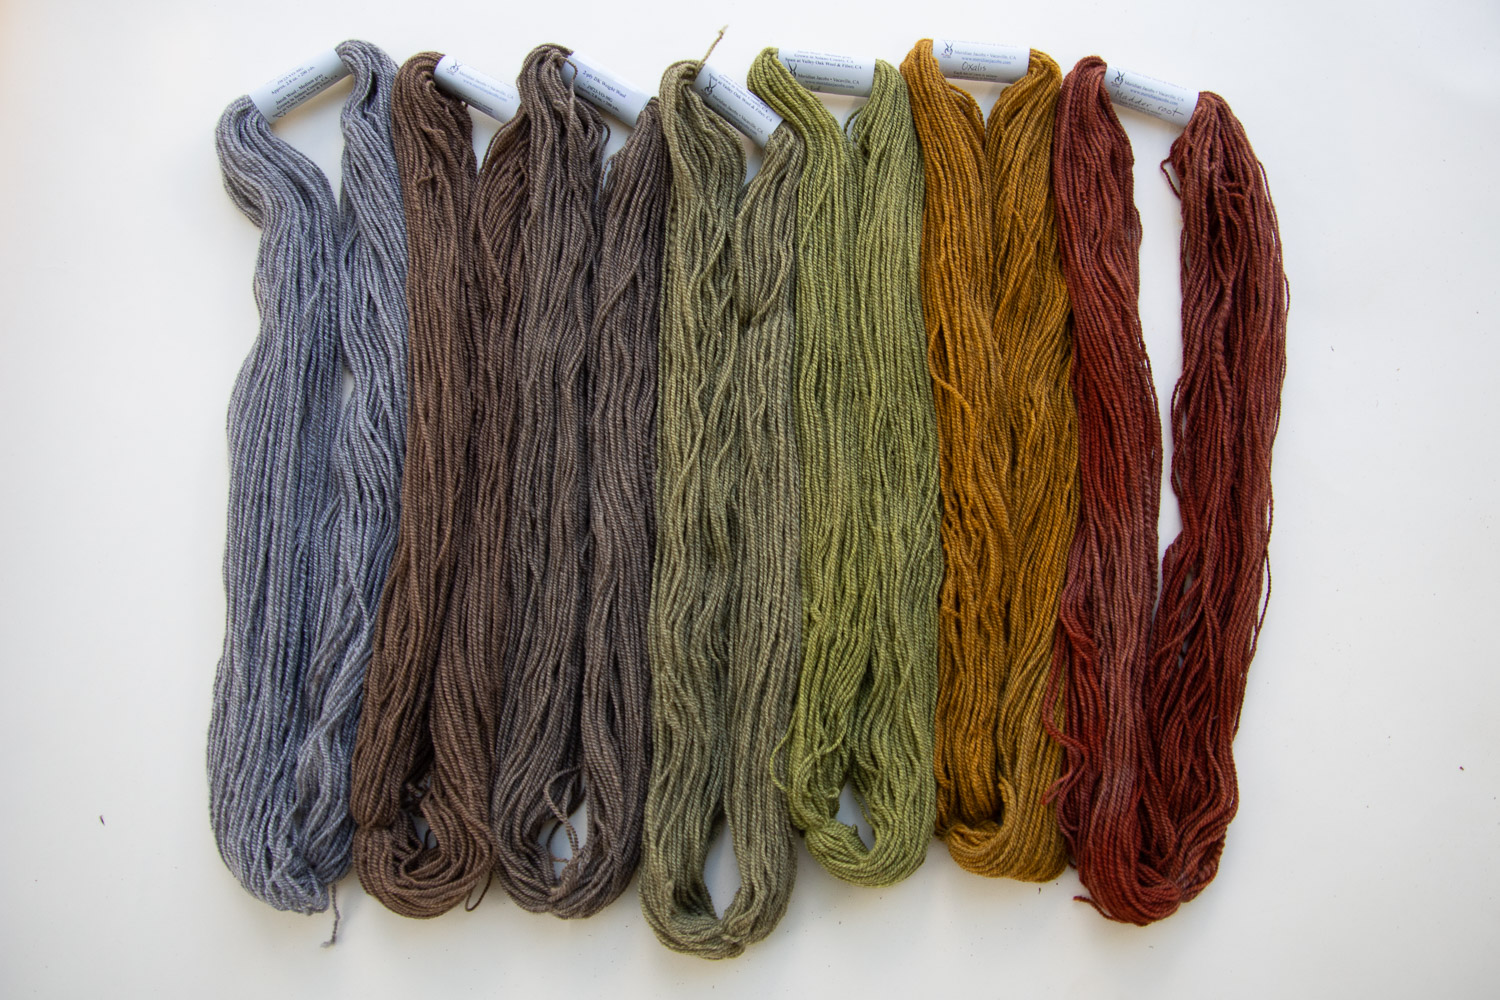
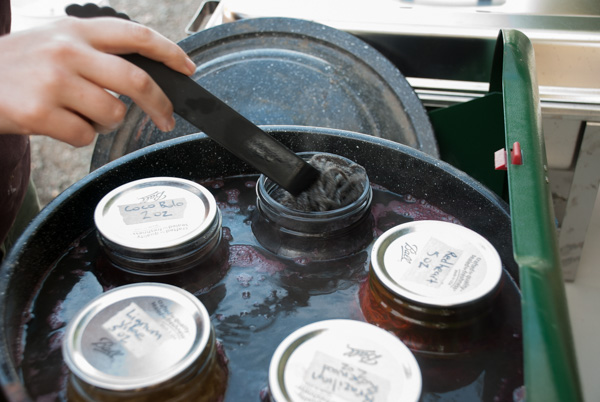
At the State Fair I had a display of natural dyeing. (See how it looked in this blog post.) It’s time to do something with those yarns. I may weave with some but I wanted photos for yet another blog post and I may try to sell them online. These yarns are the base yarns I used for the display. That is gray Jacob yarn spun spun at Valley Oak Mill, Jacob britch yarn that I don’t have listed on the website, 4 ounce skeins of TR yarn spun at the Mendocino Mill, and 1 ounce skeins of TR yarn spun in Wyoming. I’d better update those listings before I post this. They all went in a variety of natural dyes. I’m only showing a little of that here.
This is the oxalis dye pot. I decided that if I want to sell these as groups it makes more sense to sell the same yarn together instead of the same color. If you try to use all those yarns in one project you’ll have challenges. The britch wool has little elasticity and the Timm Ranch wool has lots. It’s better to use like yarns together and mix up the colors.
So this is the batch of gray yarns that went in all the dye pots. I’ll put these online but it won’t be tonight.
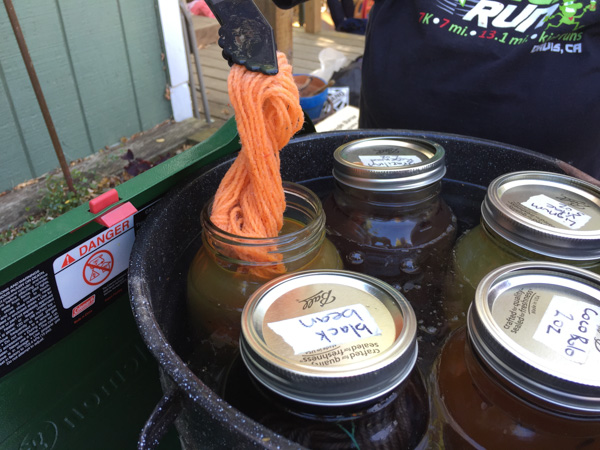
Back to what was going on in the kitchen. This is the previous batch of yarn from dyeing 4 ounces of fresh cosmos flowers–a gray skein and a white skein were the first 4 ounces in the dye pot. I used 4 ounces more the next day. I dyed a two ounce skein after that in the same pot.
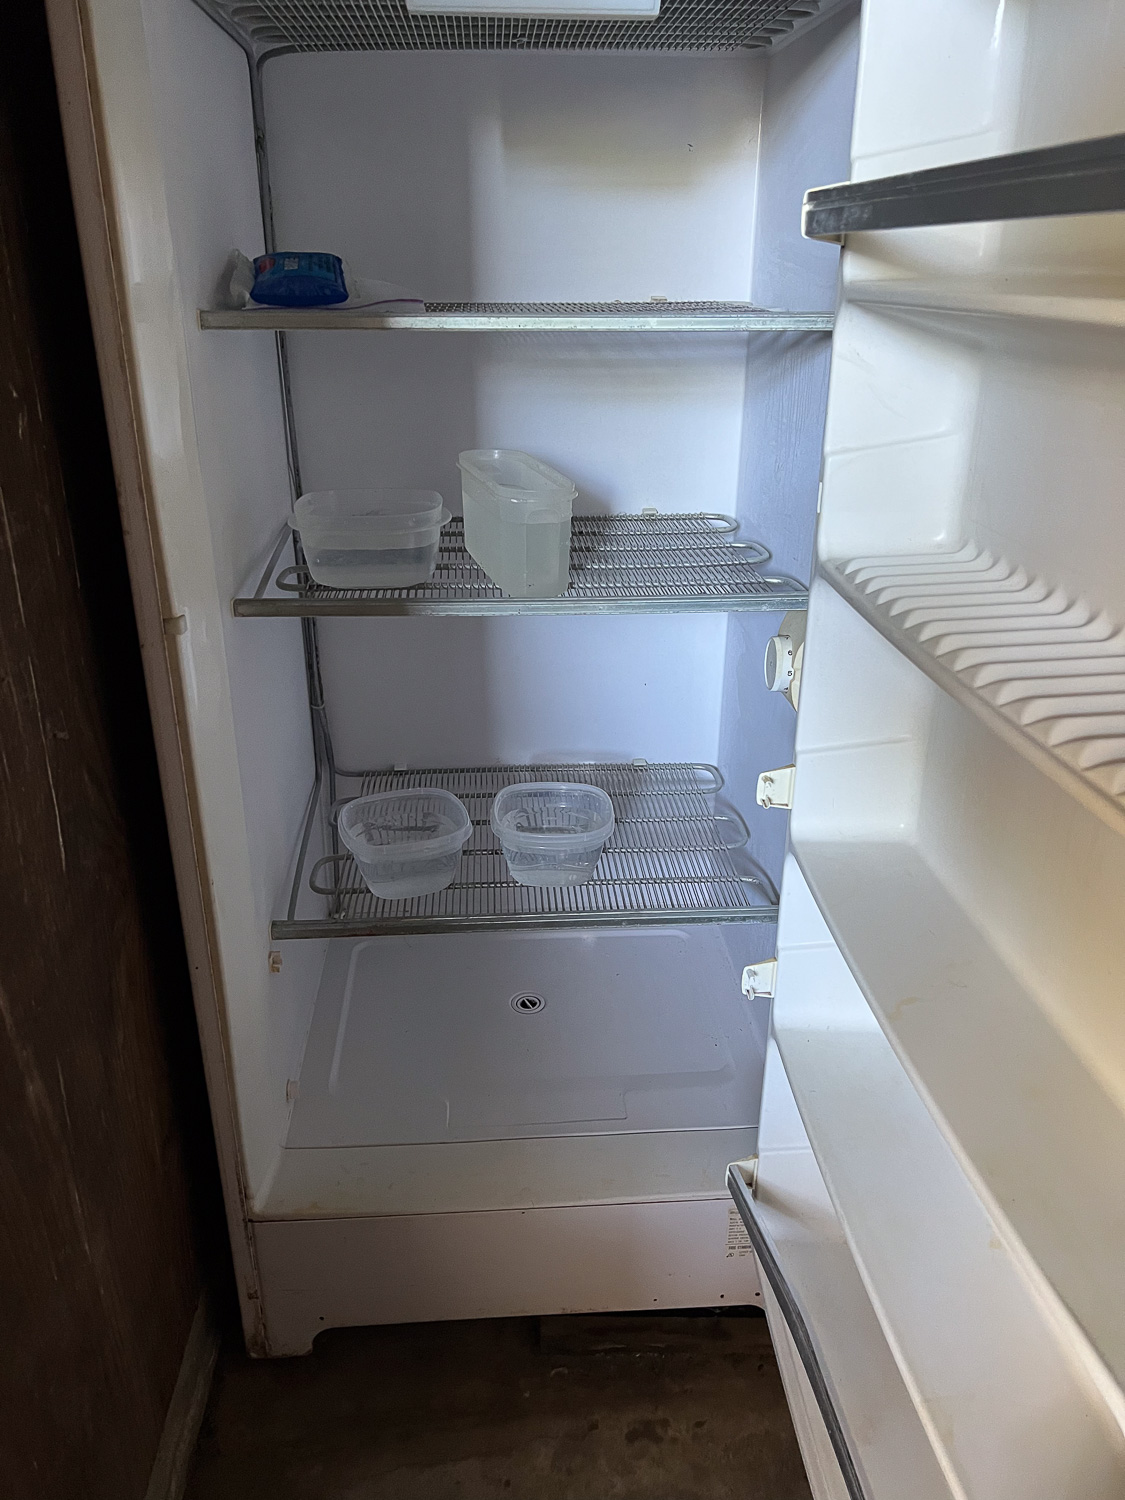
This seems like a random change. There are two freezers in the garage and last week we found them leaking. The power strip they were using failed. Needless to say that was a mess and that’s why we cooked a turkey 3 days ago and are still eating it. Fortunately there was a lot of random stuff in the freezers–yarn that had been there for years to kill any potential bugs, parts of butchered sheep that Dan hadn’t figured out how to cook and that had been there a long time, etc. So most was thrown away. I salvaged my pomegranate juice and the turkey which had not completely thawed. Today I cleaned the freezer while keeping an eye on the pot with the skulls. I put some containers of water in there to use for indigo dyeing tomorrow.
At this point, about 12:30, I came to the house for breakfast. I added yarn to those cosmos dyepots and worked on the computer while paying attention to them.
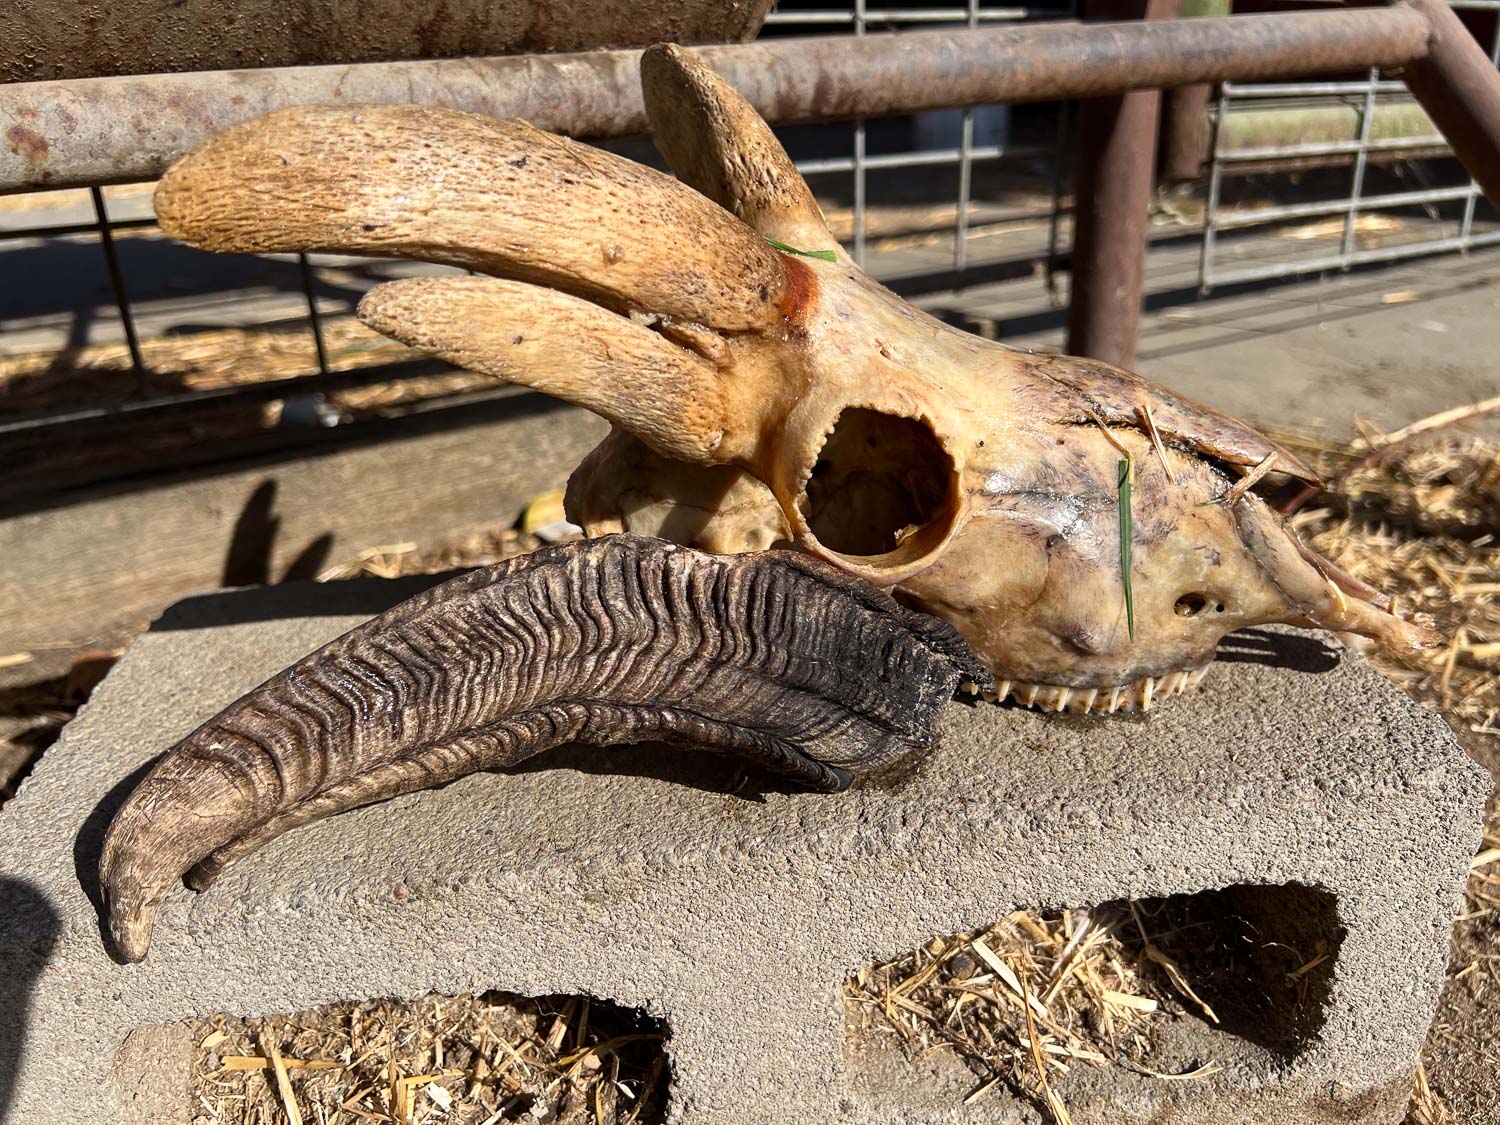
This afternoon I took the skulls out of the pot to see how well they were cleaned. I spent a lot of time picking pieces off. It is interesting to see what a fused horn ram skull is like. You can see the fusing of the outer part of the horn on this side.
There are three horns on this side.
I’ve been reading up on how to do a better job with the skulls. The next step after cleaning off the stuff that isn’t bone is to degrease. This is how I left the skulls–in Dawn liquid.
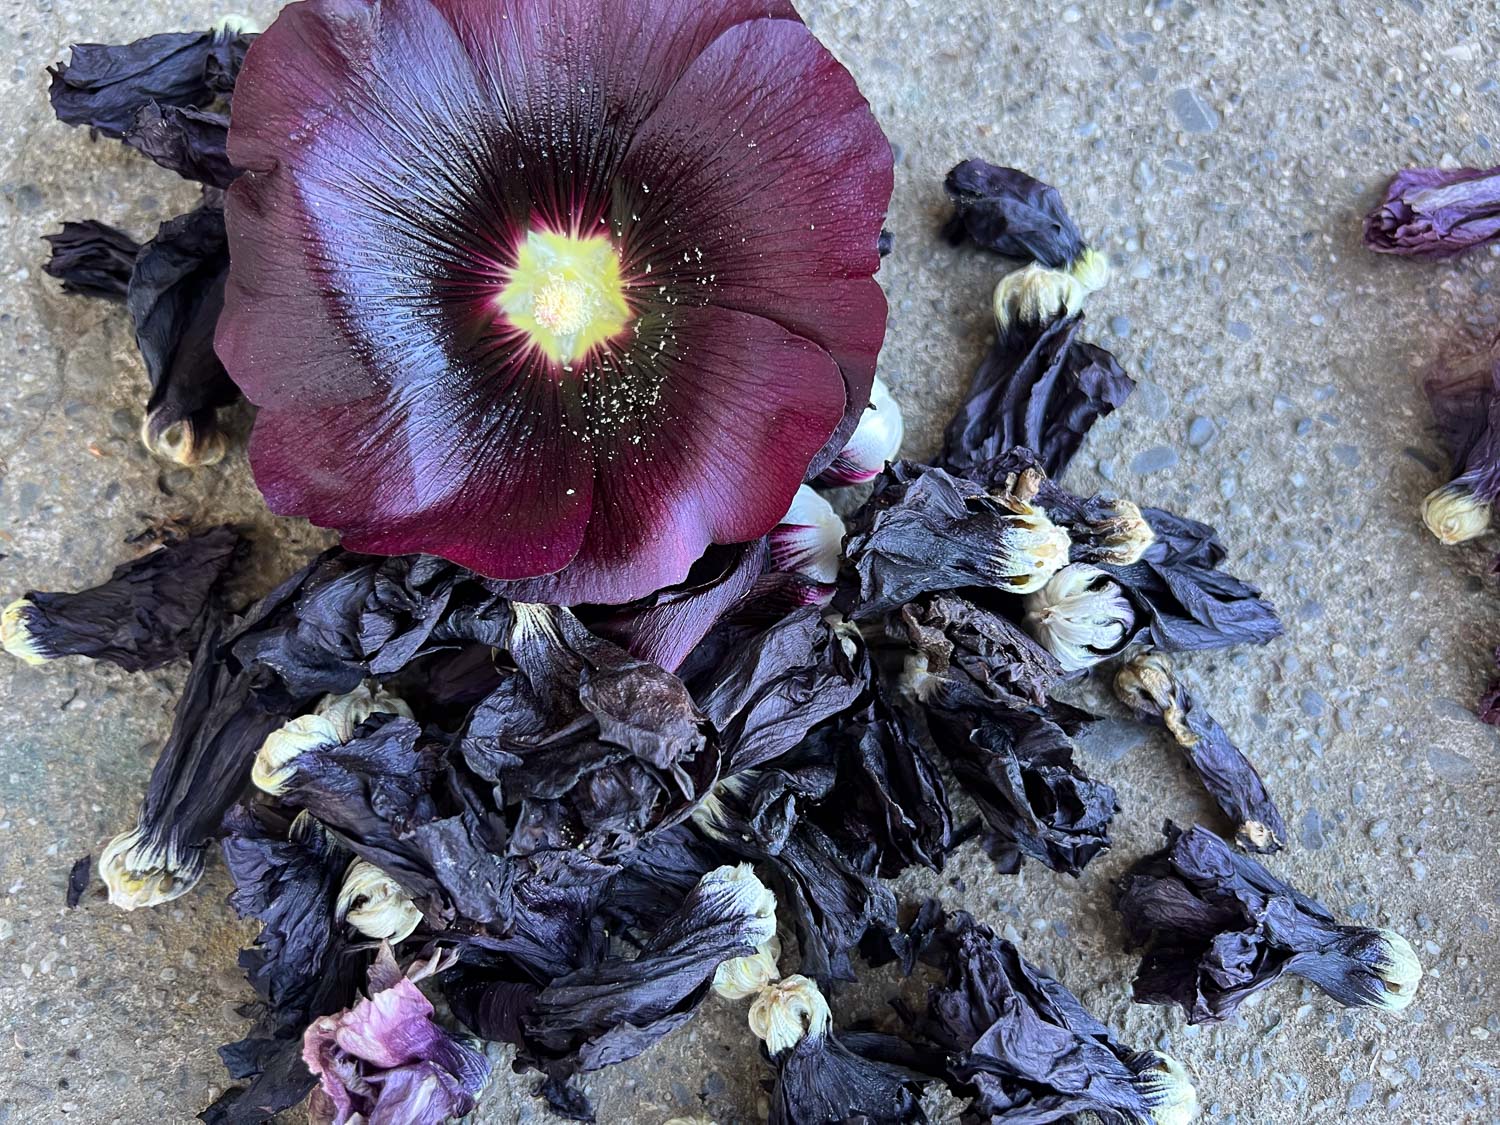
A few years ago I planted the very dark purple, almost black, Hollyhock, Alcea rosea ‘nigra’. By now I’ve lost track of which were the original plants. I don’t know if some flower stalks are from the same plant as previous years or if they are entirely new plants grown from the dropped seeds. I also don’t know if they hybridize. I decided to keep the flowers separate and see how they dyed my yarn.
I have plants with very dark flowers.
One is a bright pink.
Another is a red purple.
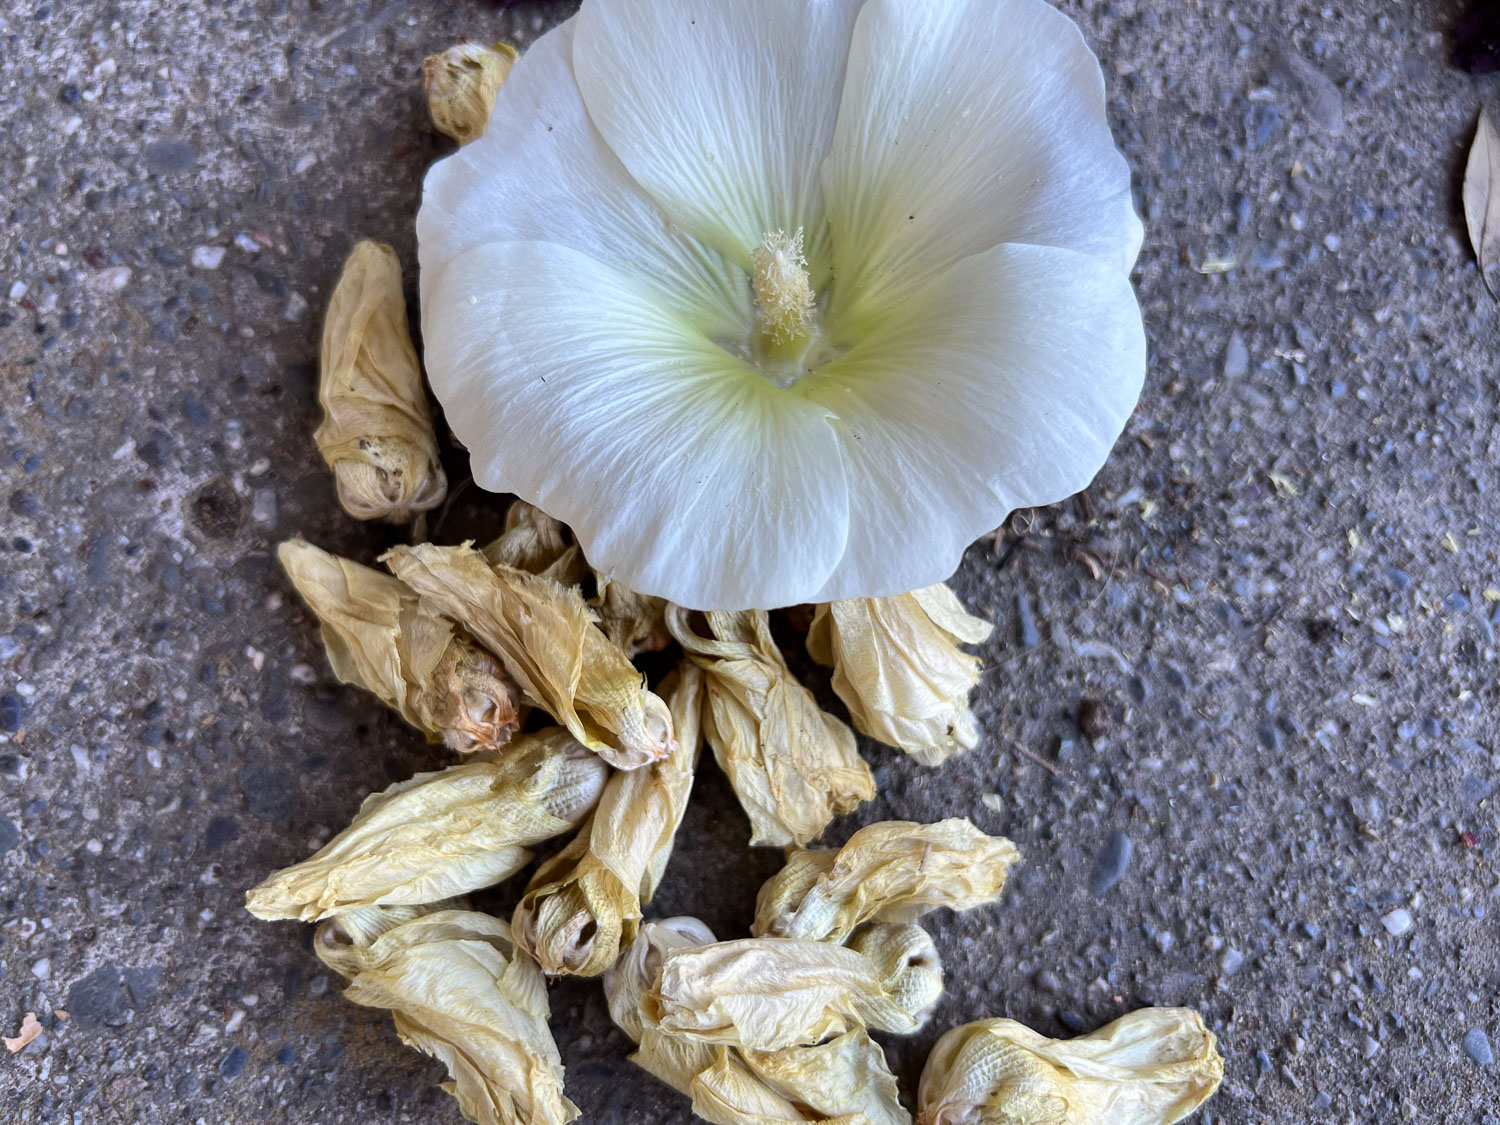
Here is the white one.
This is a comparison of them all side-by-side.
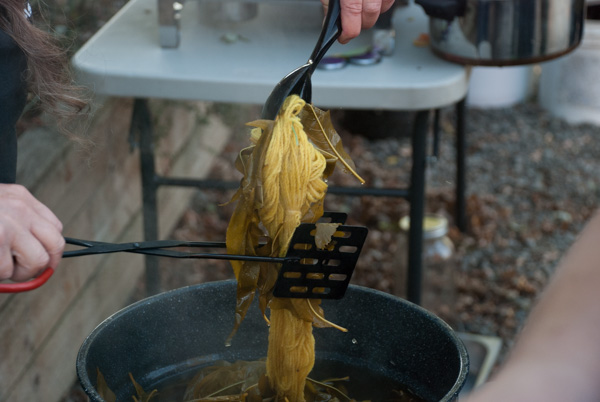
When dyeing I followed the instructions in Harvesting Color by Rebecca Burgess, using the proportion of 20 dried flowers to dye 2-1/2 ounces of yarn. I soaked the flowers overnight and then kept at the dye bath at 160-180 degrees for an hour before adding yarn.
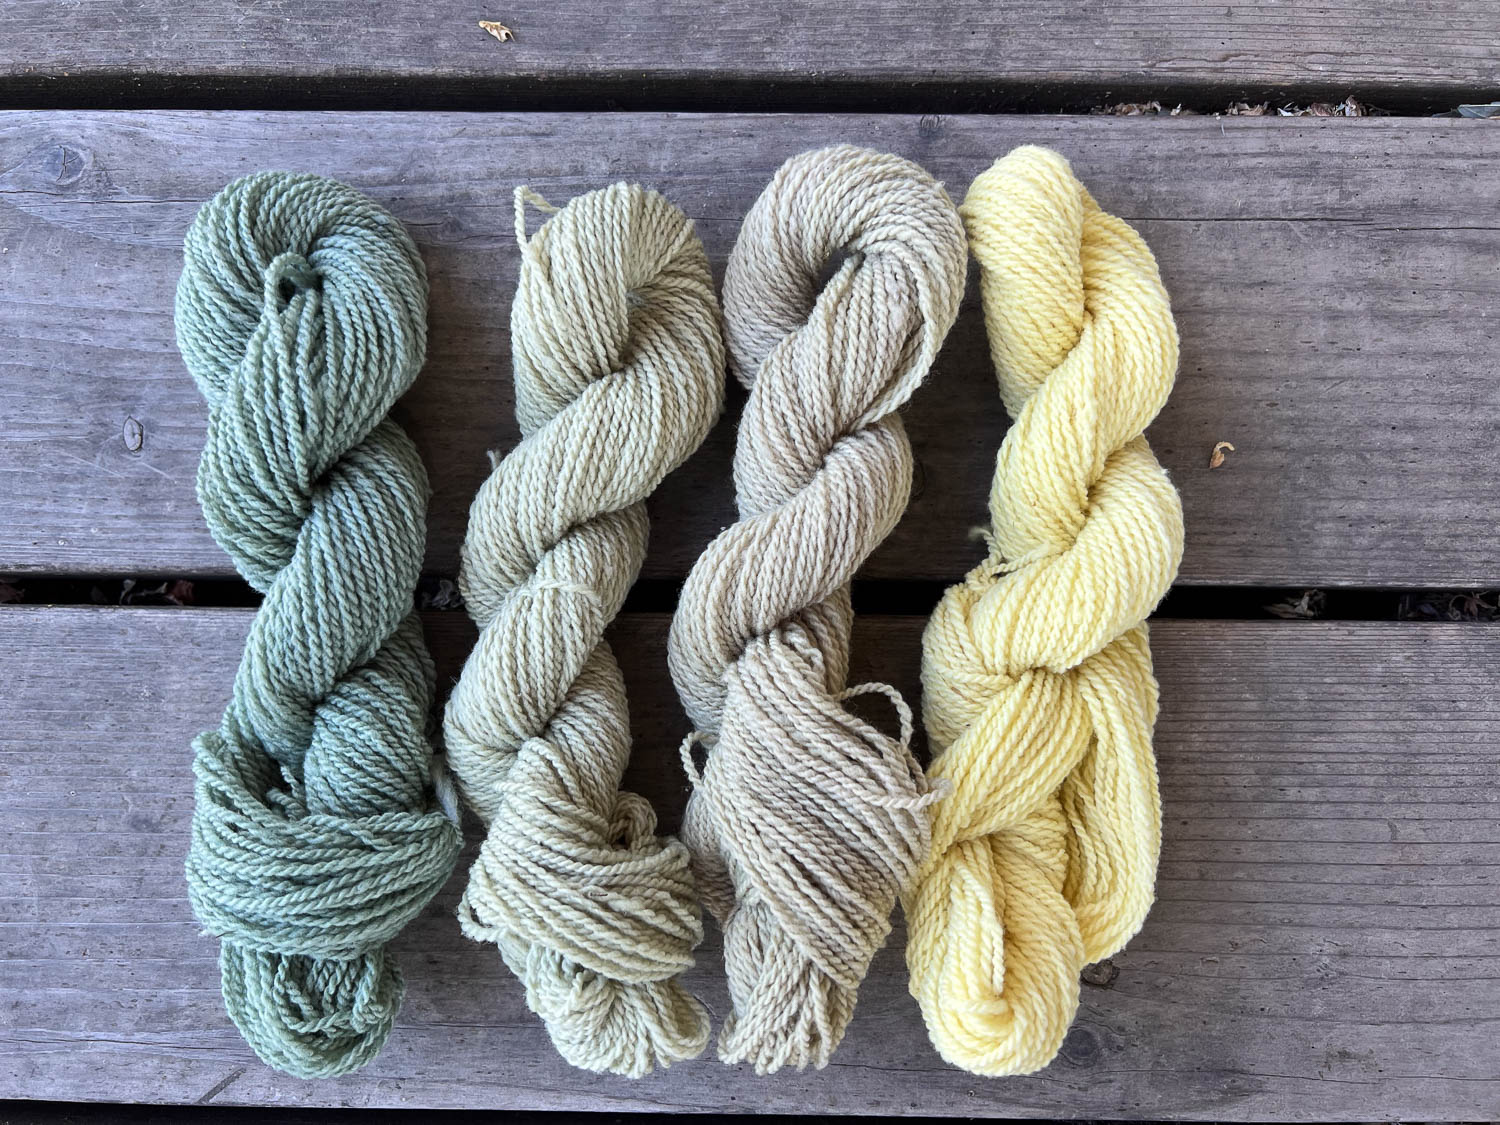
I think I kept the second and third in order here. The very dark flower yields green. I was surprised to see the lemon yellow color from the white flowers. These are one-ounce skeins of Timm Ranch yarn.
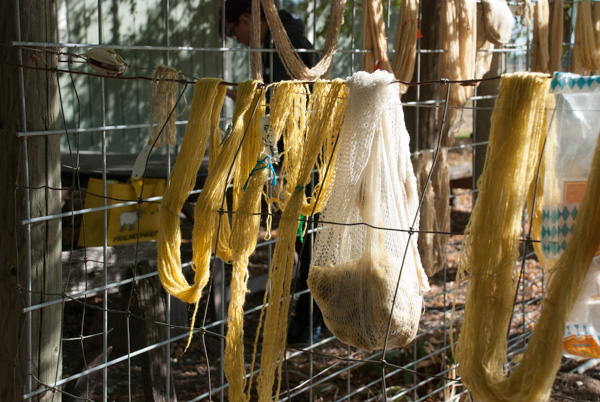
These are two-ounce skeins in new dye baths. Look at the photo below to see the slightly different shades resulting form the different batches of dye.
This photo has the two different batches side-by-side and you can see some subtle differences. I will have some of these yarns for sale on Saturday at the Fibershed Market at Fibershed’s Pt. Reyes Station Learning Center.
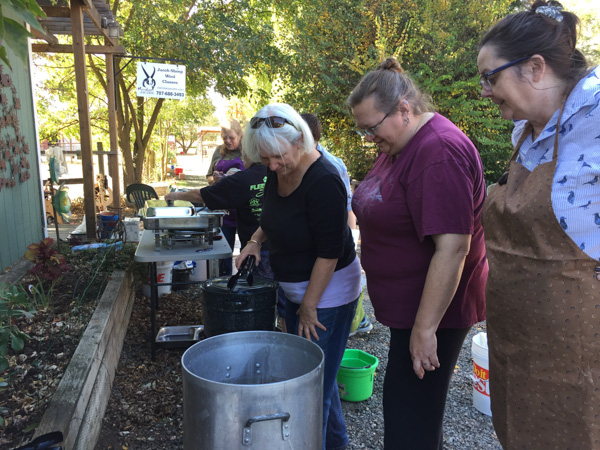
I like it when guilds want to hold their meetings at my place. I usually get to those meetings!
Today, DSG member, Jen had offered to set up several natural dye pots. We used several heat sources to heat the dyes. Jen brought all the dyestuffs along with plenty of pots and jars and we all dyed sample skeins of wool.
Pomegranate rinds.
Oak galls.
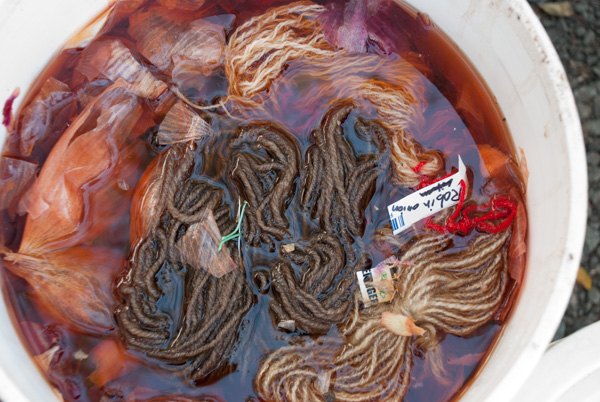
Onion skins.
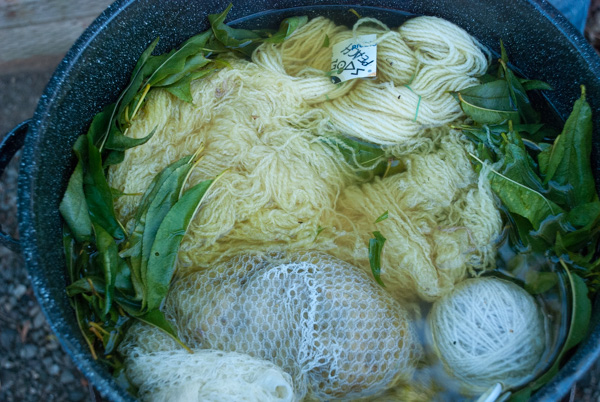
Peach leaves.
Black walnuts.
A watched pot…
While waiting for the pots to cook we chatted and spun. Jen spun brown cotton directly from the bolls that she grew herself.
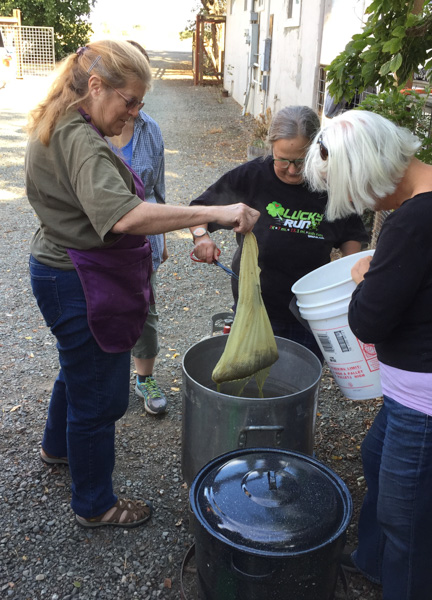
Time to check the yarn. This is madder root dye.
Removing fiber from one of the pots.
Jen had wood shavings from several exotic hardwoods and extracted the dye by soaking them in vodka. (She wondered about what the guy in the store thought when she asked for the strongest, cheapest vodka in the biggest quantity that he had.) We used one pot to dye with all five of those extracts by using half-gallon jars in the pot.
Look at the color of the Red Heart!
Here is yarn dyed with peach leaves coming out of the pot.
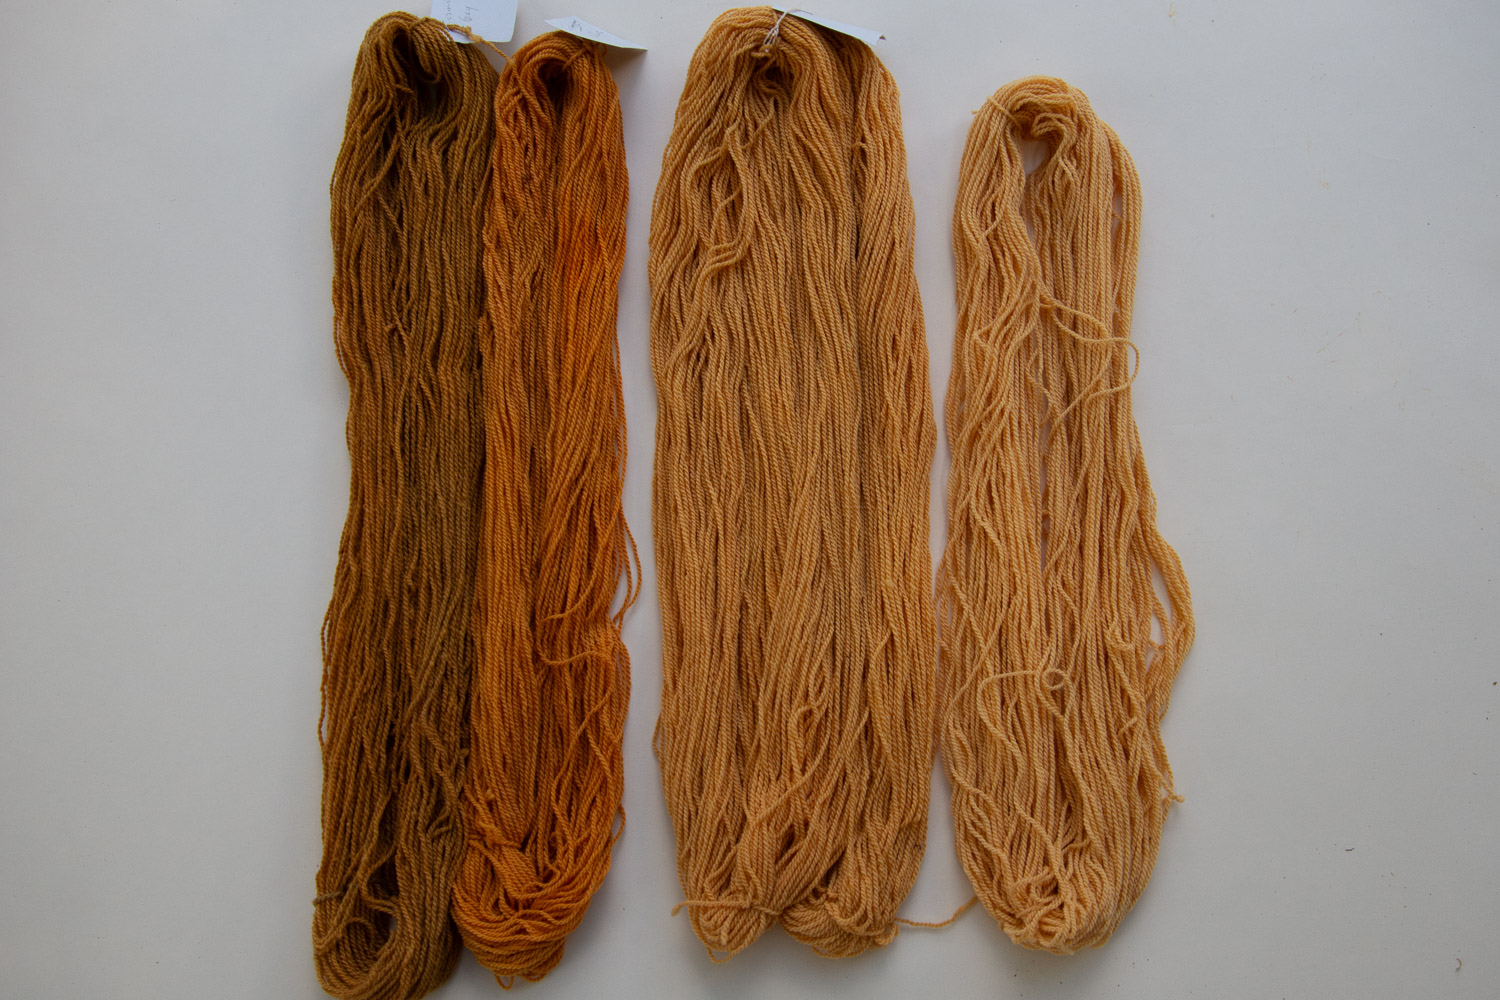
These are the yarn that I dyed. From left to right: oak galls, black walnut, Red Heart wood, peach leaves, onion skins, pomegranate.
The dogs were allowed to join us after awhile. Ginny, ever hopeful that someone will throw a toy for her.
Thanks so much to Jen for organizing this and bringing all the equipment and dye. And thanks to the Davis Spinners Guild for being such a fun group!
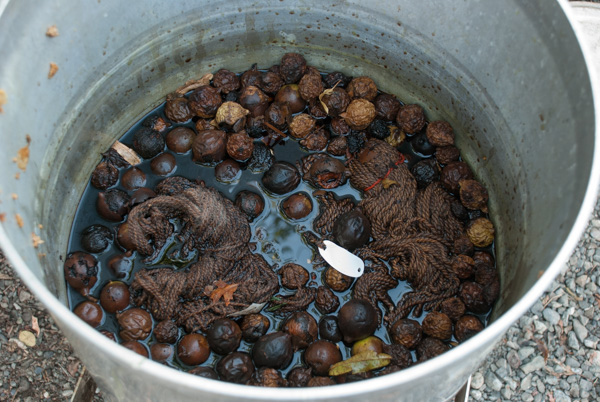
Here is one dye pot that won’t quit. I guess I didn’t actually take a photo of the dye pot. But here is a post that has a dye pot full of black walnuts.
I had been soaking black walnuts in a 5-gallon bucket for a few weeks in anticipation of getting a shipment of Timm Ranch yarn here. It turns out that due to medical issues at the mill I won’t be seeing this yarn any time soon. But a Fibershed event was coming up and I wanted a naturally dyed cloth to cover my table. I decided to use the black walnut, but I didn’t want to waste any dye so I thought I dye some yarn too.
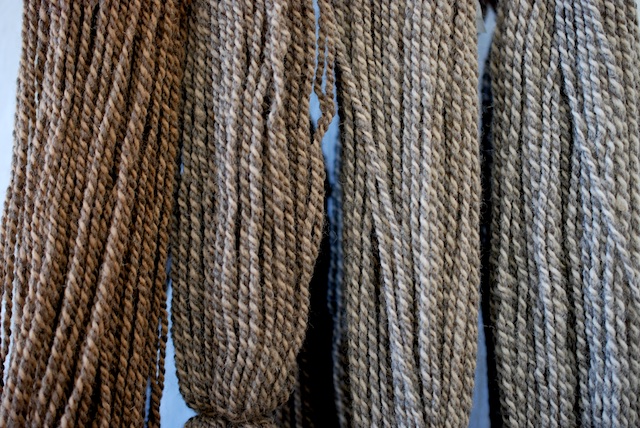
This is 5 batches of yarn out of the same dye pot. The first four skeins on the top are from the first batch. The next four are from the second and I crammed the tablecloth in that pot too. The rest of that row is from the third batch using the same dye. It looked like there was still plenty of dye in the pot so I did two more batches that are on the bottom row. They are lighter but still colored. Here is another view. It is interesting (at least to me) that the fifth batch appears to have slightly more color than the fourth. It is a different yarn. The first four batches included Anderson Ranch yarn, white Jacob, and gray and white Jacob. The last batch was Columbia yarn that hasn’t been sold and I’ll use in a project now.
This is the white Jacob from the first four batches…
…and this is the gray and white Jacob.
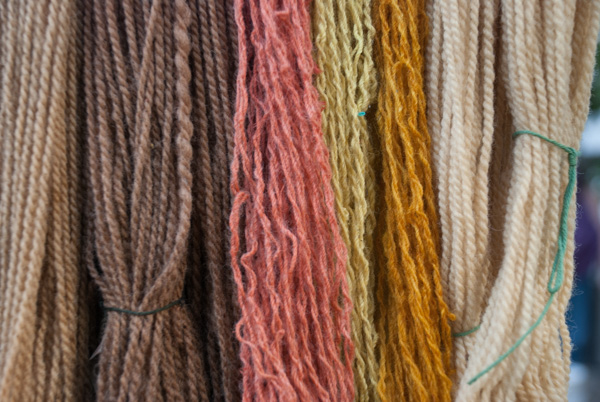
I was photographing the skeins outside and out of the corner of my eye I kept seeing this other brilliant color.
Last week my long-time friend, Irene (owner of Cotton Clouds) visited with new friend, Rocio. Rocio is an expert natural dyer and she showed the rest of us how to dye with cochineal. We started in the theater (aka garage) to watch a PowerPoint presentation about cochineal.Cochineal is an insect that lives on a particular species of cactus. It is harvested and dried.The red color becomes obvious after the dried insects are ground.
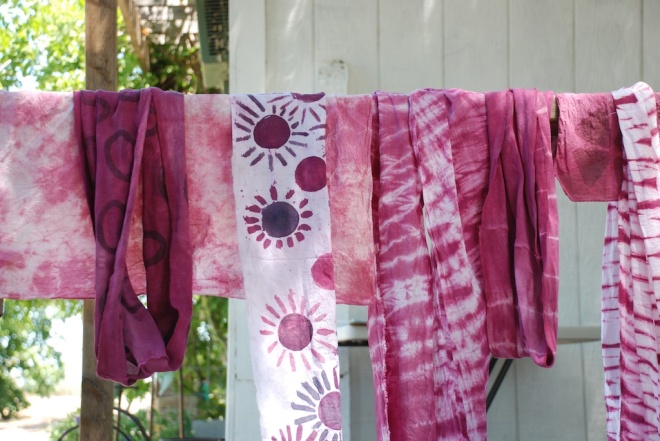
These are some of the scarves that Rocio has dyed.
Dyeing with cochineal is a multi-step process and those steps differ depending on whether you are dyeing protein fiber (wool, silk) or cellulose fiber (cotton). Participants were able to dye both.
Preparing mordant bath.
Squeezing out fabric.
Mordanted scarves and sample pieces hanging to dry.
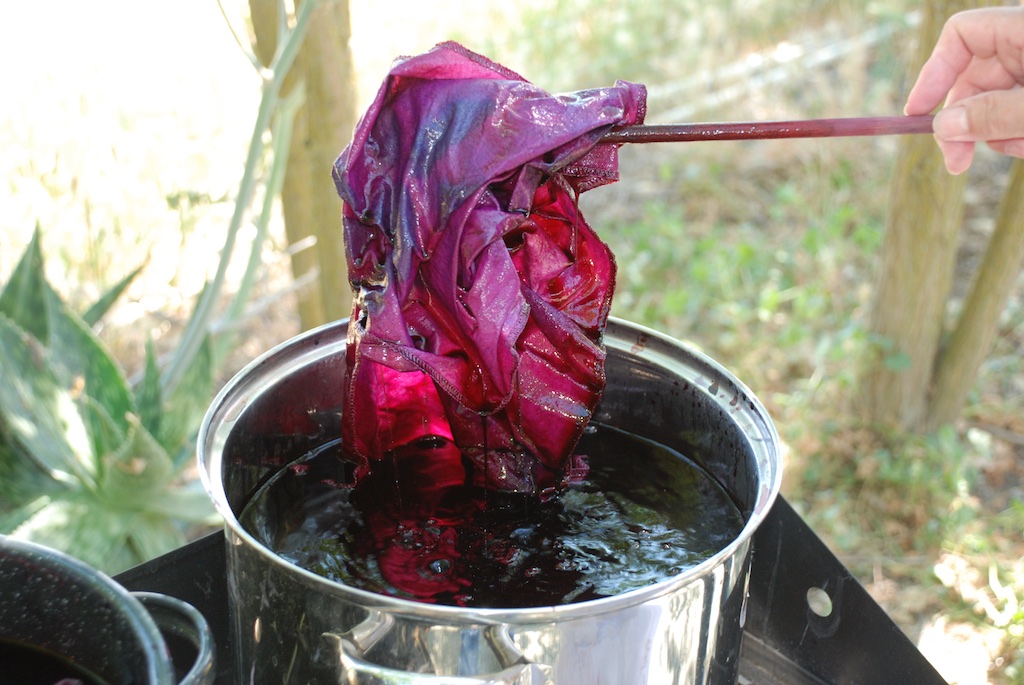
Adding ground cochineal to the pot.
Stirring one of three pots we had going. These pots simmered while we moved on to the next step.
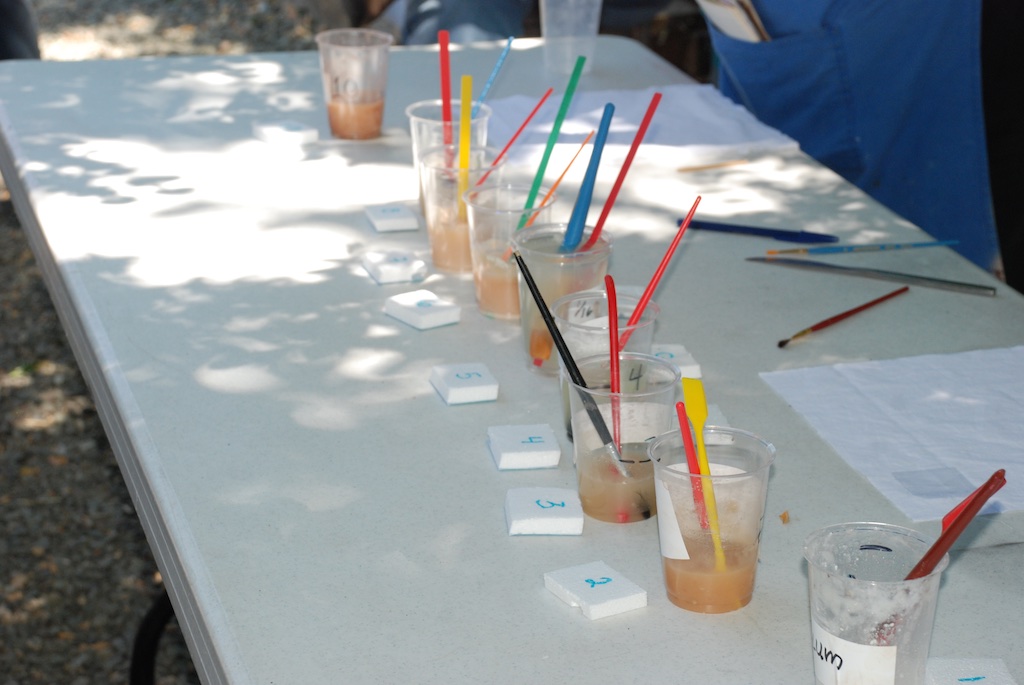
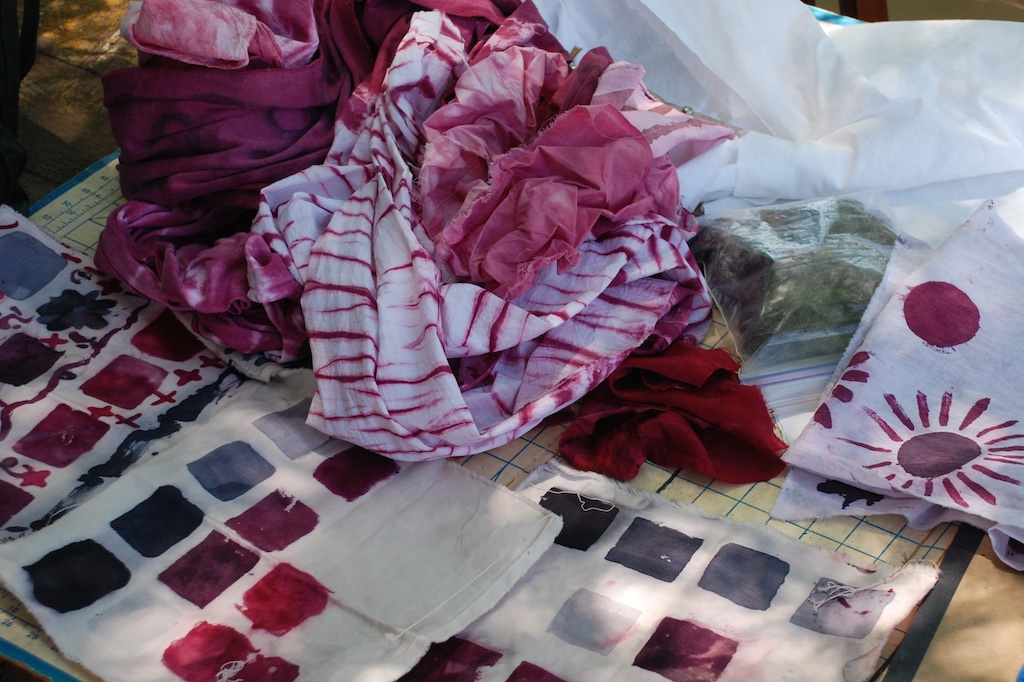
Rocio showed us how to use varying concentrations of mordant solutions to create different shades of color. From two “mother” solutions, one with iron and one with alum, we ended up with nine different concentrations.
When stamped on fabric you get those shades seen in the squares.
When the cochineal pots were ready they needed to be strained.
Fabric was dyed…
…and rinsed.
Leftover dye was saved and now is in my freezer waiting until I have time to use it.
Rocio and Irene with some of the scarves dyed that day.
Since I was the hostess I didn’t have time to dye scarves but I did make a sample using the different mordant concentrations. Rocio says that if I wash this in a wheat bran solution the gray areas will turn white. I need to try that.Happy dyers at the end of the day. Oh..dogs were there too. Look at Rusty’s blog for photos.


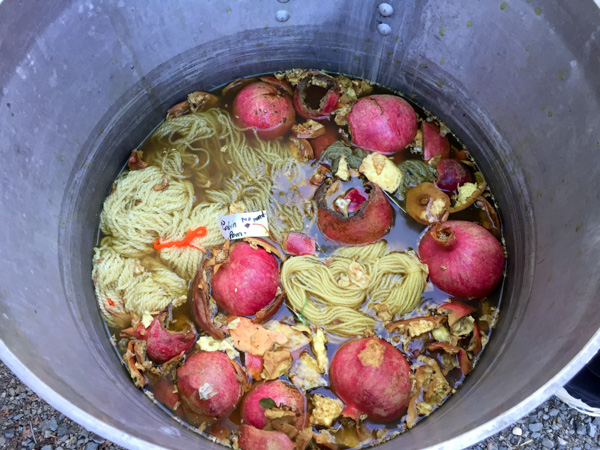 Pomegranate rinds.
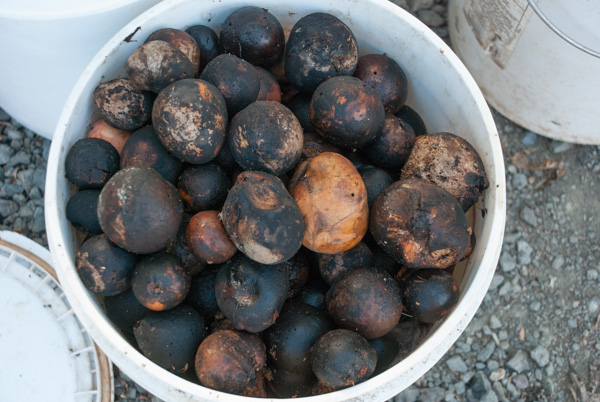

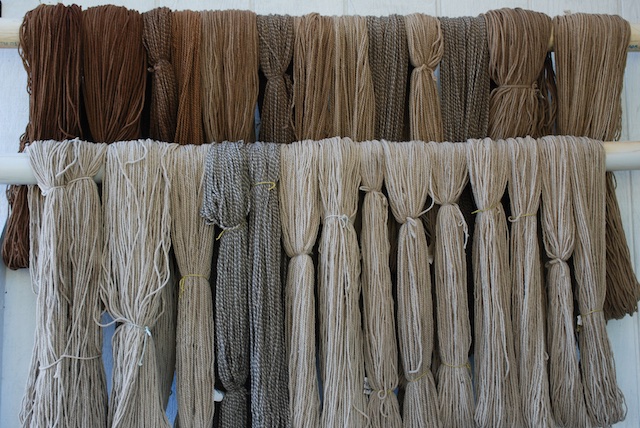 This is 5 batches of yarn out of the same dye pot. The first four skeins on the top are from the first batch. The next four are from the second and I crammed the tablecloth in that pot too. The rest of that row is from the third batch using the same dye. It looked like there was still plenty of dye in the pot so I did two more batches that are on the bottom row. They are lighter but still colored.
 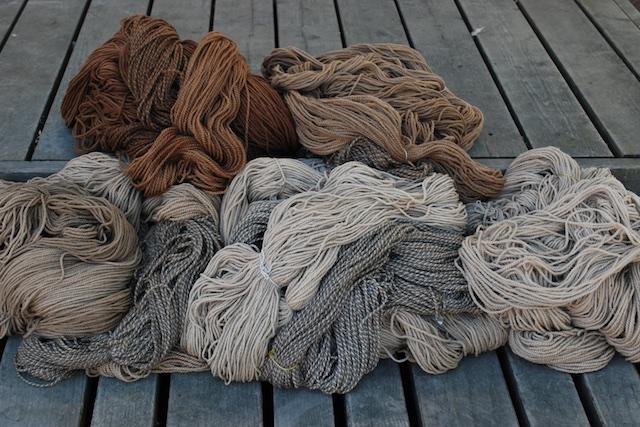 Here is another view. It is interesting (at least to me) that the fifth batch appears to have slightly more color than the fourth. It is a different yarn. The first four batches included
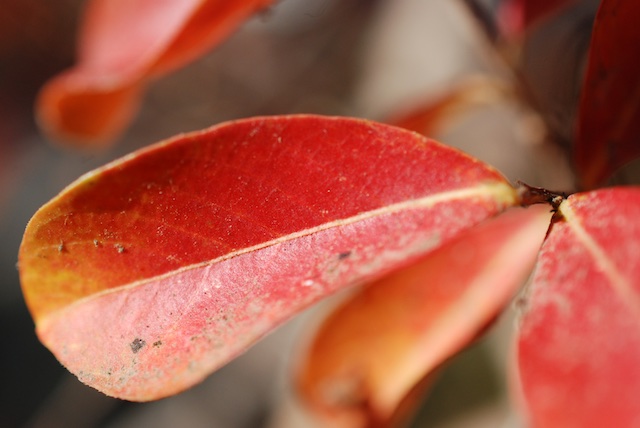 I was photographing the skeins outside and out of the corner of my eye I kept seeing this other brilliant color.
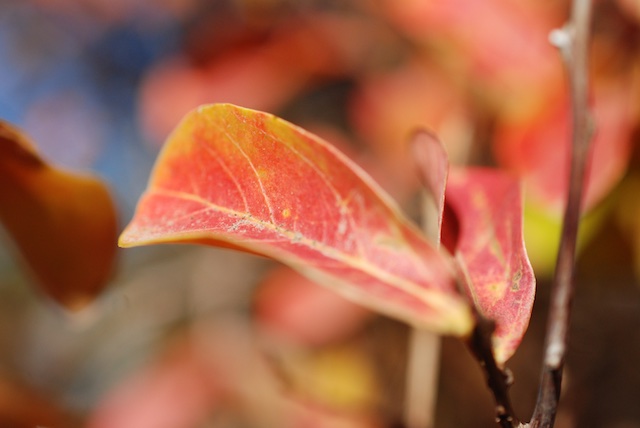
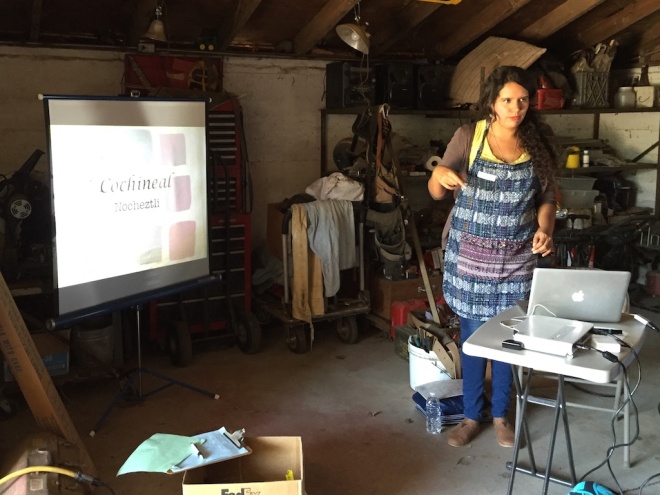 We started in the theater (aka garage) to watch a PowerPoint presentation about cochineal.