Every year I choose some sheep to coat–it’s usually those that are entered at a show. This year we took a trailer-full to Black Sheep Gathering (photos of the show). I coated most of those sheep because those who aren’t coated end up with straw buried in the fleeces. I kept coats on most of those afterwards so now there are nine sheep with coats.
Why coat? 1. The fleeces are free of VM (vegetable matter) which could be stickers, seed heads, etc from the pasture, but our pasture doesn’t have any of those. Alfalfa is our most likely VM, and is great to spin a fleece that is completely free of that. 2. The colored wool isn’t sunbleached. Why don’t I like coats? 1. I would rather see the sheep in the field without coats. 2. Coats need changing as the wool grows, at least four times each year, and maybe more. 3. Coats need repair, especially when worn by horned sheep. 4. Coats can cause felting or other damage to fleece if they aren’t changed at the right time. 5. At this time of year with 6-1/2 weeks to go before shearing I’m running out of the larger sizes. I changed coats last week and took photos of some.
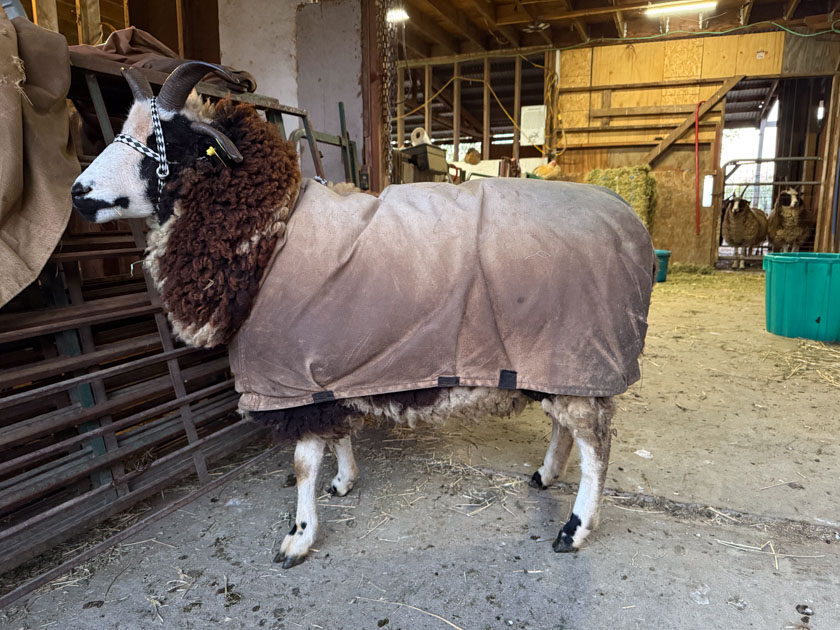
This is Lily wearing a coat that looks snug. I changed this one but didn’t get a photo.
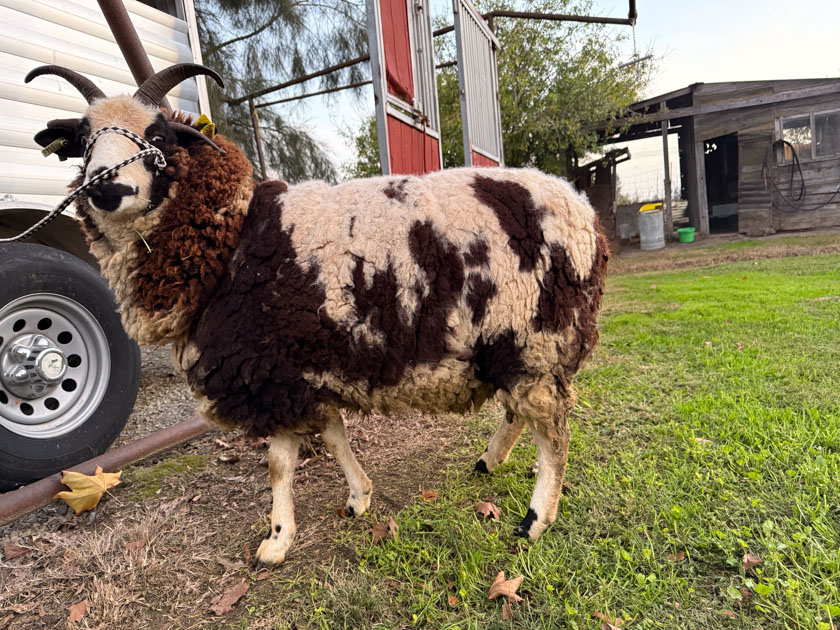
This is how Breeze looks with the coat removed. There is a bit of sun-bleaching because she didn’t wear the coat all year, but you can tell a difference from the neck wool that isn’t coated at all.
Breeze’s fleece.
Breeze with a larger coat.
I didn’t get a photo of Zoe, but here is one of her fleece. Gorgeous!
There was a lot I wanted to accomplish this morning before people came for a dye day. So when I woke up at 5-something I got up. I went to the barn for chores.
The sunset really was this intense this morning.
Every so often the Wednesday Weavers meet in person instead of just on Zoom. I know this isn’t Wednesday, but it was the day that several people could come for dyeing. I had planned to wind some warps to dye, but ran out of time after catching up with email and computer stuff and hemming Year to Remember blankets and photographing them.
This is a custom blanket for the birthday year and place of the recipient. Each color represents a 10 degree range of the high temperature for the day and I weave two threads for each 365 days of the year starting with January. This customer chose her colors.
These are three more blankets on that same warp. In this case, they represent 2023 in Vacaville and show how the stripe pattern will be the same for a given year and location, but the colors can be completely different. These will be listed on the website when I have time.
This is one of the three blankets in a “lifestyle” photo.
I think seven people came for Dye Day. I don’t do this for this group as an official class. They have all become friends and I can provide the space and materials to have a fun day. Fortunately we avoided rain today and even had a bit of sun at times. Usually we choose to do either protein fibers or cellulose because they use two different dyes and procedures. This time I got it all out.
I ended up dyeing some chenille warps that I found in a bag when I cleaned out the dye corner a month ago. These are four 7-yard warps of 4 to 5″ wide each. I think I must have wound these years ago to use up white and light colored yarns that I don’t usually use for my chenille scares. The narrow width means that I intended to wind solid colors to mix with these painted warps when they go on the loom.
After we finished I finally came to the house to sit awhile and immediately got a text from Dan to say that there was a sheep with a coat problem and the other sheep were all panicked. I found April with the coat neck behind one front leg with the rest of it wrapping around underneath. She couldn’t get her foot away from the part on the ground so obviously wasn’t walking correctly. The sheep would panic and run away from her. But she wanted to be with the rest, so she’d follow.
That is one reason that I am not a big fan of coats, but look at the fleece underneath. We are only three days away from shearing and I wasn’t about to risk this fleece at this point. I had changed coats a few weeks ago. The point of changing coats is to go up a size so that the fleece doesn’t cot (felt on the sheep). But I guess this one had a leg strap that was too loose and eventually April got tangled up in it.
I found another coat of the same size. I wanted to tighten up the leg straps. Here are the tools.
The solution is to tuck a small rock under the coat and hold it in place with an elastrator band.
Now the coat fits just right.
The day isn’t over. I need to do chores right away and then I’m presenting a slide show to a weavers guild over Zoom. Got to go.
I can’t think of a title for this post. Unplanned Tasks. Distracted by Other Stuff. Digging up Bones. What I did instead of weave or wrap presents. Sheep Skulls.
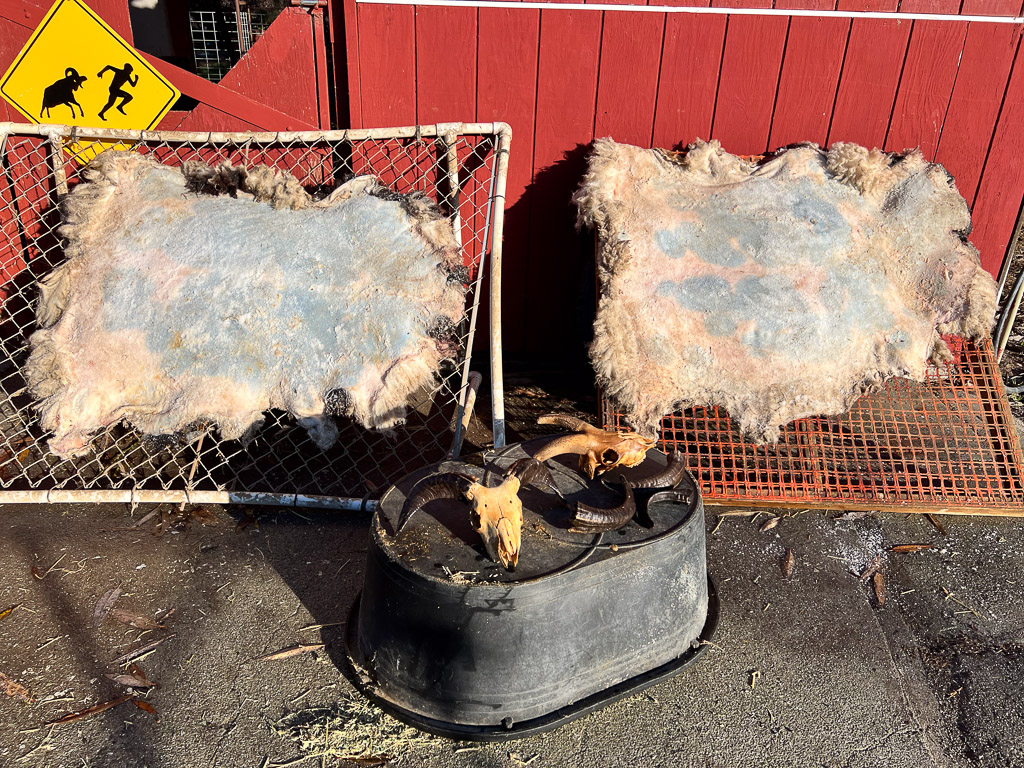
This is from two days ago. I remembered these sheepskins in the barn. We had three rams harvested in early December. I salted the hides and they cured like they are supposed to. But then I forgot about them. Last week we had a significant amount of rain and dampness for several days. The hides were in the barn and weren’t rained on, but the salt absorbs moisture from the air. These were very wet, including puddles of water on the skin where it wasn’t well supported. I took them outside and put them on racks that I tilted to help water drain. I knew if I put them back in the barn they’d be wet again overnight. I brought them to the house. Fortunately I have “the weaving house”, another house on the property that I have taken over for my projects. I spread them out there, and turned on the heater and the ceiling fan. I was going to box them and ship them yesterday, but decided that they weren’t quite dry enough to pack into a box since over the Christmas holiday there would be a delay before the box was open. I spread them out in the house again, but moved them into my sewing room (second bedroom) because my son and DIL just arrived from Idaho with their cats and dogs. They’ll be here a week. I’ll ship these hides the day after Christmas. The skulls on the upside-down tub are another story (below).
That evening I found a scrap of a sheep coat on the barn floor and knew that there must be more of the coat somewhere–hopefully not entangling a sheep with a fence or branch. I found SilverSun, the same lamb who featured in this post from December 6 with the same problem. The coat was around her middle so tight that it was difficult to get her front leg back through even bent at the knee. Eventually I got her out of the coat.
This one is not going on the repair pile. It’s not worth it.
I debated leaving her without a coat, but with only four weeks until shearing I hate to do that. None of the sheep are coated all year but she has worn a coat for several months.
I put this coat on her. I think it is a little snug and I hope that I don’t regret that, but I don’t want to risk her getting stuck in one again.
The skulls on the tub in the first photo are from the many skulls in the barn waiting for me to do something with them. I hosed those off and was letting them dry. Yesterday I decided to soak them in a peroxide solution to see if they would lighten up. That led to thinking about all the other skulls around. I have an email from someone who wants to find out about skulls AS IS without me trying to do all the extra work. I needed to figure out what I have and take photos.
I didn’t go into detail but this post of August 27 says that I found the ram, Townes, dead two days prior. There is a photo of him (alive). To be realistic about the farm as a business I need to try a salvage what I can from the sheep. A skull with four horns that size has real value–if it’s cured and cleaned properly. By the time I found Townes, it was too late to take his hide. We didn’t take the head at that time because it was so swollen I wondered if it would explode if I used a knife or saw. We buried the whole ram. I tied baling twine around a horn so I could keep track of where to dig later. I don’t have enough experience to know for sure how long bones should be in the dirt. I’m sure conditions of heat, moisture, and type of soil all have an effect. And this was more than bones–it was the whole sheep with skin and wool all intact. So that was four months ago.
Here is what the skull looks like after hosing it off. I was able to pull the outer horn off the bone. Now I have to figure out how best to thoroughly clean the skull. I have saved several recommendations. I think the first step is to make sure there is no more tissue–that may mean simmering (but paying close enough attention so it doesn’t come to a boil) for awhile first. That’s always challenging because I get distracted by doing other things. Even with a time set I may not pay close enough attention. This is the kind of thing that I’d be simmering outside and not on the kitchen stove. If that is successful, then there is degreasing in soapy water, then soaking in a peroxide solution. All of it will have to wait at least a week.
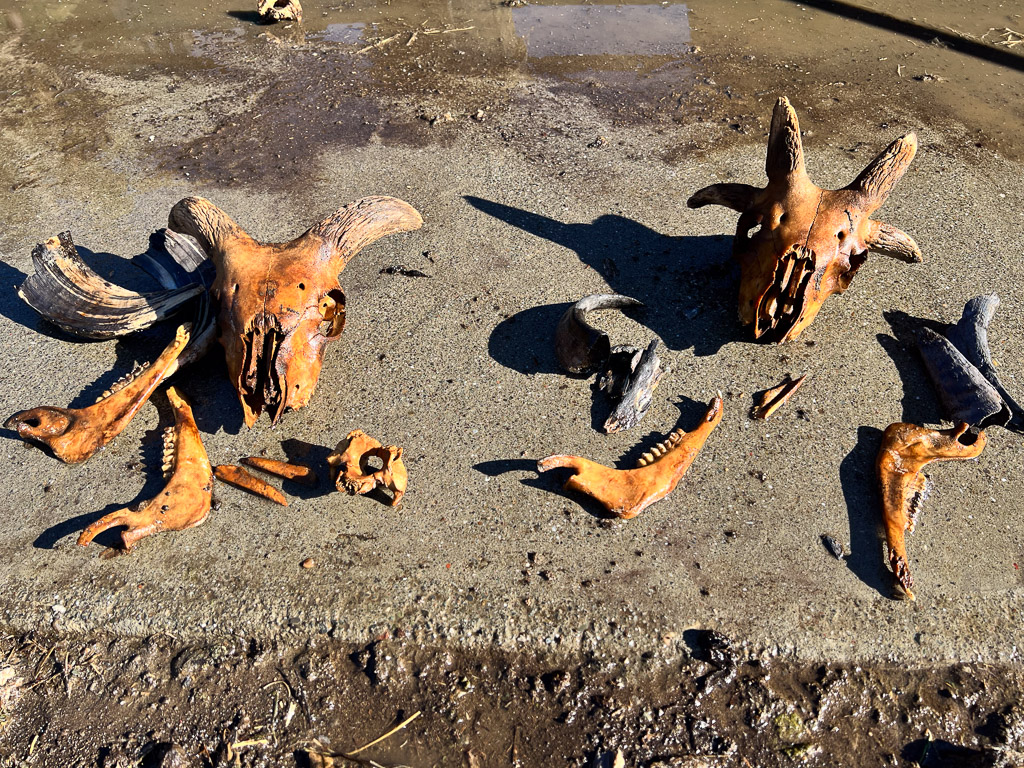
Then I decided to dig up the rest of the skulls I’d buried after harvest days throughout the summer. Many may have been in the ground too long. At least I should have pulled off the outer horns because they deteriorate faster than the skull. There is still tissue on some of these especially at the base of the skull. Some of the bones on the front of the face are missing. This is why I may sell them AS IS if someone else wants to tackle them. I feel like this is something that I should be able to do, but there is always something else I want to do too.
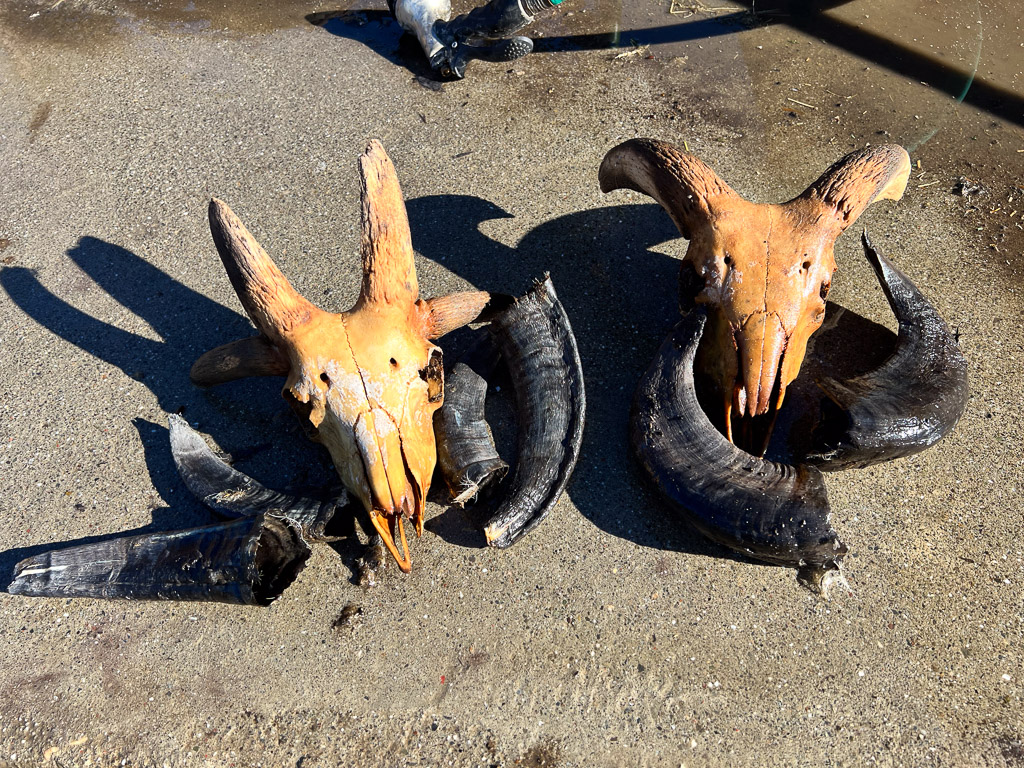
These two aren’t bad and I think I’ll experiment to see how well I can clean them.
Here are two more that are in worse condition.
I have many more in the barn from earlier in the year and there are still a few out back that I did not bury. I guess I should check on those.
I started to name this Dress-Up Day for Sheep, but that is misleading and a little too cute. The title describes what I did yesterday.
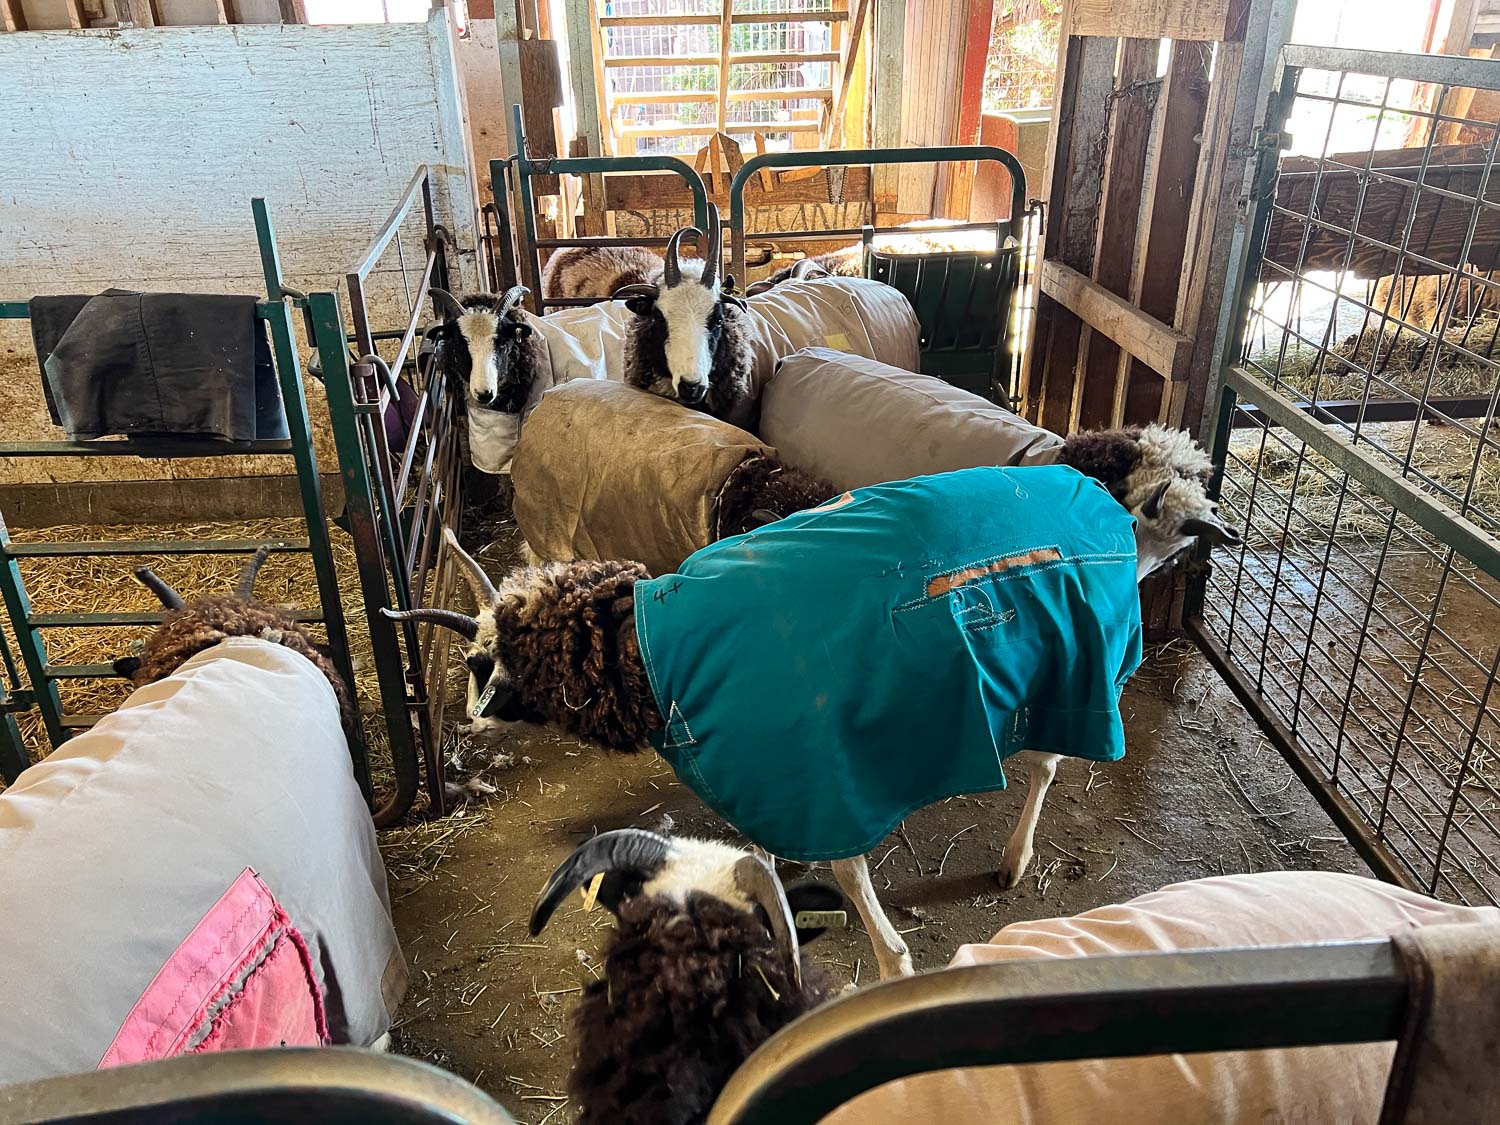
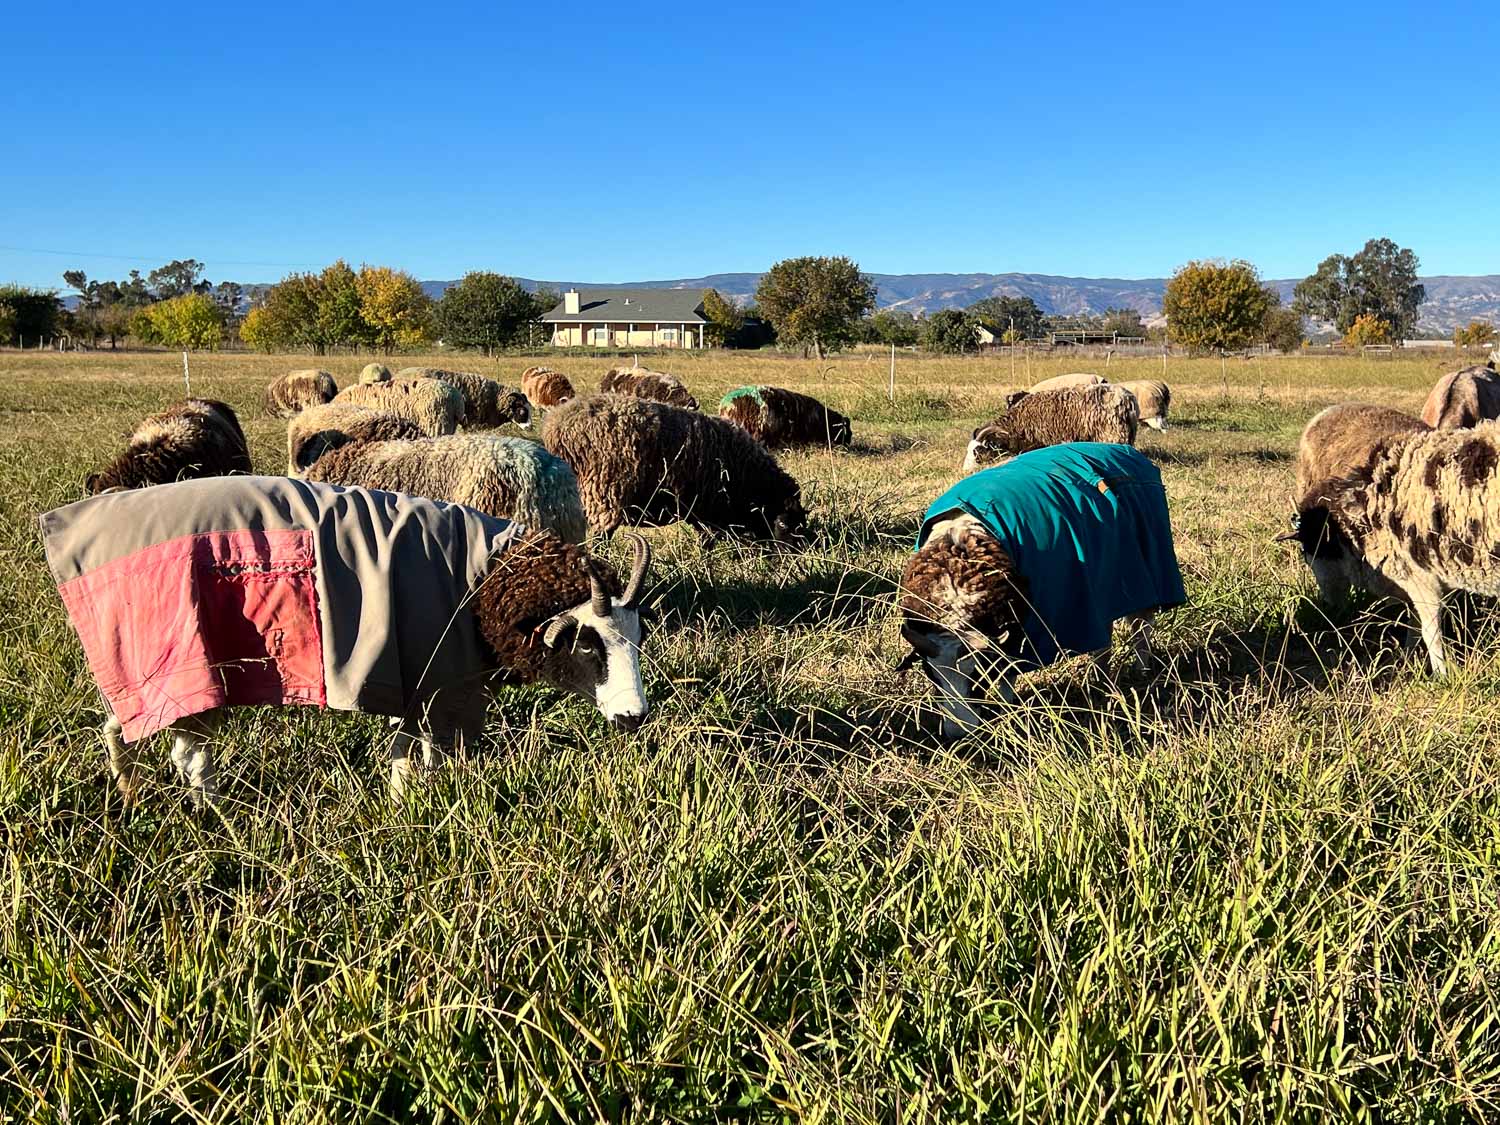
I caught 7 of the 8 sheep that have coats. A coated fleece is often prized because it is free of VM (vegetable matter). In my situation that is mostly hay and grass seeds. My coated fleeces may not be as wonderful as some because I don’t usually coat the sheep from shearing day on. Most of these coats were put on either when the sheep traveled to Black Sheep Gathering in June or went to State Fair in July and Lambtown in October. So they may have been coated only part of the year. But that is less VM than if there was no coat. There was also the advantage that those sheep with coats won’t have as much marking crayon from the rams in their fleeces (note the green rear of the sheep on the right).
Why don’t I coat all of my sheep? 1. I’d rather see spotted sheep, not coats. 2. It’s a lot of work. Coats need to be changed periodically through the year as the wool grows and they get too tight. Then they will cause felting and may ruin the fleece. We may go through 4 coat changes in a year, especially for a younger ewe who is not only growing more wool, but she is getting larger too. If I put on a coat that is too large I risk having sheep get a leg through the neck hole or slip out of one of the back leg straps. Then you have a sheep that can be tangled up and/or cause damage to the coat. 3. It’s a lot of work to repair the coats that are torn. Horned sheep are tougher on the coats than those without horns. 4. Eventually coats need washing, especially before I take them to my sewing machine for repair.
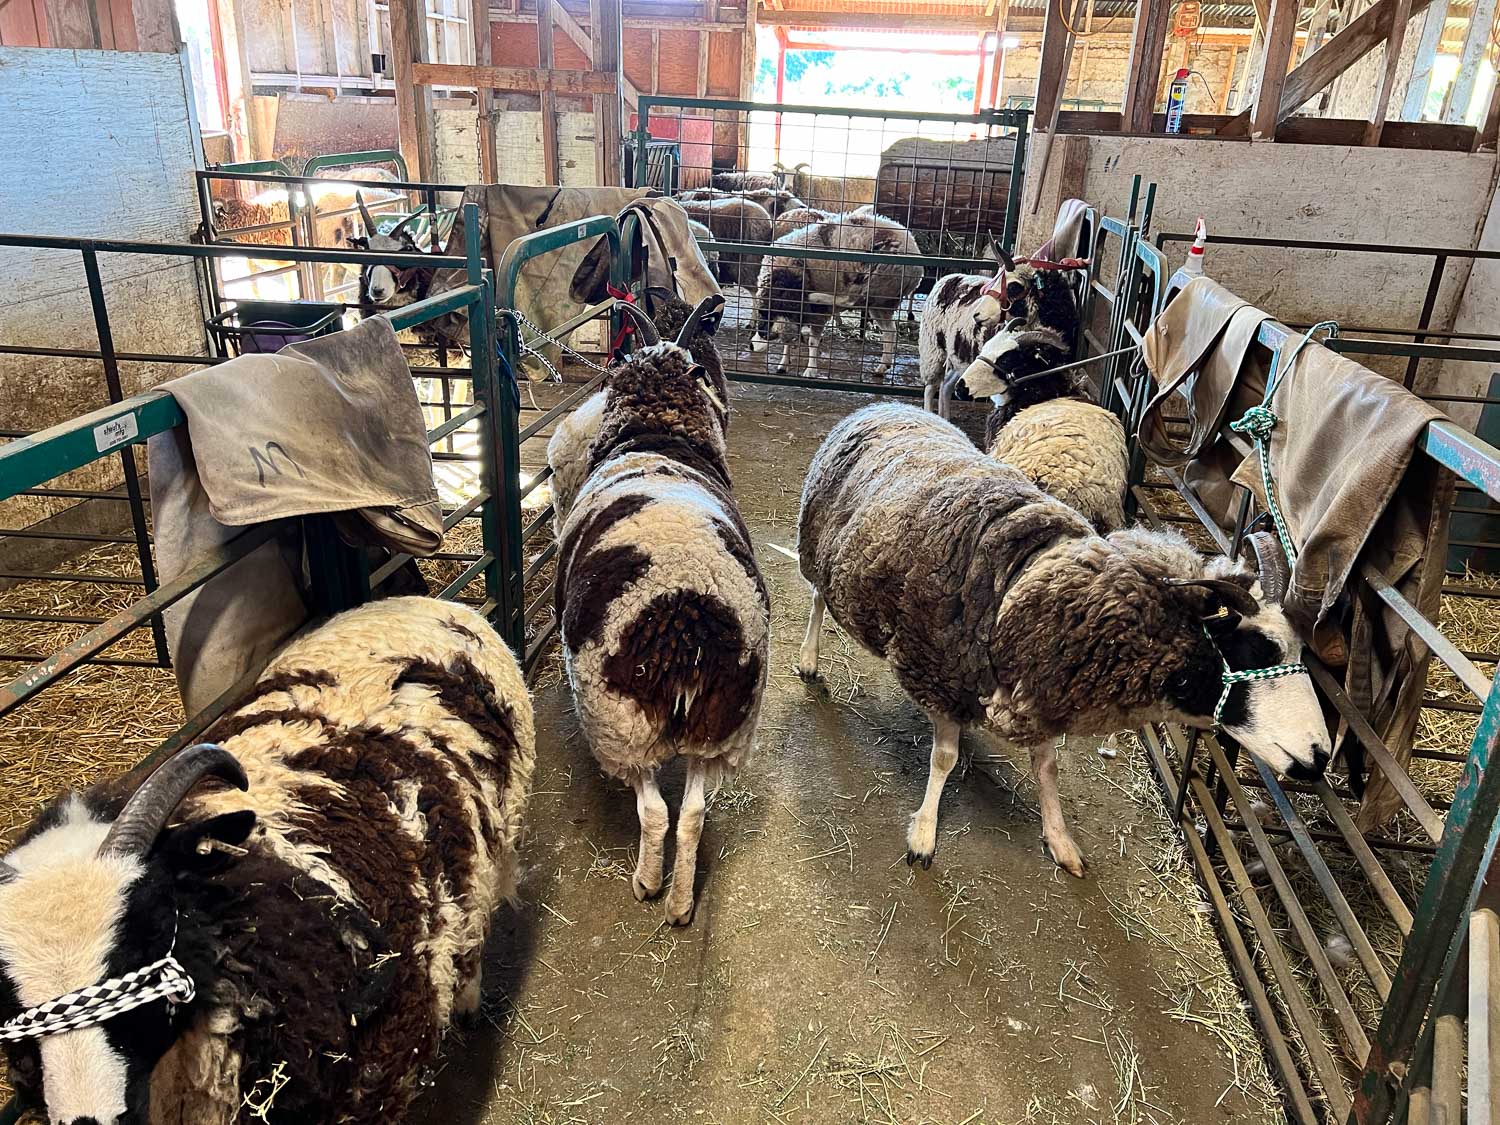
I tied all the sheep in the lambing area and removed coats. I hung the coats on the fence near the sheep so I could find the next size without trial and error.
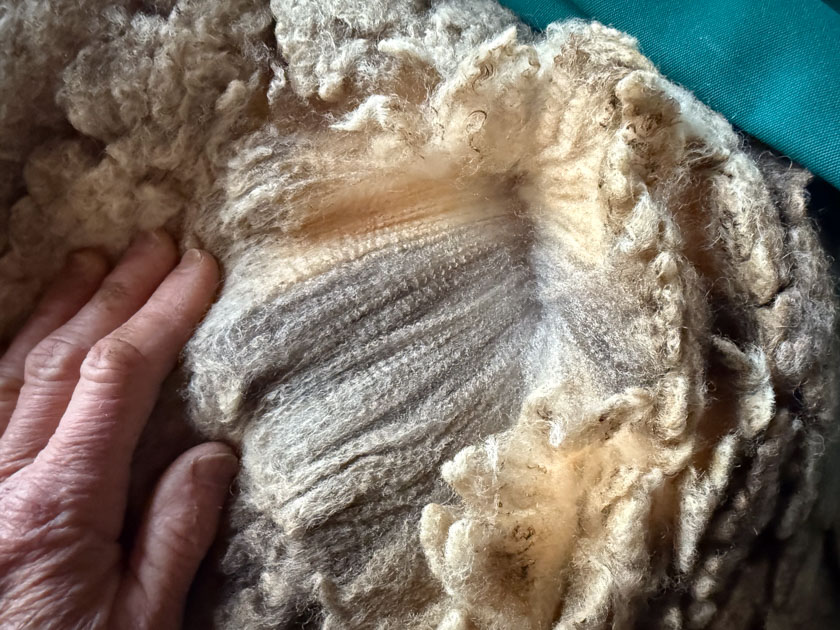
This photo shows another advantage of coating. The fleece under the coat does not have sunbleached tips so the color of the black yarn will look blacker than if those brown tips are mixed in. You can also see the amount of hay in the neck wool of this sheep.
These photos are some views of the fleece under the coats.
Some are cleaner than others because the sheep has worn a coat for longer.
This photo and the one below it are good examples of the different styles of Jacob fleece, at least as far as the crimp. Both fleeces are within breed standard.
Here they are all ready to have new coats.
This coat has a little more room for growth. Most of us probably don’t walk around with our clothes size showing, but it is helpful for me when keeping track of coats that may need changing. (The number 3 is above the shoulder.)
I have acquired coats from various sources although most came from Terri Mendenhall who is well-known for her award-winning sheep and fleeces. As the coats need repair they get a mix of patches.
They have been repaired by a Farm Club member who took some home, by me, and by my son who lives in Idaho and works as a smokejumper. Did you know that smokejumpers learn to sew so that they can make gear and handle all their own repairs? They use heavy duty sewing machines and fabric so Chris was able to make some repairs using fabric from the scrap pile.
This is a post I debated not writing. But it is part of my life. These photos are mostly from Friday. which was a full day…as are most days.
One of my regular customers wanted 8 lambs for Friday. This is the rack that Dan built for drying salted hides. It’s far better than having 9 pallets spread out on the floor. And even better, that orange netting like they use for construction work was given to us by someone who was cleaning up a property and didn’t want it.
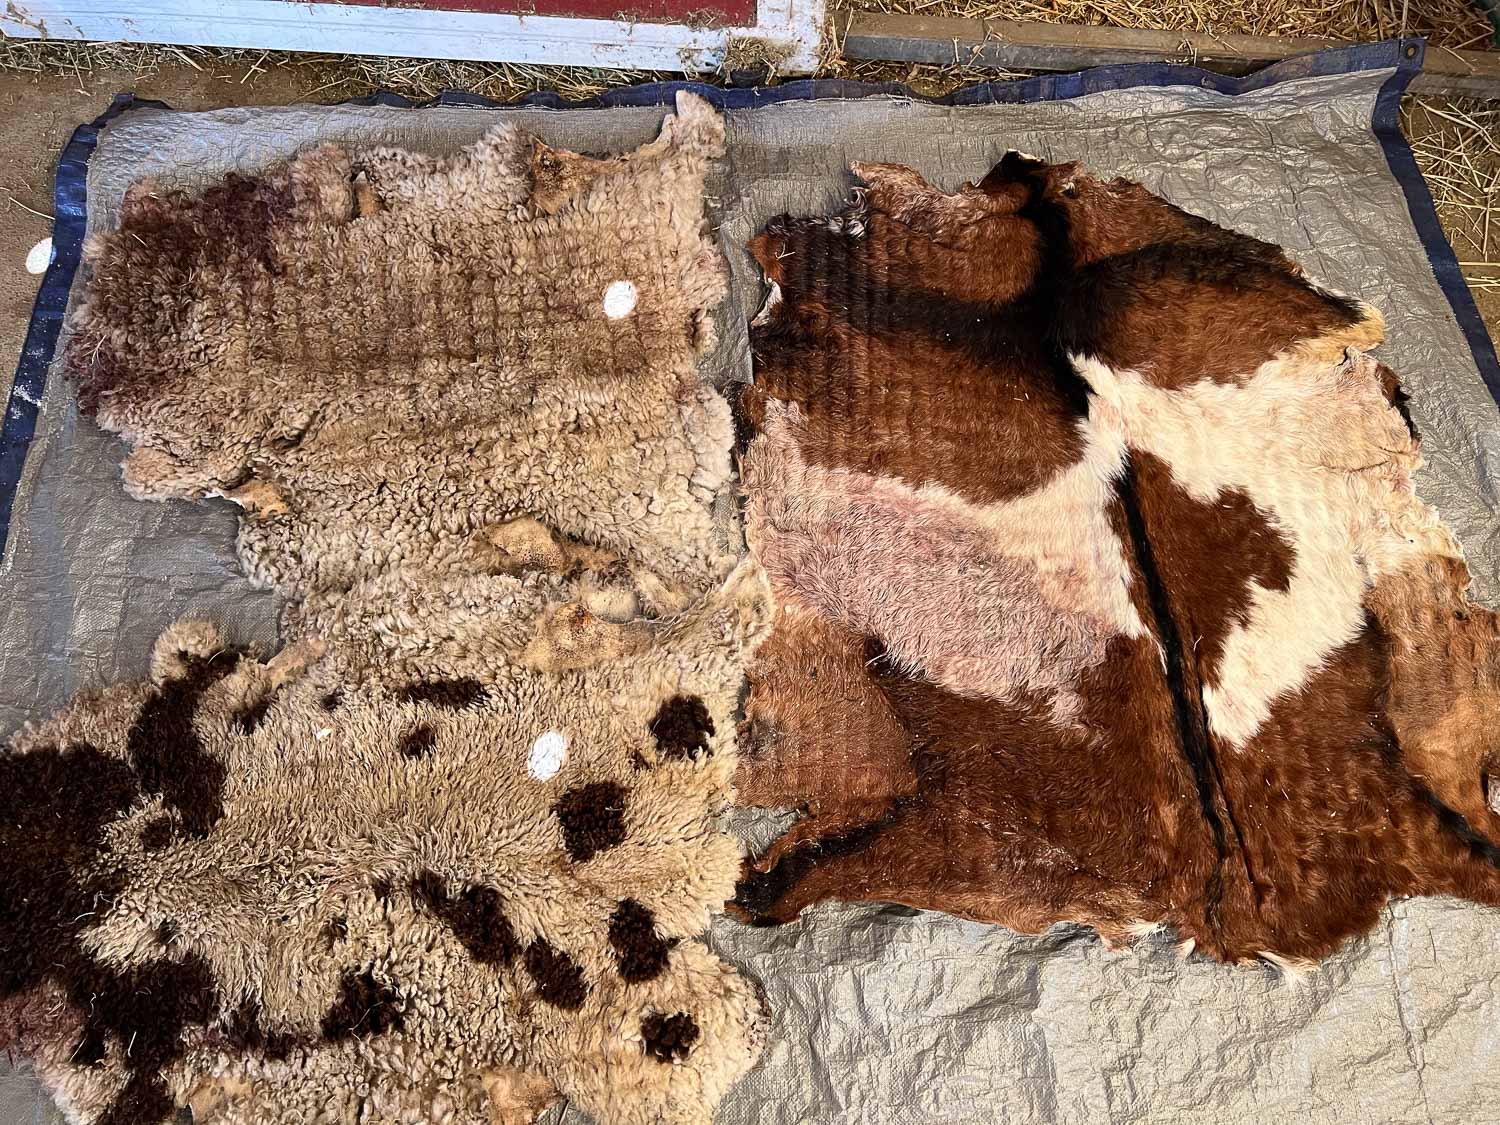
I took these three hides off the rack so that I could fill it up with new ones. That is two Jacob sheep and the neighbor’s goat. One of my customers wanted to add a goat to the order and there happened to be one next door.
I have learned to take photos of hides before I send them to the tannery so that I can keep track.
This is the previous batch of hides…
…and the reverse side. This is what you get when a professional does the work. There are no holes and no big chunks of fat left on these. I sent these and the three above to Driftless Tannery in Wisconsin.
This batch went to Vermont. The tannery is up and running again after being sold. Why send these so far away? Tanneries are few and far between and I like the natural mimosa tan that is offered. There was a tannery in Idaho that did a great job for a year, but they moved and didn’t start up again.
Warning: dead sheep parts in the next few photos.
If I’m going to sell sheep for butcher then I want to use as much of the other parts as possible. The hide is an obvious option, but there is also a market for skulls with horns and horns by themselves. With the sheepskins all I have to do is salt them and then ship them to a tannery where all the work is done. I have to deal with the other parts. I’ll write a button post one of these days to explain the process I use to make buttons from the horns.
I have a hard time getting the skulls in shape to sell. I used to put the skulls out in back, wiring them inside a fence so they couldn’t be dragged off. After I retrieve them from “outback” there is still a lot of work to do. They are not completely cleaned and definitely not ready to list on the website.
One year I bought a “starter kit” of the kind of beetles that will do the work for you. But that is a whole other story and it’s not that simple. Also that was the year of my accident and I wasn’t able to keep the beetle colony working.
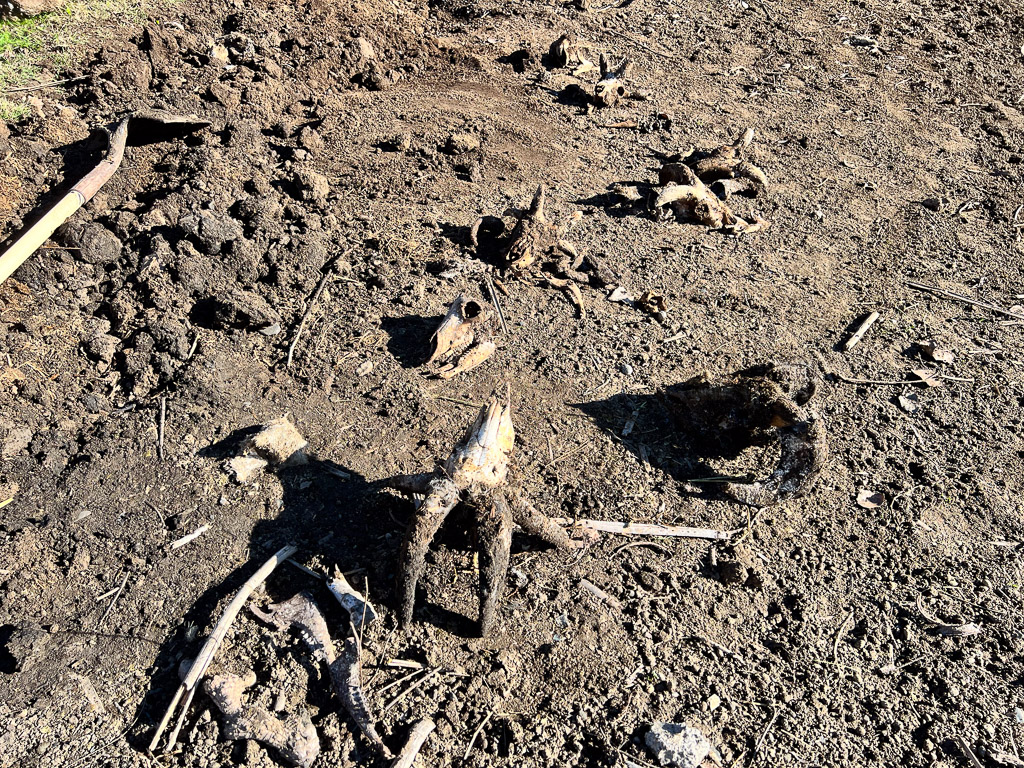
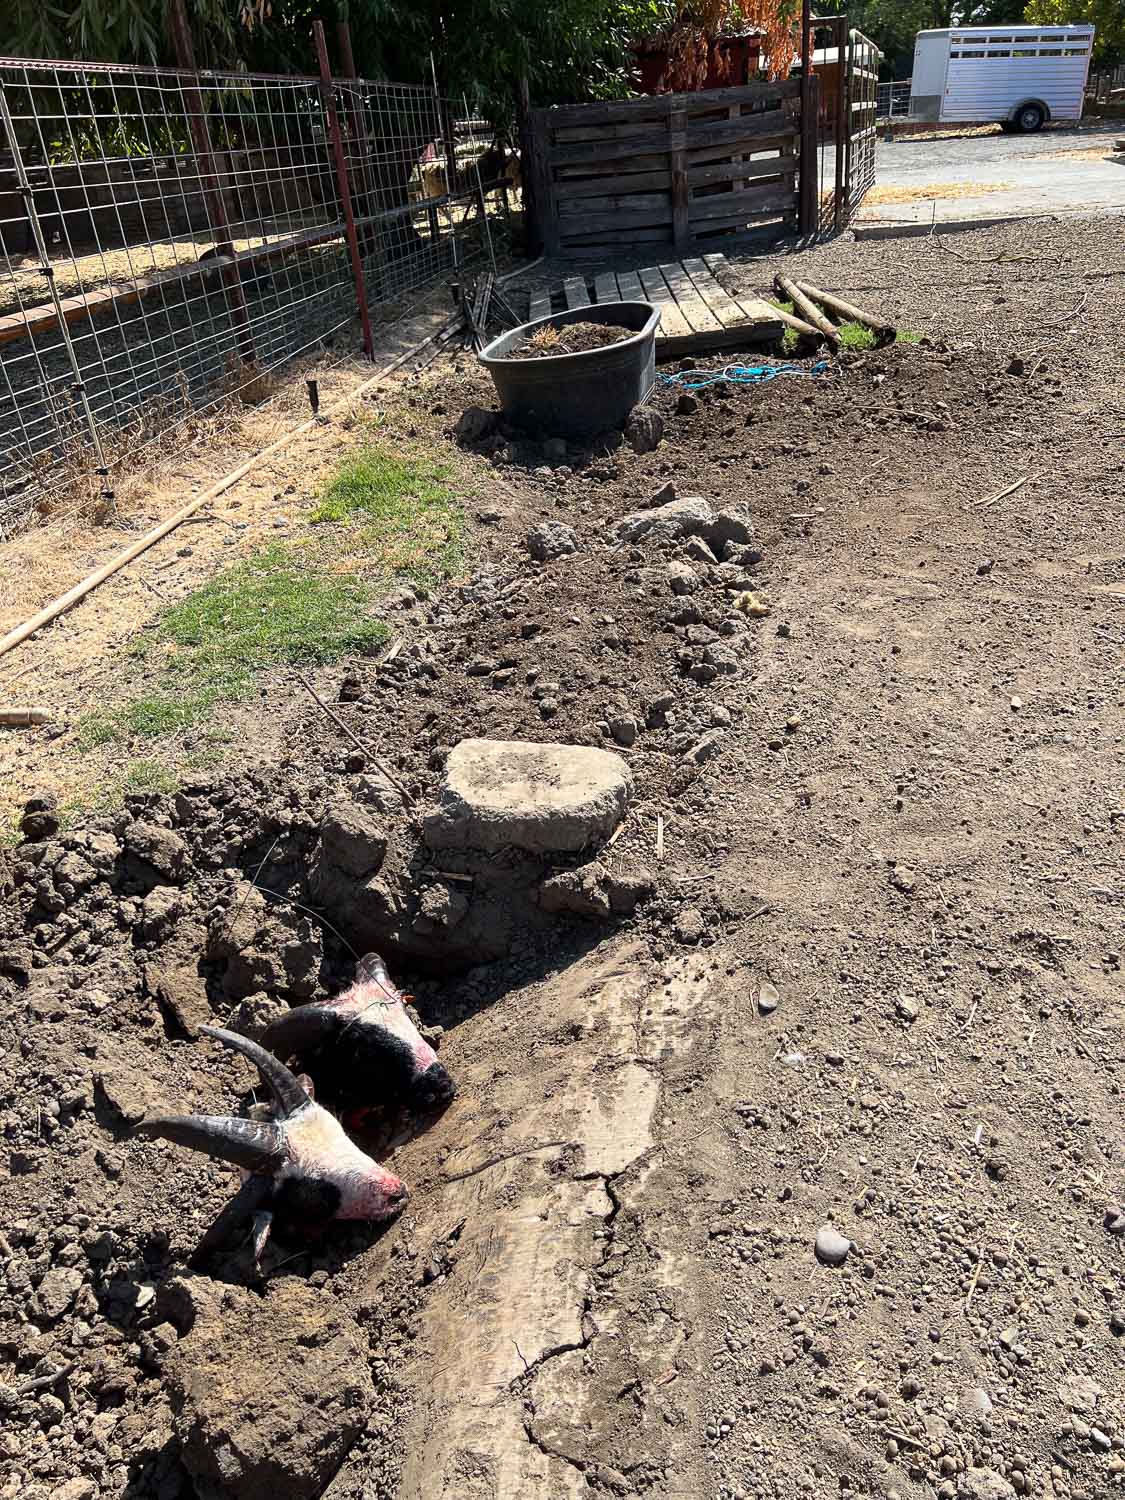
This is my new method which is not yet perfected. Last fall I buried several heads and left them for the winter. There was so much rain for so long, that there was plenty of insect and/or microbial action. When I dug the skulls up I found that they were still not perfect, but much better than the “outback” method. They mainly need some work on whitening, after turning brown in the dirt, and there is a risk of the horns deteriorating faster than the bone. I don’t know how long these need to stay in the ground and I don’t know how much difference it makes if I add water occasionally. There are some heads under the dirt pile in the middle of the photo and there are some under the black tub. There are some IN the black tub as well. The last few that are buried have baling twine tied to the horns so I know where they are. The new ones in the foreground have baling wire around the horns that sticks up through the dirt when they were covered.
When I make buttons I need just the horns so I cut them off the skull. There is a bony core that is attached to the skull. You have to soak the horn or otherwise allow the tissue between the horn core and the outer part to deteriorate or be eaten by something so that you can get the outer part off.
This was a ewe lamb with horns that tipped forward. One was so wobbly that it didn’t seem attached to the skull. You can see here that it wasn’t. I think that would be an example of a scur.
Friday’s harvest was fast. The farm harvest guy dealt with all those sheep within two hours and did a great job with the pelts. After I finished salting hides I spent the rest of the morning sorting and organizing sheep coats. I don’t coat a lot of sheep, but usually have about five coated through the summer and up until shearing. These are usually the sheep that go to Black Sheep Gathering and/or State Fair. Right now there are only two with coats. I’d rather see my sheep without the coats and it adds work to keep up with changing coats as the fleeces grow out. You can see that there is also a lot of coat repair to keep up with.
The coats I have always used are those lined up in the middle and the left. I recently bought a new brand of coats that was recommended when I was at the Jacob show in Estes Park. My original coats are sized by number. The new ones have a color tab that indicates size. I matched them up to the old coats to figure out where they fit as far as size and I added the numbers to match the others. The coats on the right are the new ones. I guess I didn’t get the sizes I’ll need as the fleeces grow out.