The tomato plants Across the Road aren’t as striking as the sunflowers I showed in my last blog post, but it is still interesting to watch the progress of the crop, especially now as they get closer to harvest. I have heard that harvest time is problematic this year, mostly due to the prolonged rainy season this winter and spring. Fields didn’t dry out soon enough for farmers to work the fields and many planted 3 to 4 weeks later than normal. That means the tomatoes ripen 3 to 4 weeks later. Tomato farmers have contracts with the cannery that state when and how much they deliver. The cannery can only handle a certain amount at once and will turn away excess. Some farmers may risk harvesting while some tomatoes are still green. Others may have to wait until the cannery can take the load, but they risk over-ripe fruit or early rain. Farming isn’t as simple as it may seem.
If you’re interested in reading more about this situation in 2023 read this article in Ag Alert, published by the Farm Bureau.
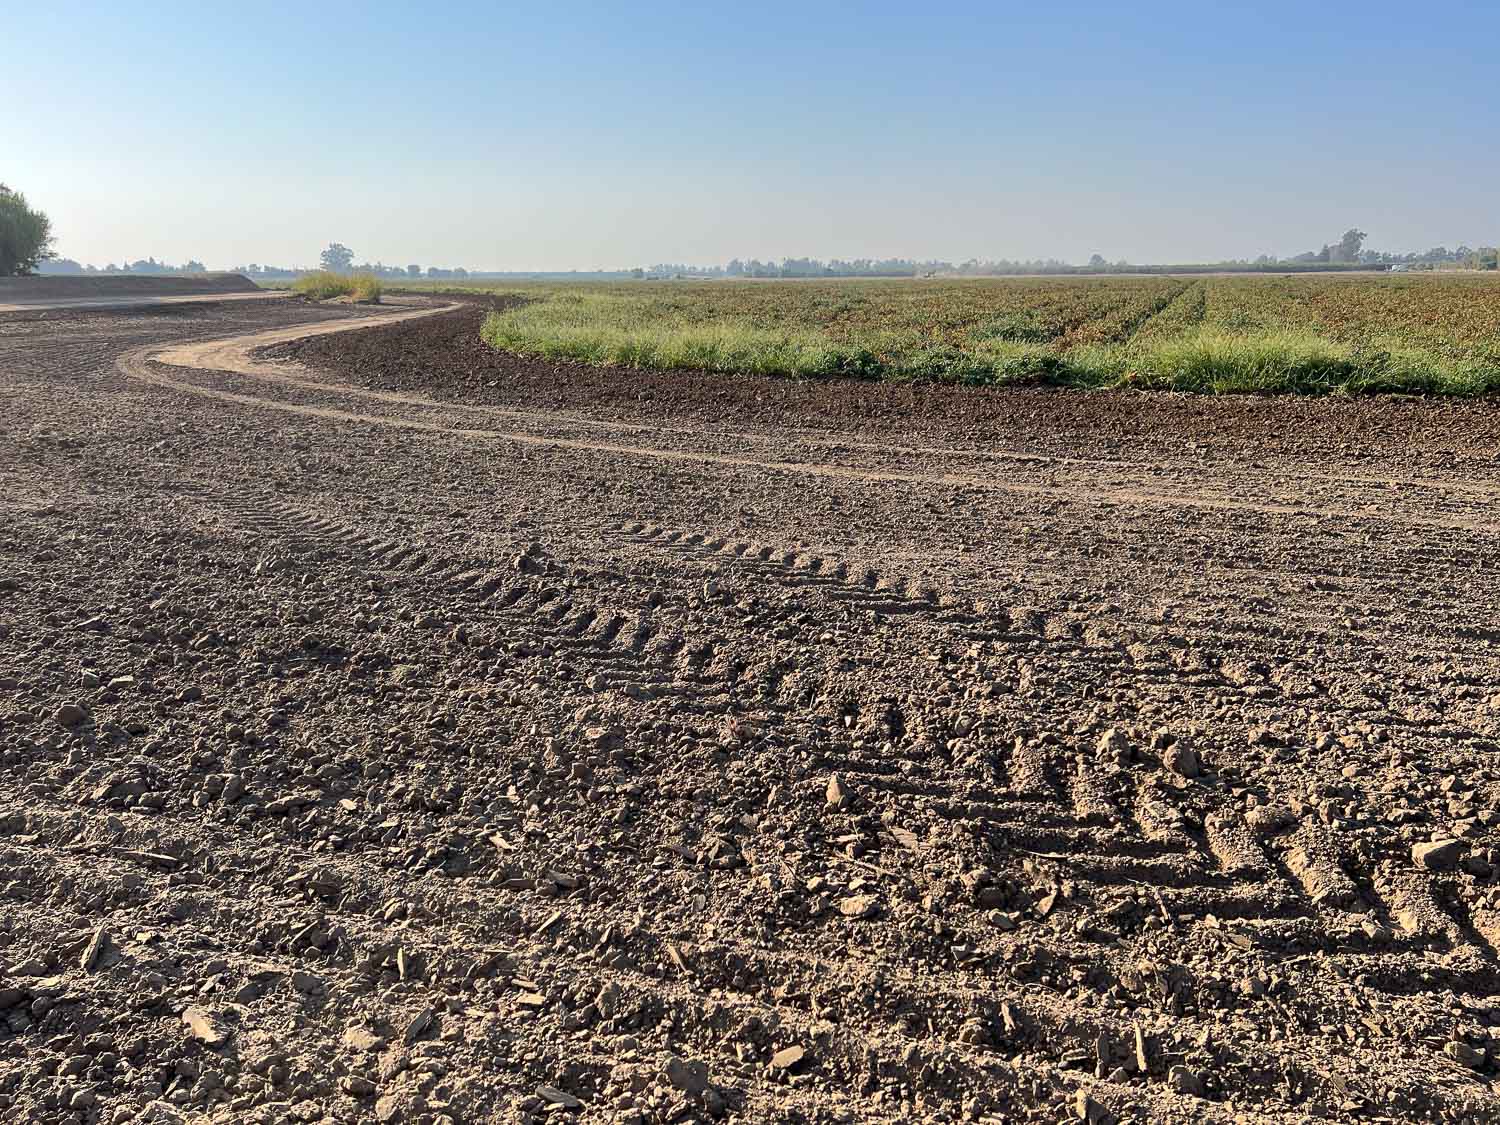
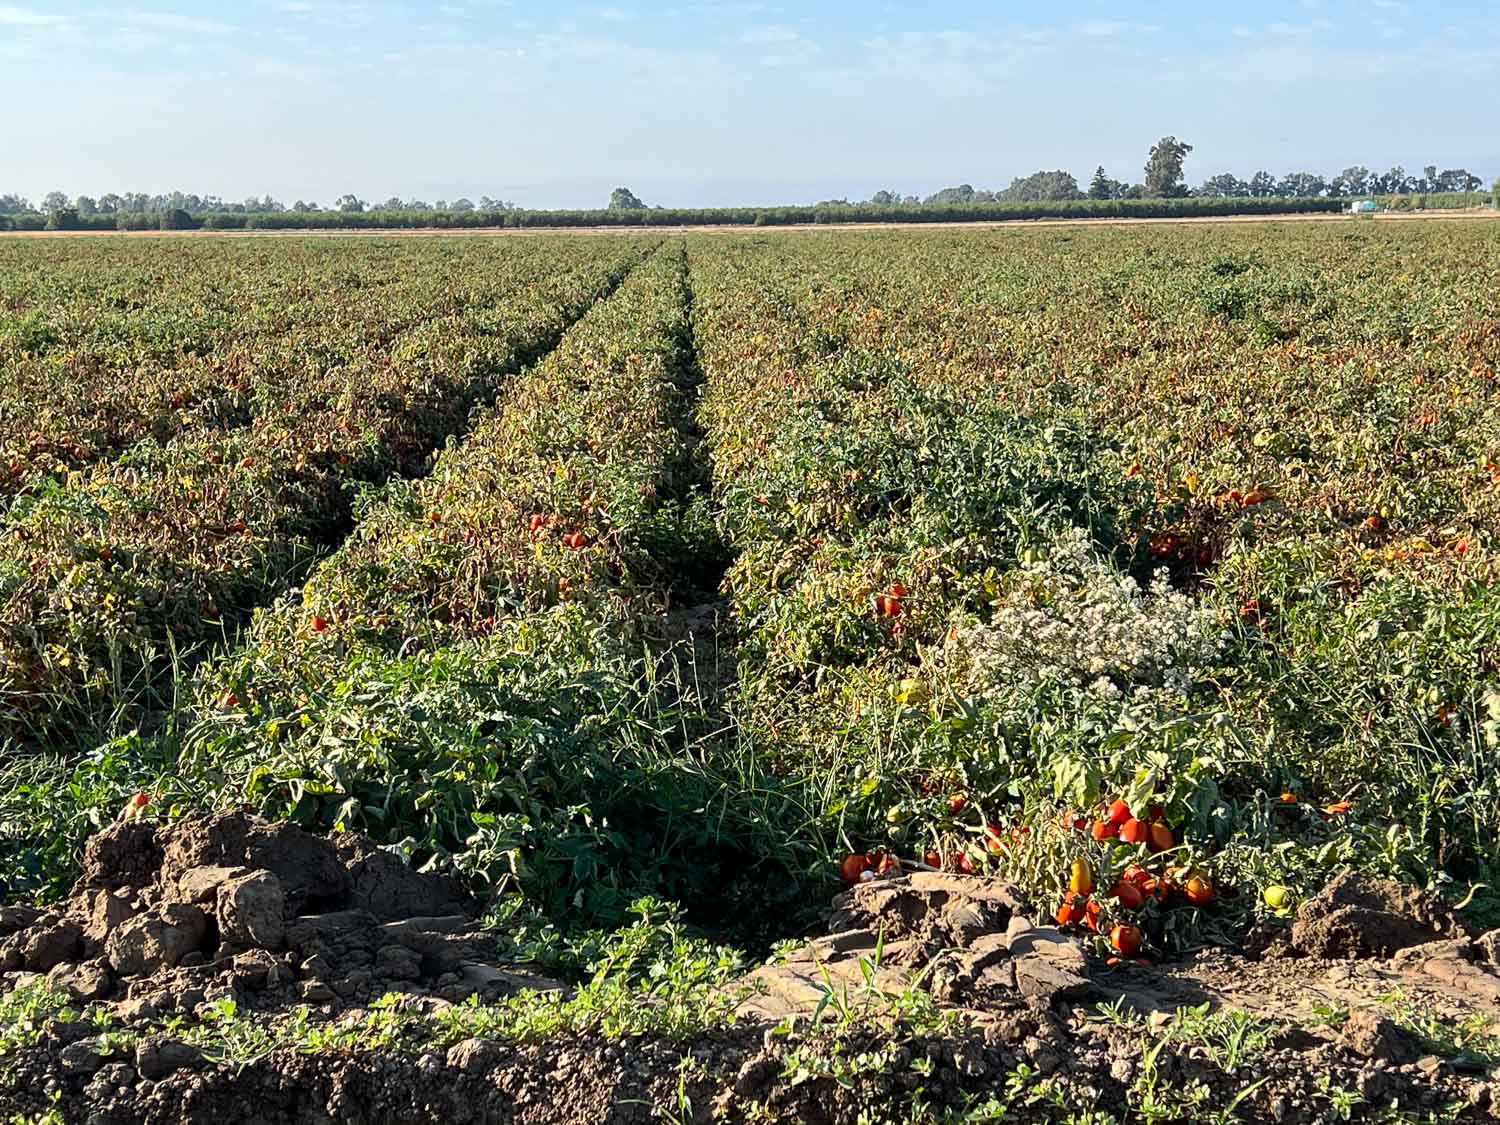
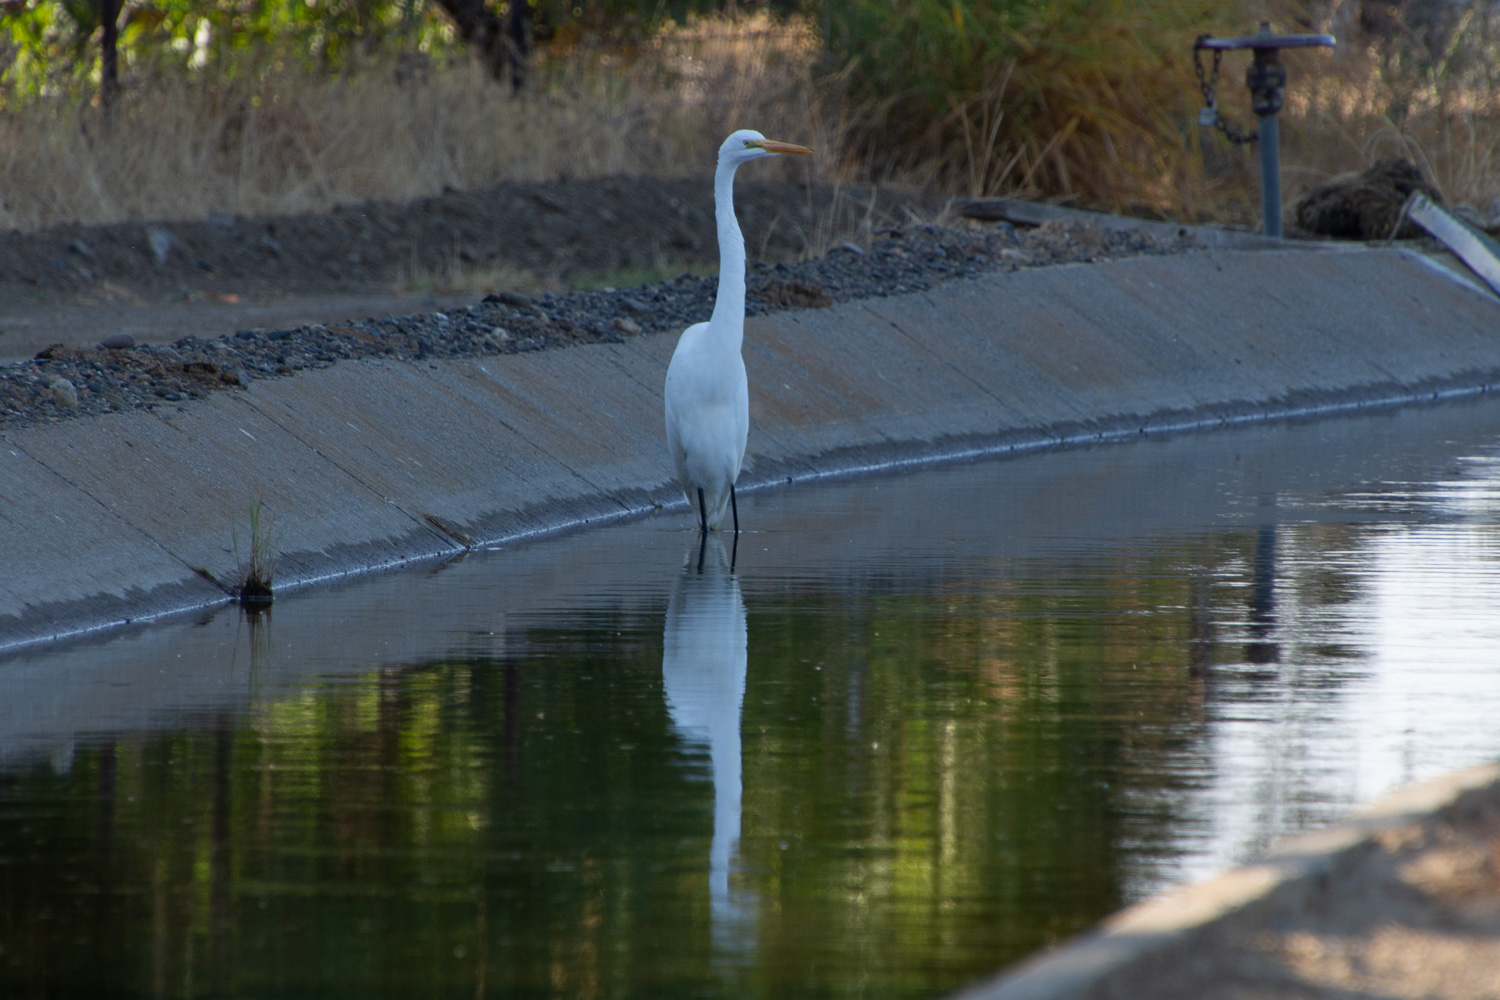
Here’s the tomato field I watch because it is right Across the Road. The latest ditch has been filled in and smoothed over. I assume there will be no more irrigation.
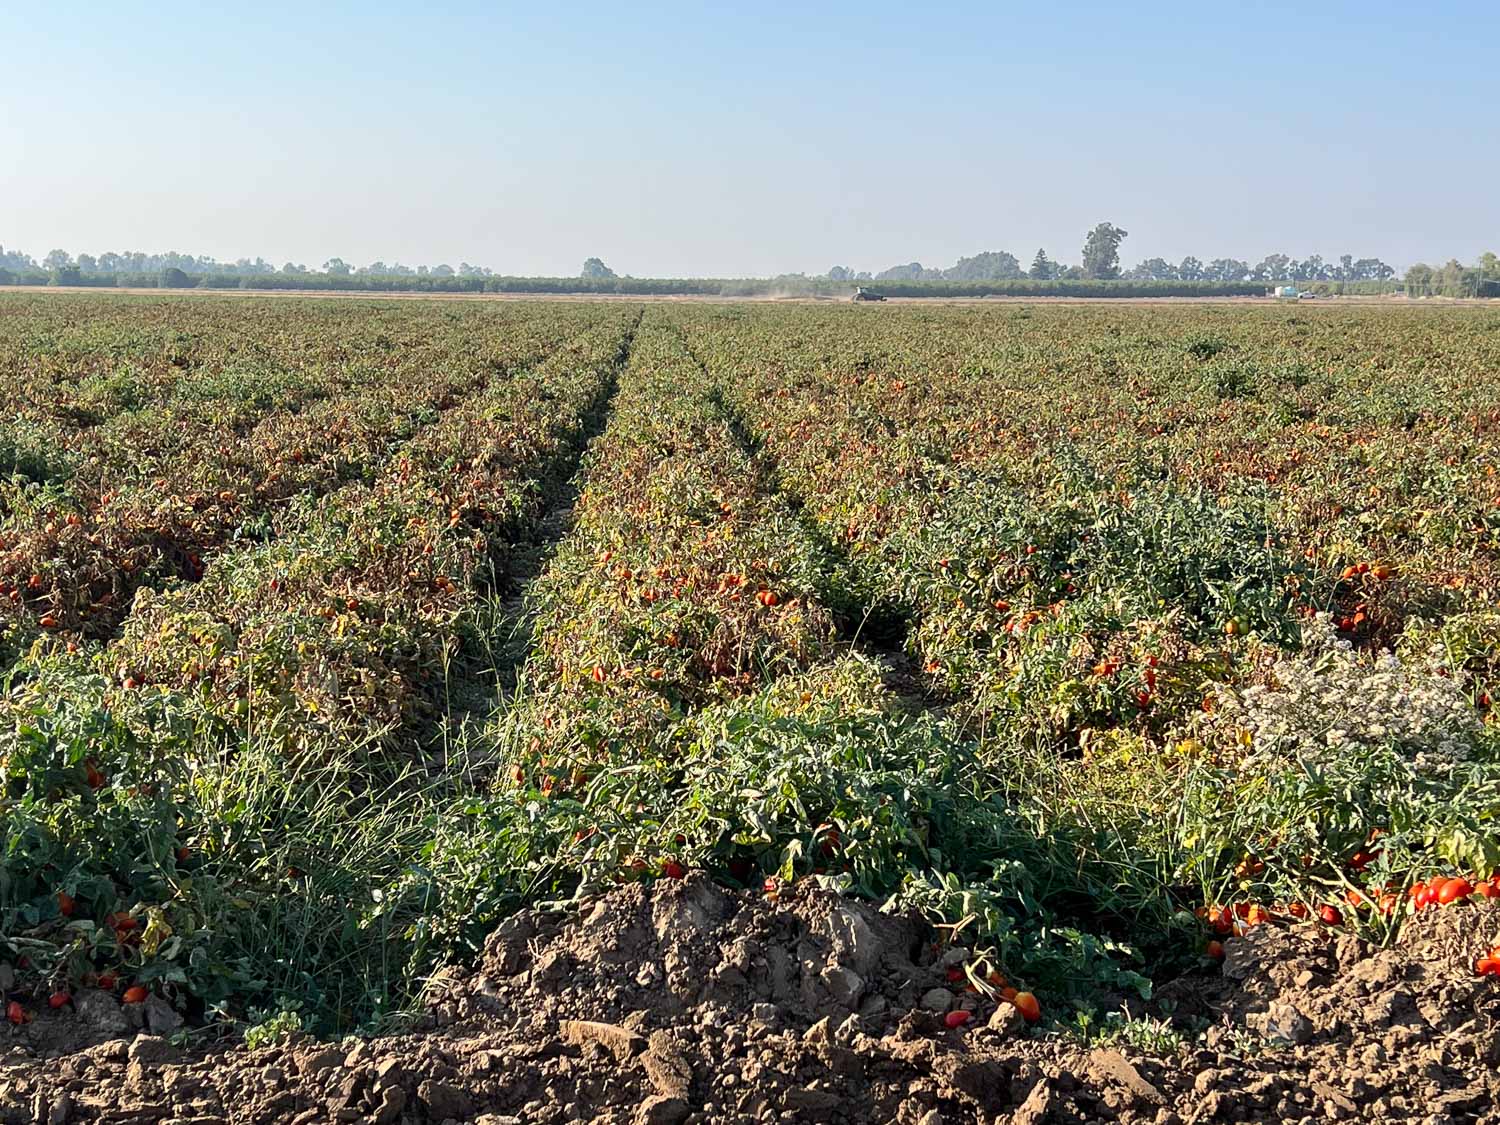
The plants are not that impressive when you look over the whole field.
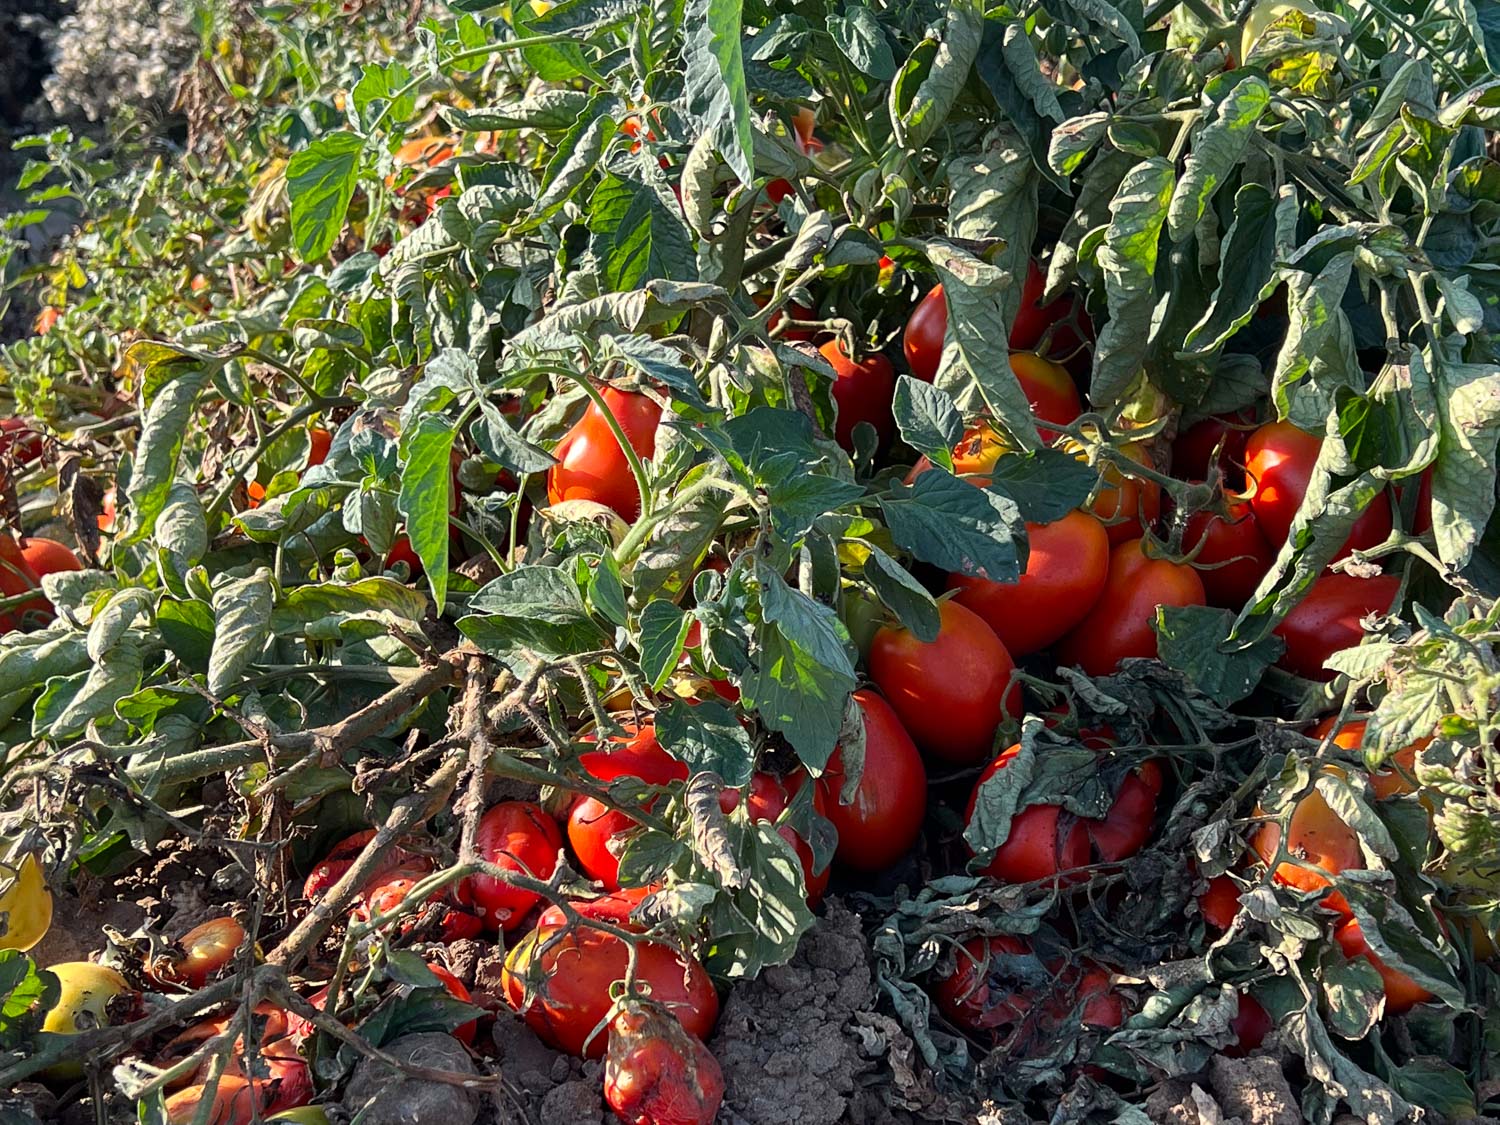
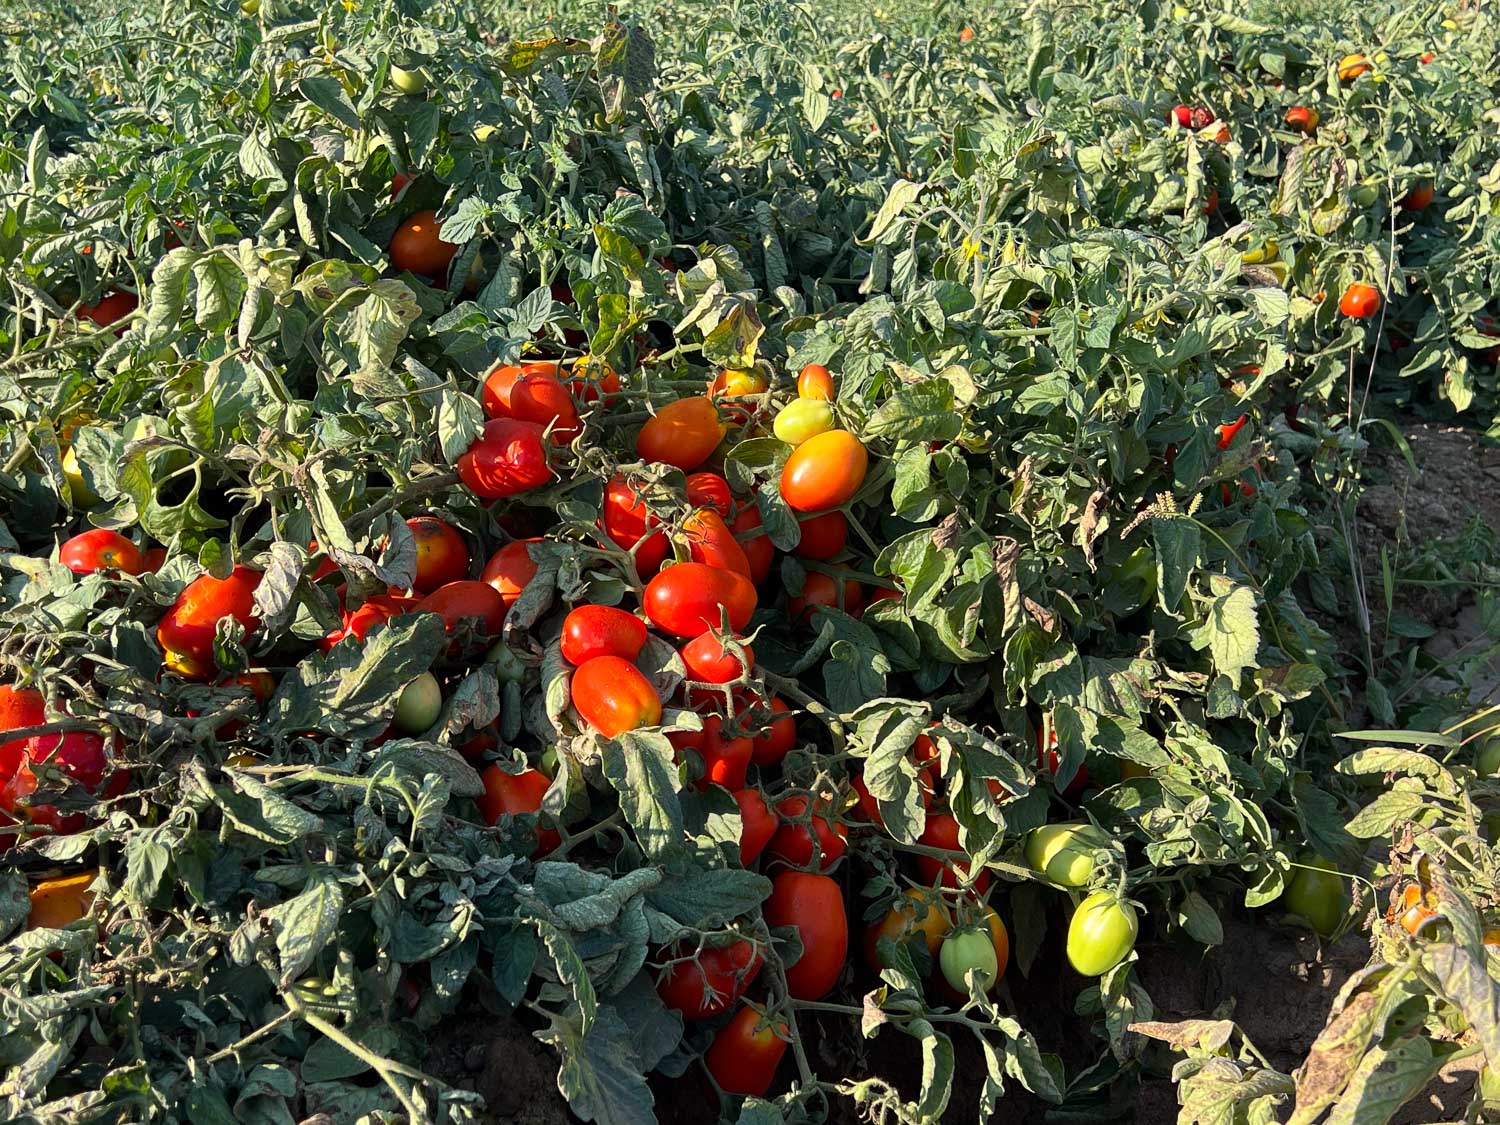
When you look up close you see the red tomatoes.
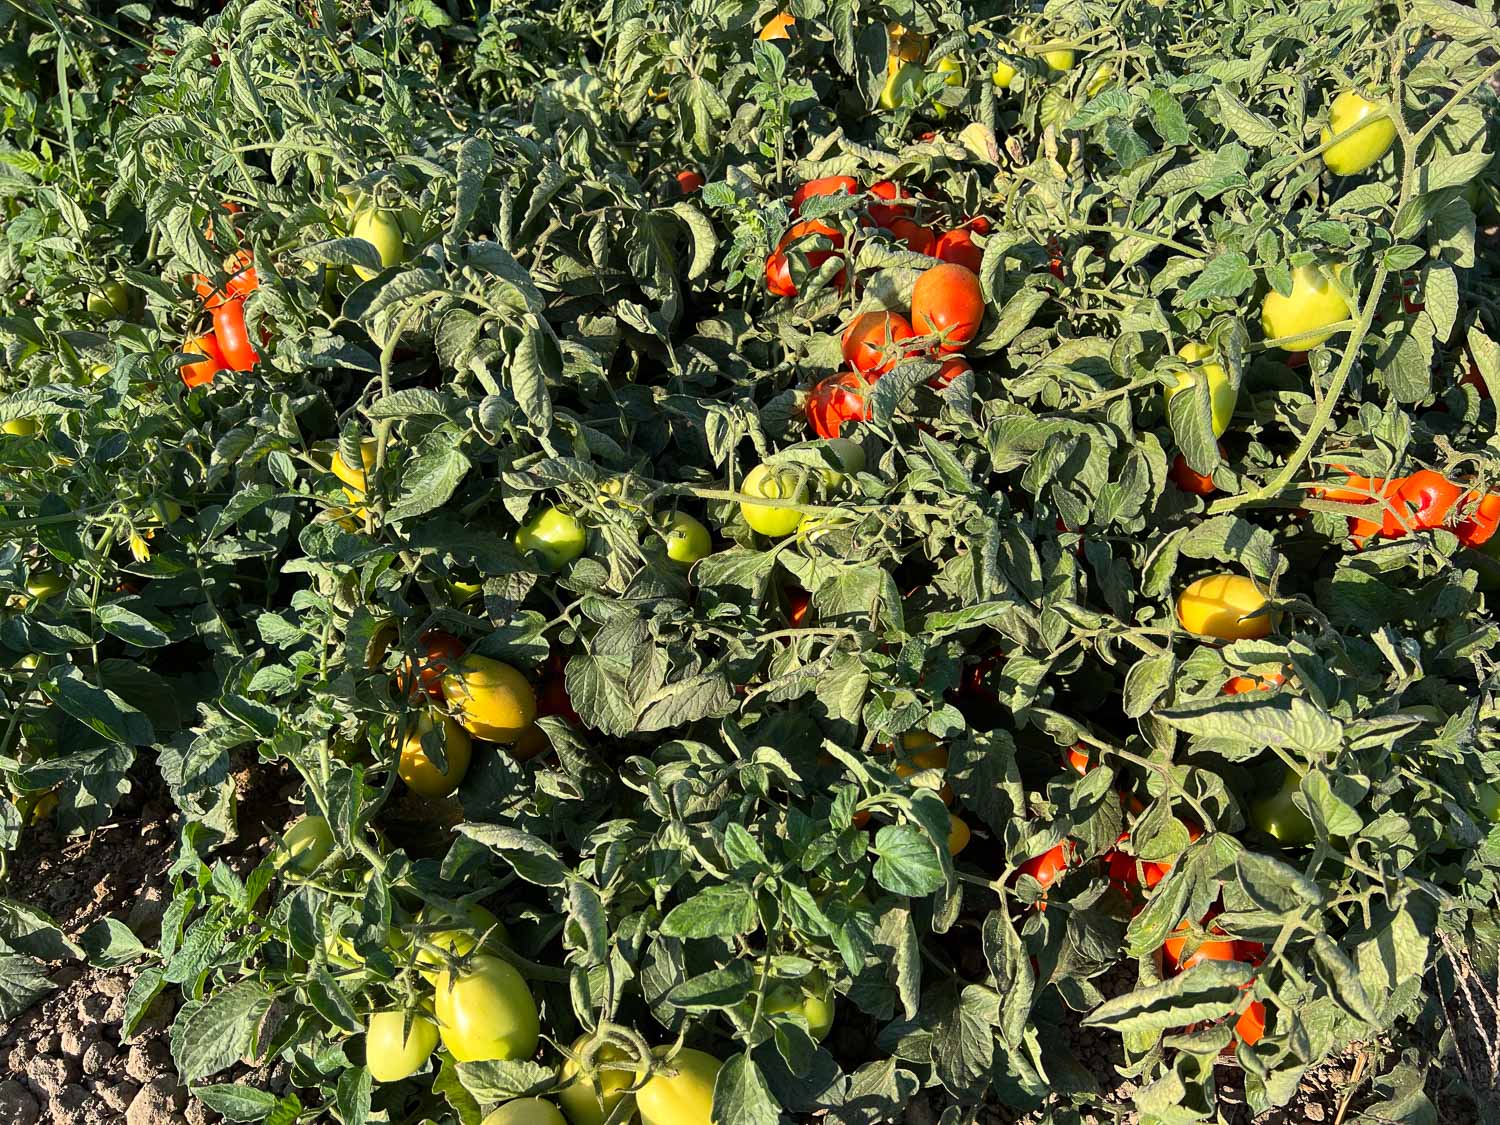
There are still a lot of green ones in some parts of the field.
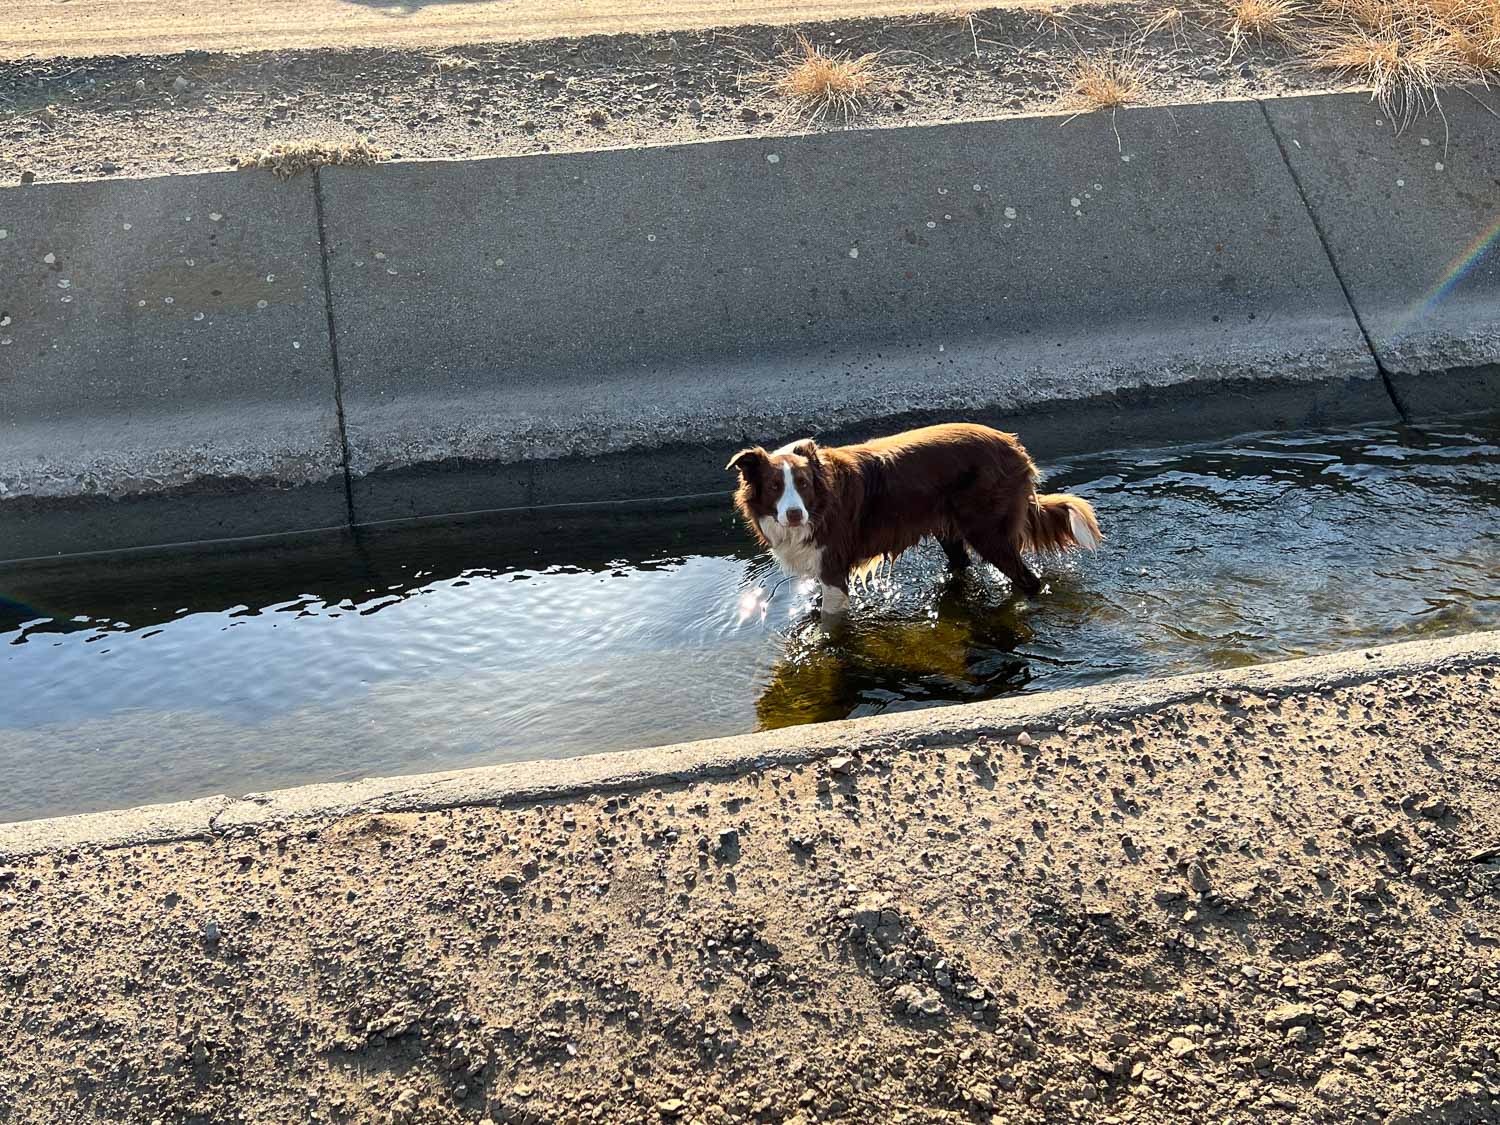
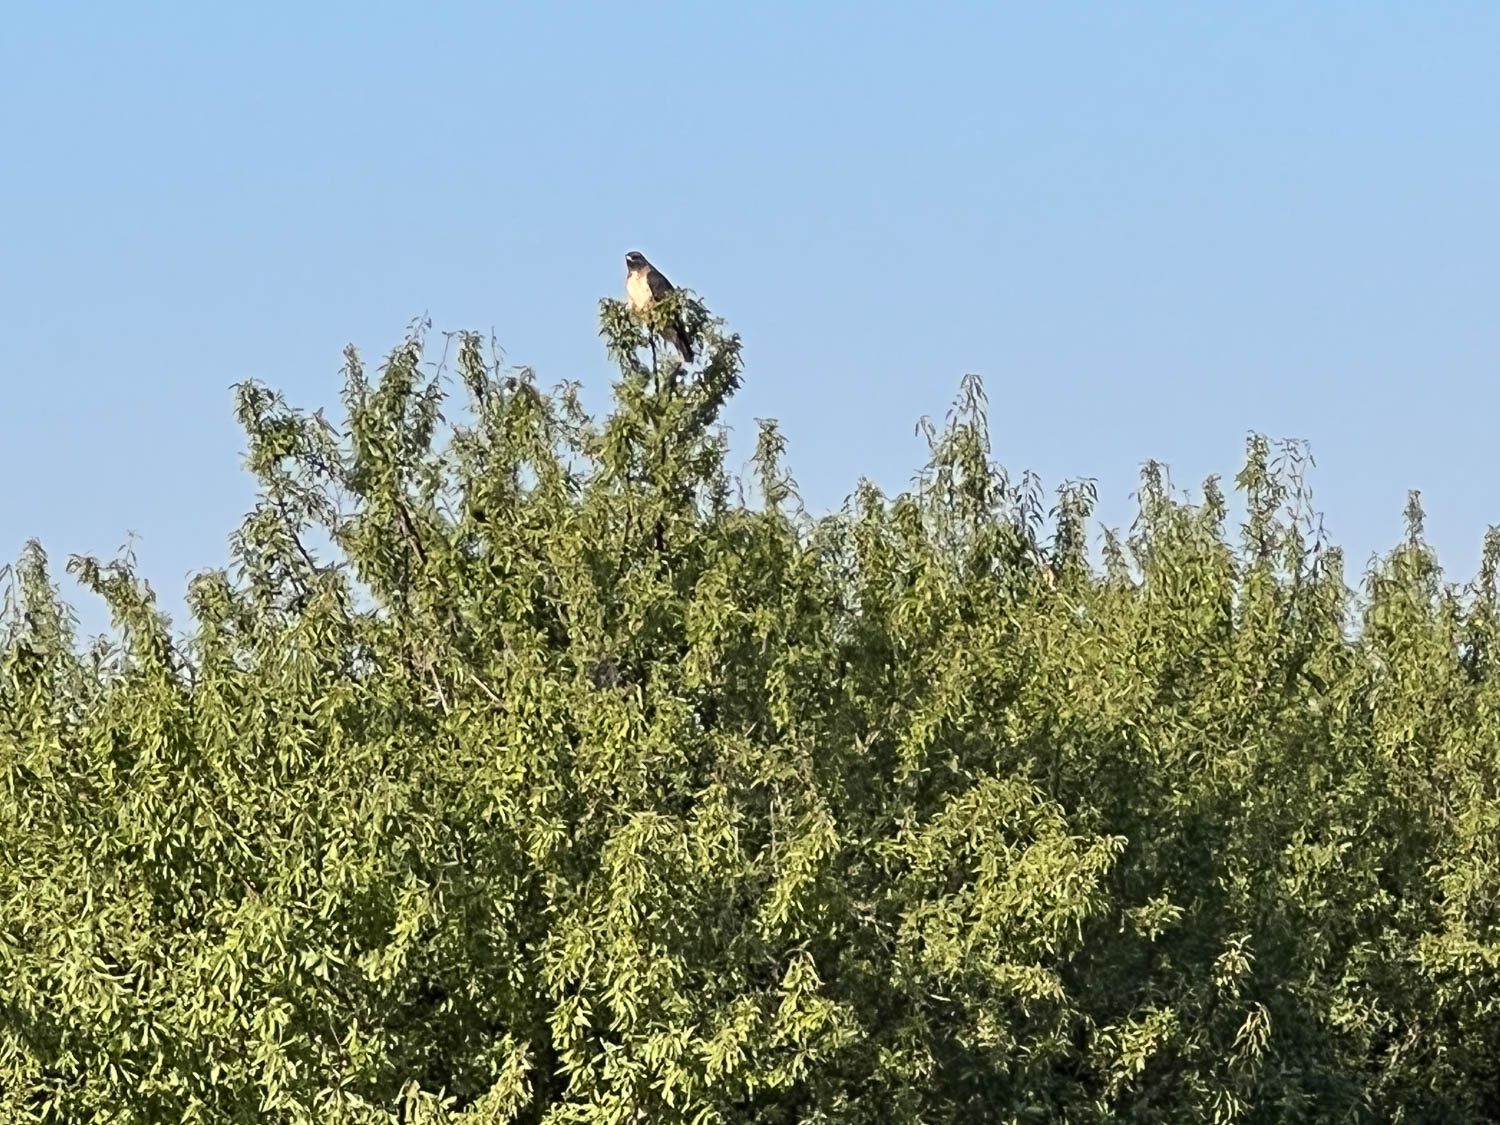
My walks aren’t all about a study in agriculture. They are mainly to get some exercise to fight off the effects of aging and to get Ginny out. More views from Across the Road:
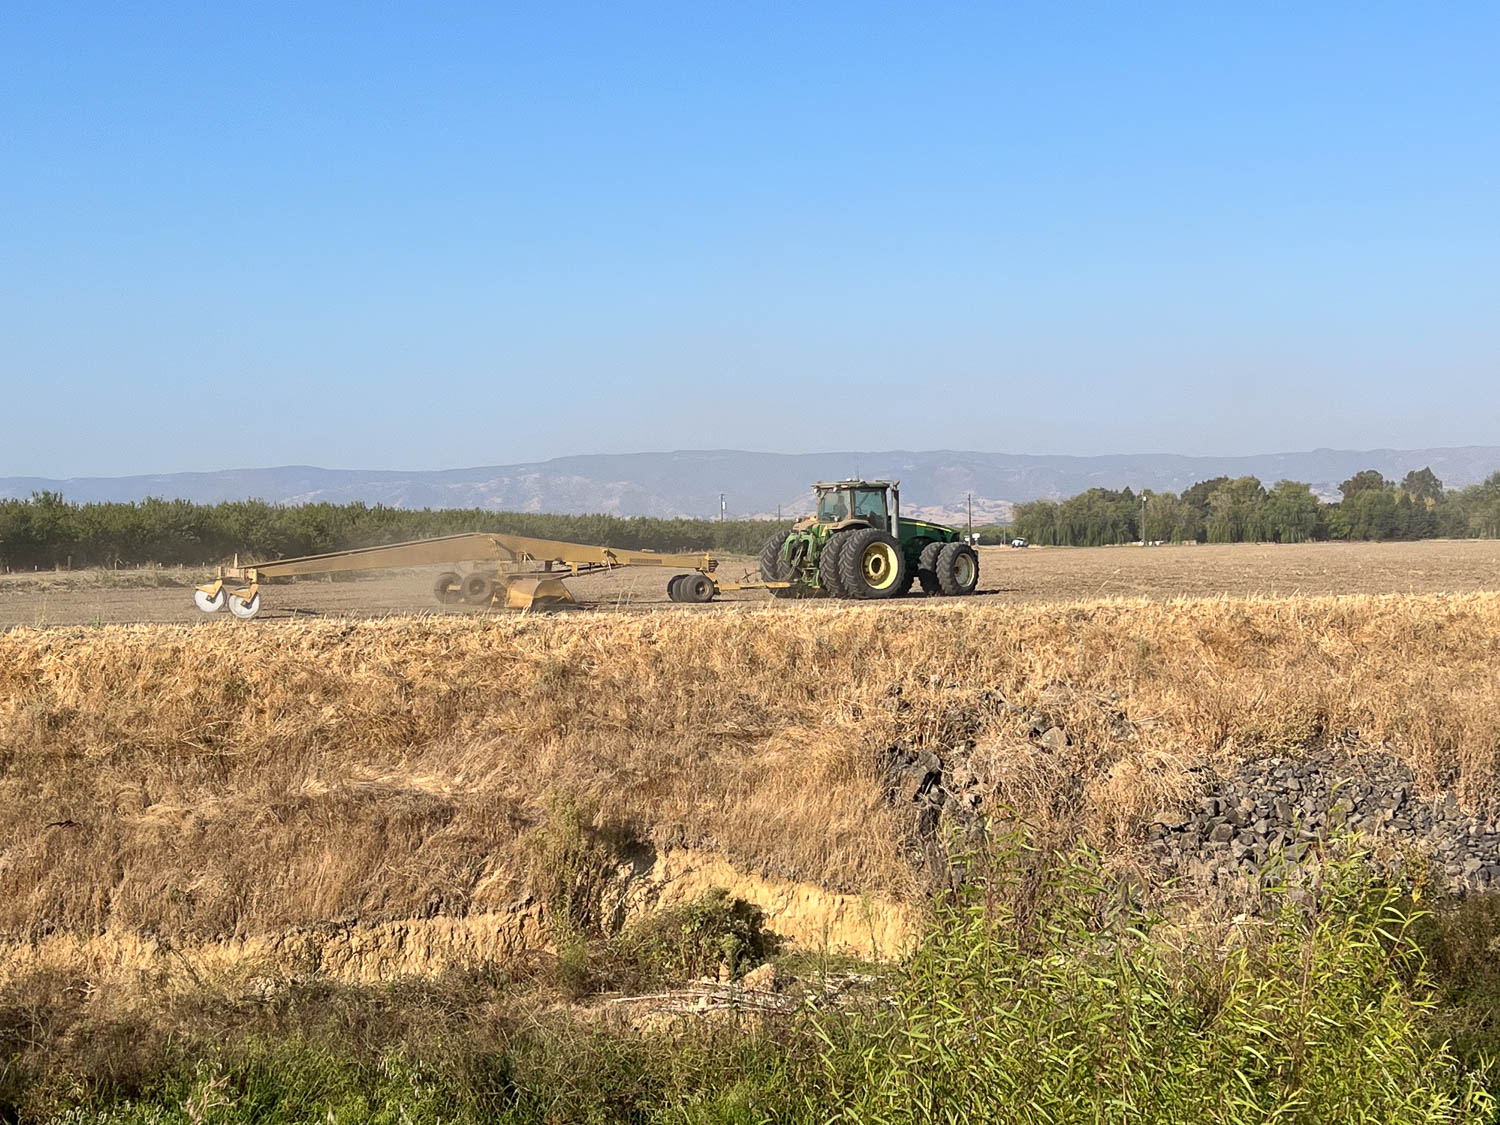
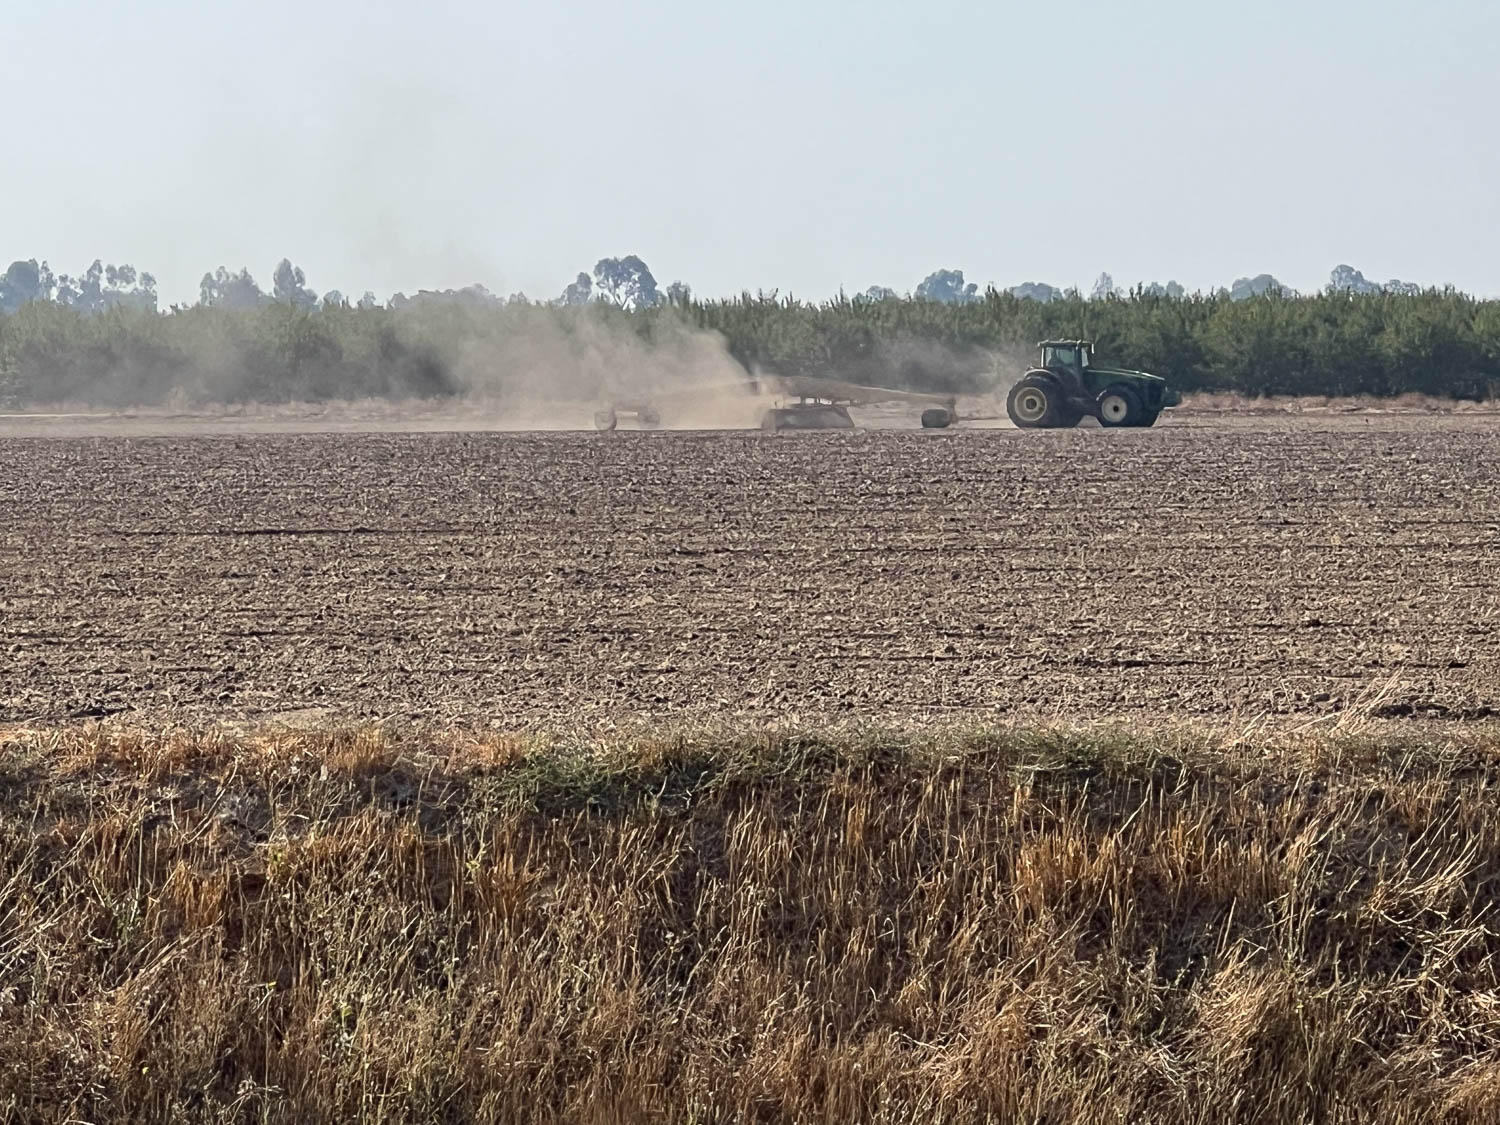
This field is across the canal from the tomato field. They just harvested hay and it will be interesting to see what goes in here next.
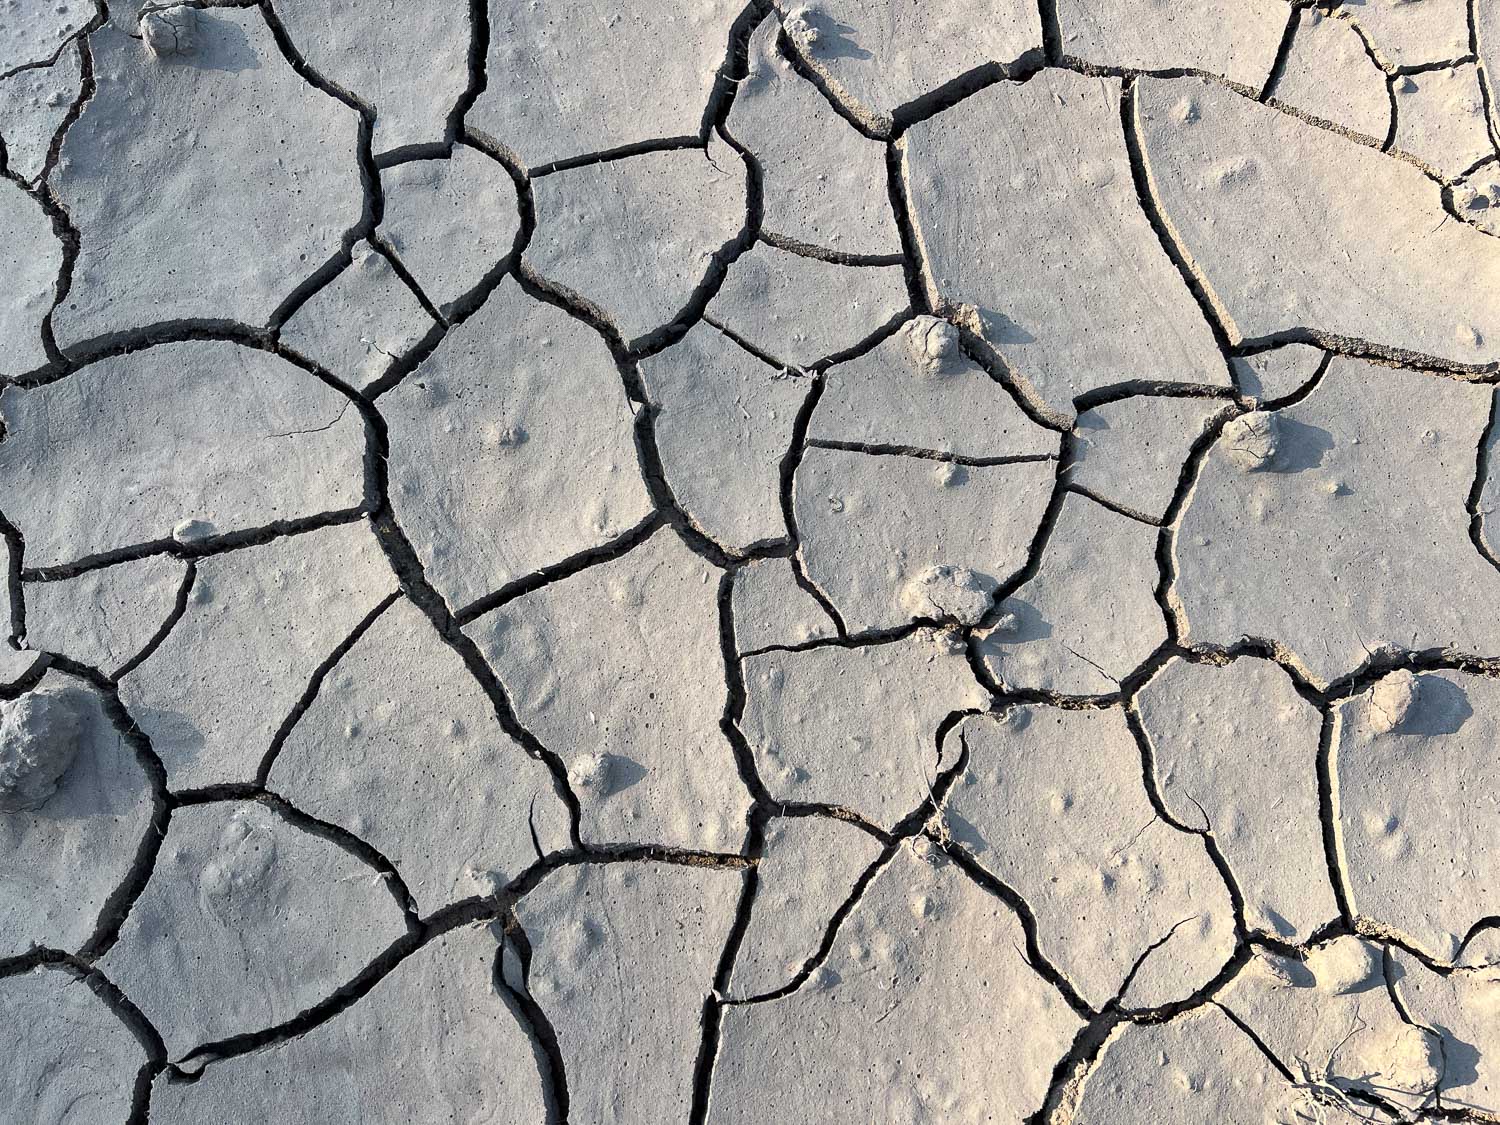
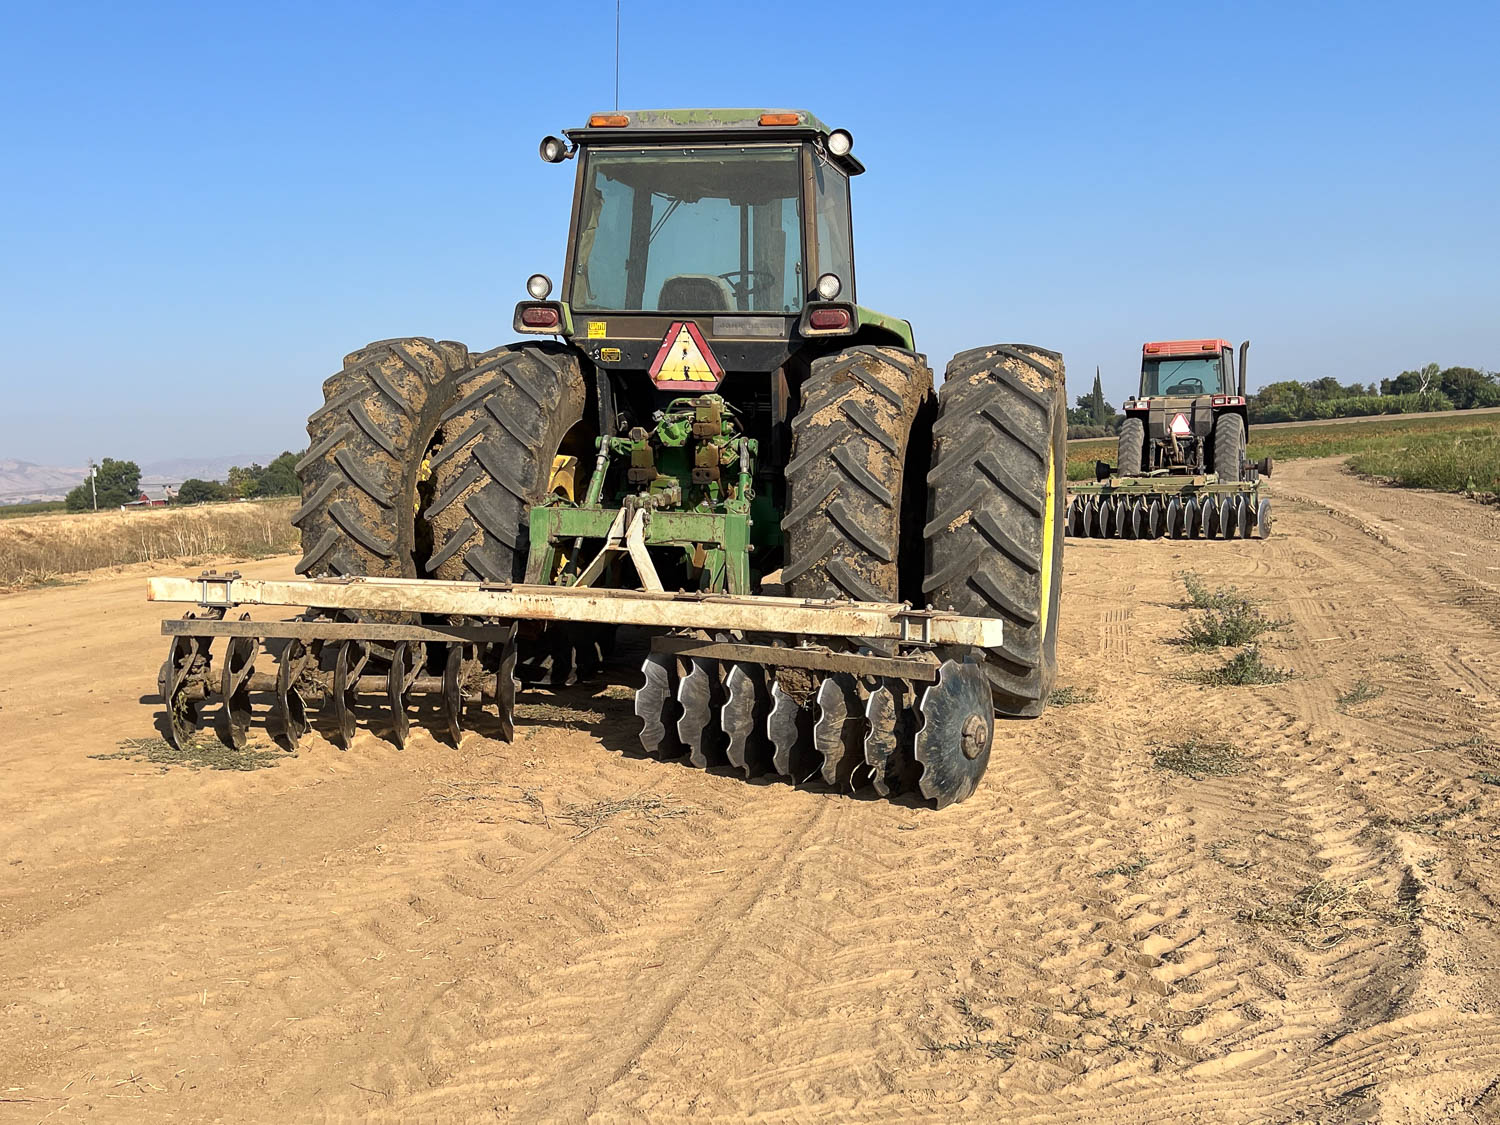
Another view of the field prep.
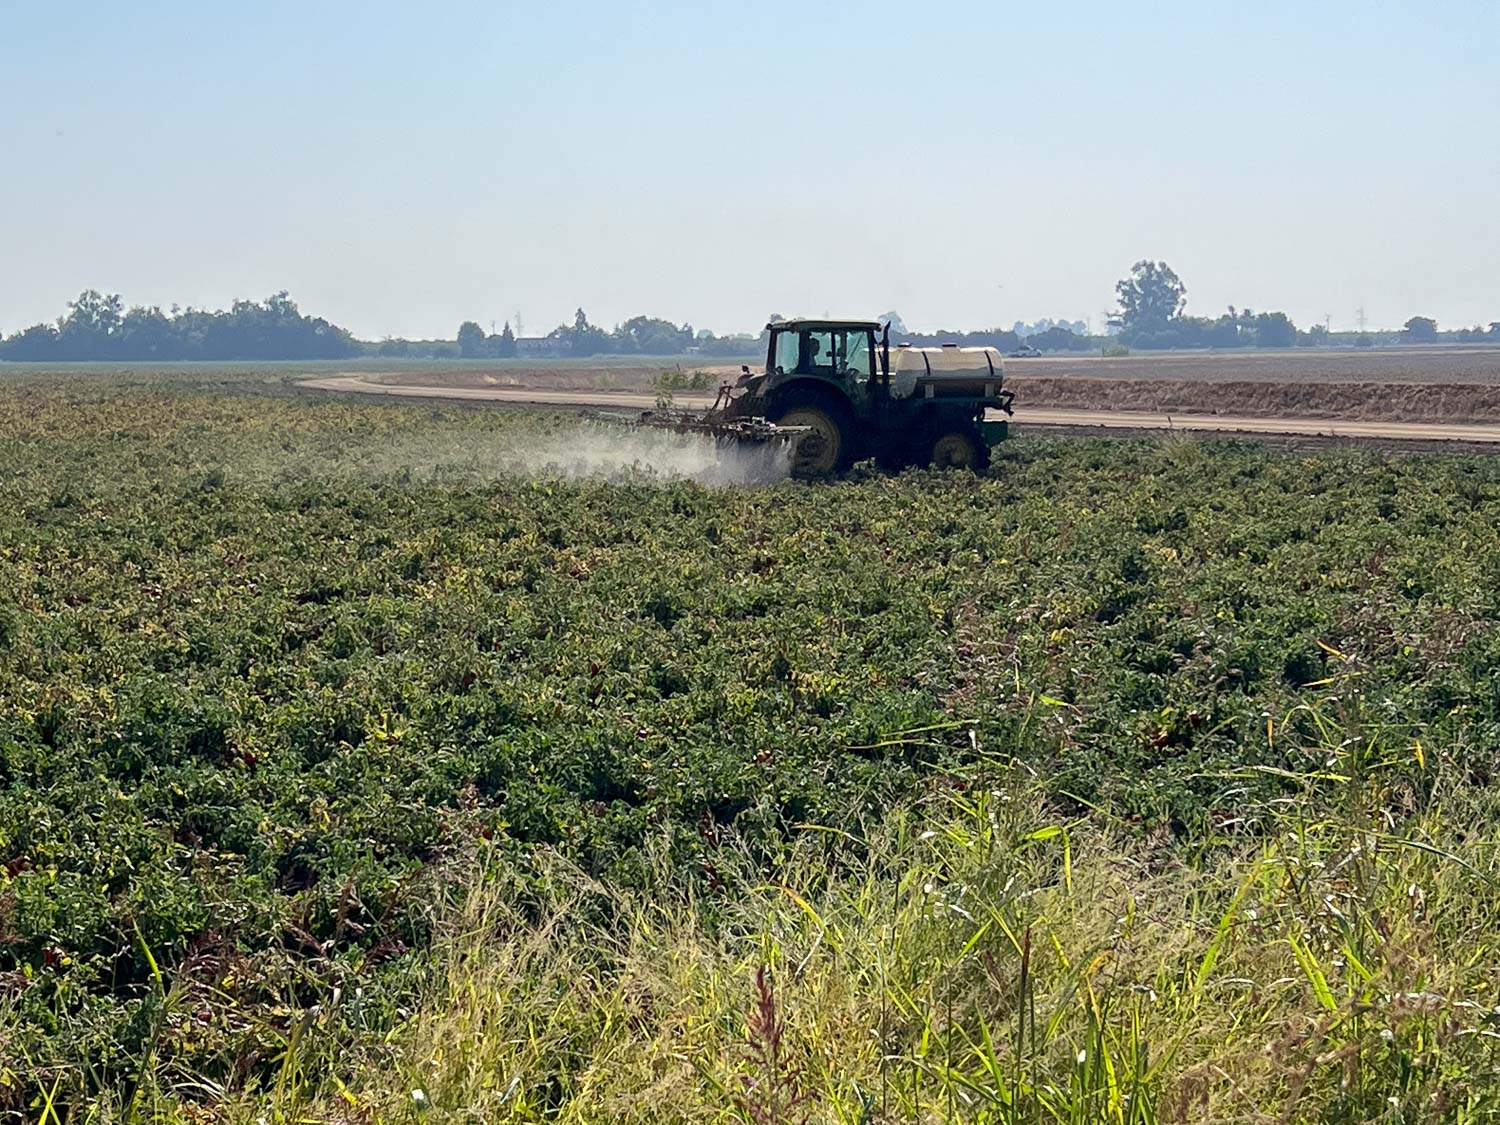
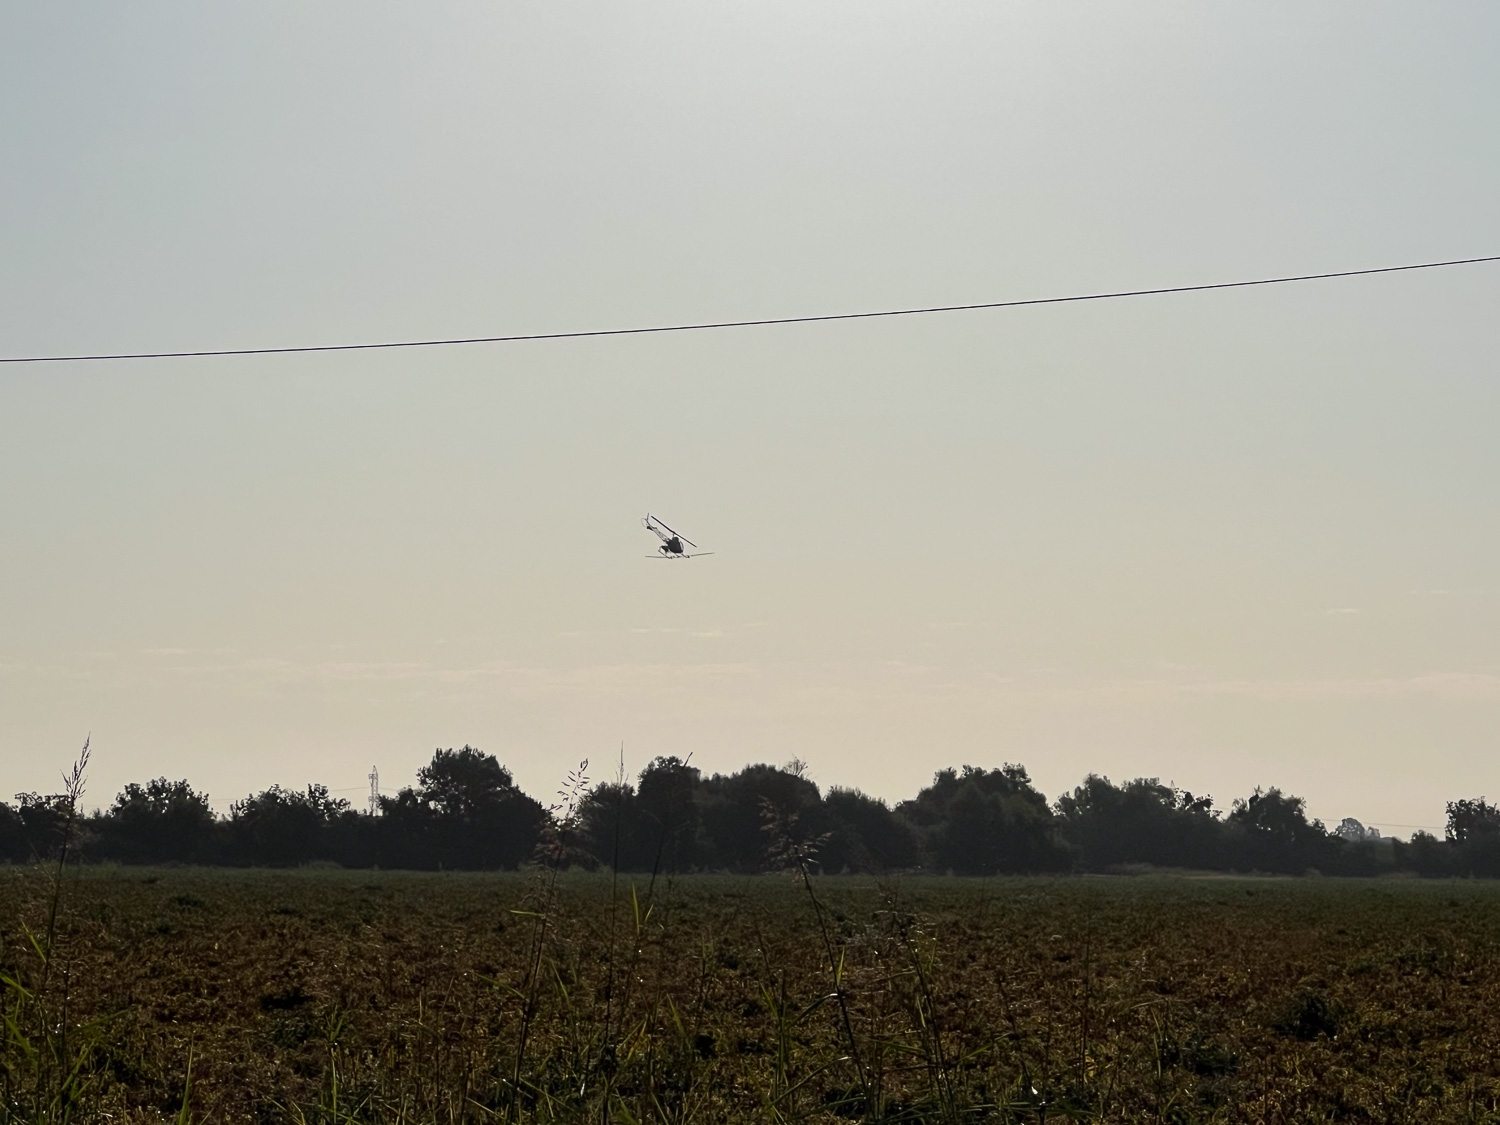
I usually don’t walk here when they are spraying, but this started just as I was getting back. I saw the label on the tank of spray. It’s a regularly used fungicide. The last time I saw spraying it was with a helicopter.
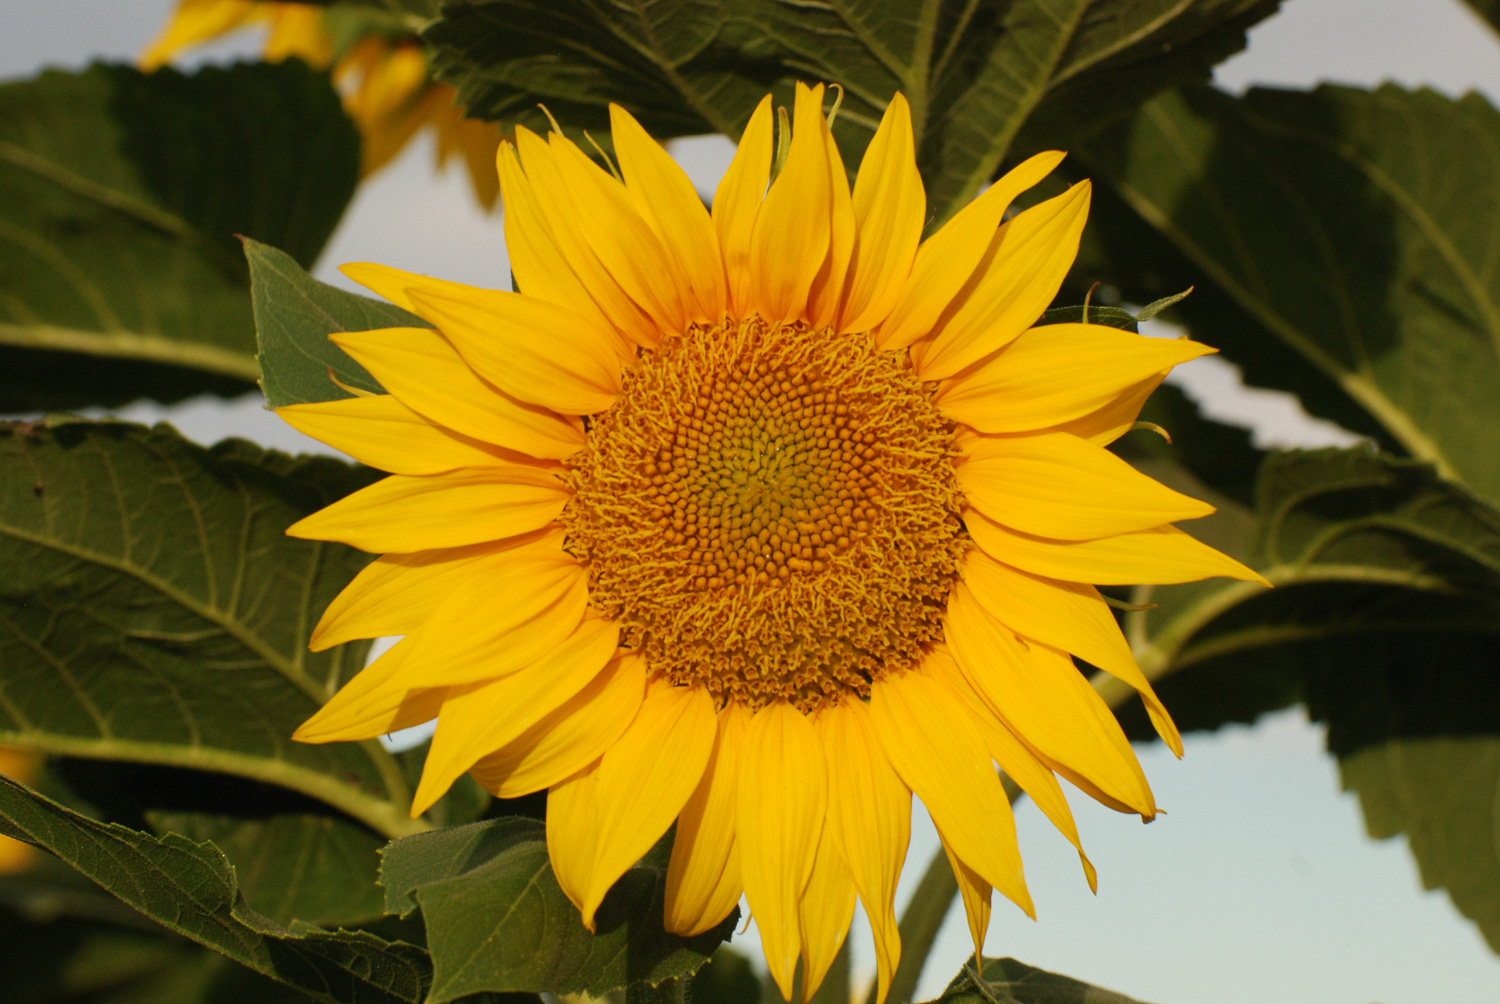
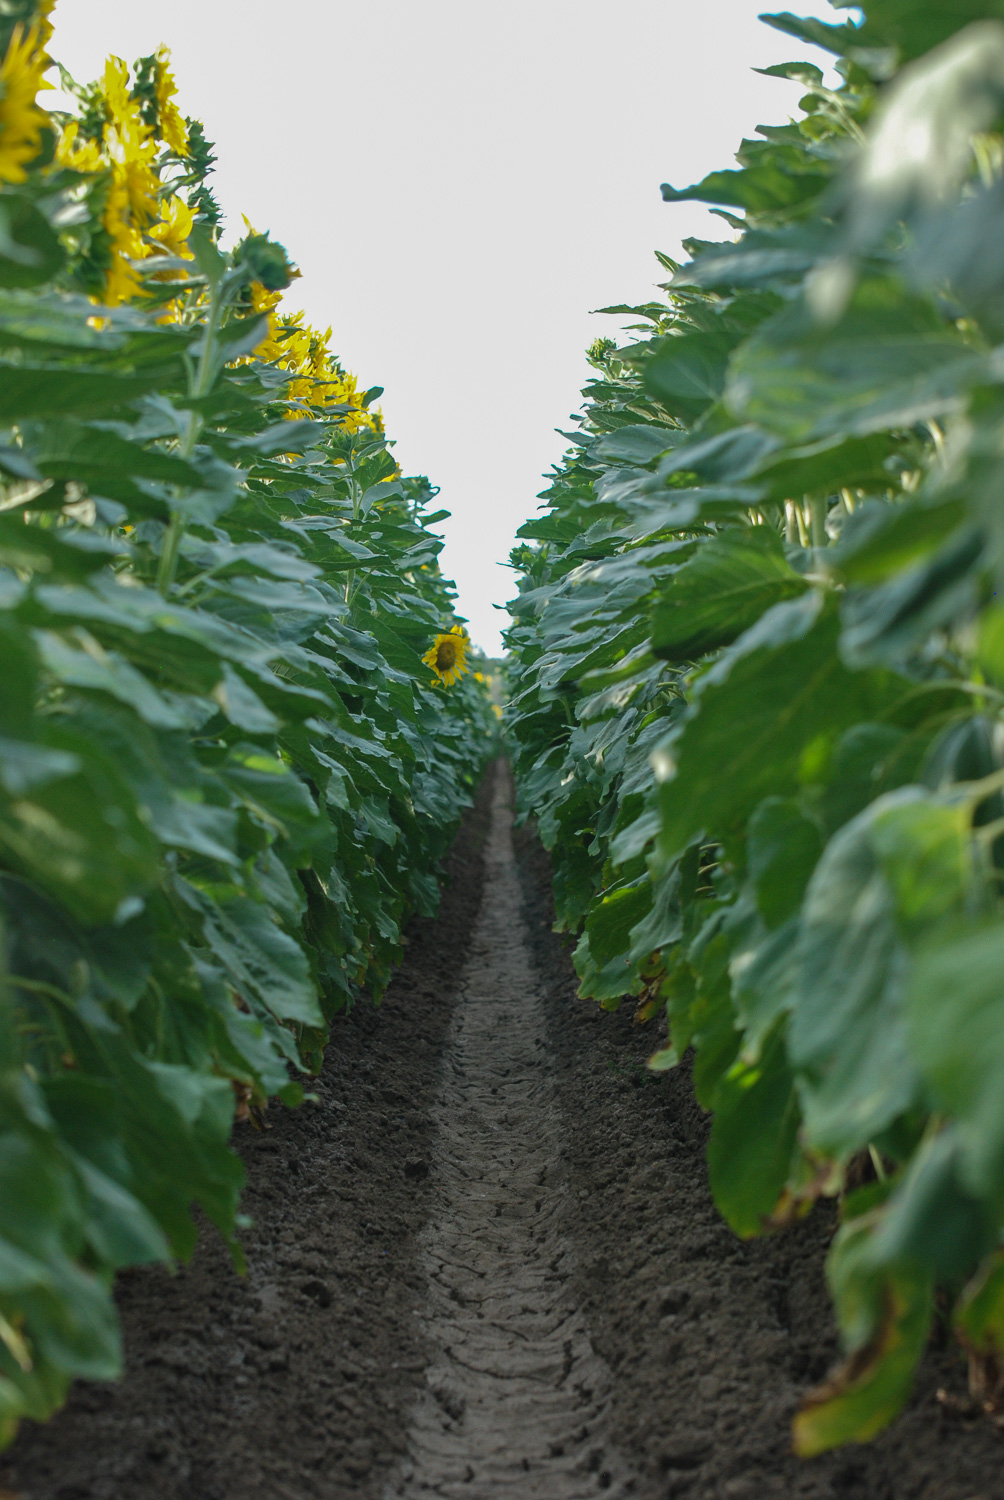
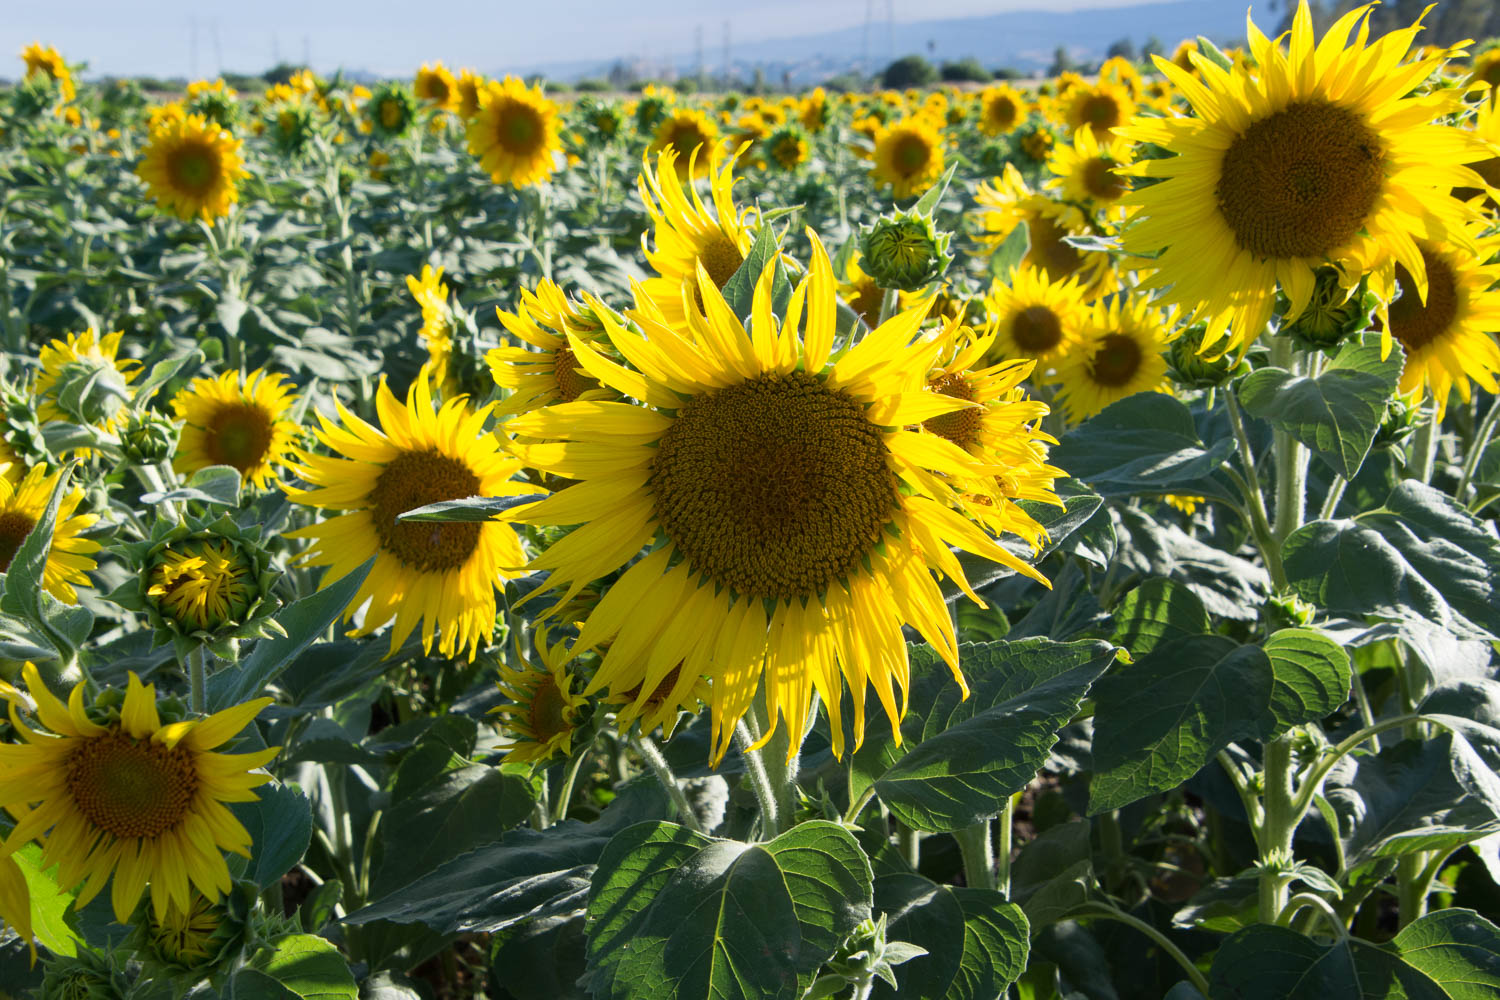
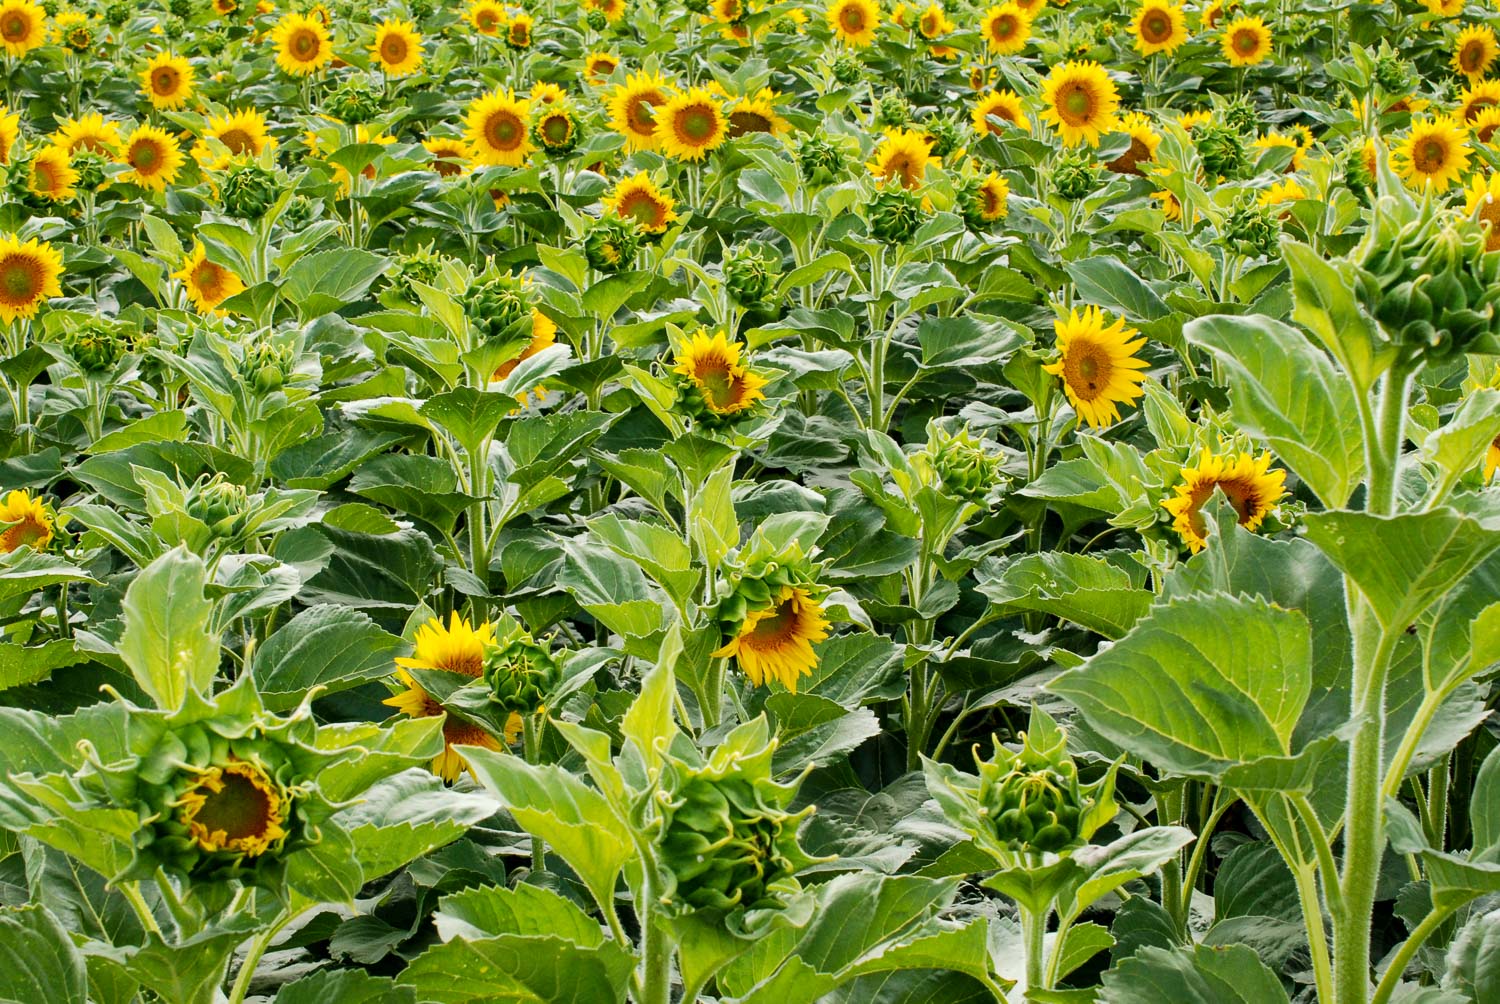
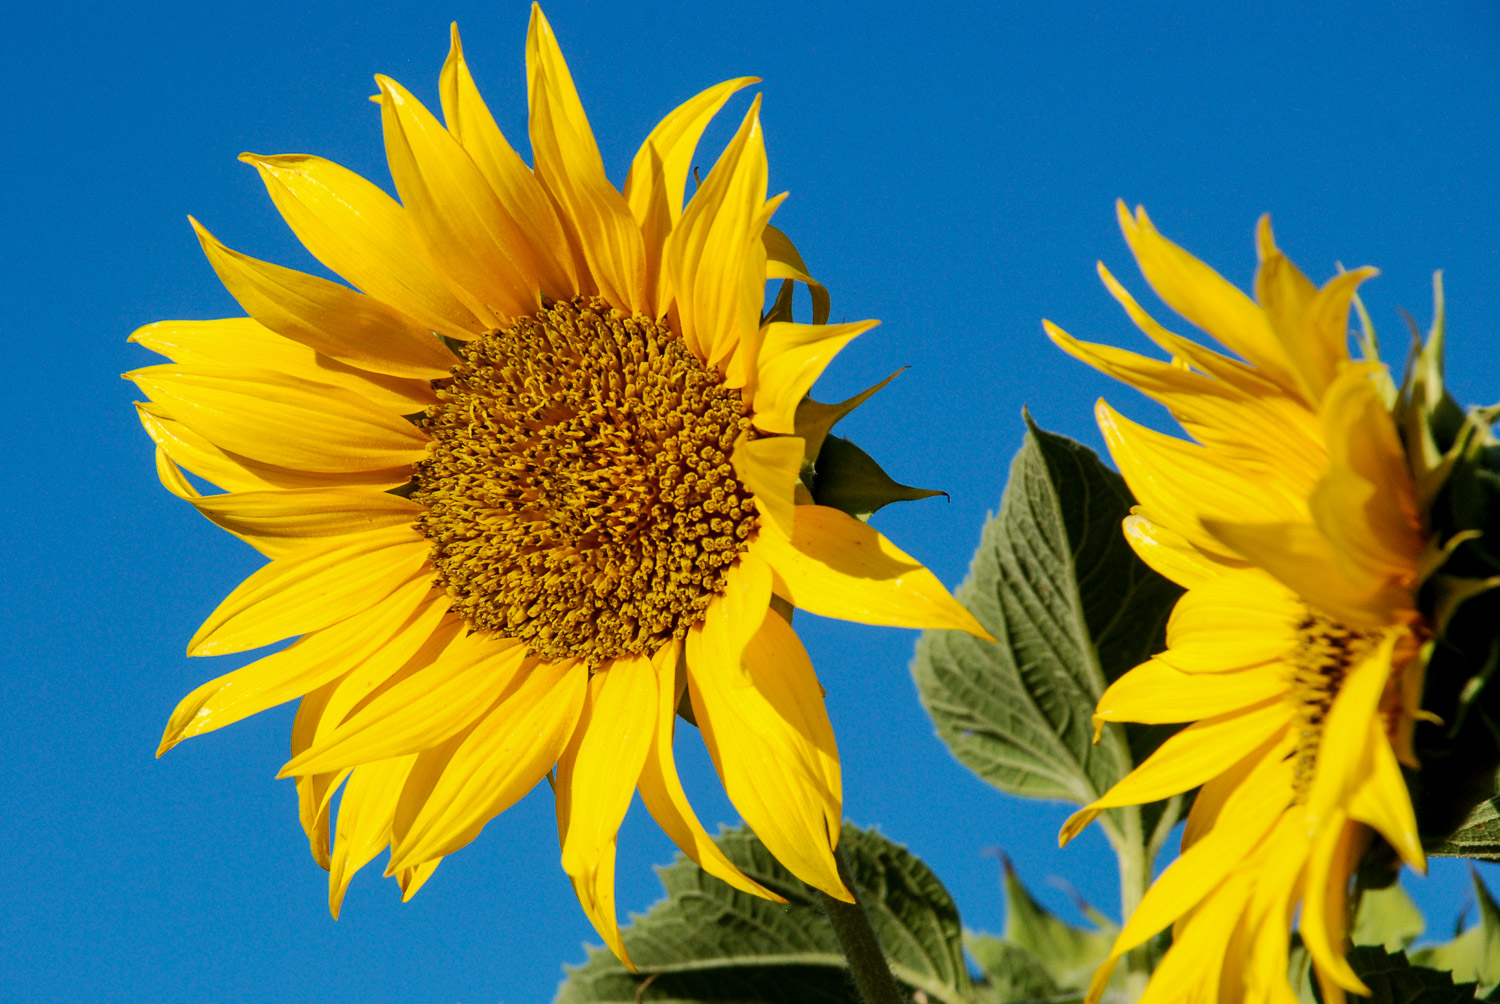
I’ve been moving my photos from my computer’s hard drive to an external hard drive because I’m running out of room. As I moved the Across the Road folder I saw yellow flashing by and I thought I’d share. The landowner Across the Road from me often grows alfalfa in those fields. That is usually a three or four year crop. So every fourth or fifth year there is something else there. This year it is tomatoes. Other years there have been sunflowers. I love sunflowers.
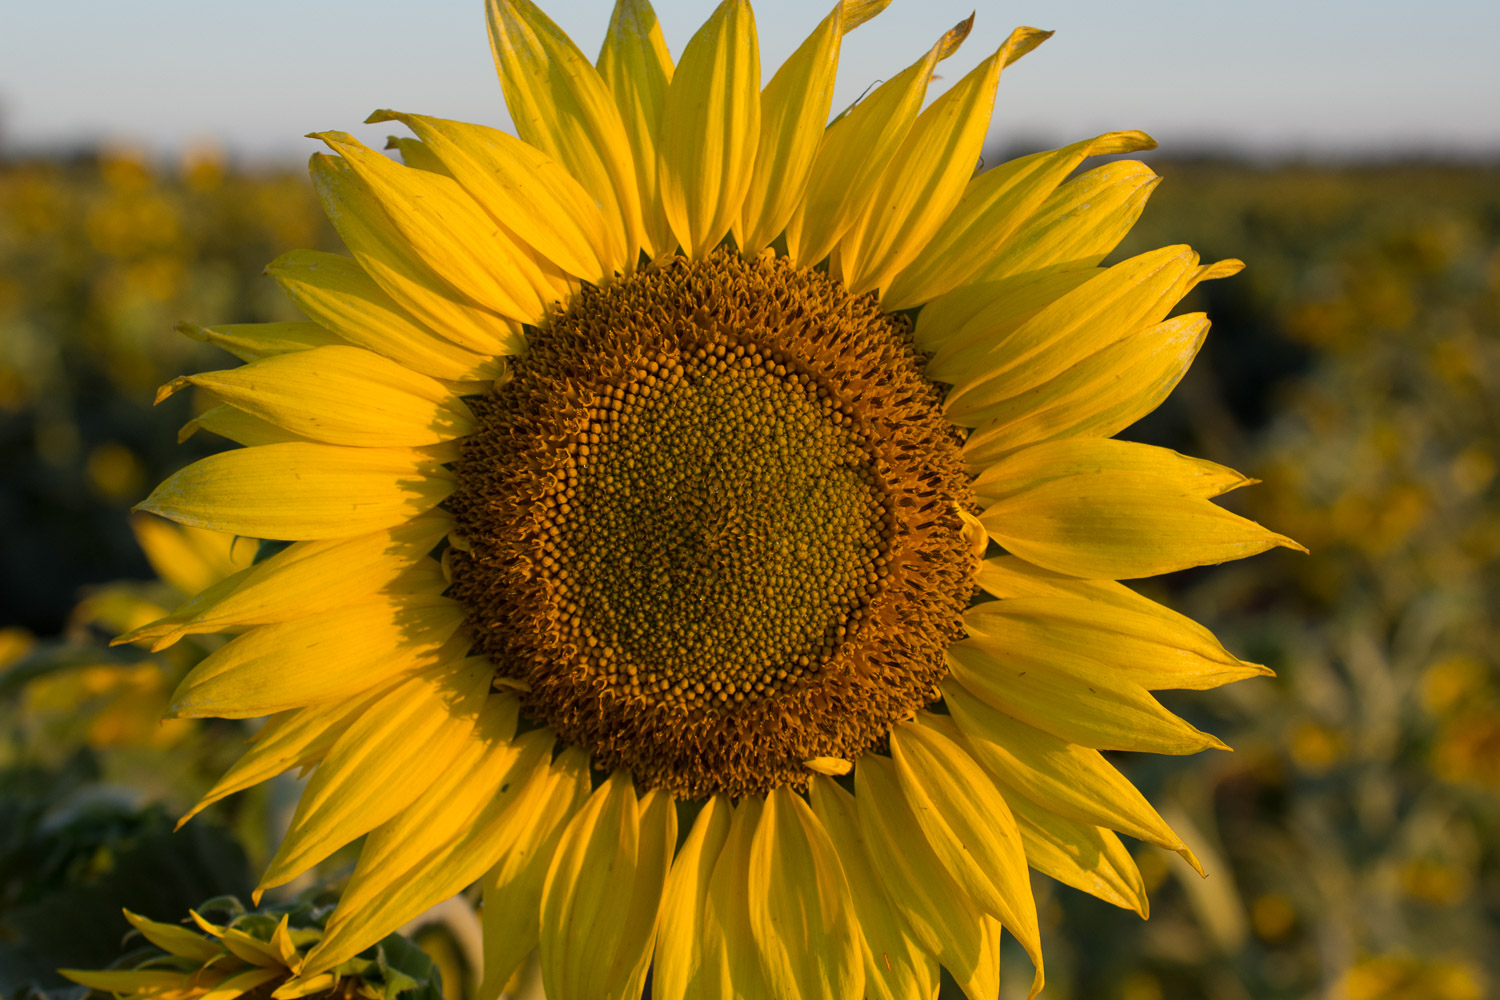
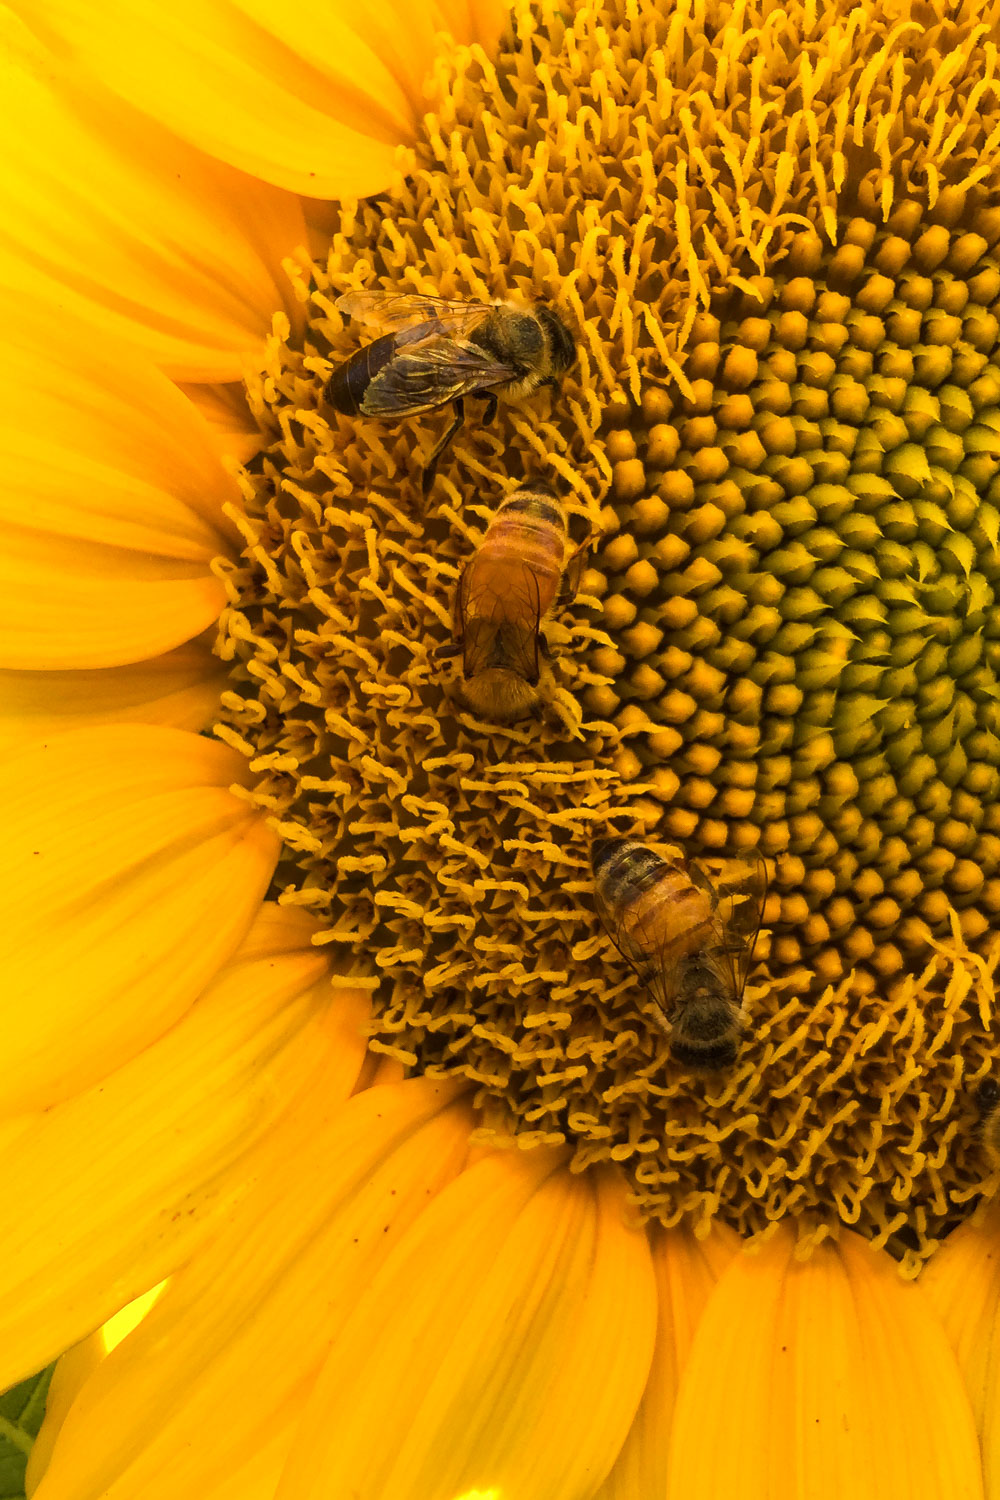
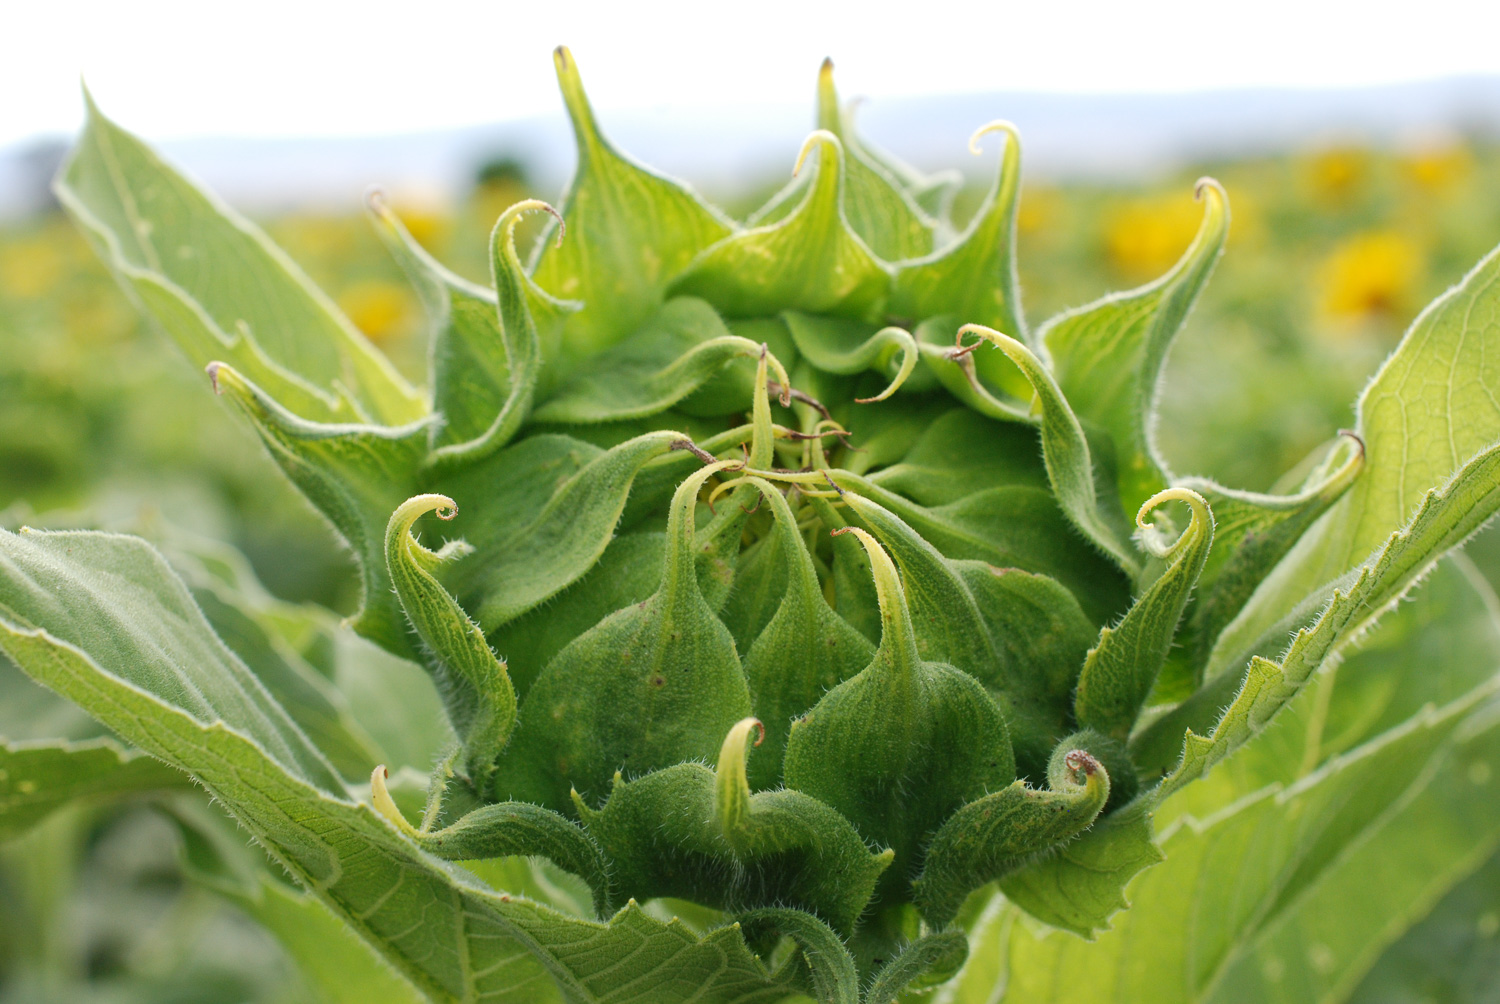
There isn’t a story here. I’m just sharing photos of sunflowers…and in no particular order. I just like seeing these flowers.
Yesterday I spent time with sheep and weaving and ecoprinting and computer. I did more of the same today but didn’t take any weaving photos.
I changed the fence today to move the sheep into a separate paddock. You can’t tell from this photo but there are 8 paddocks that run north-south on this half of the property. There are 3-wire electric fences that keep the sheep in and I change the net fences at the two ends to open or close paddocks. Notice the hot-air balloons. It’s that time of year. There are four in this photo.
This looks like a lot of grass. It is a lot of grass, but it’s not the desirable grass and forbs I’d like. There is a lot of bermuda grass and dallisgrass. Those two take over this time of year. The sheep don’t like them when they get too coarse and head out. Then they go dormant in the winter and choke out the winter/spring annuals that I’d like to see. At least it’s green right now. That’s because we irrigate–there is no summer rain here.
Close up of one of the balloons. Who remembers Rusty? Blog post from 2011. Rusty even had his own blog for several years. I just got distracted and read back through some of it. Rusty was a pretty good writer and I enjoyed reading through his posts just now. I wonder if I could get Ginny to write a blog.
Anyway, about Rusty. He was afraid of these balloons. During “balloon season” he wouldn’t leave the house first thing in the morning. He knew that they’d be gone by mid-morning and then he would go out. Ginny doesn’t mind the balloons, but she is sure gun-shy and that’s a problem with all the recreational shooting around here.
Speaking of things in the sky, this is the third time there has been a helicopter spraying the tomato field across the road.
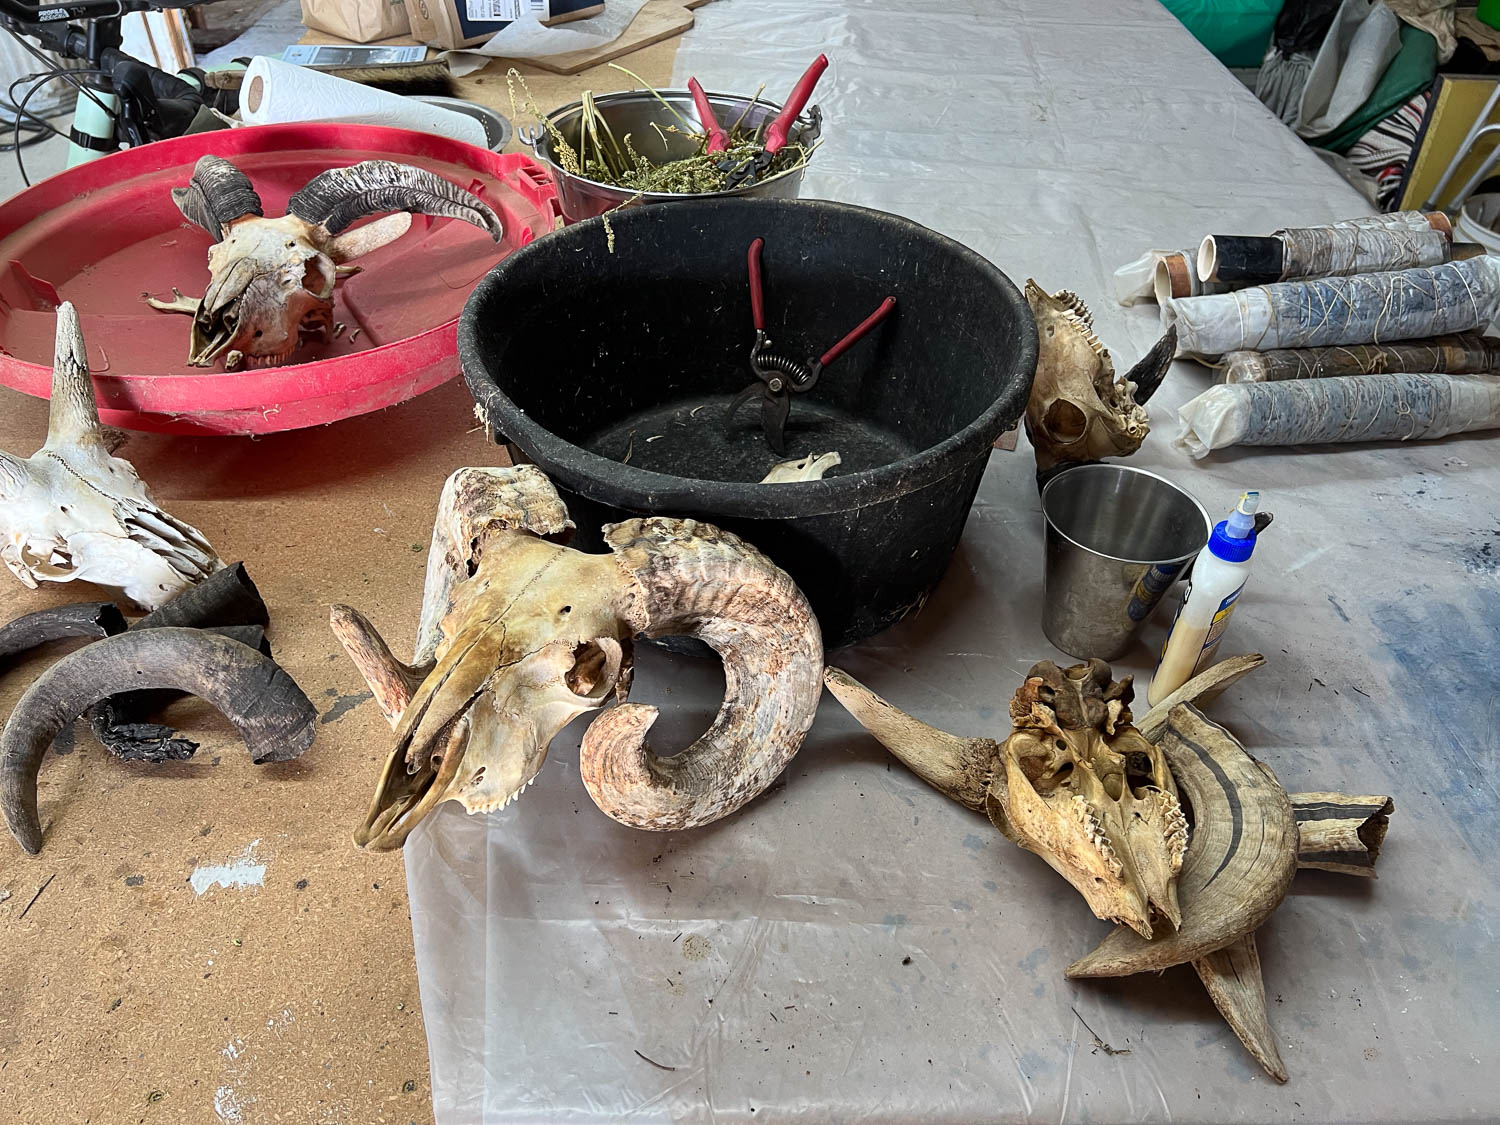
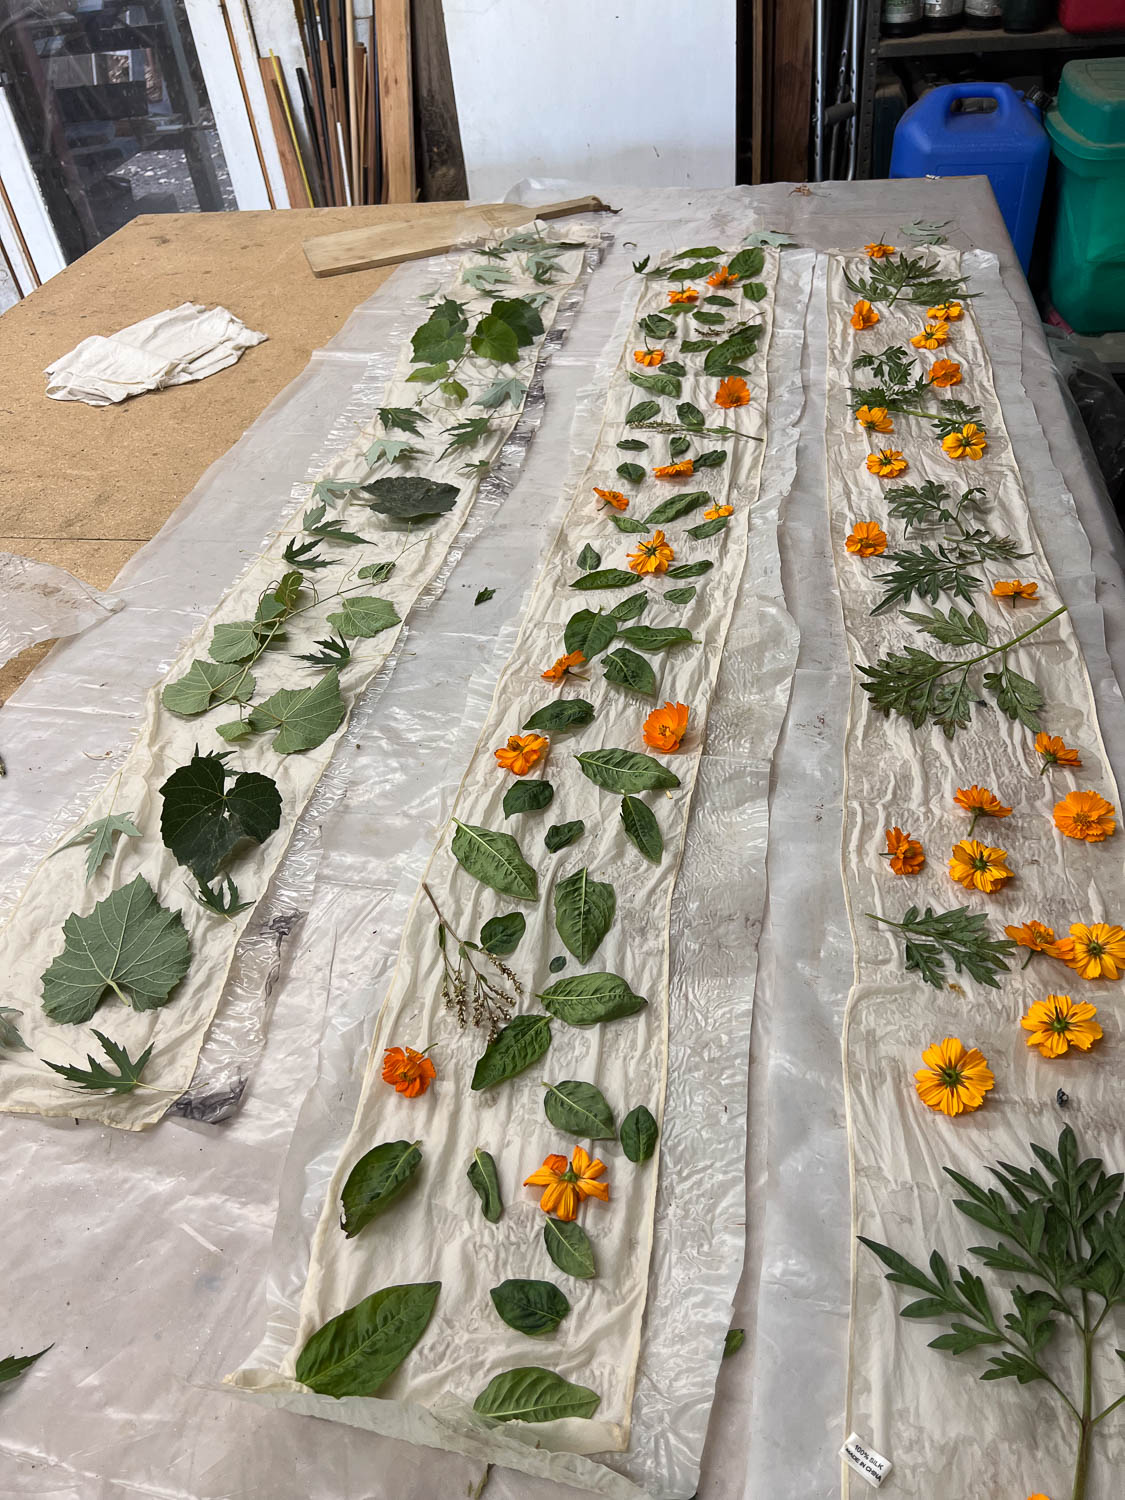
Before I went to the house after this morning’s chores I wanted to unroll the ecoprints from yesterday (see yesterday’s blog post). I have taken over this work table in the garage. The ecoprints are still rolled up on the right of the table. This is a look at the other projects I have going on–getting these skulls in some shape that I can sell them.
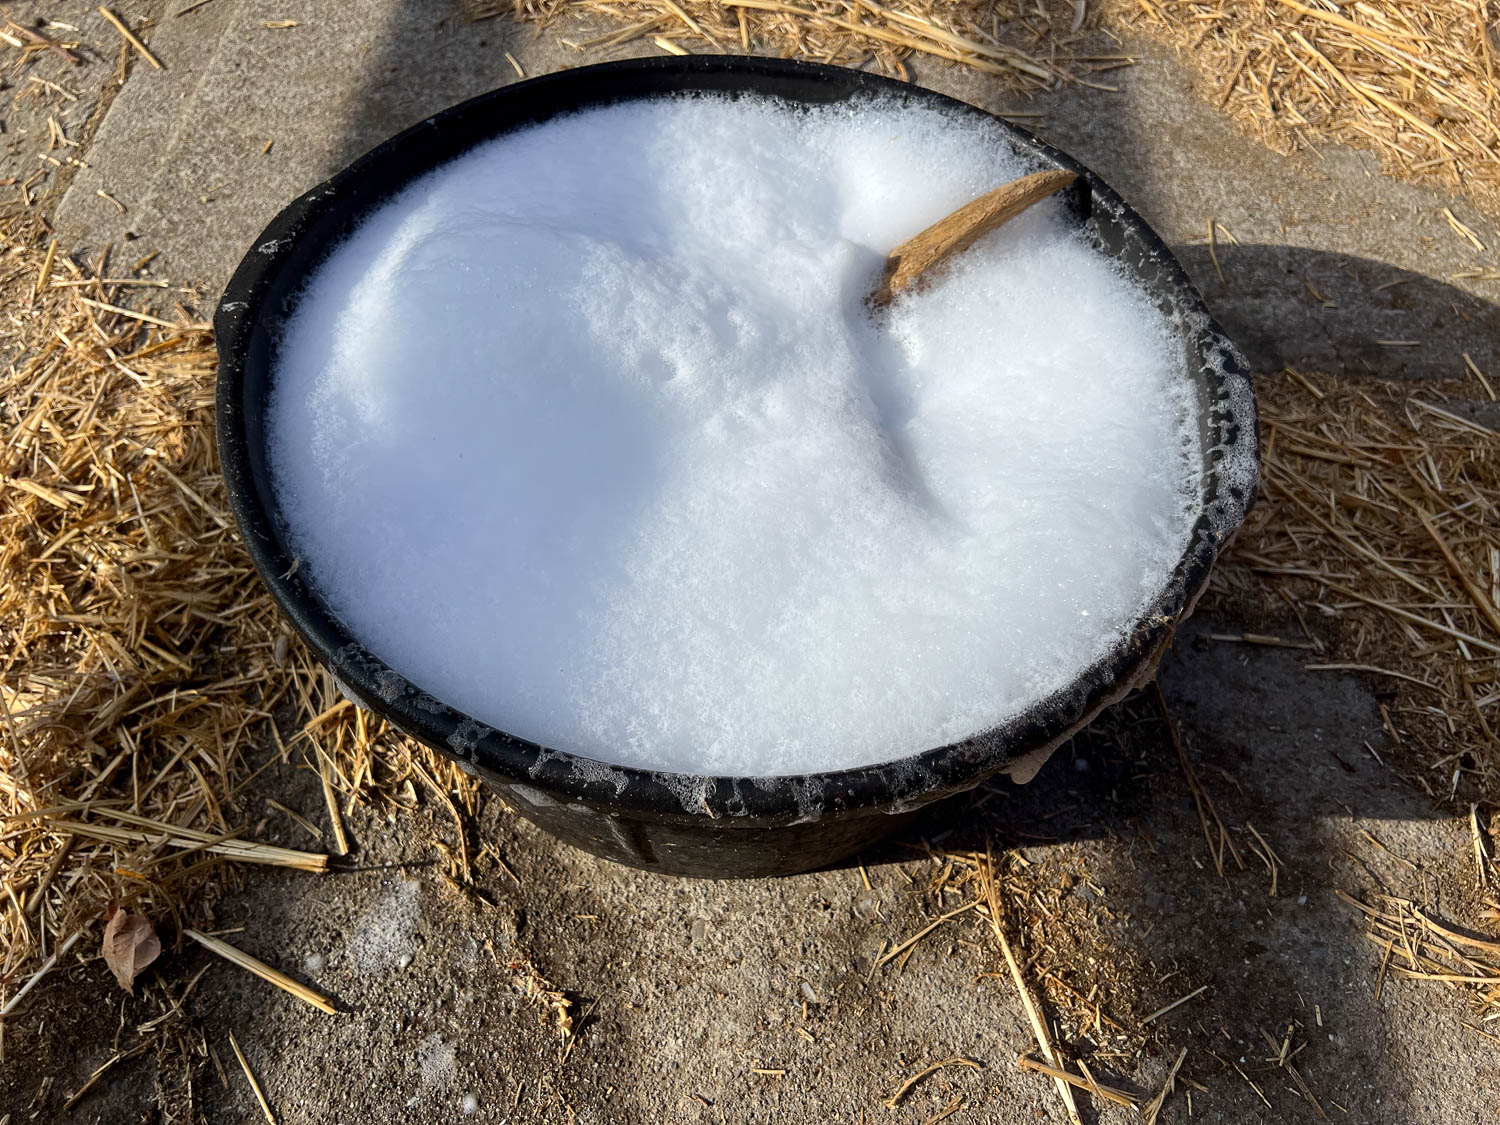
While I was working on the ecoprint scarves this morning I had a pot cooking with a couple of skulls to see if I could get them cleaned up better.
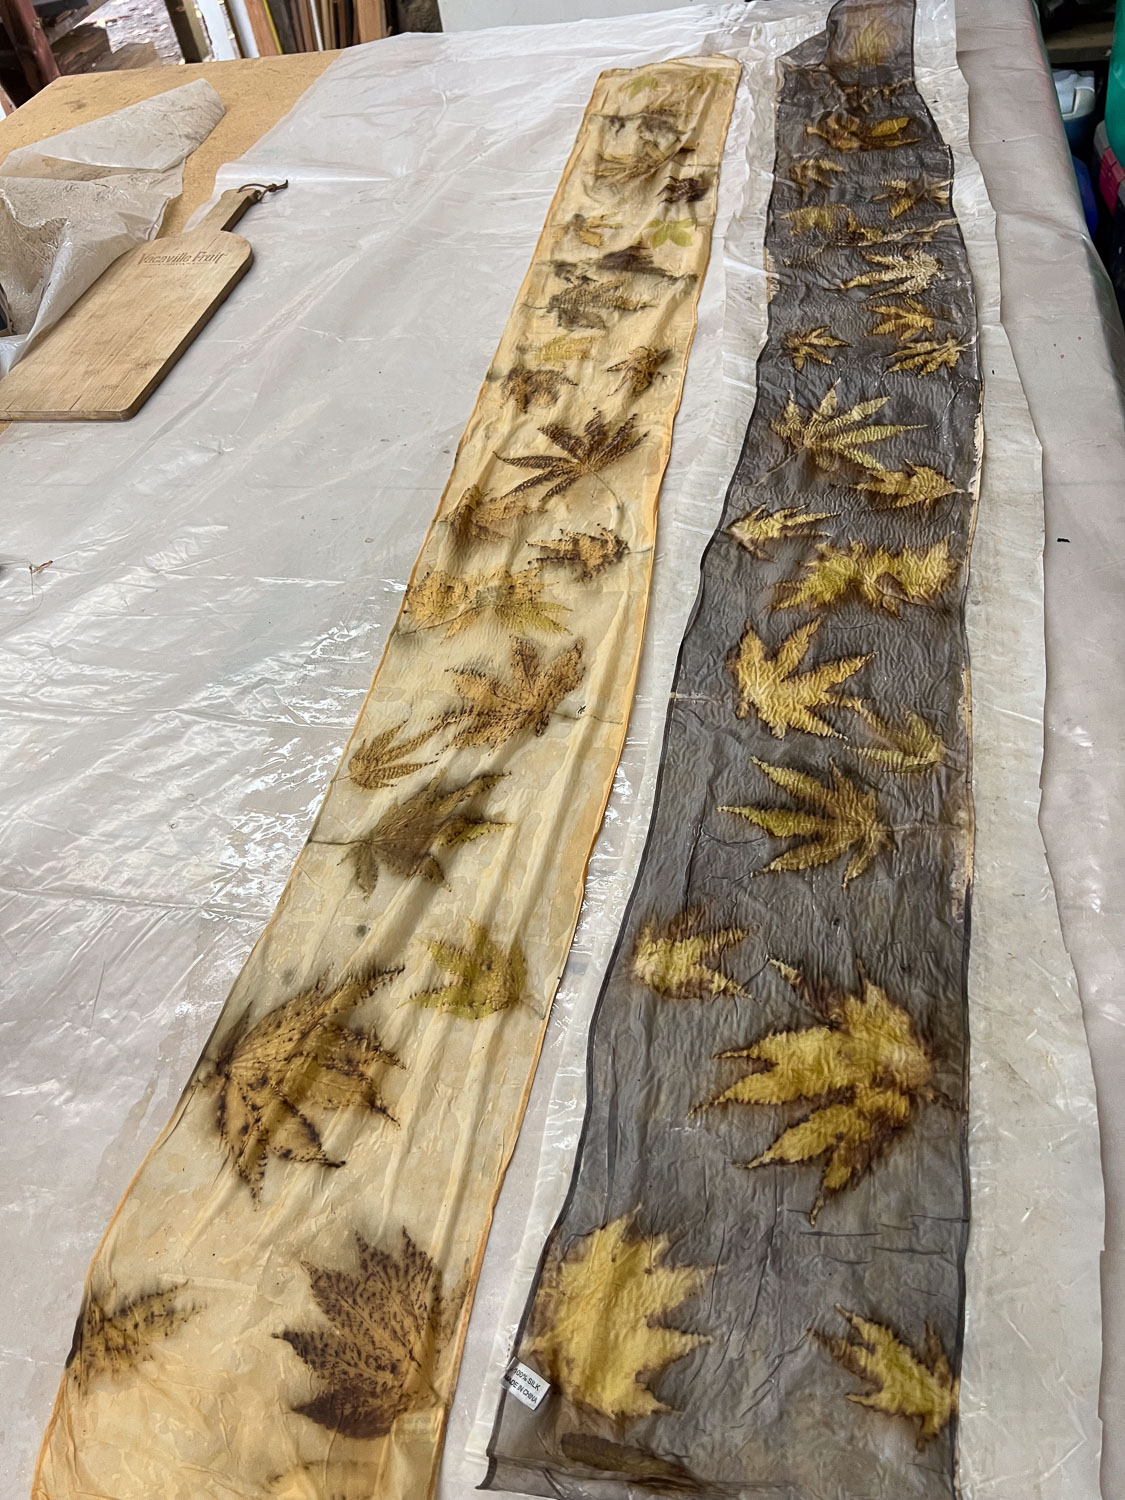
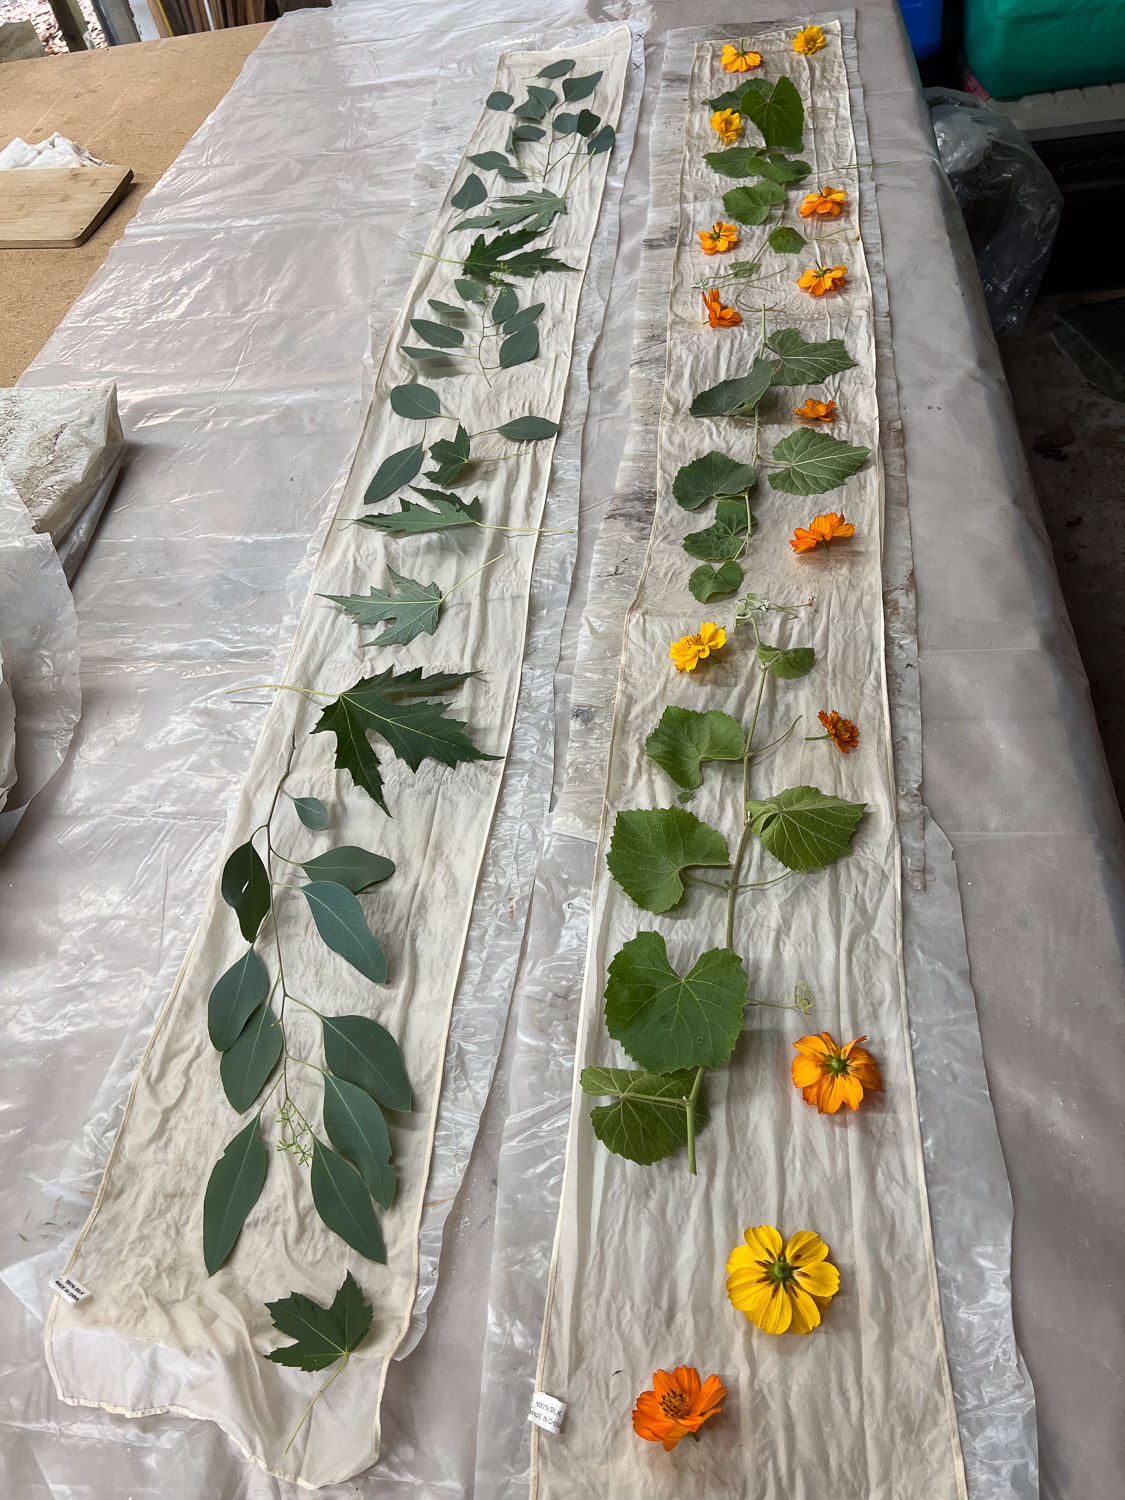
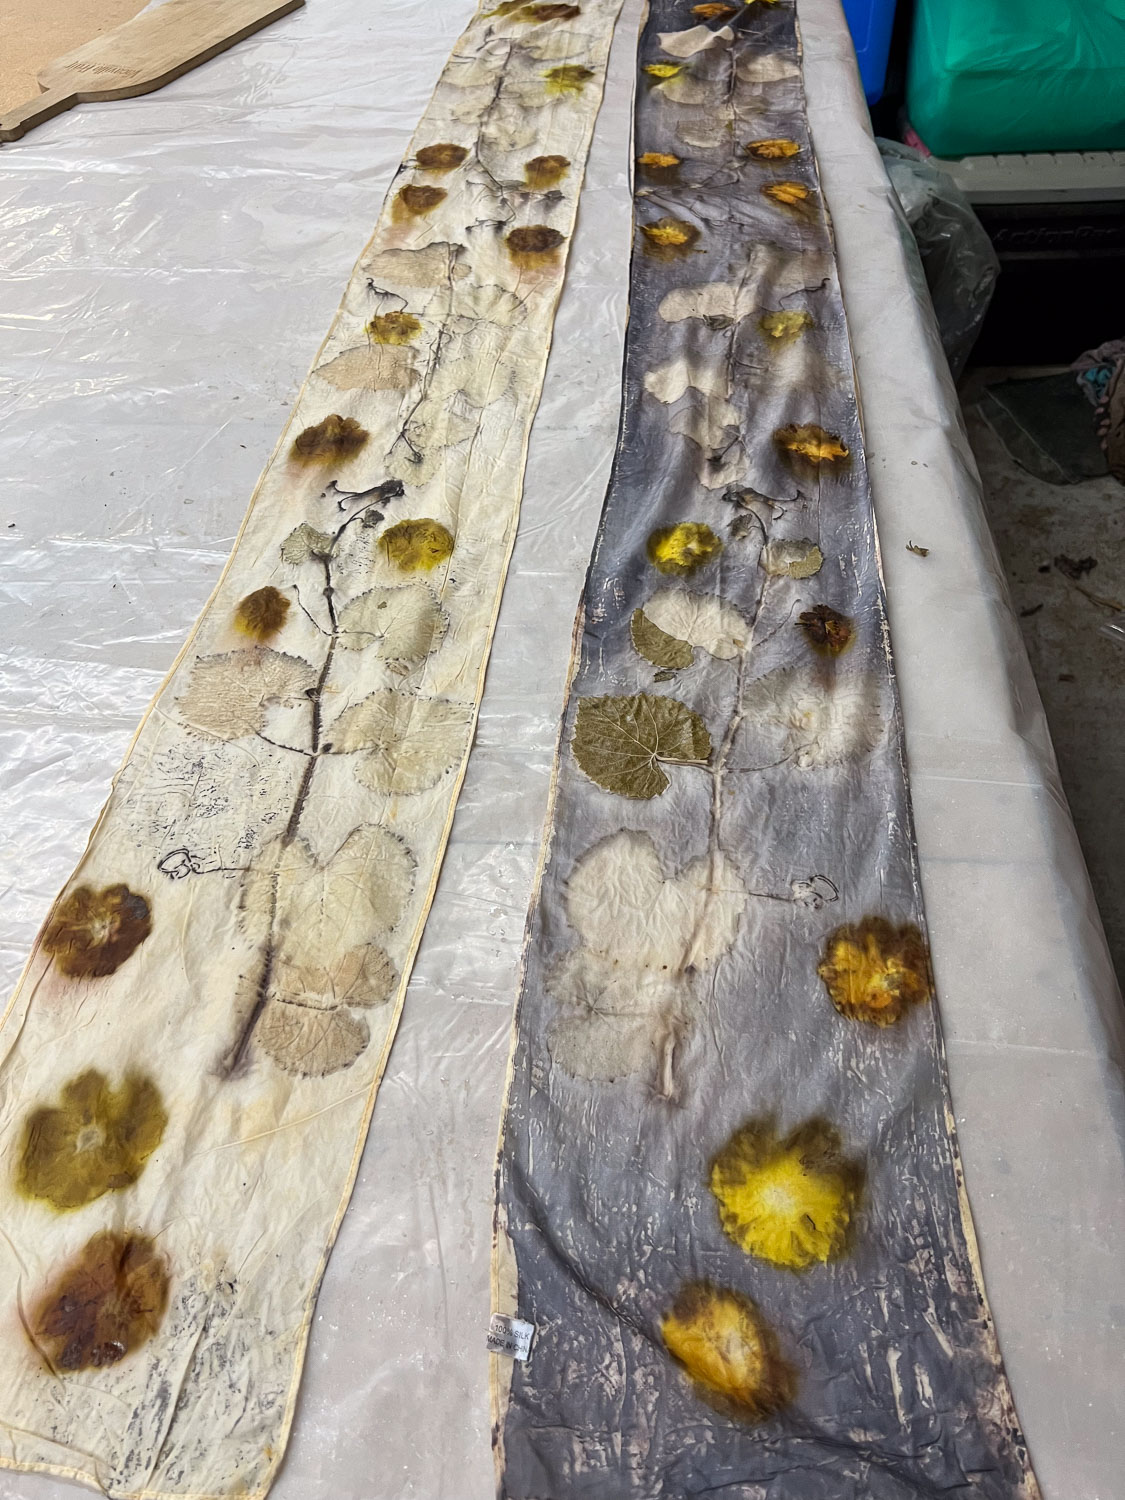
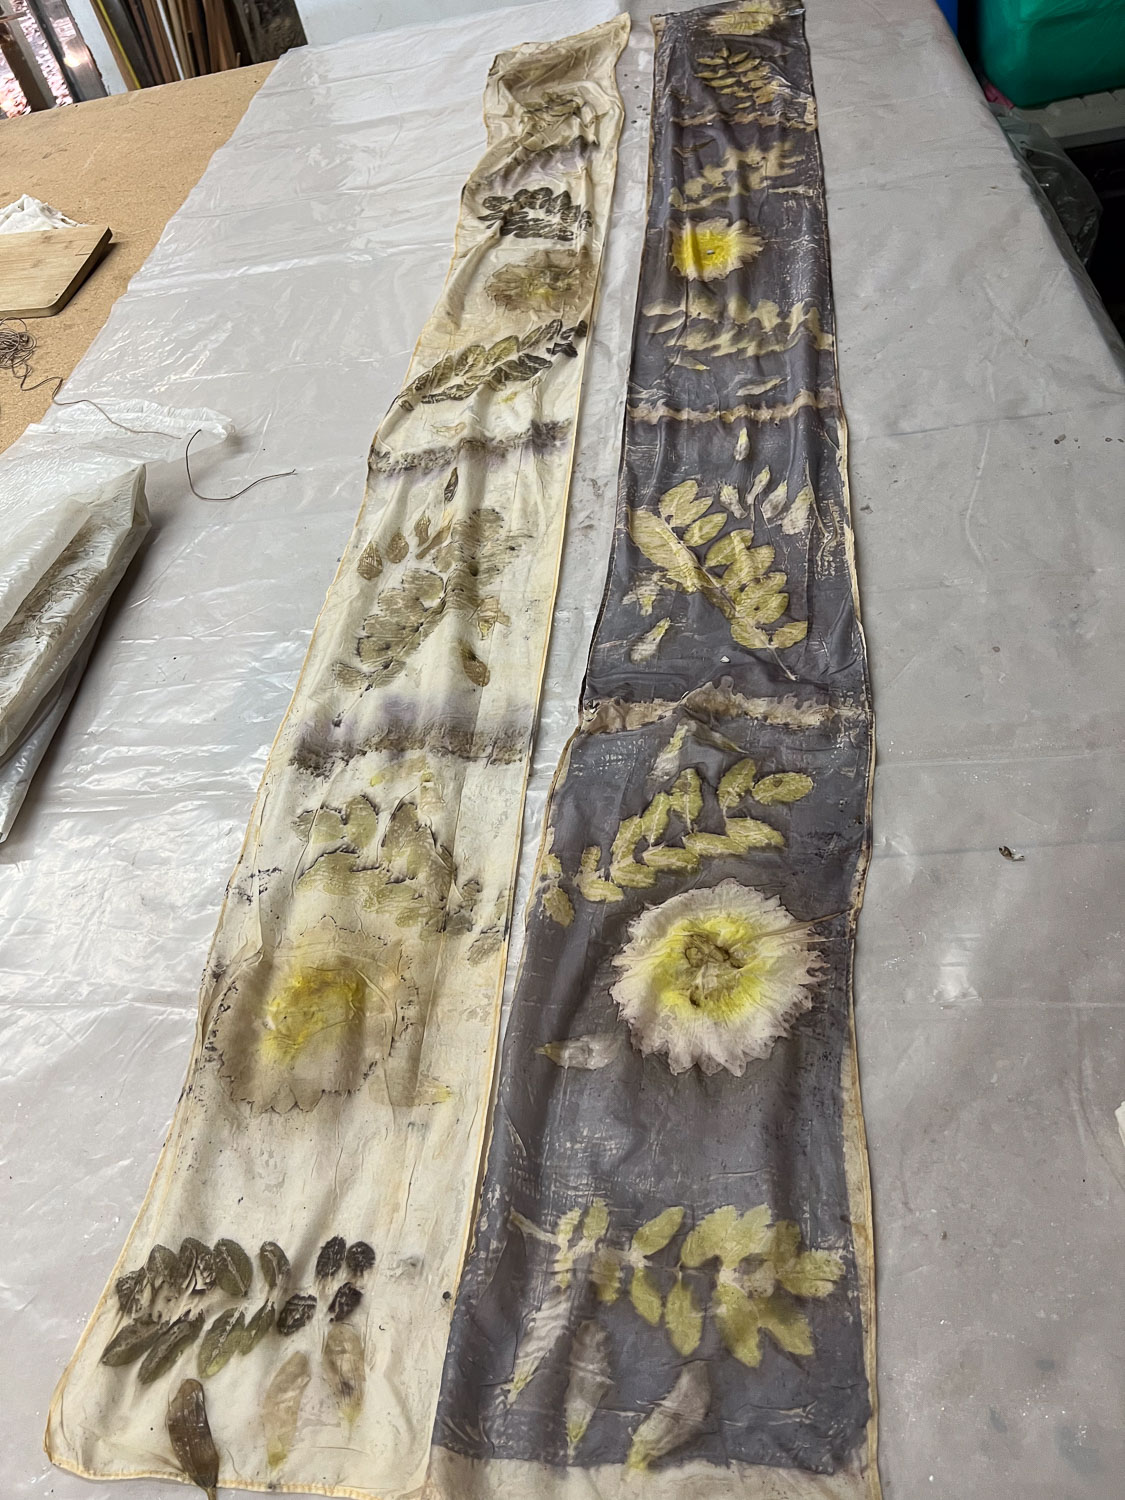
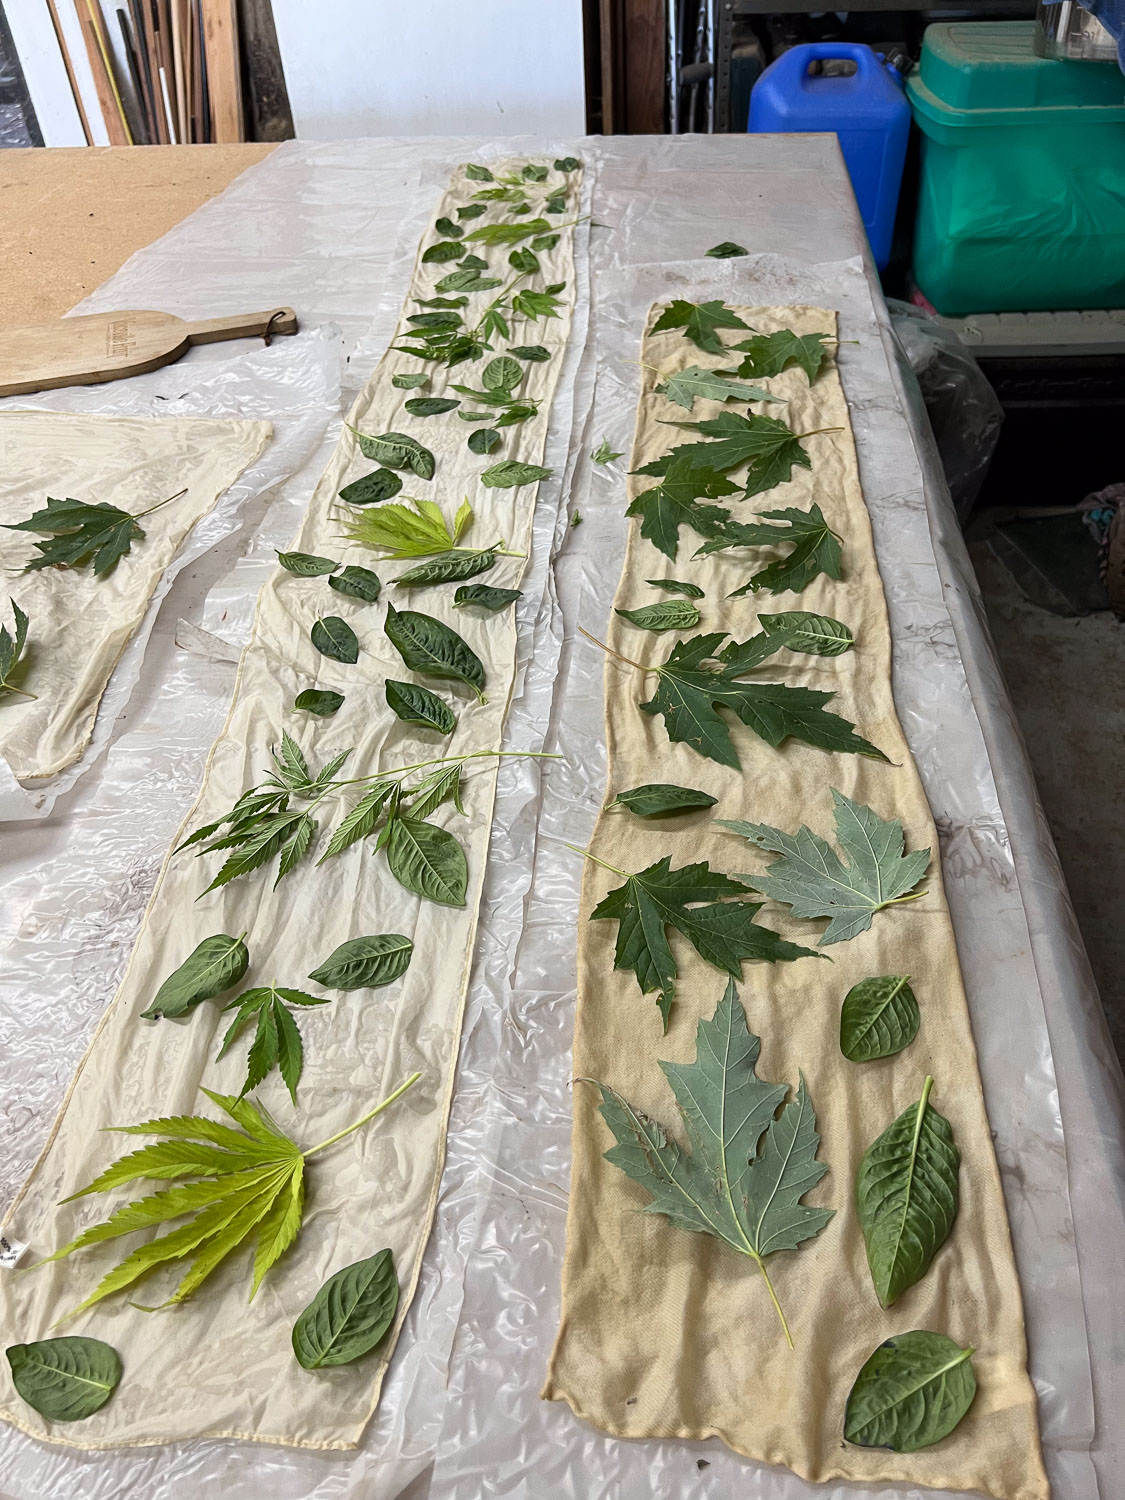
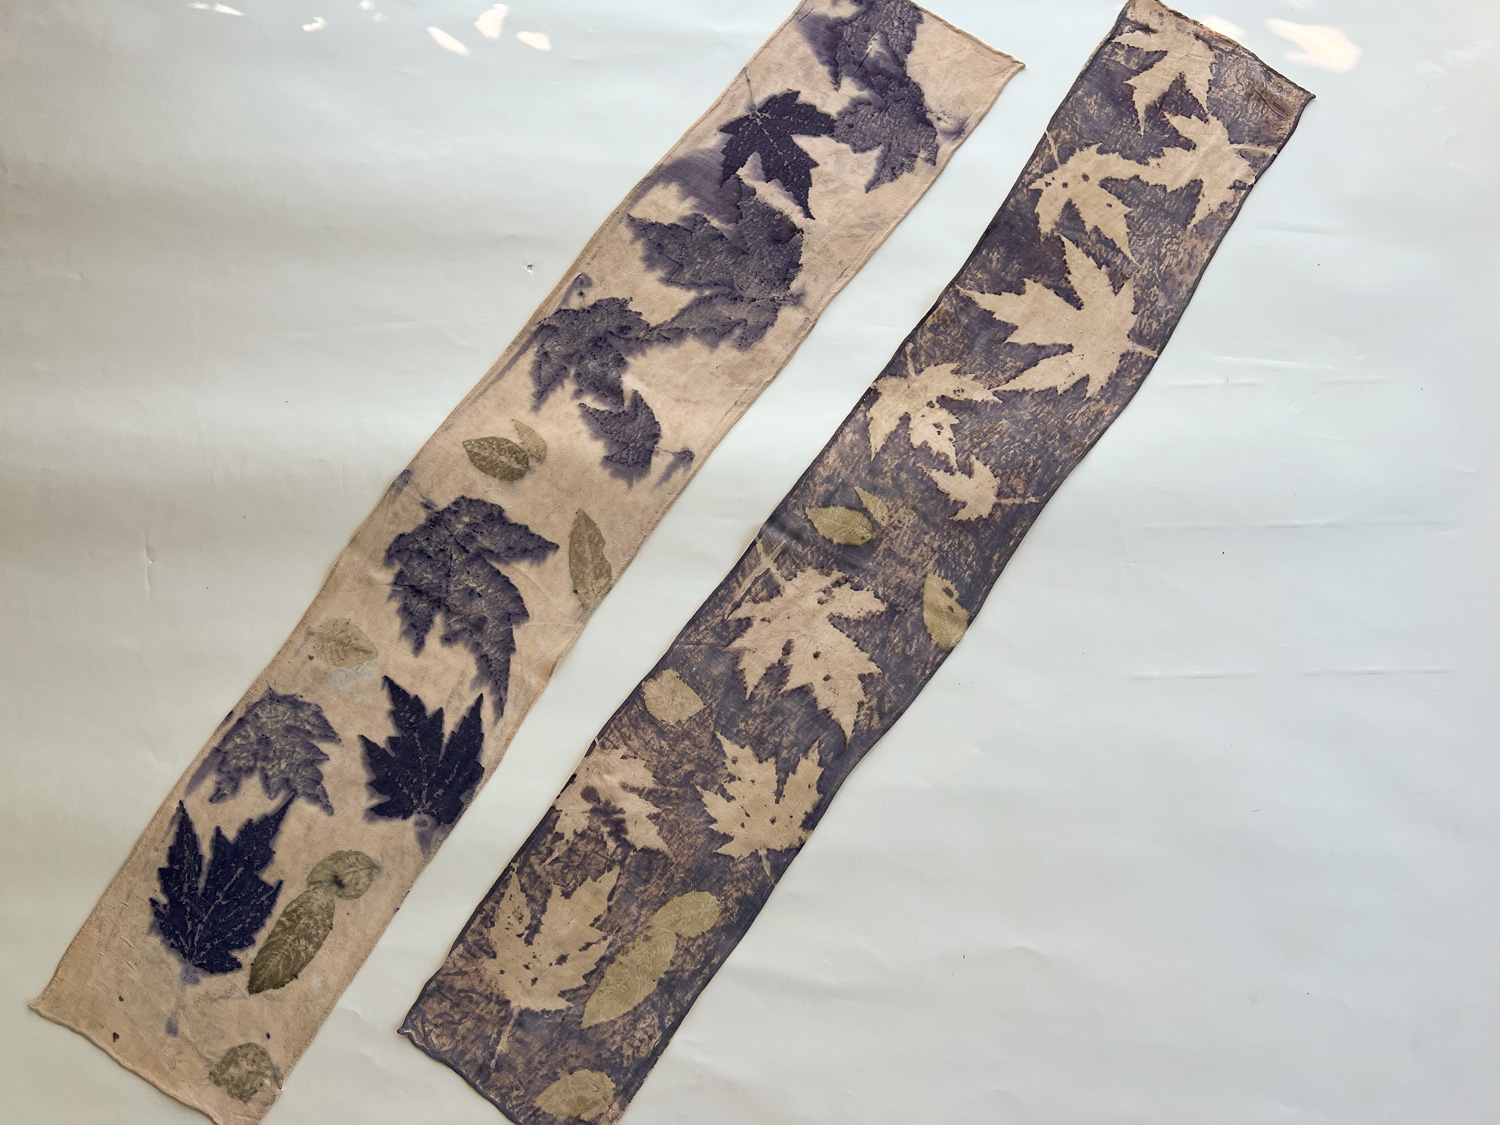
Here is a pair of square scarves. The photos in yesterday’s post show scarves with leaves or flowers in place. I put a second scarf on top of each of those and then roll them around a PVC pipe to steam. These photos show the pairs of scarves after unrolling. This pair has cosmos leaves and flowers. I am always fascinated by the different looks on the two scarves.
This one is all cannabis leaves (supplied by a friend). These don’t have that classic look of the ones below because by the time I got to this, the remaining leaves had started to fold up and at that point it is very tedious to spread them out again, especially with all these small ones.
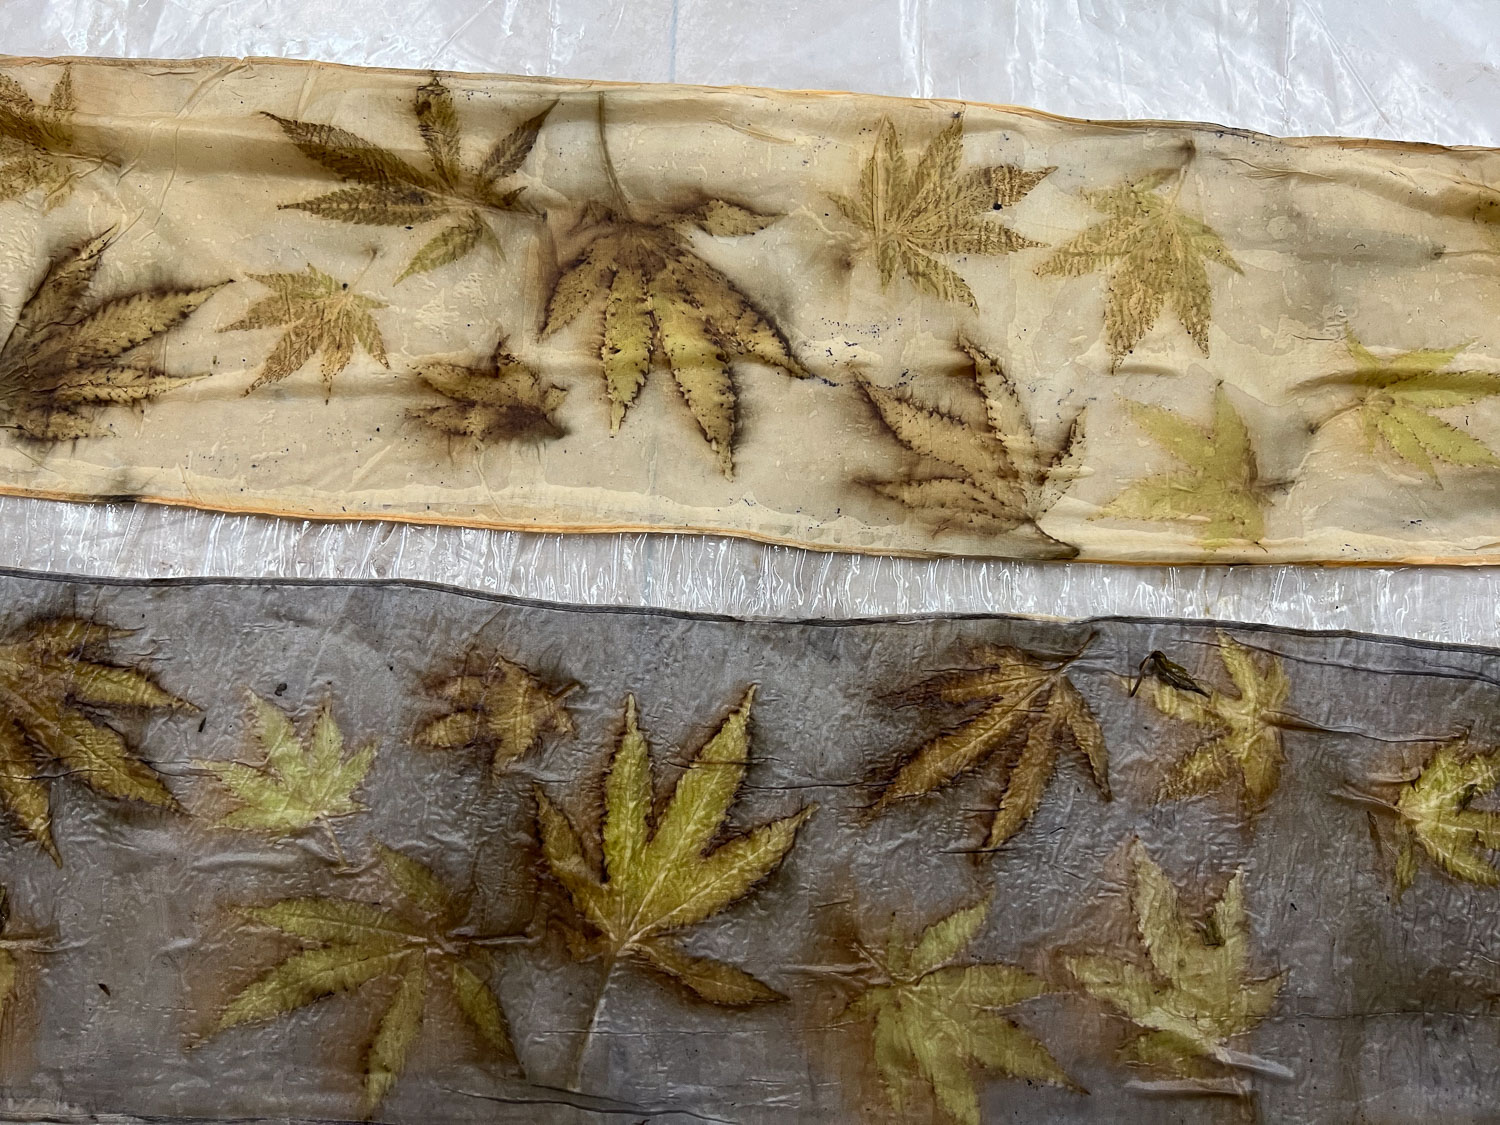
Cannabis leaves in the more classic look.
Another set of cannabis leaves with a close-up below.
Some plants print on one scarf and create a resist on the other. These are printing on both scarves.
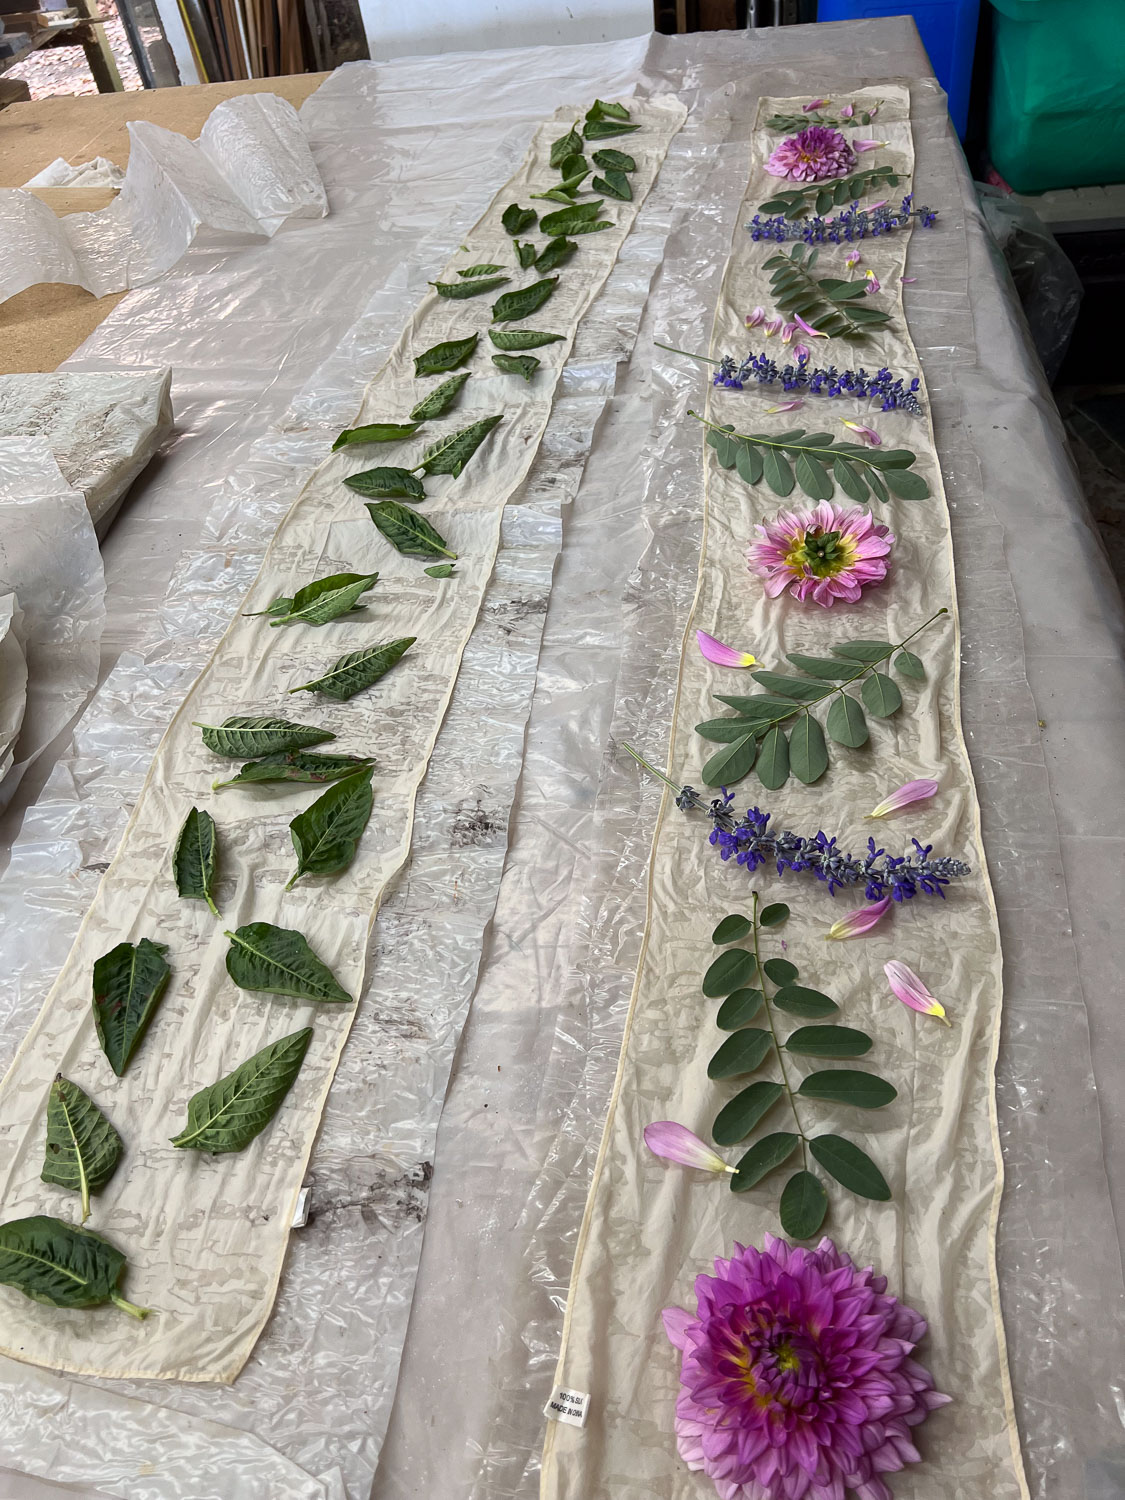
No, I am not selling cannabis. These are purple hollyhocks and cosmos flowers that I have added to my website and will have at Lambtown.
Tomorrow is a Farm Day and we’re setting up breeding groups! I need to look at my list one ore time.
I don’t have photos of everything I do during the day. Standing at the computer for hours doesn’t make for very exciting photos.
Now that the only ewe lambs left are those that I’m keeping, I wanted to halter break them. I don’t expect them to lead like a horse, but I like to be able to tie them to a fence without them panicking. Also, a couple of these will be going to the Lambtown sheep show at the beginning of October. It will make it easier for my Farm Club crew if the lambs are at least somewhat halter broke.
There is a bit too much giant zucchini. Too bad zucchini isn’t a dye plant. But at least I can feed the extra to someone.
I have a couple of articles scheduled for Handwoven Magazine for next spring. The deadlines are approaching and I need to finish some more weaving so that I have photos for one article and the project to send for another. This is Clasped Warp, a technique usually done on a rigid heddle loom. I am adapting it to use on a multi-shaft loom.
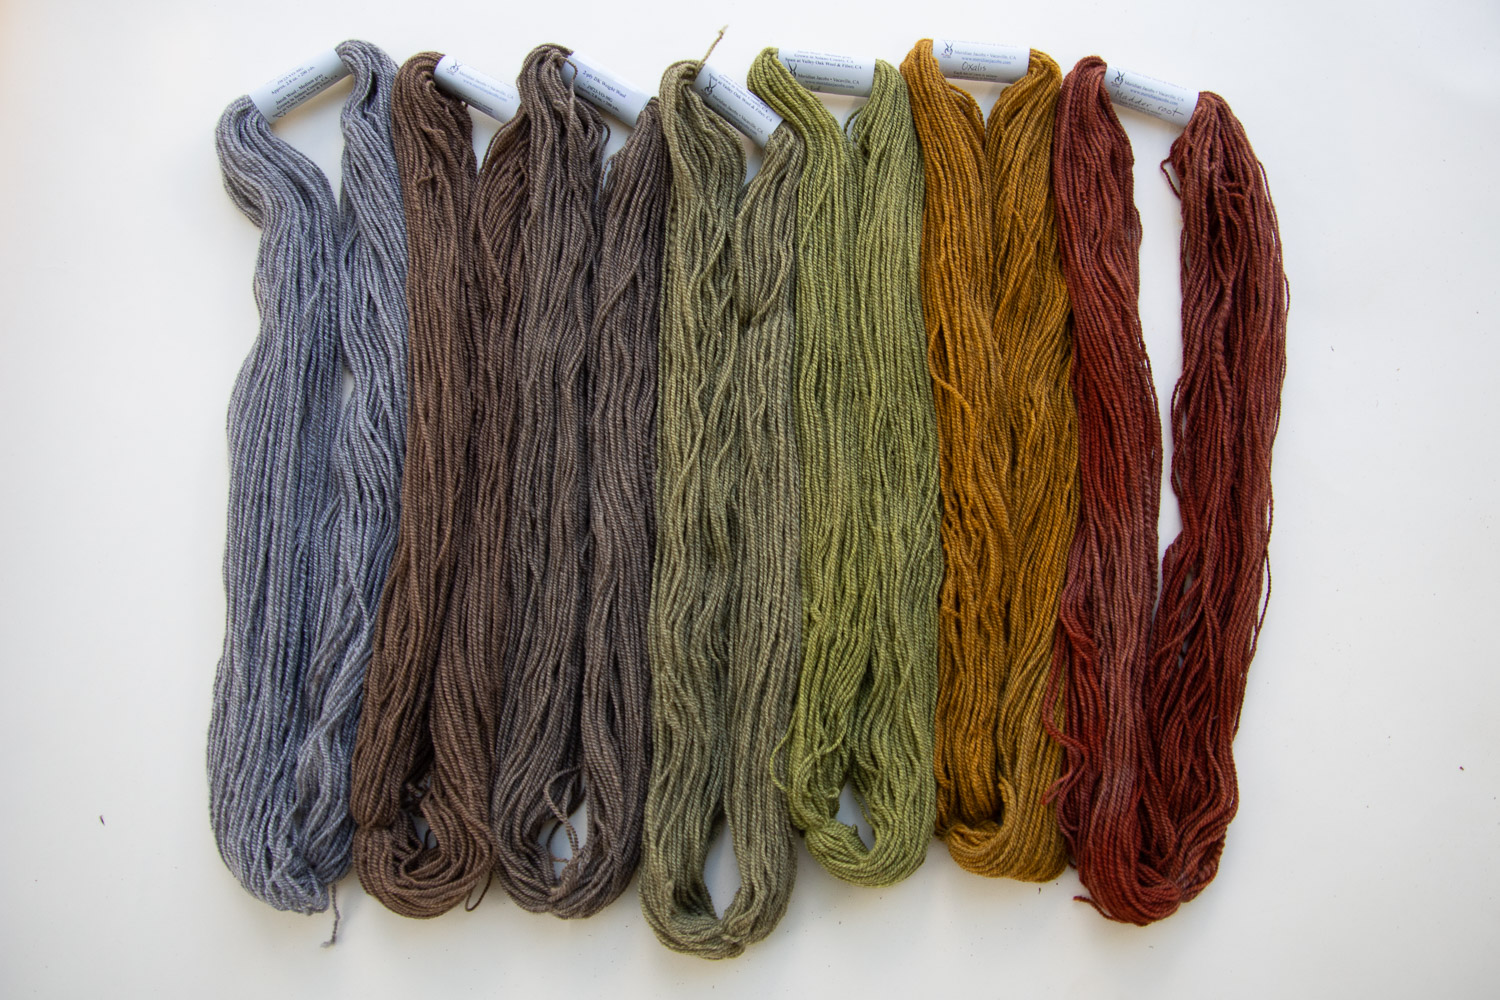
I have some custom projects in progress on the AVL loom in the shop. I have woven two Year to Remember blankets on this warp. Now I need to finish the warp with other blankets. The yarn above is all naturally dyed and I want to use that for a blanket that I can post on the new Fibershed Market site (not available yet). The yarn is dyed with mushroom (dark gray), hollyhock (blue-green), indigo (blue), weld, (yellow), cosmos (orange), and madder (rose).
Here is how it looks on the loom.
A friend dropped off more plant material to use for ecoprinting scarves and I wanted to get to it right away while the leaves were fresh. I have learned something about working with cannabis leaves–they start to fold up quickly. It’s tedious to arrange them the way I want them to look. They have a property of differential friction–the little hairs on the leaves allow them to slide one way on the fabric, but not the other. There is a second scarf that goes on top of these and it’s important to have the leaves spread out as the second scarf is spread across the first. Each scarf is wet with different solutions and they begin to react quickly upon contact.
I am trying out some square scarves as well. This one is printed with cosmos flowers and leaves.
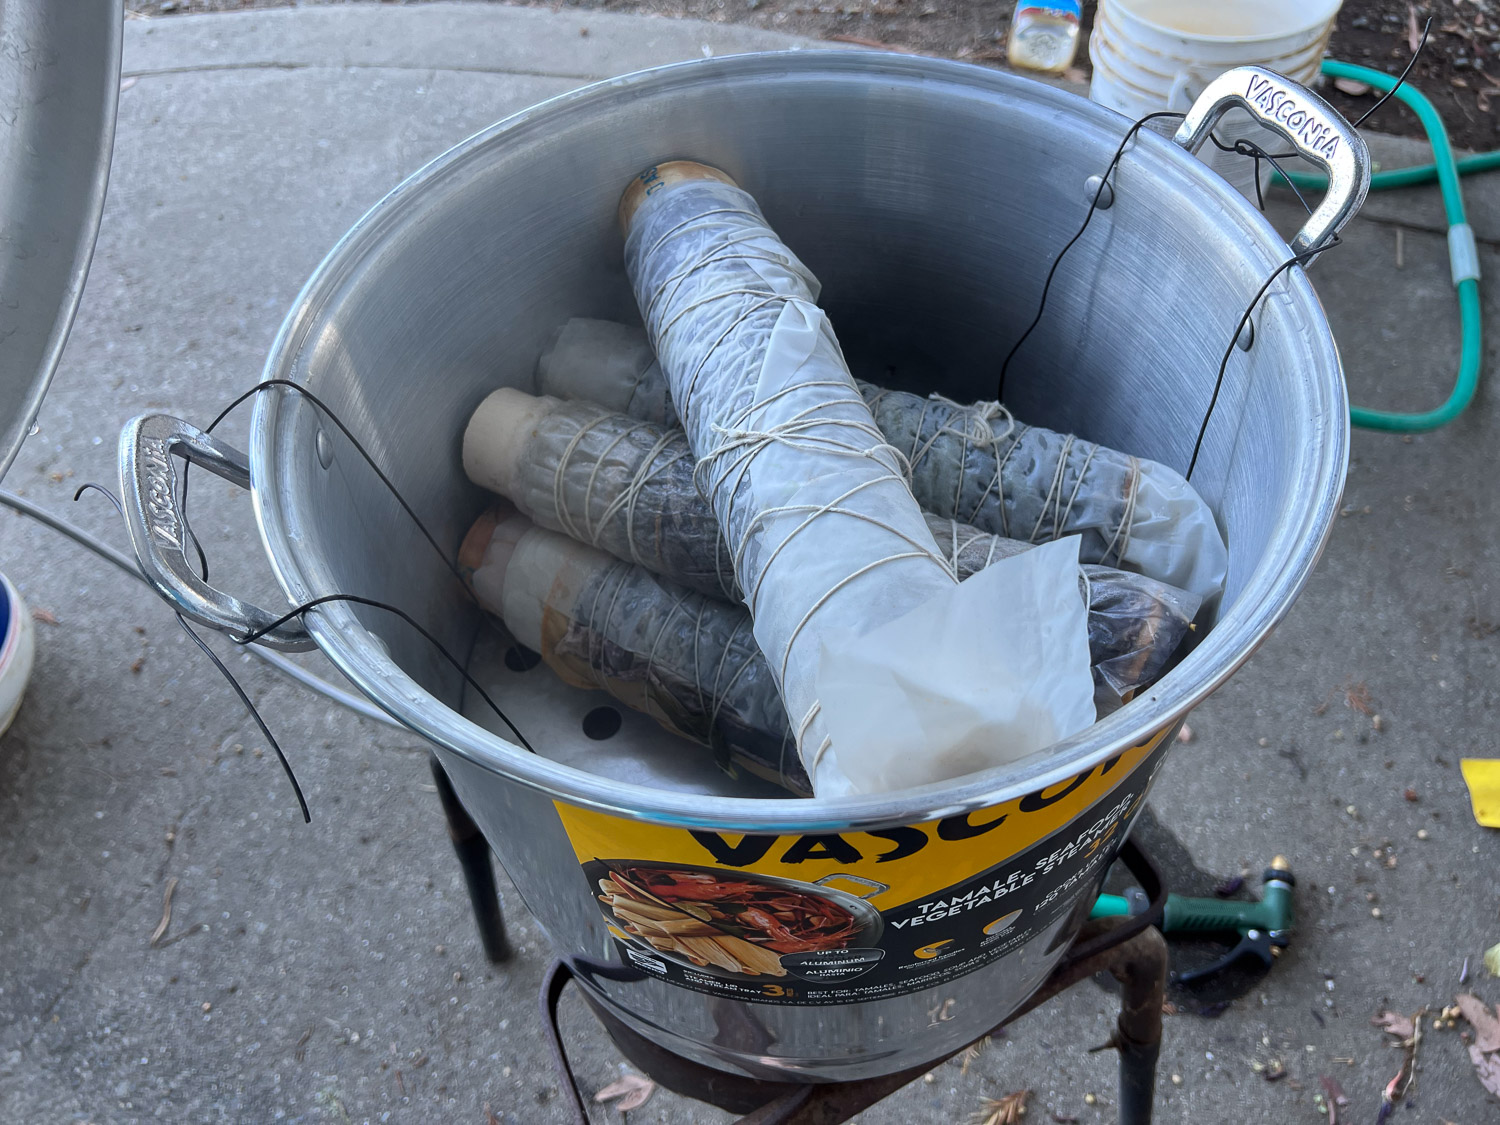
These scarves use maple and madder leaves (left) and cannabis and indigo leaves (right). I rolled all of these up on PVC pipes and they steamed for 90 minutes. They are cooling in the pot and taturhe unveiling will happen tomorrow.
Yesterday’s post was all about vibrant orange of Cosmos! Today it’s Hollyhocks. Guess what color the deep purple, almost black hollyhocks give to yarn!
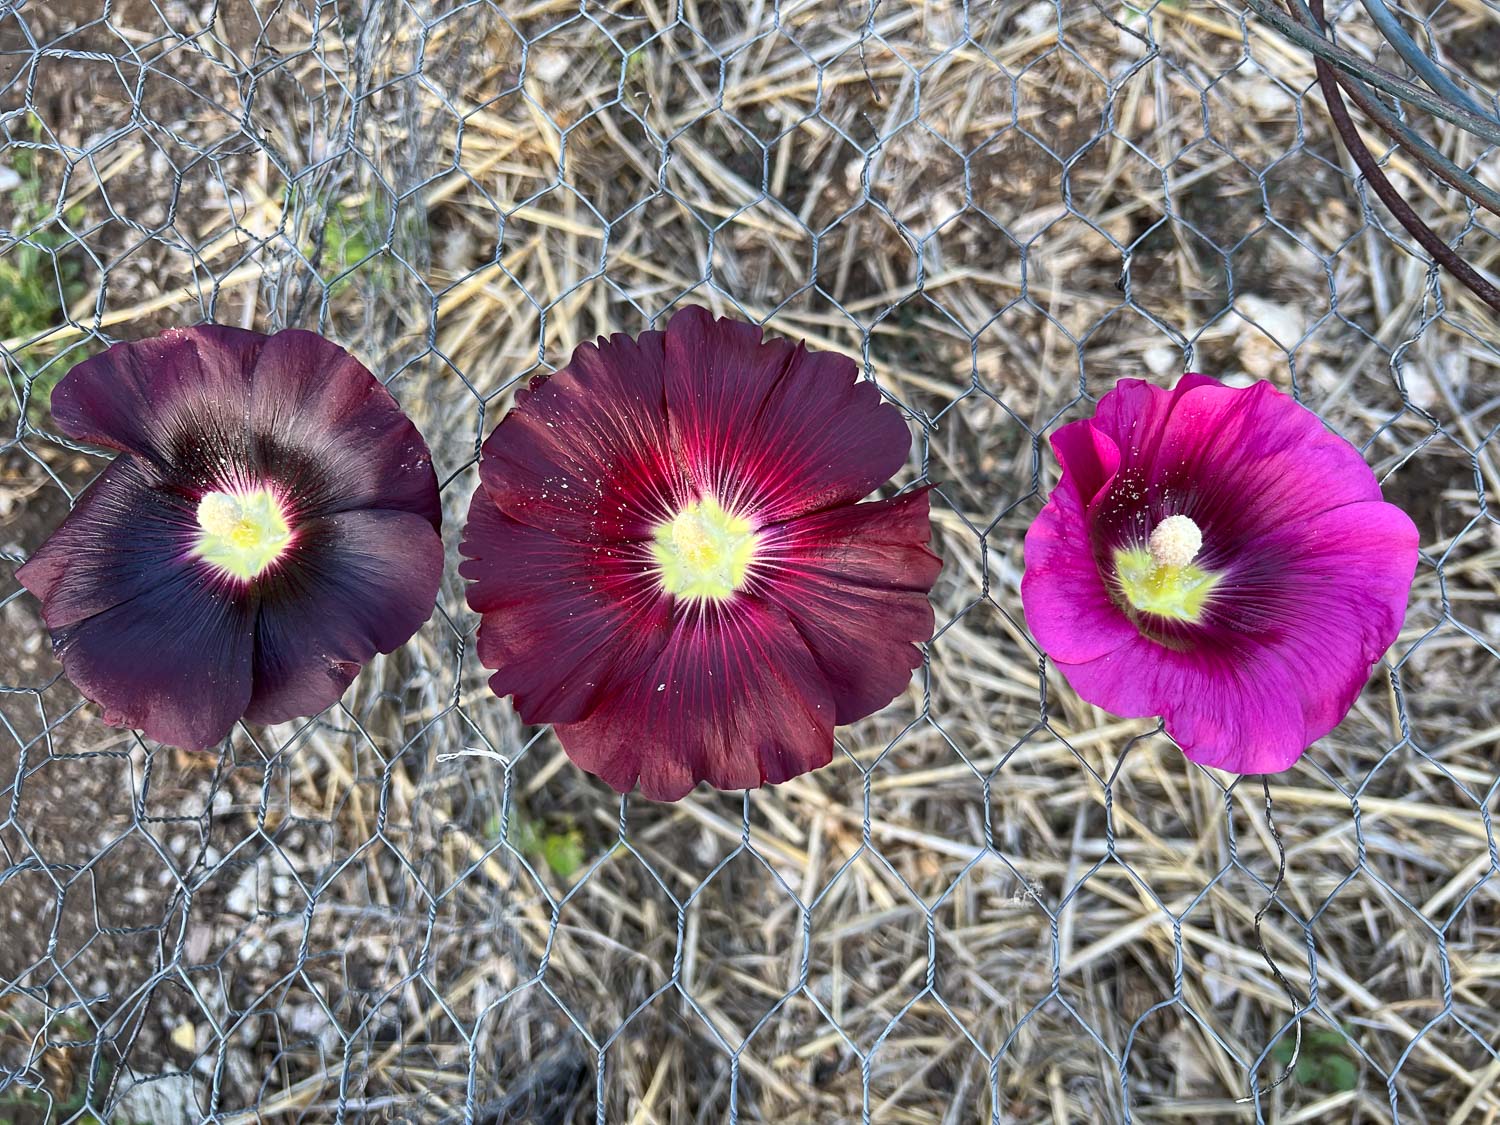
This is the traditional hollyhock I have grown for a long time.
This year two friends gave me a few hollyhocks that look like this. Even the leaves are different. I’ve been calling these “frilly” to differentiate the two batches. These were started later so didn’t flower until later in the season. I’ll get back to this.
Before the frilly flowers were blooming I was paying attention to the hollyhocks growing in the front dye garden. These hollyhocks had come back from last year’s plants or had grown from seed dropped from the previous year. I didn’t pay much attention at first, but it became obvious that the flowers were not all the same color. It’s known that its the dark purple, almost black flowers that dye yarn. But I thought I’d experiment with the others.
I worked methodically to keep the dried flowers separate as they were ready to pick or had already fallen.
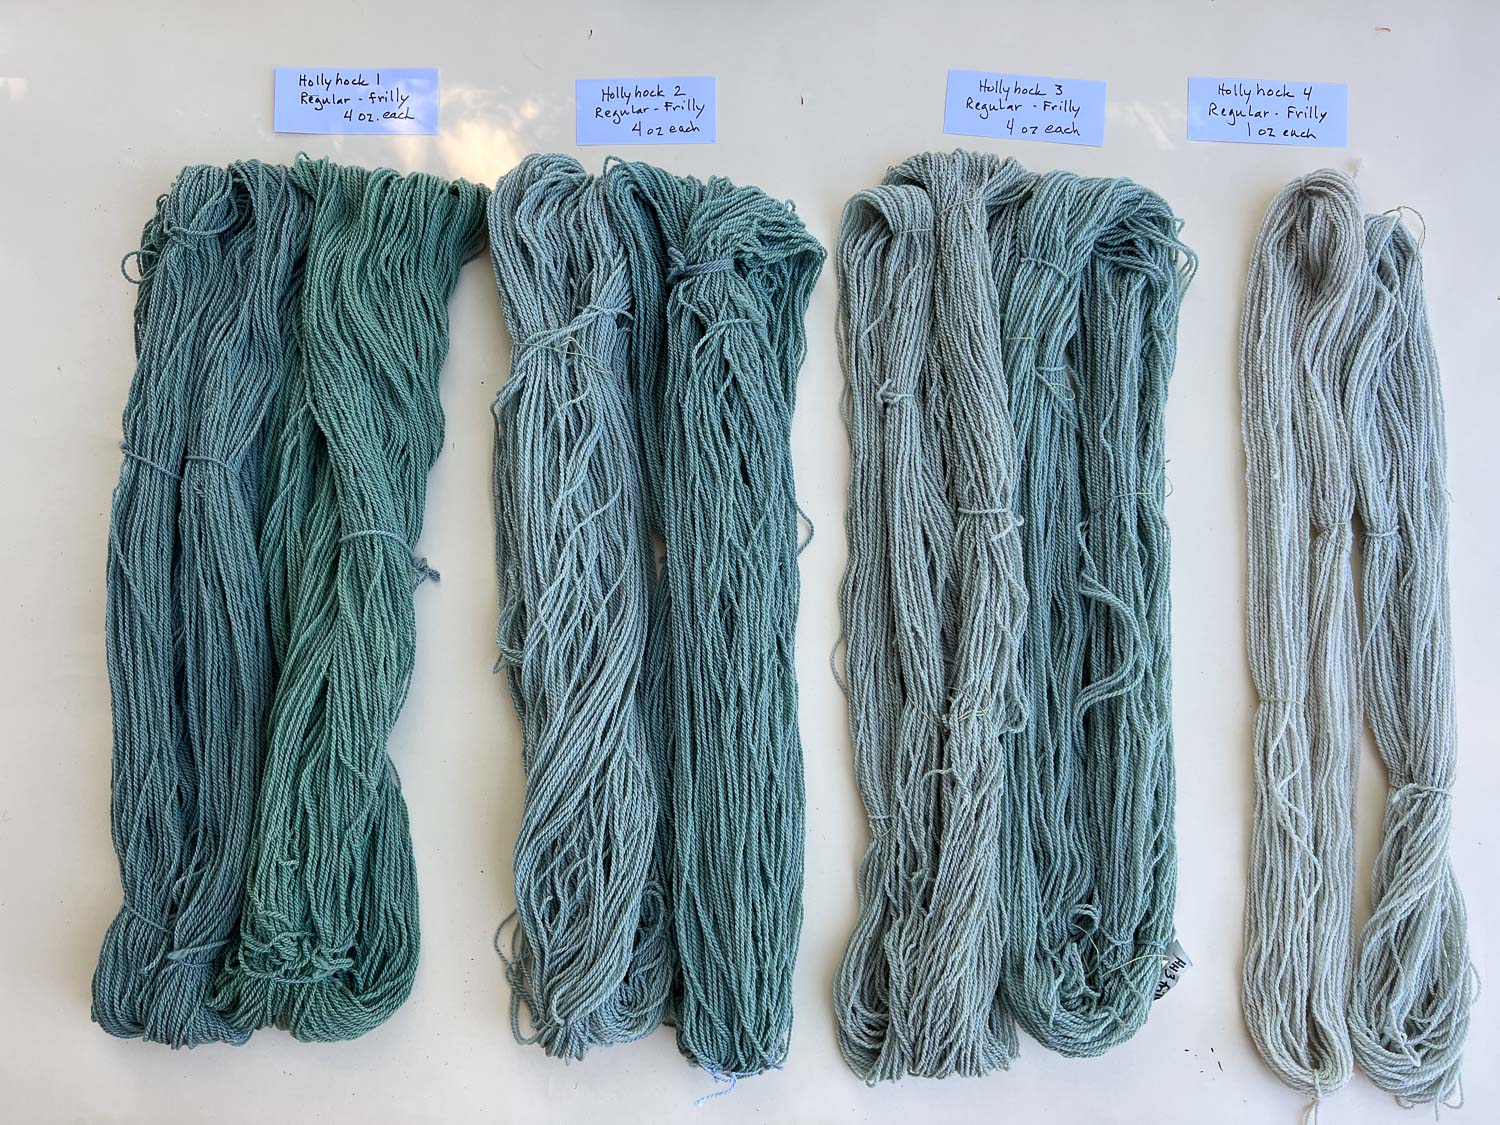
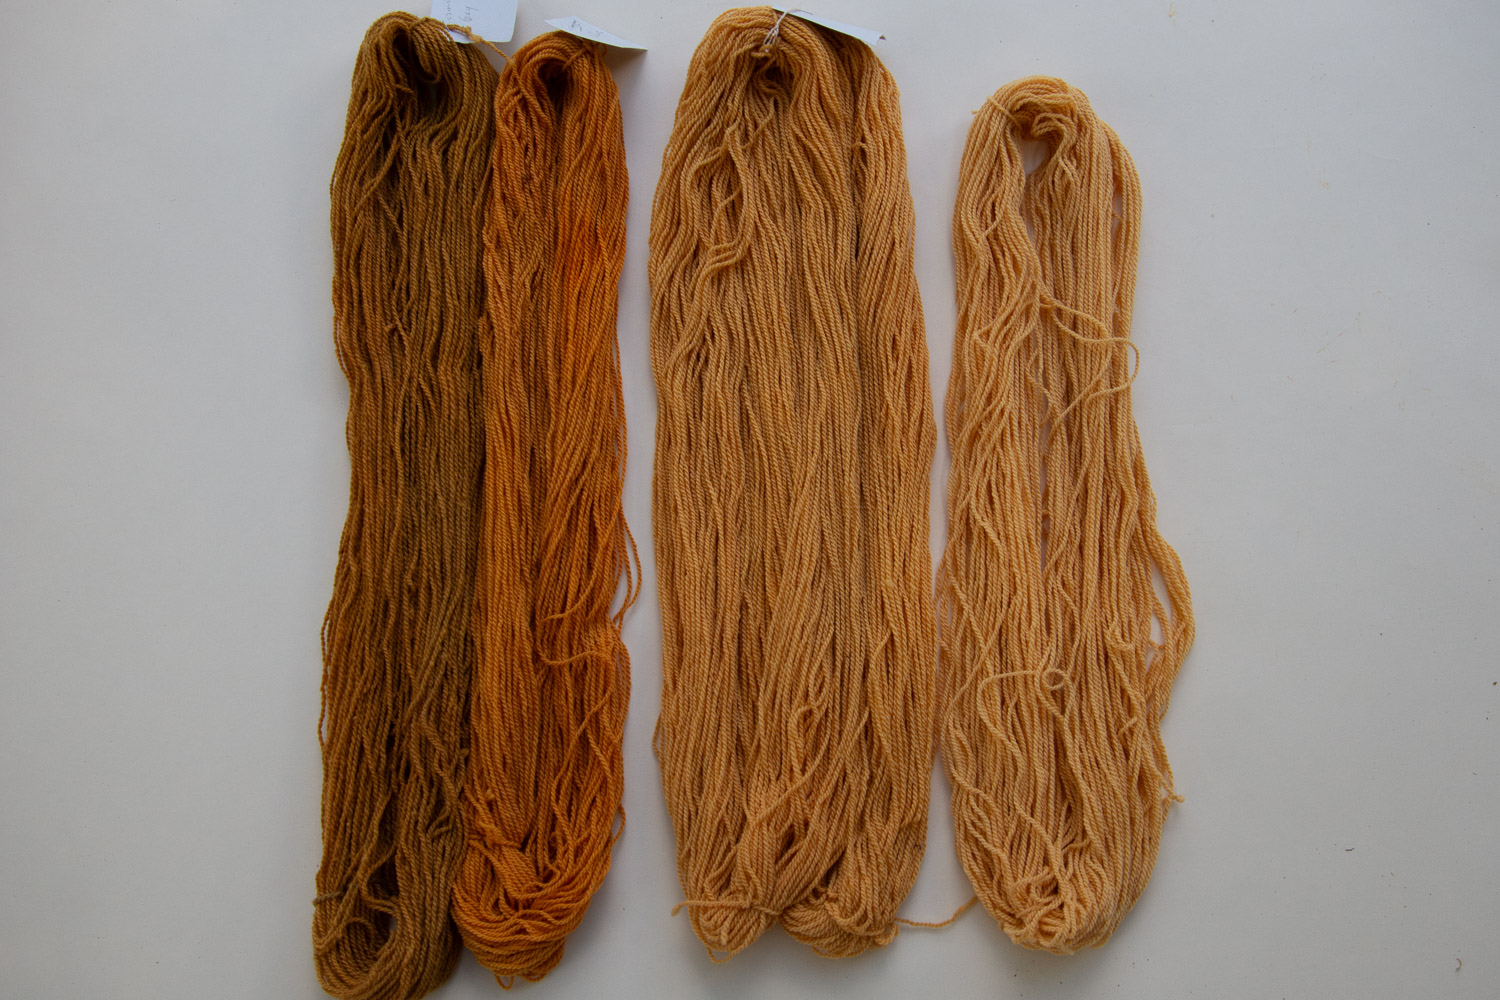
I dyed in four separate pots and got these colors.
Then I dyed another four pots. This photo shows yarn from the first batch and the second. The shades are close, but not exactly the same.
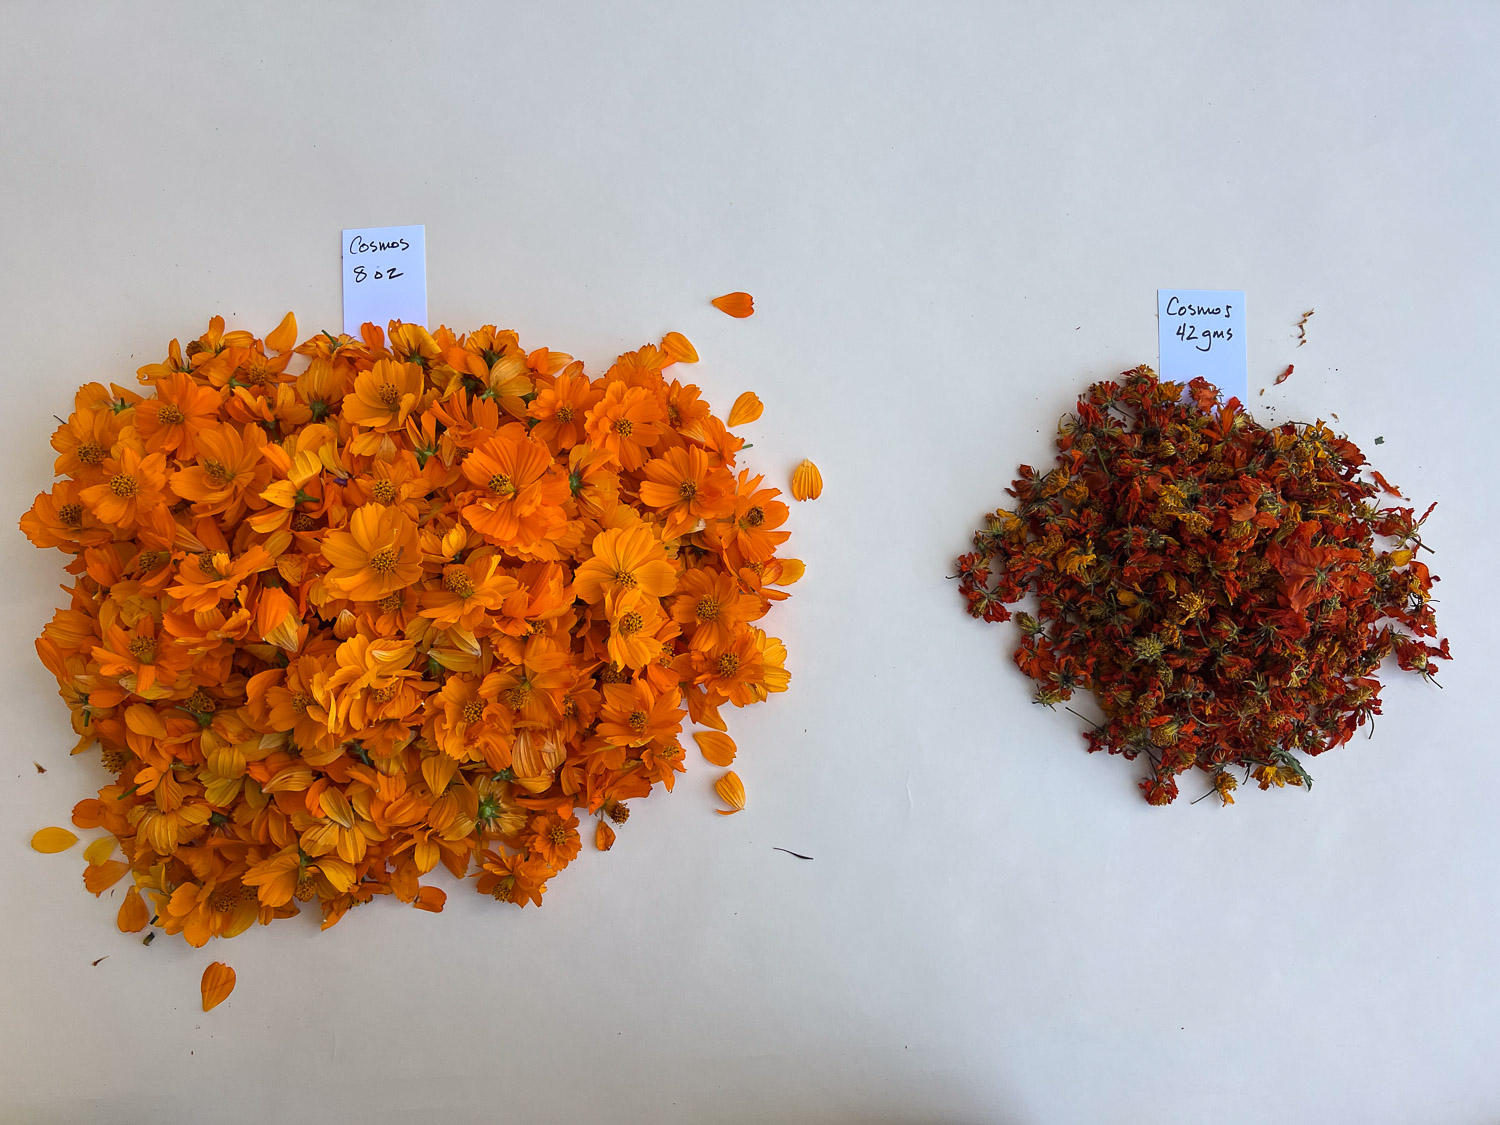
Now to the frilly flowers. Would there be a difference? As I did with the Cosmos I figured out weight in grams to use to dye 4 ounces of yarn. I based this calculation on the recipe in Harvesting Color by Rebecca Burgess. She suggests 20 flowers for 2-1/2 ounces of yarn and that recipe has worked well for me. I get a strong dye and there is enough color left to dye another yarn in the same pot. I calculated how many flowers I would need for four ounces and the weight of the flowers when dry. Yes, I counted flowers as I harvested and then weighed them after they were dry.
These are handy pots for small batches of dye. Notice the one on the left says R. Pratt 308. That was my dad and his lab was room 308 at UCSF Medical Center back in the 50’s and 60s. These are stainless steel and I use them all the time for my fiber activities.
Here are the results. I used these dye pots four times. The color lessened each time, but there was plenty of dye left until I got to the fourth time. The first three times I put four ounces in each pot. It was only at the last one that I put in just one ounce. There is a bit of difference in the regular and frilly flowers, but I don’t know that it would be repeatable. I think there is enough variation among different batches that I wouldn’t say it’s due to the frilly versus regular flowers.
Before I dyed the frilly/regular samples I had run a similar test with successive batches of yarn. The first pair here was putting a gray skein and a white skein in the same pot.
No matter how many times I have dyed with plant material I feel as though it is always an experiment. There are a lot of variables. After I decided to sell dye material I wanted to be able to almost guarantee an outcome. So I experimented.
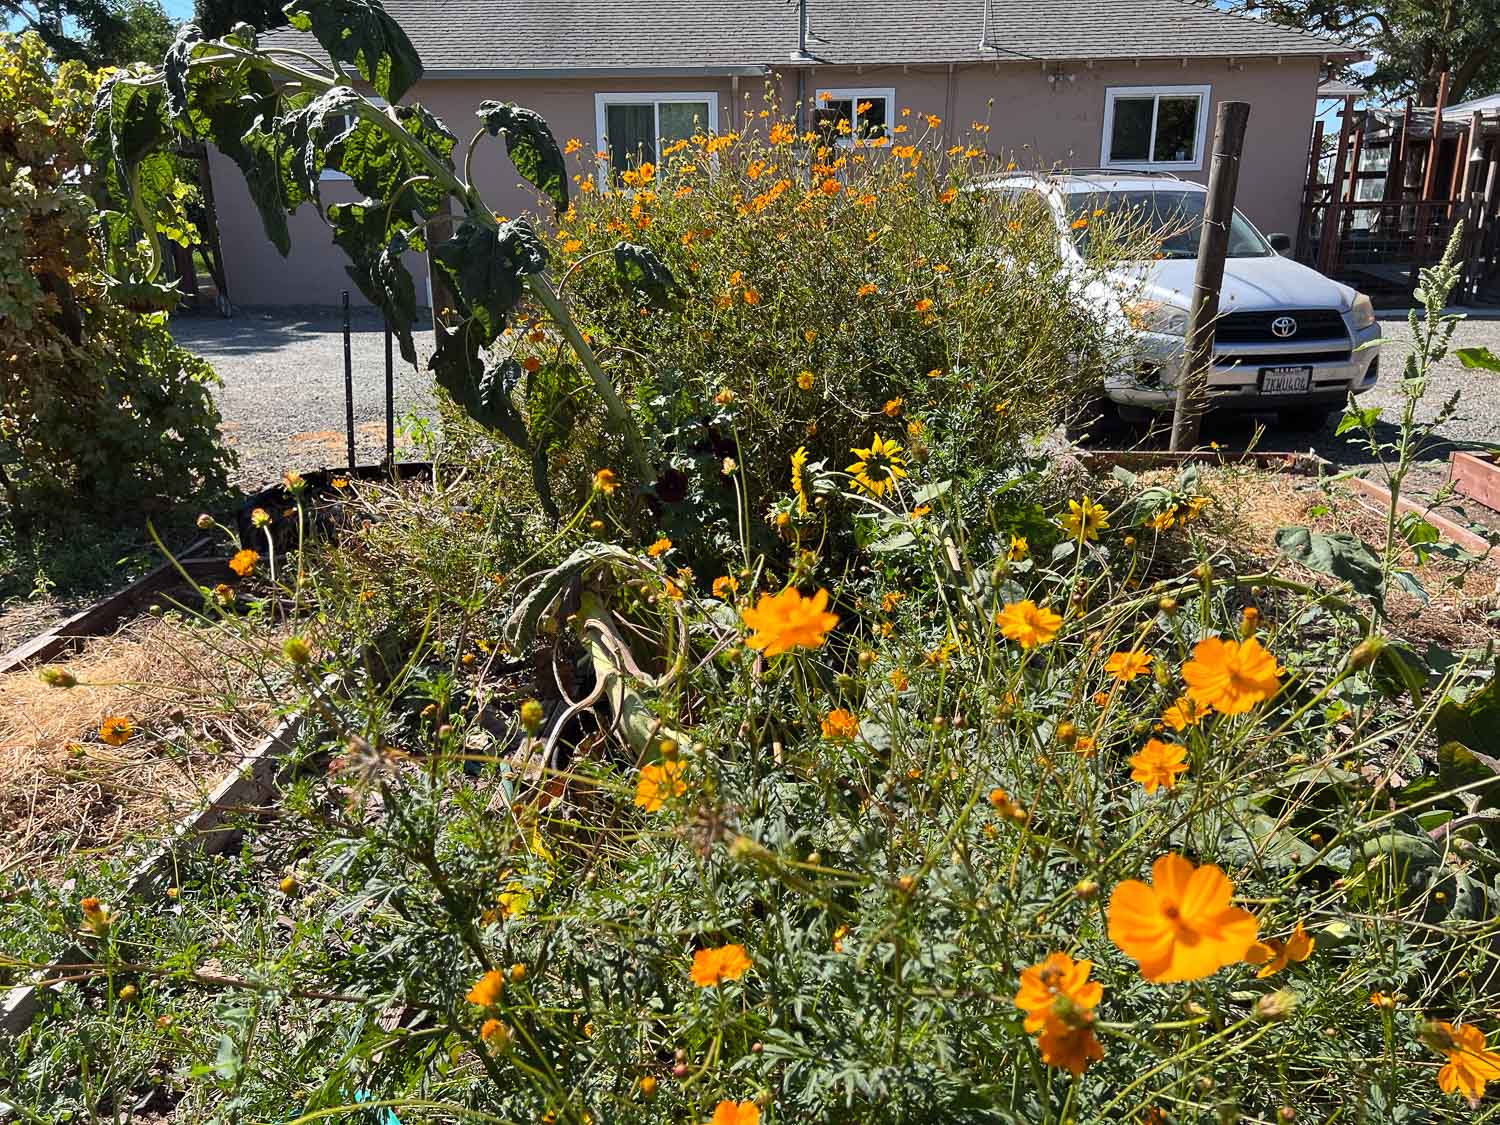
Isn’t Cosmos a cheery plant?
Earlier in the year I saw a lot of swallowtail butterflies on the flowers. Now they are full of bees.
These plants have grown as tall as me. I pick the flowers every three days and there are always more. It’s amazing.
Here is one day’s crop drying in the sun.
Every time I picked flowers I weighed the fresh flowers and the dried flowers. I calculated that the dried flowers weighed 19% the weight of the fresh flowers. I found my gram scale so I could be more accurate than trying to work in fractions of ounces.
I did some calculations based on a 1:1 weight ratio of fresh flowers to fiber. I could use 4 ounces (112 gms) of fresh flowers or 21 gms of dried flowers to dye 4 ounces of yarn. I wanted to find out if there was a difference in the yarn color if I used fresh or dried flowers. The first step is to heat the flowers. I heat to 160 degrees, trying to not go over 175 degrees.
After 30 to 60 minutes I add yarn that has been mordanted with alum. I keep the dye pot at about the same temperature for another hour. I find the easiest way to do that is to put a lid on the pot and turn it off. I check the temperature in about 20 minutes and if it is going under 160 degrees I turn the stove on for 5 minutes, bring the temperature up, and then turn it off again. Using this method I don’t have to worry about it getting too hot and boiling. I let the yarn cool in the pot overnight before removing it. Then I can the next batch in the pot. I used these two dye pots three times before discarding the liquid in the garden.
This shows the results of those dye pots. In each pair, the yarn dyed with fresh flowers is on the left and yarn dyed with dried flowers is on the right. There is not a significant difference.
Here is an earlier experiment using the same dye three times. In the first pot one skein was gray yarn and the other white.
Lots of Cosmos dyed yarn.
The result of all this is not only yarn that I can use in weaving but dye products for sale. These are on my website.
I should be weaving. I planned to listen to a new book and weave today. This is what I did instead.
Anytime you have a sheep in for medical care it takes a little more time. Hazel spent Thursday night at UCD VMTH (Should I to spell it out? U.C. Davis, Veterinary Medicine Teaching Hospital). I took her in because the night before and Thursday morning she looked like the photo below.
I had texted the veterinarian I usually use and she thought that Hazel should go in. She never acted sick other than not wanting to eat because her mouth was so sore. We still don’t have a diagnosis because we’re waiting on blood tests. No matter which, if any, come back positive, the care would be the same. Isolation and TLC. Hazel is not happy about being locked in. I put a couple of sheep across the aisle from her so that she’s not totally alone. She is getting meloxicam and a slurry of something that includes lidocaine to coat her mouth to reduce the pain so she’ll eat.
After cleaning the barn and dealing with other sheep I faced the two skirting tables holding skulls in various states of cleaning. I am not very good at this but there is a value to the skulls and I need to make it work.
I had planned to boil some of them and see if I could get them cleaner that way. I brought two up to the garage and started a pot.
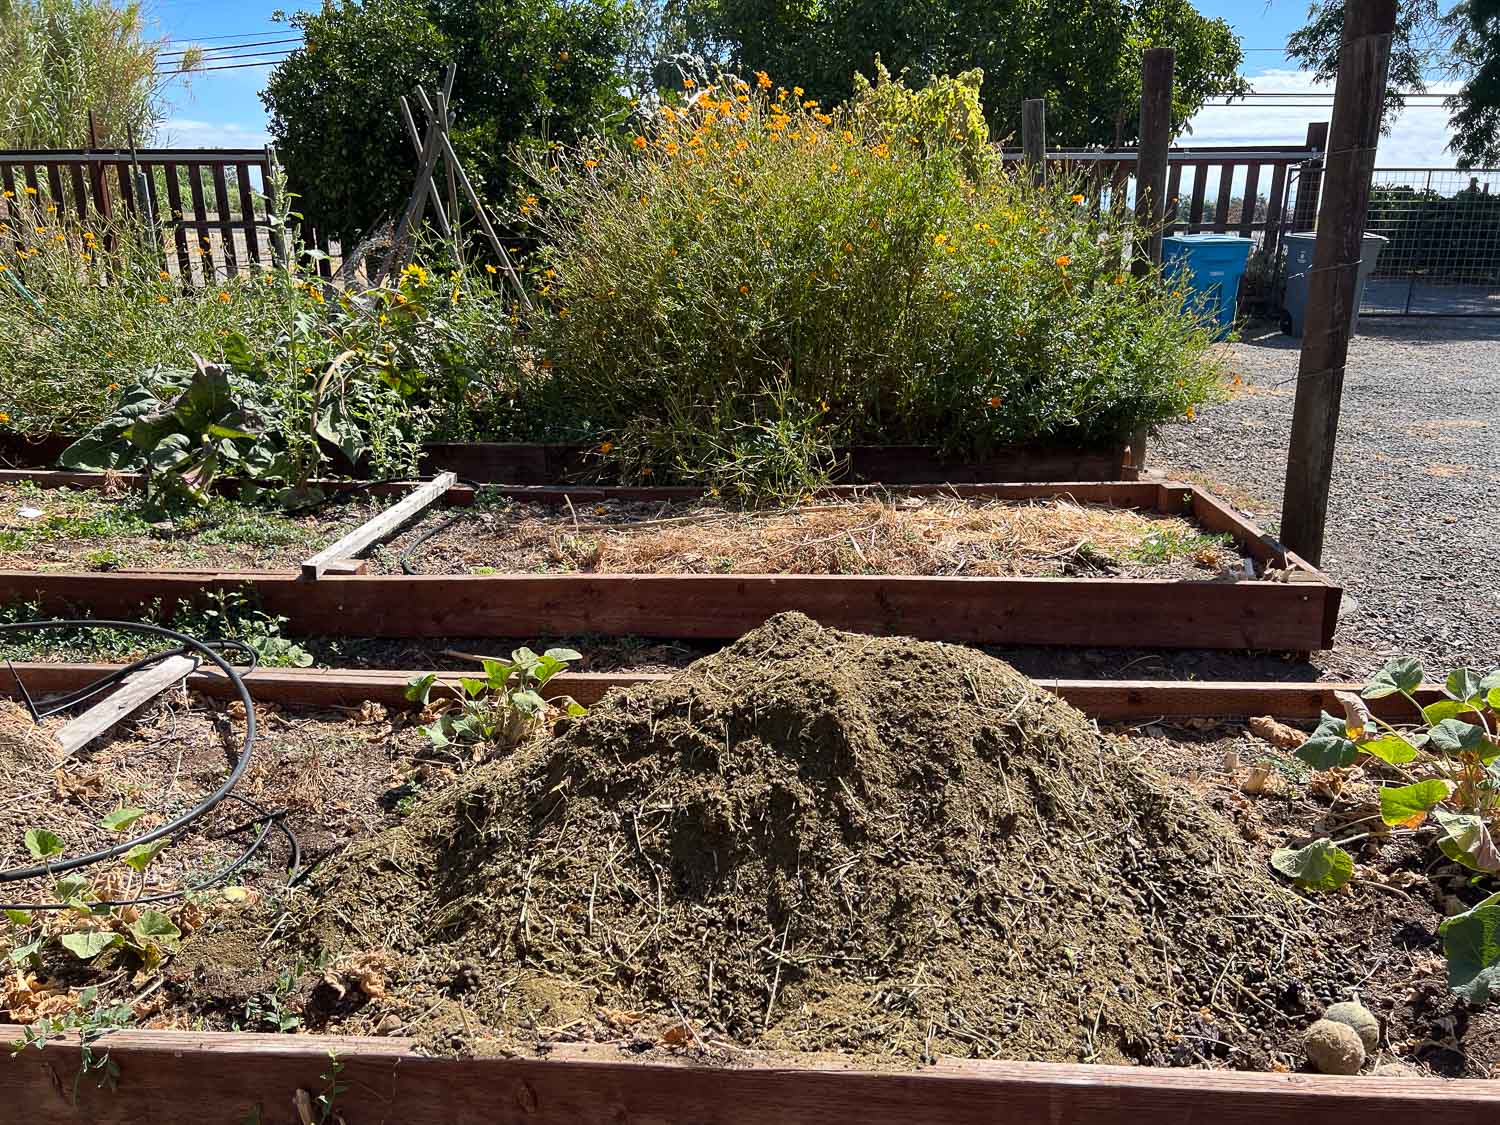
After I got that started (and started the timer on my phone so I wouldn’t forget) I dumped the wheelbarrow load in the dye garden where I had cut out the old dead hollyhock stalks.
This is a different view of the cosmos that you can see in the photo where the hollyhocks were. I took this after I picked cosmos today…or maybe while I was in the middle of it. It still seems like there are a lot, but not as many as earlier. Notice the sunflower that came up from last year’s seeds. It’s hard to tell in this photo but it is massive. There are two branches at the bottom. One is leaning left and the top is bent over. You can barely make out the head of the sunflower just above where you see the gravel driveway in the photo. The other fell over very early in the season and that is what looks like a big branch coming toward me in the lower half of the photo. If you look to the right of that between the close cosmos and the big stand of cosmos you can pick out smaller sunflower heads. Those are growing off that big branch that goes all the way to the right side of the photo. I took this photo to show the hollyhock that was planted just behind the row of cosmos. It is now flowering but you can only see if if you know where to look right at the base of that leaning sunflower. This was a lot of writing to explain a not very interesting photo. This is one of my dye garden plots.
One of my goals today was to photograph more products for my website and for the website that will be for Fibershed producers nationwide. (!!) I’ve been weighing fresh cosmos as I pick the flowers and after they are dried so I can sell dried flowers with a recommendation of how much you need to dye a give amount of yarn. I have dyed enough yarn with these flowers now to know that you can start with a 1:1 ratio (weight of fresh flowers to yarn) and have plenty of color left in the dye pot for more. I wanted to do another batch after I found my gram scale. I don’t want to try and measure smaller quantities in tenths of ounces. At that 1:1 ratio this should dye 4 ounces of yarn (oops, I just recalculated and it should be 113.4 gm.
I have been keeping a spread sheet and have seen that the weight of dry cosmos is .19 that of fresh cosmos. So here is enough dried flowers to dye 4 ounces of yarn. I need to continue to take photos of the process to add these to the two websites.
I set up two dye pots and turned them on low figuring that I could keep track of those while I took more photos.
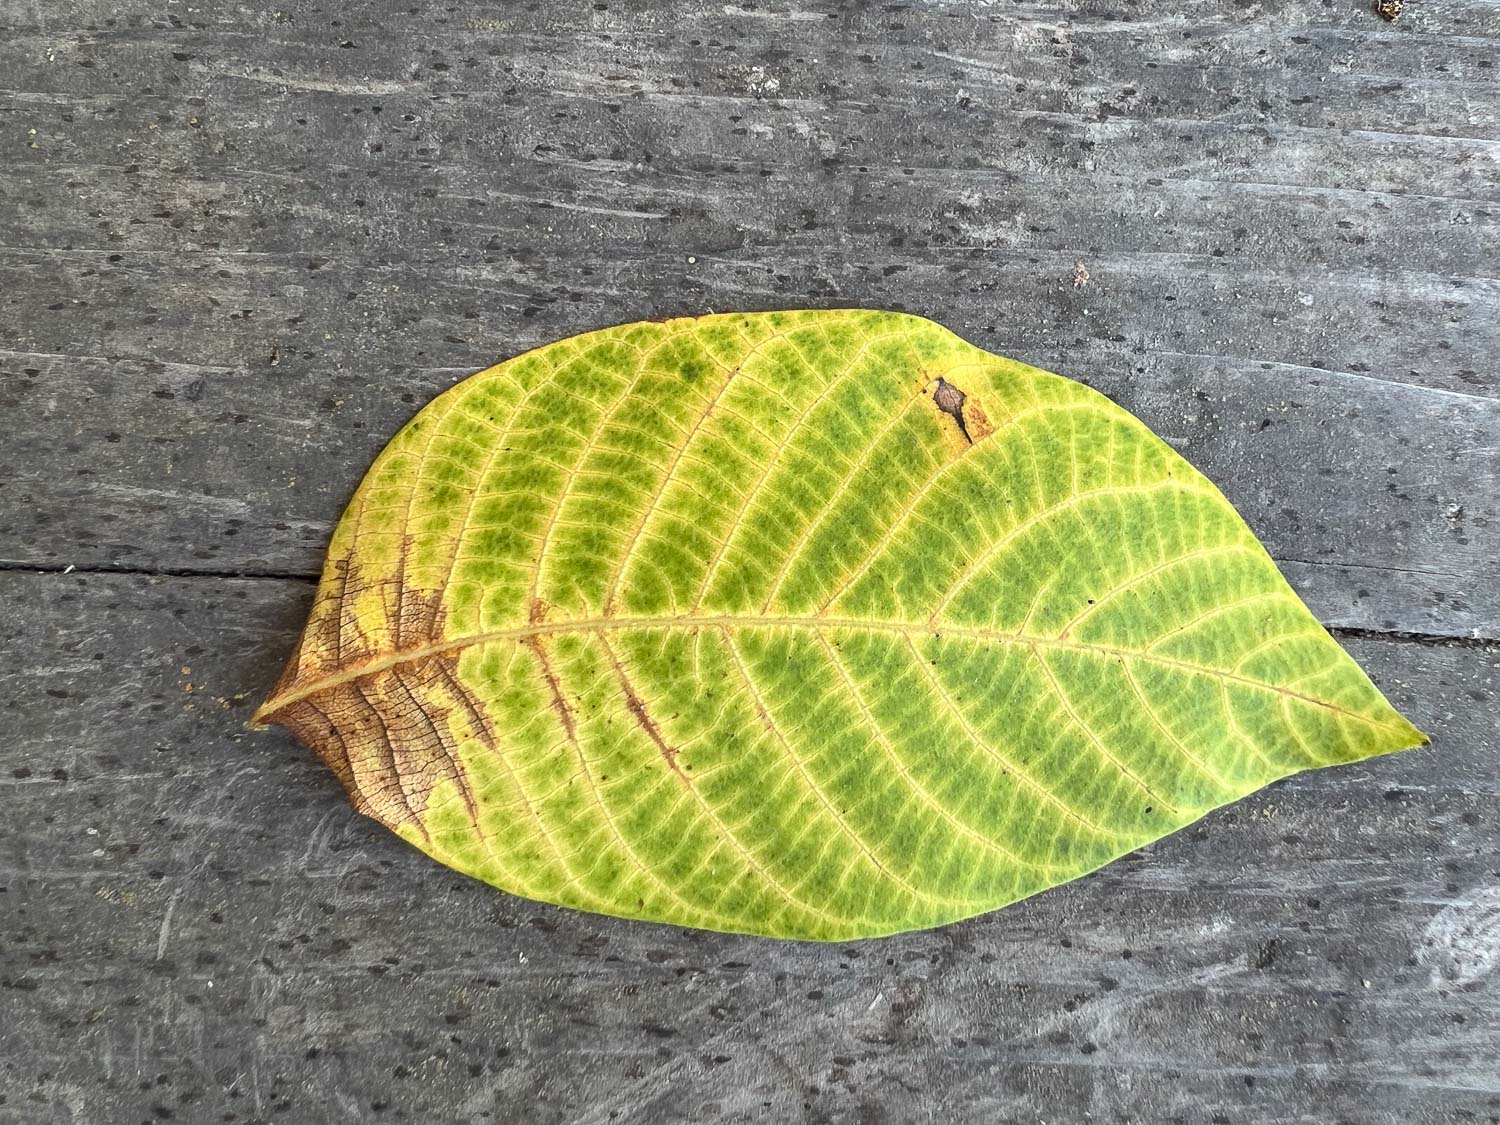
In the meantime I got distracted by this interesting leaf! Great weaving pattern and colors!
Moving on to buttons. I need to update what I have on my website and add them to the new website.
The template for the sale products on my website uses horizontal photos. If I use a square photo it is cropped. That is why some of the weaving tools, looms, etc are not the way they should be –I used photos provided by Schacht and Ashford. But the new website, as well as that of the Artery, which I’m helping with, needs square photos. So I am taking two sets of photos or taking the horizontal photos with enough room around them that I can also crop to square. Very annoying. I know I could change the template I use on the Squarespace platform but do I have the energy to figure it out without having to change all the other stuff I have on there? Not right now. Maybe never.
My goal is to get these listed on my website before I send this blog post so that I can include a link, but that may not happen tonight. [I am proof-reading now and know that I won’t get to that. If you’re interested in some check back or see me at Lambtown next month.]
We’re trying to have a consistent background for photos and I’m using this manila paper. (Want to know about Manila paper? Read this blog post.)
More distractions. These sheep were looking through the fence near where I’m taking photos. I really need to figure out the breeding line-up. This is a topic for another post (as are most of the topics in this one). But this introduces one of the contenders for breeding in two weeks. This should be another post because I’ll explain why I don’t have any adult 4-horn rams to use now and have only a couple of choices here and it’s really too early to know for sure. Back to photos.
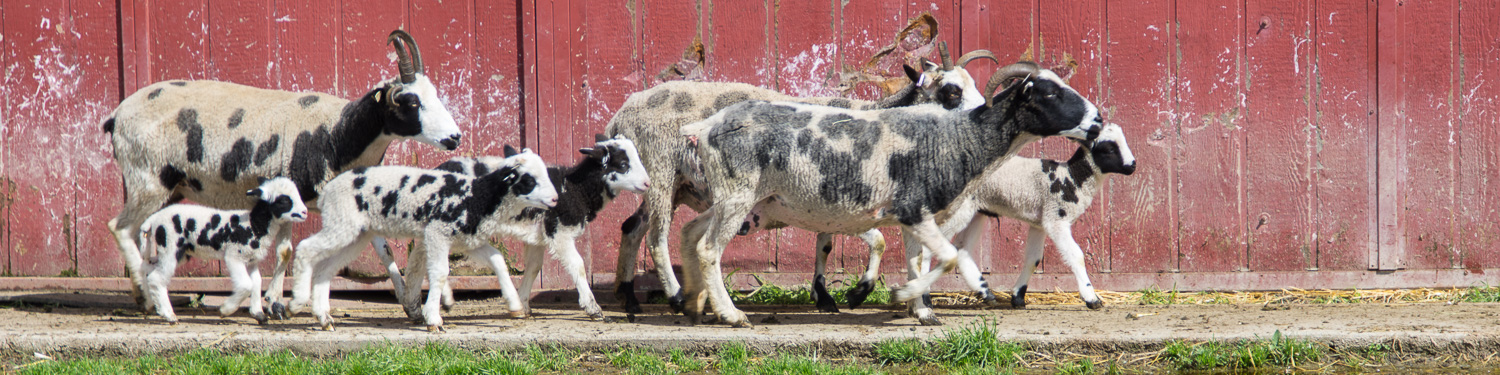
At the State Fair I had a display of natural dyeing. (See how it looked in this blog post.) It’s time to do something with those yarns. I may weave with some but I wanted photos for yet another blog post and I may try to sell them online. These yarns are the base yarns I used for the display. That is gray Jacob yarn spun spun at Valley Oak Mill, Jacob britch yarn that I don’t have listed on the website, 4 ounce skeins of TR yarn spun at the Mendocino Mill, and 1 ounce skeins of TR yarn spun in Wyoming. I’d better update those listings before I post this. They all went in a variety of natural dyes. I’m only showing a little of that here.
This is the oxalis dye pot. I decided that if I want to sell these as groups it makes more sense to sell the same yarn together instead of the same color. If you try to use all those yarns in one project you’ll have challenges. The britch wool has little elasticity and the Timm Ranch wool has lots. It’s better to use like yarns together and mix up the colors.
So this is the batch of gray yarns that went in all the dye pots. I’ll put these online but it won’t be tonight.
Back to what was going on in the kitchen. This is the previous batch of yarn from dyeing 4 ounces of fresh cosmos flowers–a gray skein and a white skein were the first 4 ounces in the dye pot. I used 4 ounces more the next day. I dyed a two ounce skein after that in the same pot.
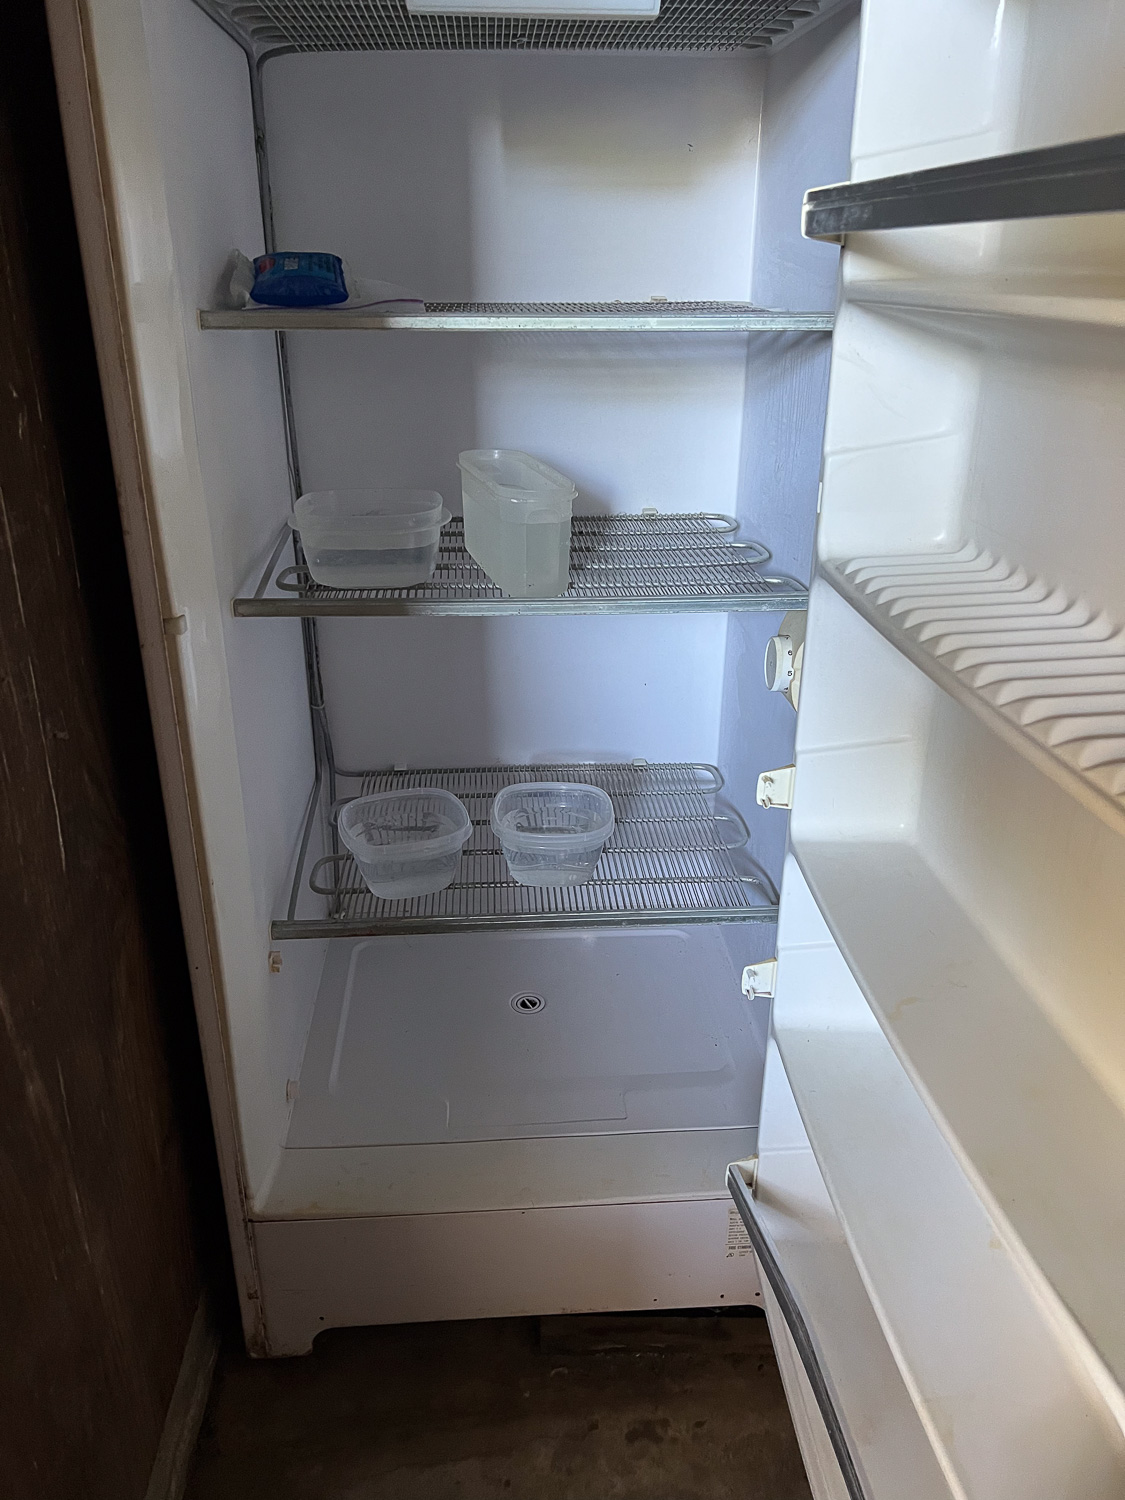
This seems like a random change. There are two freezers in the garage and last week we found them leaking. The power strip they were using failed. Needless to say that was a mess and that’s why we cooked a turkey 3 days ago and are still eating it. Fortunately there was a lot of random stuff in the freezers–yarn that had been there for years to kill any potential bugs, parts of butchered sheep that Dan hadn’t figured out how to cook and that had been there a long time, etc. So most was thrown away. I salvaged my pomegranate juice and the turkey which had not completely thawed. Today I cleaned the freezer while keeping an eye on the pot with the skulls. I put some containers of water in there to use for indigo dyeing tomorrow.
At this point, about 12:30, I came to the house for breakfast. I added yarn to those cosmos dyepots and worked on the computer while paying attention to them.
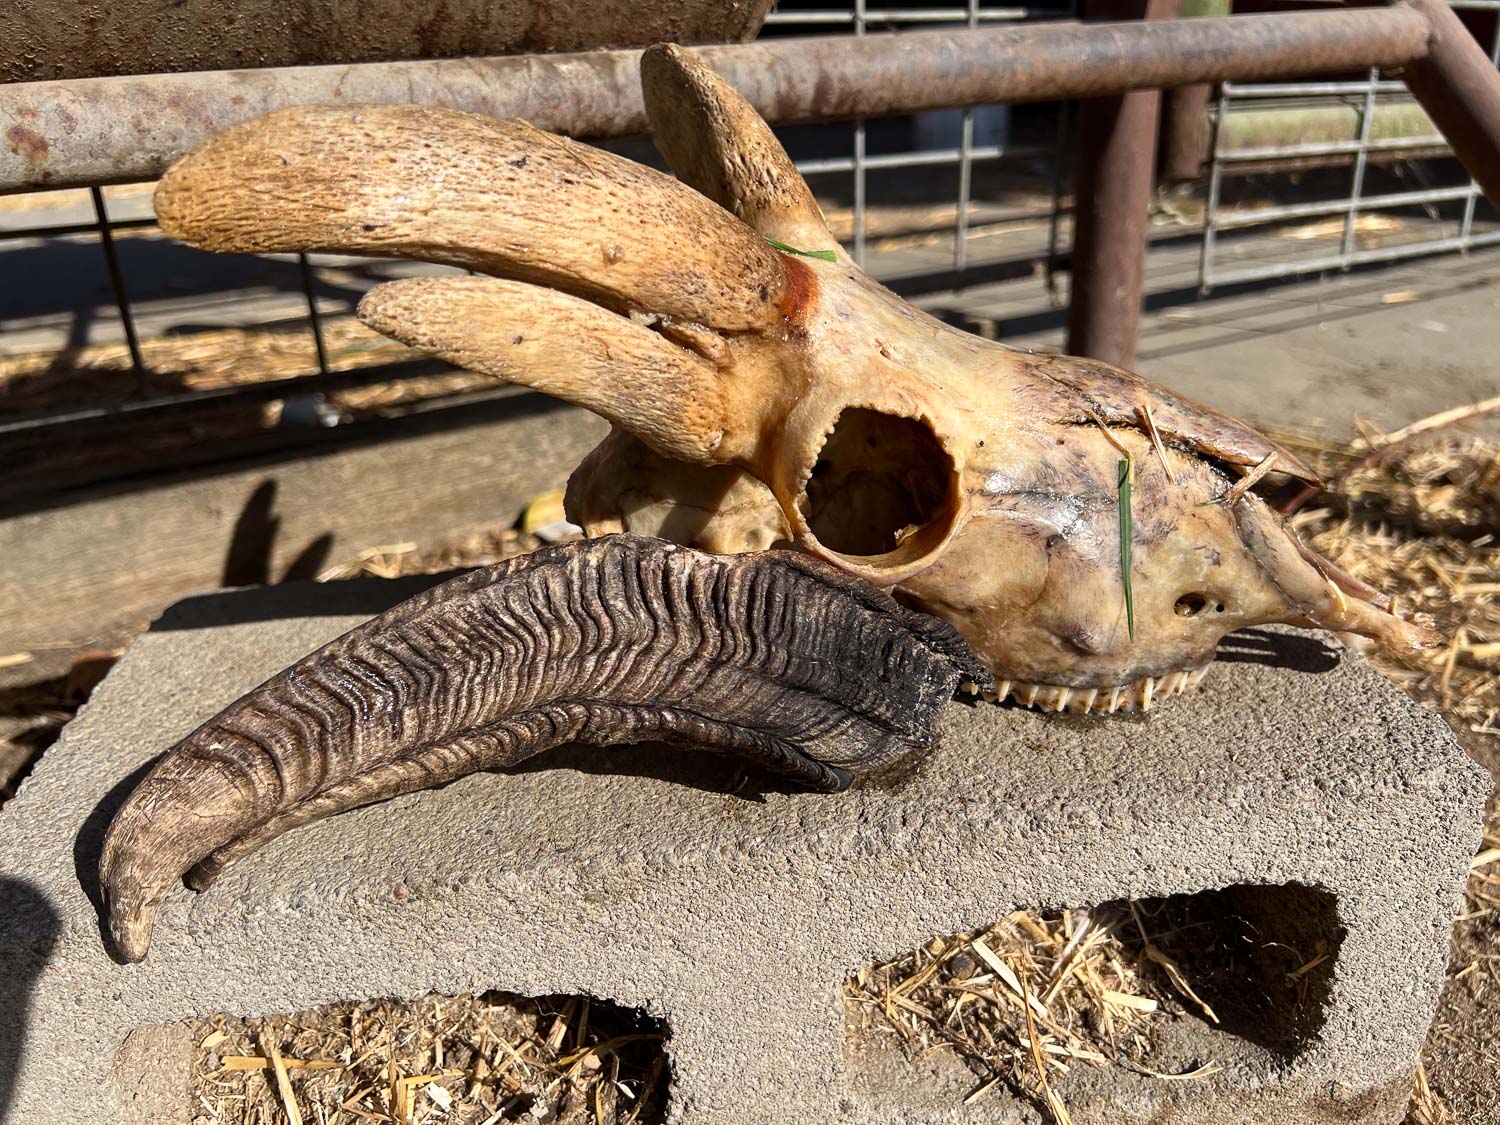
This afternoon I took the skulls out of the pot to see how well they were cleaned. I spent a lot of time picking pieces off. It is interesting to see what a fused horn ram skull is like. You can see the fusing of the outer part of the horn on this side.
There are three horns on this side.
I’ve been reading up on how to do a better job with the skulls. The next step after cleaning off the stuff that isn’t bone is to degrease. This is how I left the skulls–in Dawn liquid.
I consider that botanical printing (or ecoprinting as it is better known lately) is always an experiment. There are lots of variables beyond the obvious of the use of tannins and/or iron to bring out color or an imprint. Does the stage of growth of the plant make a difference? Is there a difference if the front or the back of the leave or the flower is against the cloth? How fresh is the plant? How about dried plants?
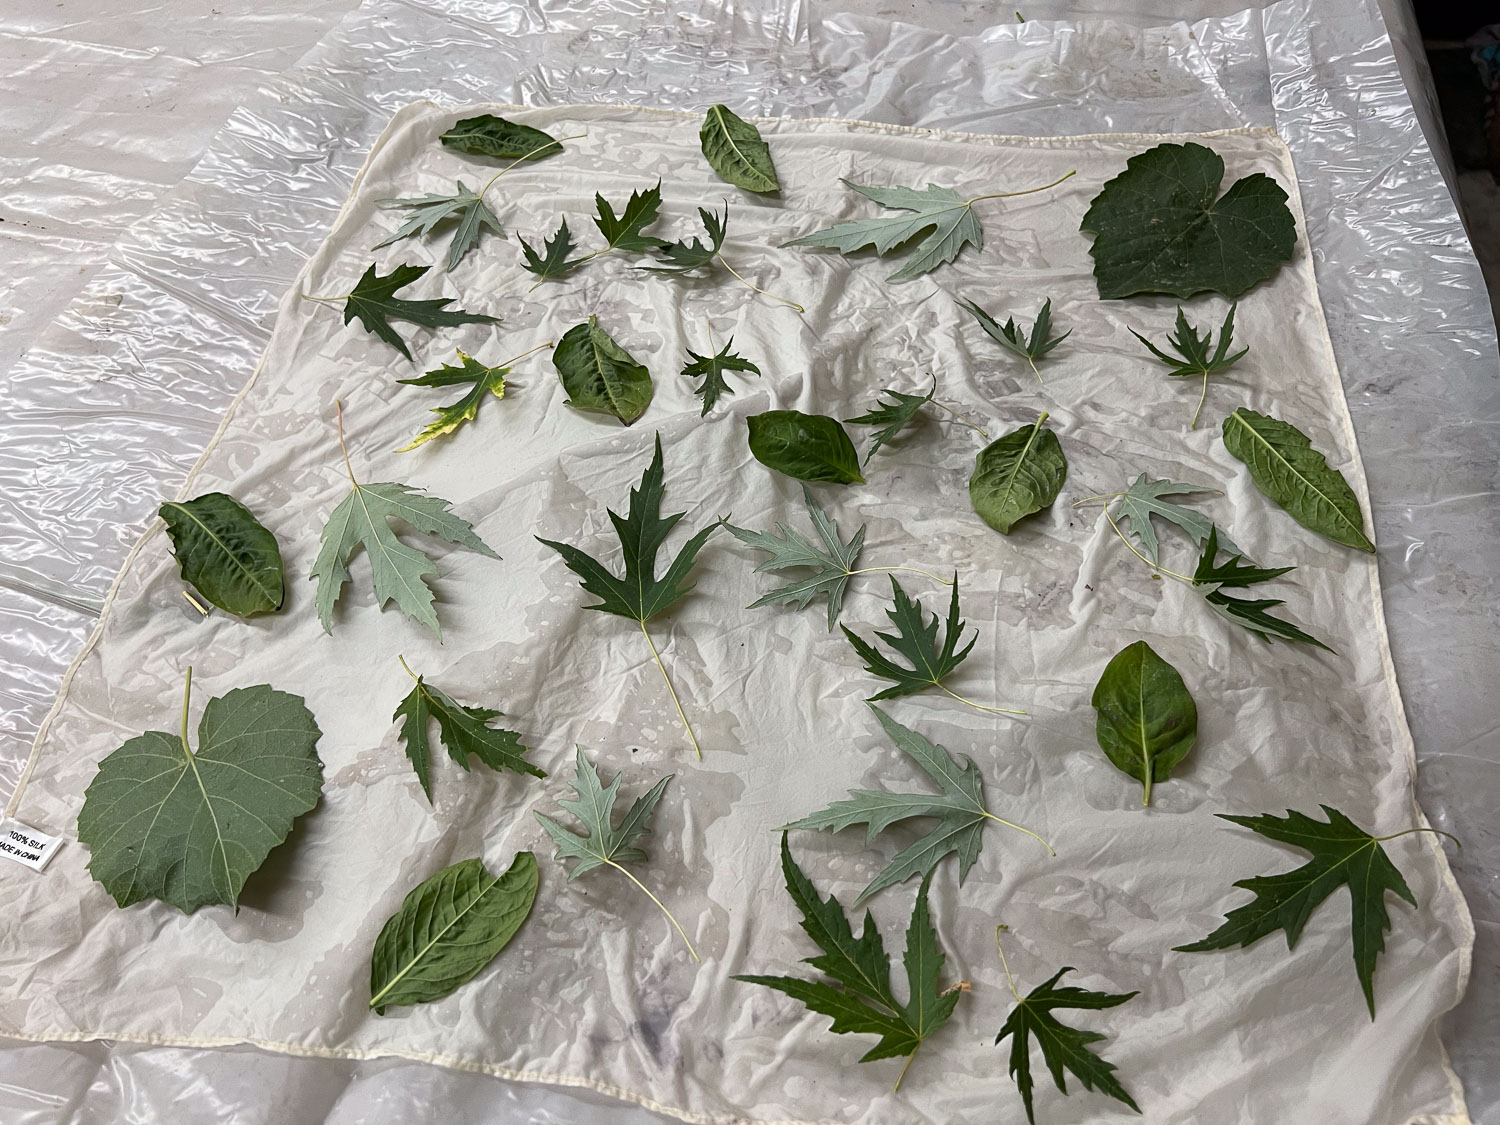
Here is what it looks like while I’m working. These are two different scarves, but I’ll end up with four because I put a second one on top of the first. These were soaked in a tannin solution before adding the plants. The second scarf is soaked in an iron solution. As I put the iron soaked scarf on the tannin soaked scarf a chemical reaction occurs that turns the tannin soaked scarf gray. Wow! Why didn’t we do this in high school chemistry? Maybe some of the rest of chemistry would have stuck.
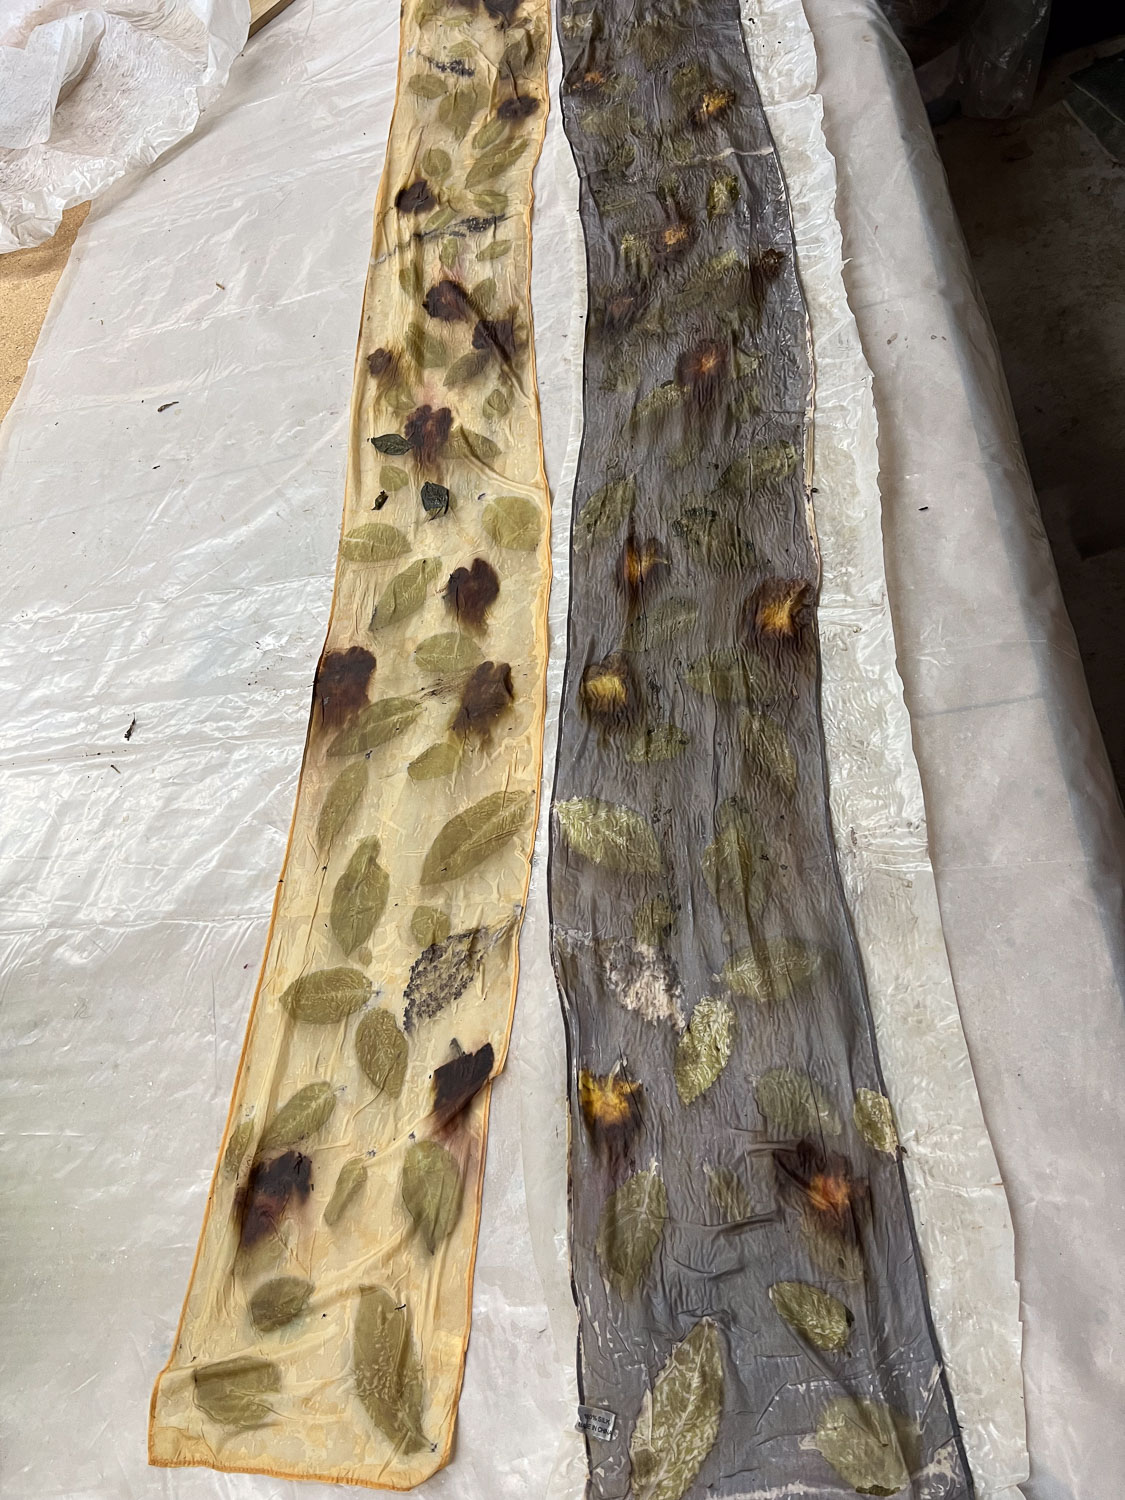
The pair of scarves sandwiching the leaves and flowers is rolled on a PVC pipe, tied tightly, and then steamed for an hour or more. The rolls cool overnight and then I get to open them. These two scarves are the pair from the left. The one on the left is the iron soaked scarf that was put on top of the flowers and leaves before rolling. Those are cosmos flowers from my dye garden and wild grape leaves from the front fence. I find it interesting that the top scarf has the imprints of veins from the leaves and the leaves act as a resist for the bottom scarf. (That green leaf is the actual leaf I haven’t pulled off yet.) The flowers print on both, but differently.
Here is another pair. That’s indigo leaves on the left and dahlia flowers on the right, along with something I can’t remember although I think I wrote it somewhere.
Here is the big reveal of the dahlia scarf.
The indigo scarf. In these two pairs, the leaves printed on both scarves instead of acting as a resist.
I have used a canning kettle in the past, but I just found this tamale steamer and bought it. The advantage is that a steamer tray comes with it. However I didn’t know if I could put enough water in to last over an hour, and I recently ran my old pot dry which ruined the scarves. So I wired the steamer rack high enough to put plenty of water in the bottom. Now I can fit many more at a time.
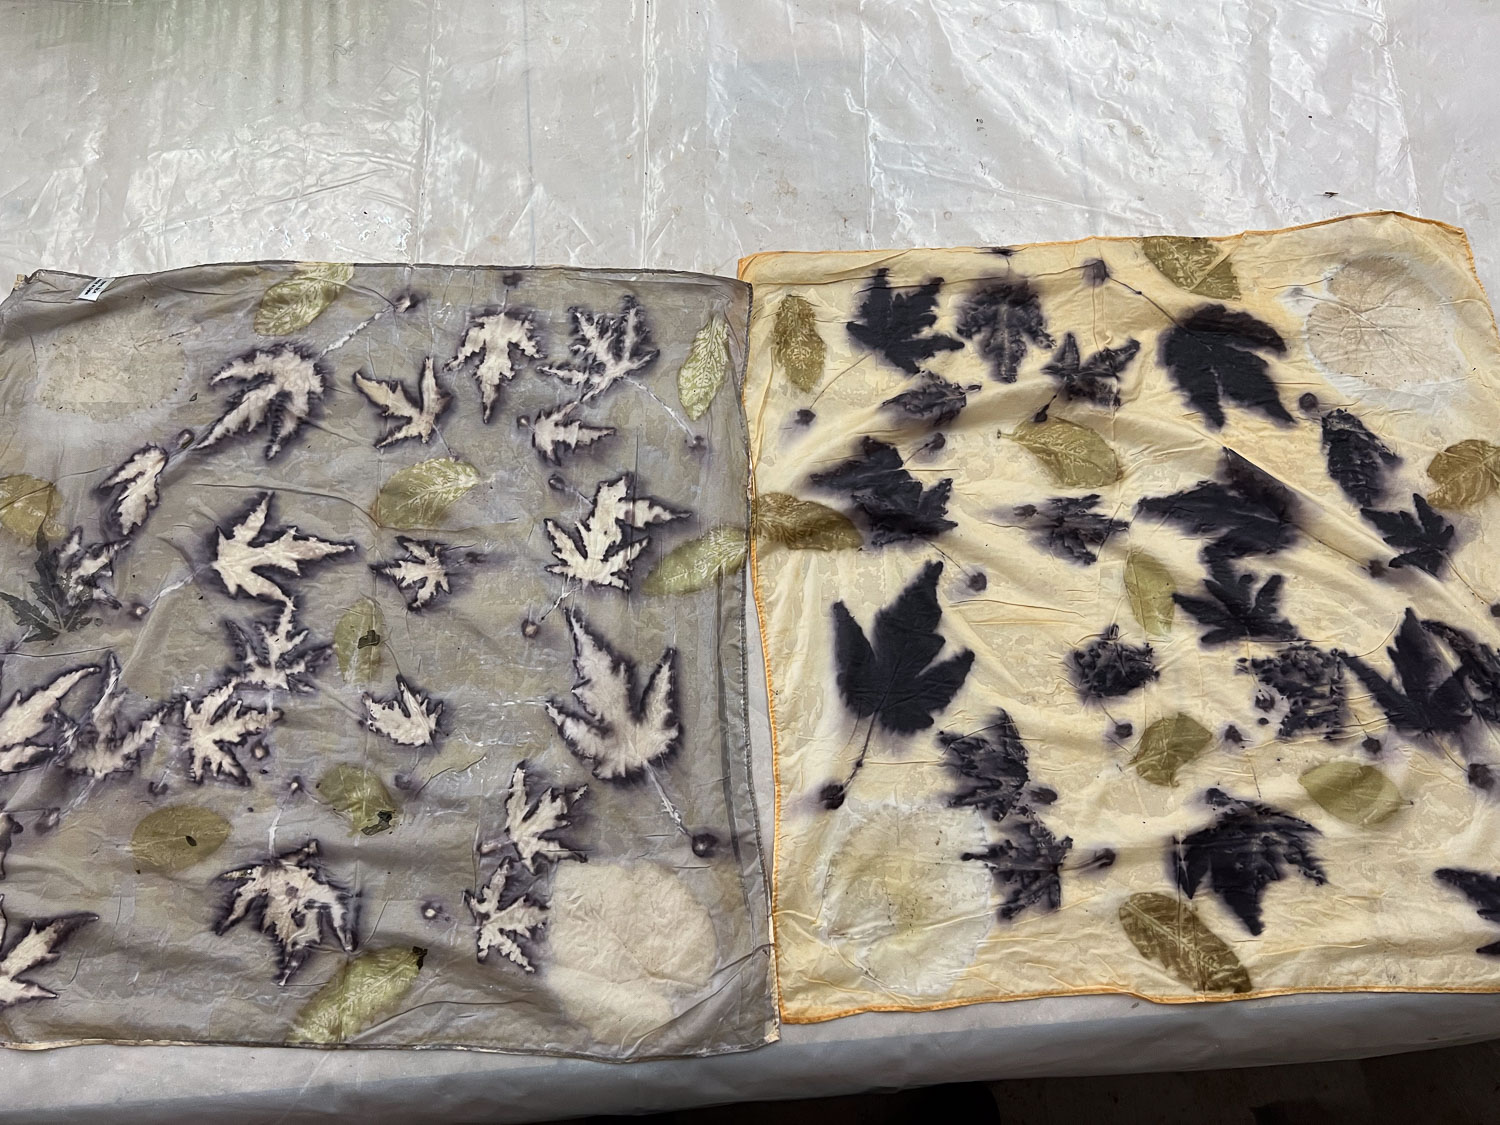
I’m experimenting with square scarves. I haven’t figured out the best way to display them at the Artery yet. This is maple, grape, and indigo leaves.
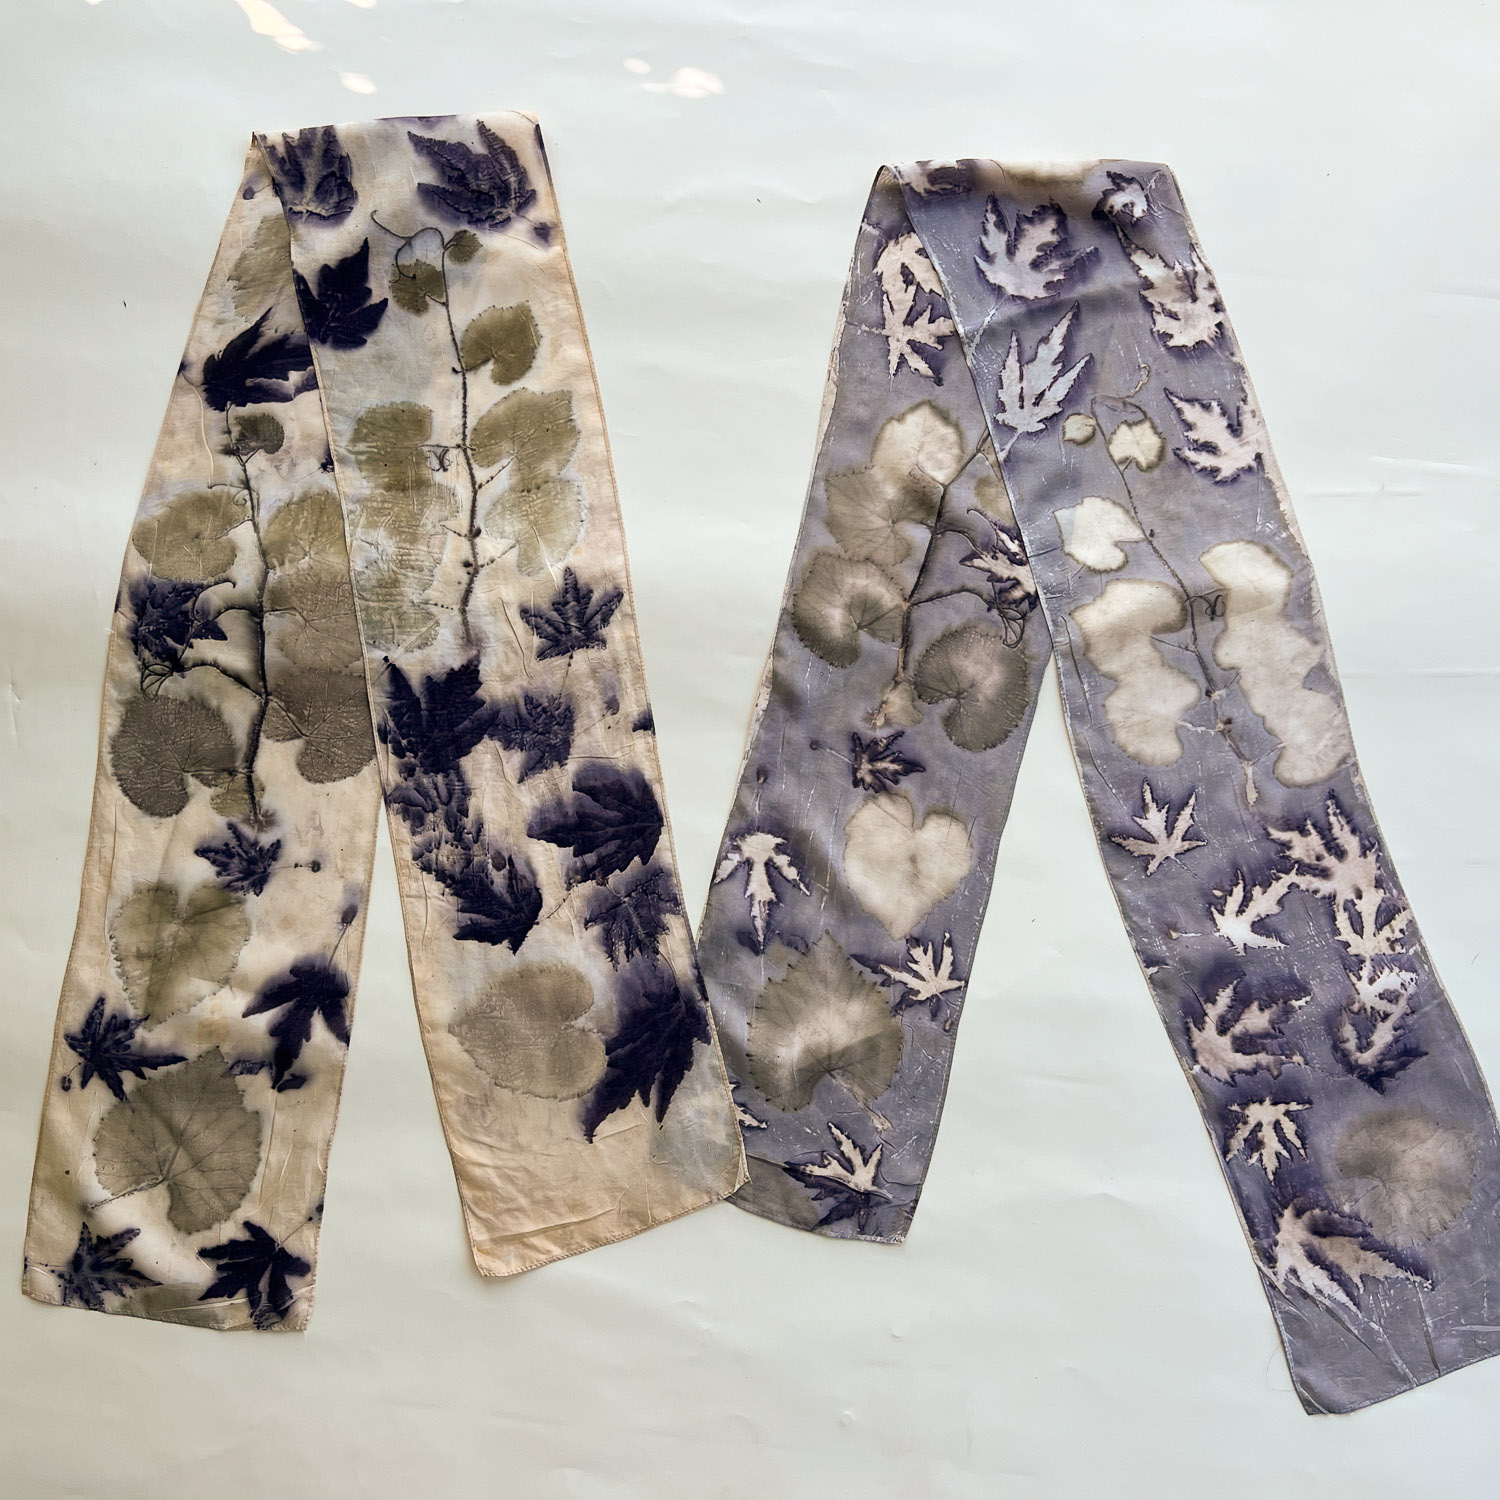
Here is the finished pair. Notice that the indigo dyes green on both scarves but the maple and grape leaves act as a resist on the gray scarf.
I worked on three at a time here. Maple and grape leaves on the left, indigo leaves and flowers and cosmos flowers in the middle, and cosmos leaves and flowers on the right.
These are the two scarves from the middle after unrolling.
These are the scarves from the left in that photo of three, after washing and ironing. I have four scarves listed on the Artery website right now–working on more listings but need photos. A lot more are in the store in Davis.
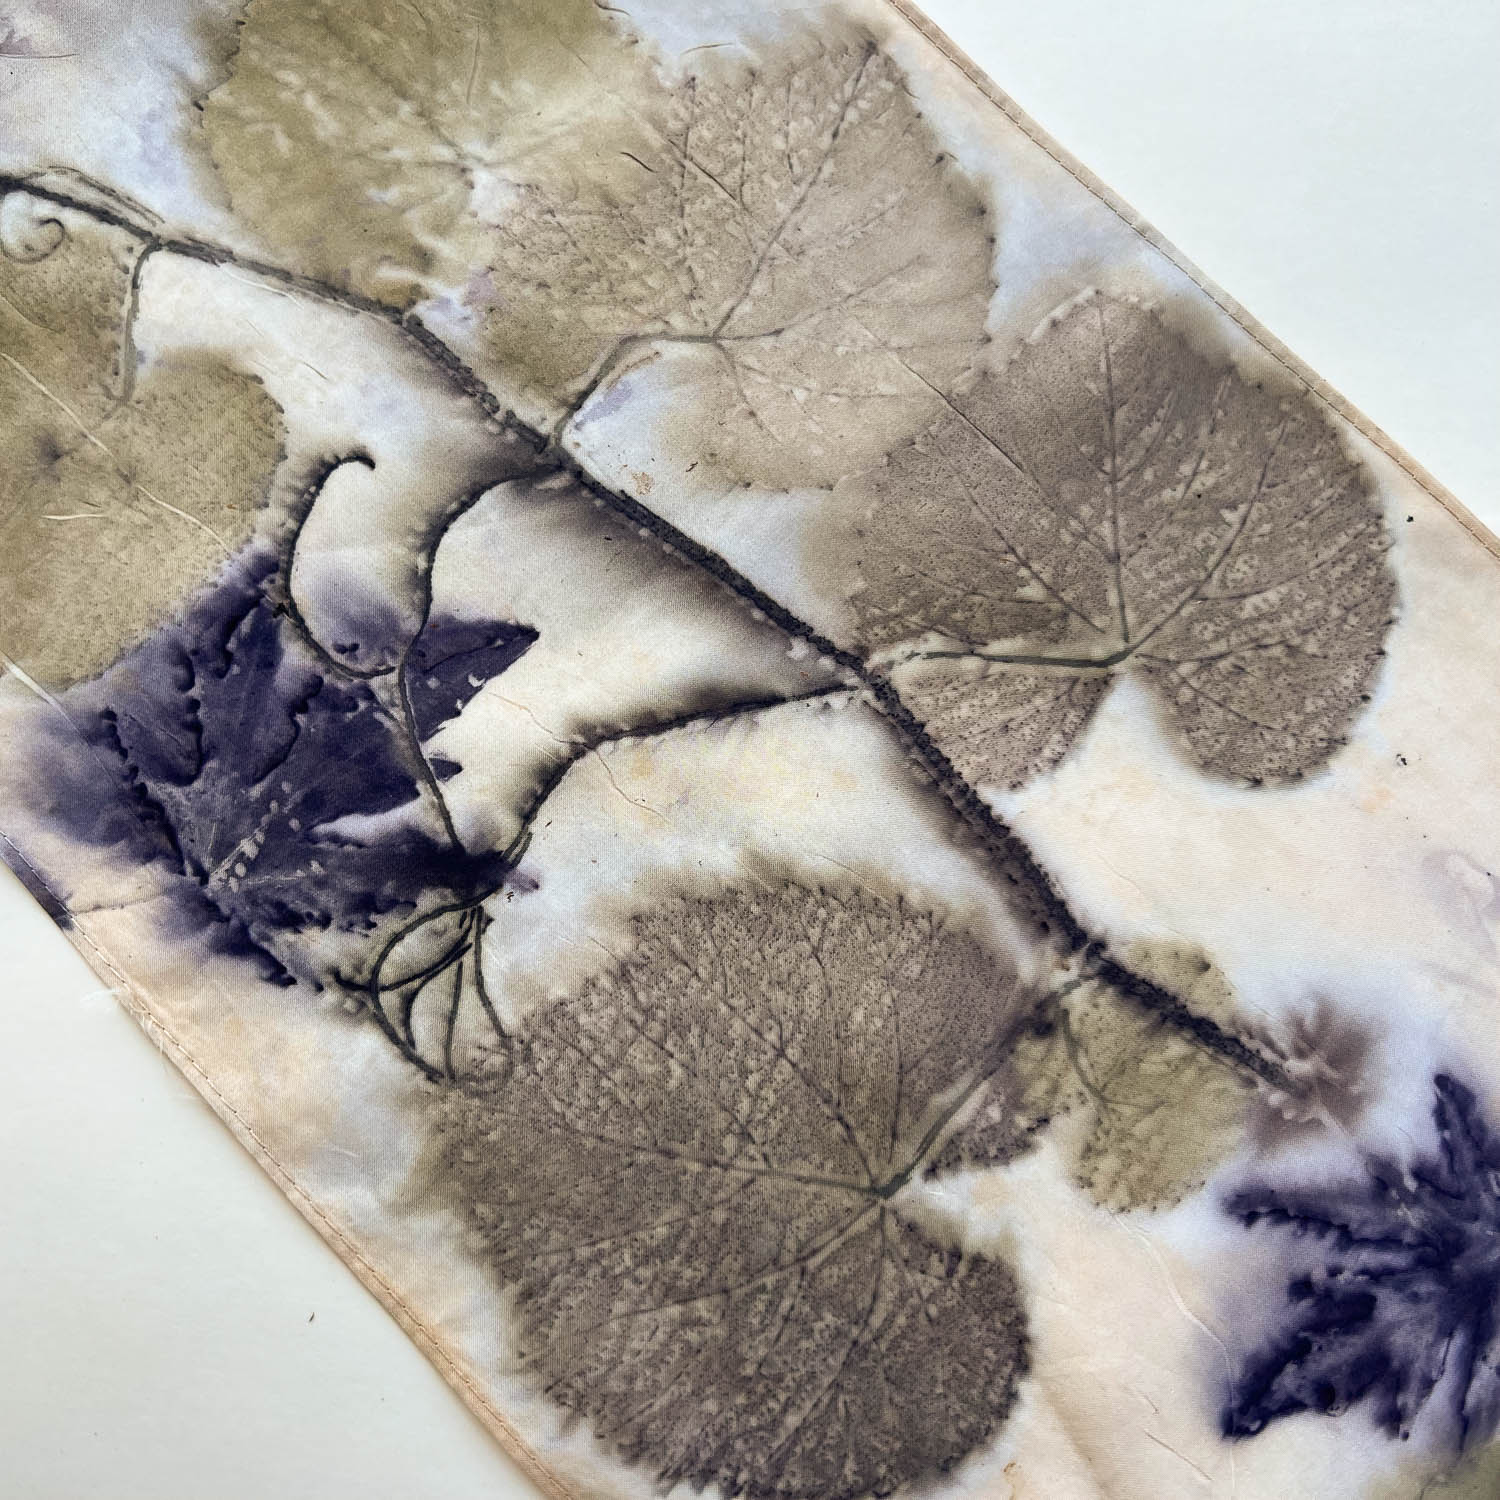
Here is a detail.
I printed more scarves the next day. All the scarves have been silk, but I tried a new batch that are 63% silk and 37% silk (right).
Here is that wool/silk scarf after finishing. These are the only ones on my website right now. Hopefully I’ll get more listed soon. I’ll tell you more about that other scarf in another post.
How much time and energy do you spend making decision? Sometimes it seems overwhelming and it’s often about something trivial.
I’m helping with a new website. I’m not really helping, but being a guinea pig about how it all works for a non-tech person to enter things and helping to find glitches and things that are confusing. Is that a beta-tester? Or do you have to know more to have that title?
There is a place that asks for a banner across the part that will have Meridian Jacobs info. How to decide what photo? Sheep? Weaving? Yarn? The point of the website is to sell things. How do I choose one? The photo needs to fit the banner space. The software will supposedly take the appropriate size piece out of whatever photo you send, but I thought I should start with something the right size. I started with these below. Some were just experimental to see how they would fit the space.
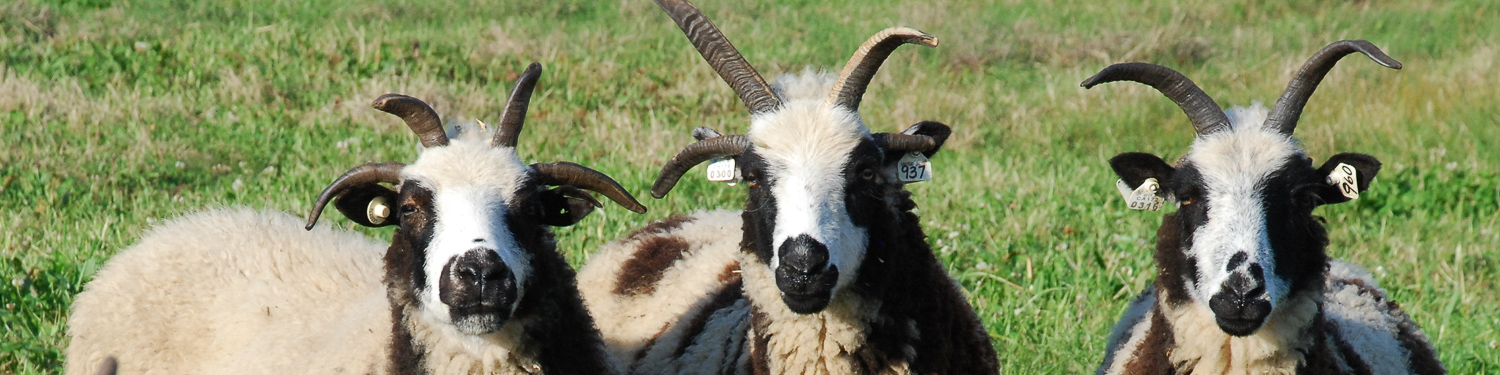
A sheep photo? This is an older photo but I suppose that doesn’t matter as long as the quality of the photo is good enough.
I wanted to try something with more sheep and a background. This is not a good background.
This photo looks a bit washed out–maybe I can adjust that but at this point I was looking for any photo that fit the sheep into the landscape with a bit of horizon.
What about yarn or weaving? I’d sure like to sell blankets. Version 1.
Version 2.
Version 3.
I have a series of these photos that I have always liked.
I have used this photo (full size) a lot because it shows the difference between black and white sheep and lilac sheep. Townes, the lilac on the right, got the tips of the top horns caught in a fence two days ago and I found him dead.
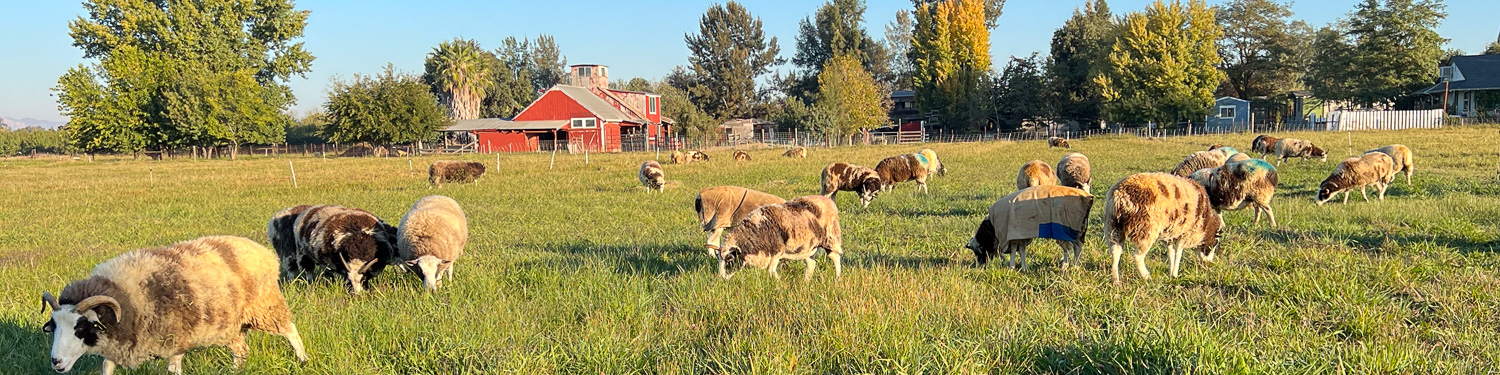
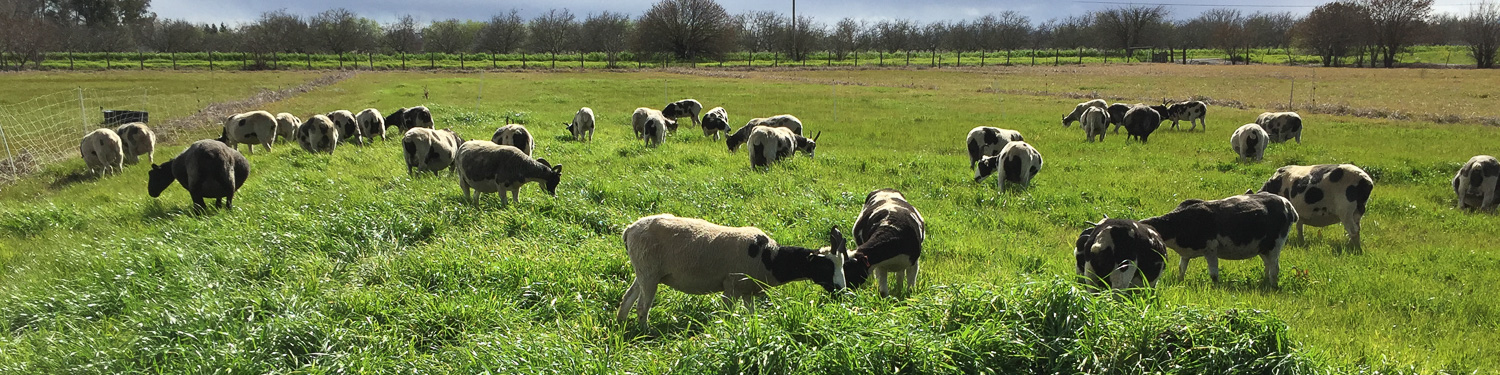
Back to landscape photos. Here is one with a horizon and a lot of sheep and lush grass. The sheep are pregnant and recently shorn.
I walked across the road this morning and had just changed the fences so the sheep have this field near the road. That’s the view I was after. It is a narrow band but it shows sheep and the horizon. I like that this one shows our position in the Sacramento Valley. That notch you see in the hills is where the road goes to Lake Berryessa. Its a landmark for me.
This is a little different cropping of this morning’s photo.
A closer up view makes the sheep and the barn more prominent and removes the white fence on the right but cuts off the trees and my notch on the hills.
Back to yarn. This is what I did the last few days. Indigo on the left and Cosmos and Dahlia on the right.
But maybe I need black and white.
No decision made yet. Any suggestions are welcome…
I needed to update ram photos on the website. This is the adult ram page and the ram lamb page. I need to make decisions about which rams to keep and which to sell and how many ram lambs to continue to evaluate.
Right now there are five mature Jacob rams here and several ram lambs.
Fair Adventure Horatio is the most recent ram. I brought him home from Colorado where I sold Turbo (blog post from Estes Park). He is not with the other rams because I didn’t want to disrupt the pecking order. He has had a ram lamb or two with him for company, but after breeding season he will go with the other rams.
Here is what I wanted to avoid with introducing Horatio to this mix. These four have been together for several months but they were fighting a couple of days ago. I don’t know if it was because I was in the ram pen and they decided to get feisty. Or was it that the ewes are starting to cycle and there seemed to be some interest across the fence? Silverado, the 4-horn ram on the right, hasn’t been feeling well–spending a lot of time in the ram shed lying down. I think he may have had bluetongue which causes sore feet. Now he is doing better and is out with the others–so maybe that was reason to reestablish pecking order…and he is not on top anymore.
The lilac 4-horn ram, Patchwork Townes, is the oldest at 3 years. Hillside Barrett is the 2-horn ram on the left. He and Silverado (middle) are the same age, born in 2021.
After Townes and Barrett both bashed Silverado, then they went at each other. The ram on the right is Thorn–that is my granddaughter’s ram that we showed at State Fair. He is a yearling.
All four of them are facing off here.
Thorn didn’t seem to be as aggressive as Barrett and Townes, but this photo shows he took his turn.
Townes and Silverado.
Townes seemed to be the aggressor again…
…but Barrett was still involved.
You might ask why I let this happen. This was relatively mild as ram fighting goes. After breeding season I go through a protocol to keep the damage to a minimum. I put the rams in a very small pen. They fight but they can’t back up and put the power into the hits. After a few days they have figured out who is on top and if the others remain subservient they all get along. ..usually.
The reason I was in the ram pen was to get photos. Here are the photos I got.
Hillside Gabby’s Barrett. Don’t you love those horns? He is only two this year.
Patchwork Townes, 3 years old.
I need a better photo of Silverado.
Thorn is Silverado’s son from 2022.
Blizzard is one of Silverado’s sons from this year.
Cyclone is Blizzard’s twin. I’m not sure if he lower horns will point away from his neck–I hope so because I’d like to keep him as a replacement for Silverado.