Grazing and Irrigation 7- May

I wrote posts a couple of weeks ago to create a photo diary of our grazing progress as we started grazing the new pasture. As usual I got behind. It’s crazy now to try and document this the way I had intended. Instead I’ll start with this week and see where I go with this.

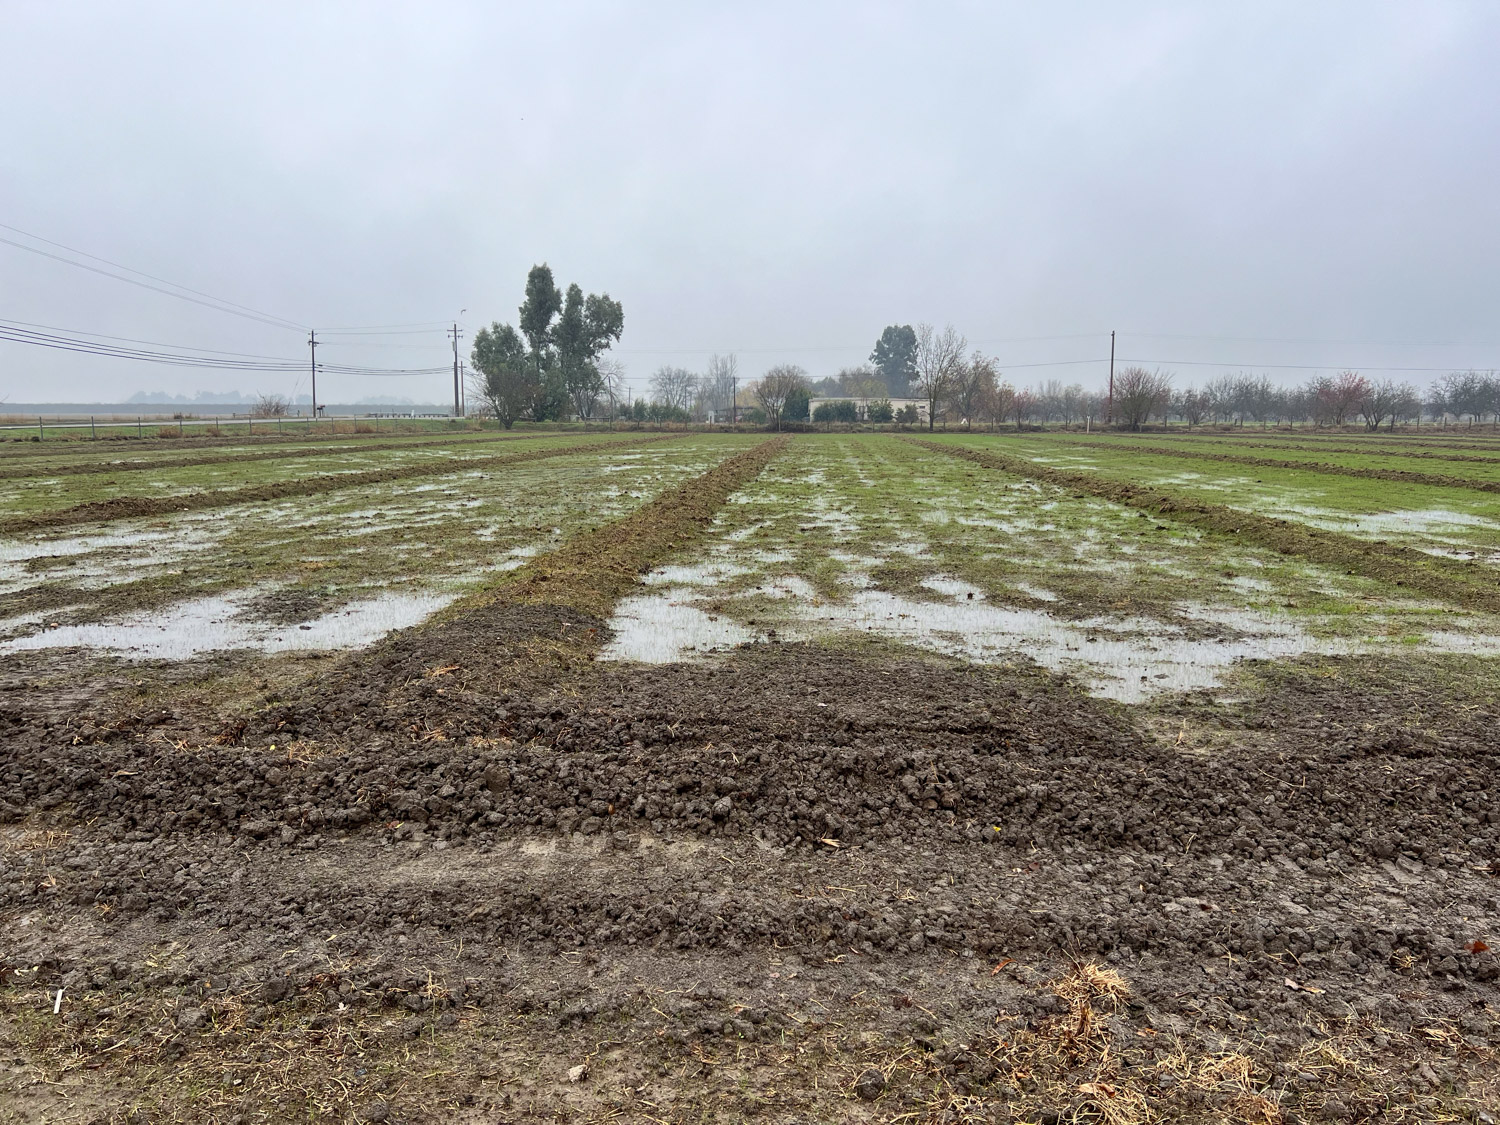
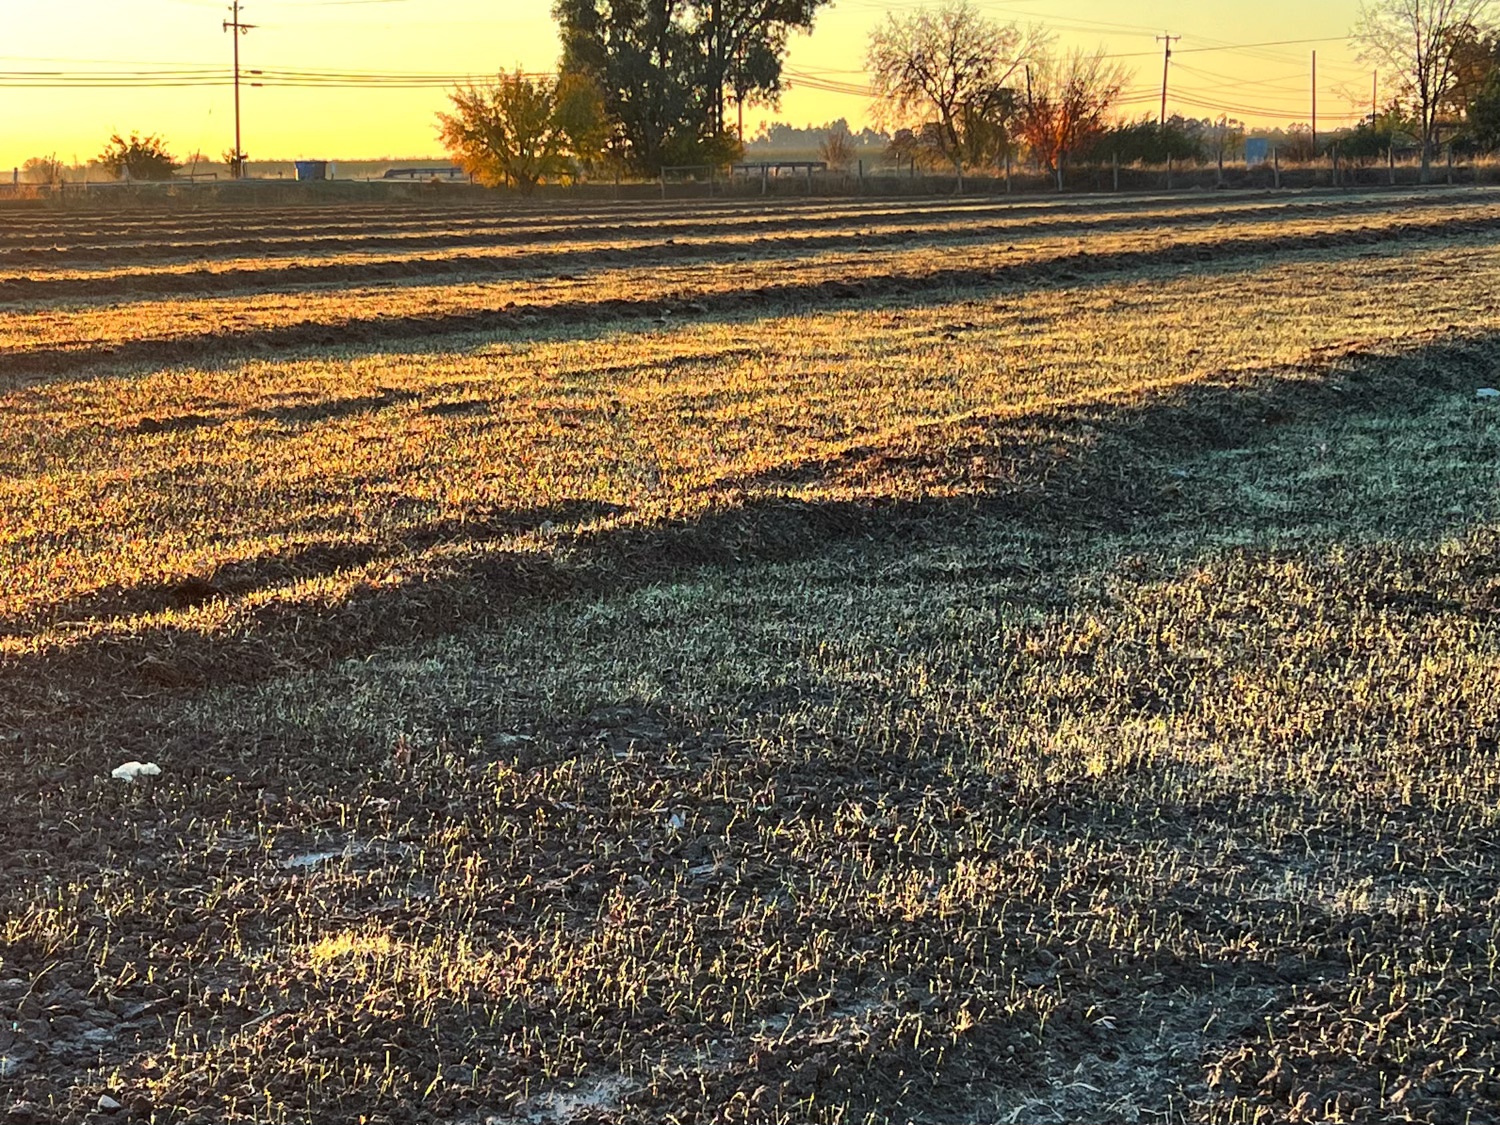
This is yesterday’s photo. I have numbered all the checks from west to east so I can keep track of what I’ve been doing. They are 30′ wide. We started grazing this spring with the paddocks in the north field. This is the previous post about that before I went on to the first irrigation. When we switched from grazing the north paddocks to the south ones we started with fencing two checks at a time and the idea was to split into smaller areas with cross fencing.

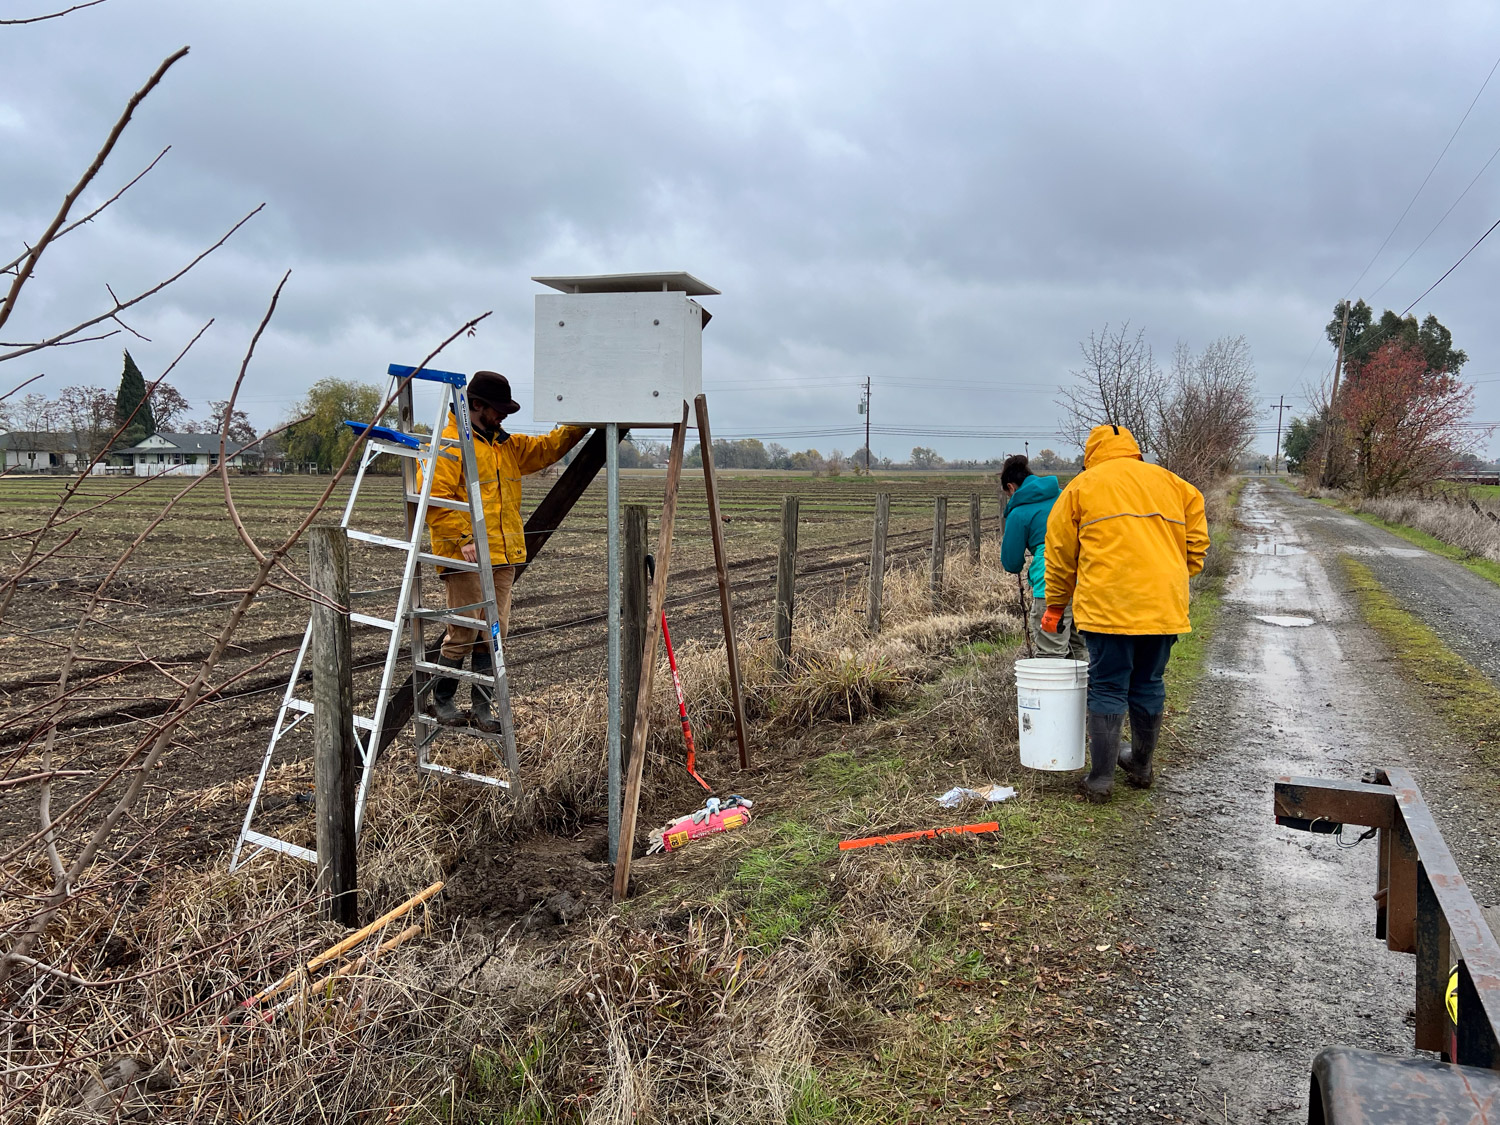
I have to say here that the main challenge here is that we have no permanent fences yet. When this project began (see the first post in October) we had to remove all the interior fences. Dan had knee replacement surgery in April and he wasn’t able to get those fences up before we needed to start grazing that month. I am using electronet fence and that means piecing together lengths of net and moving it as I move the sheep across the field.

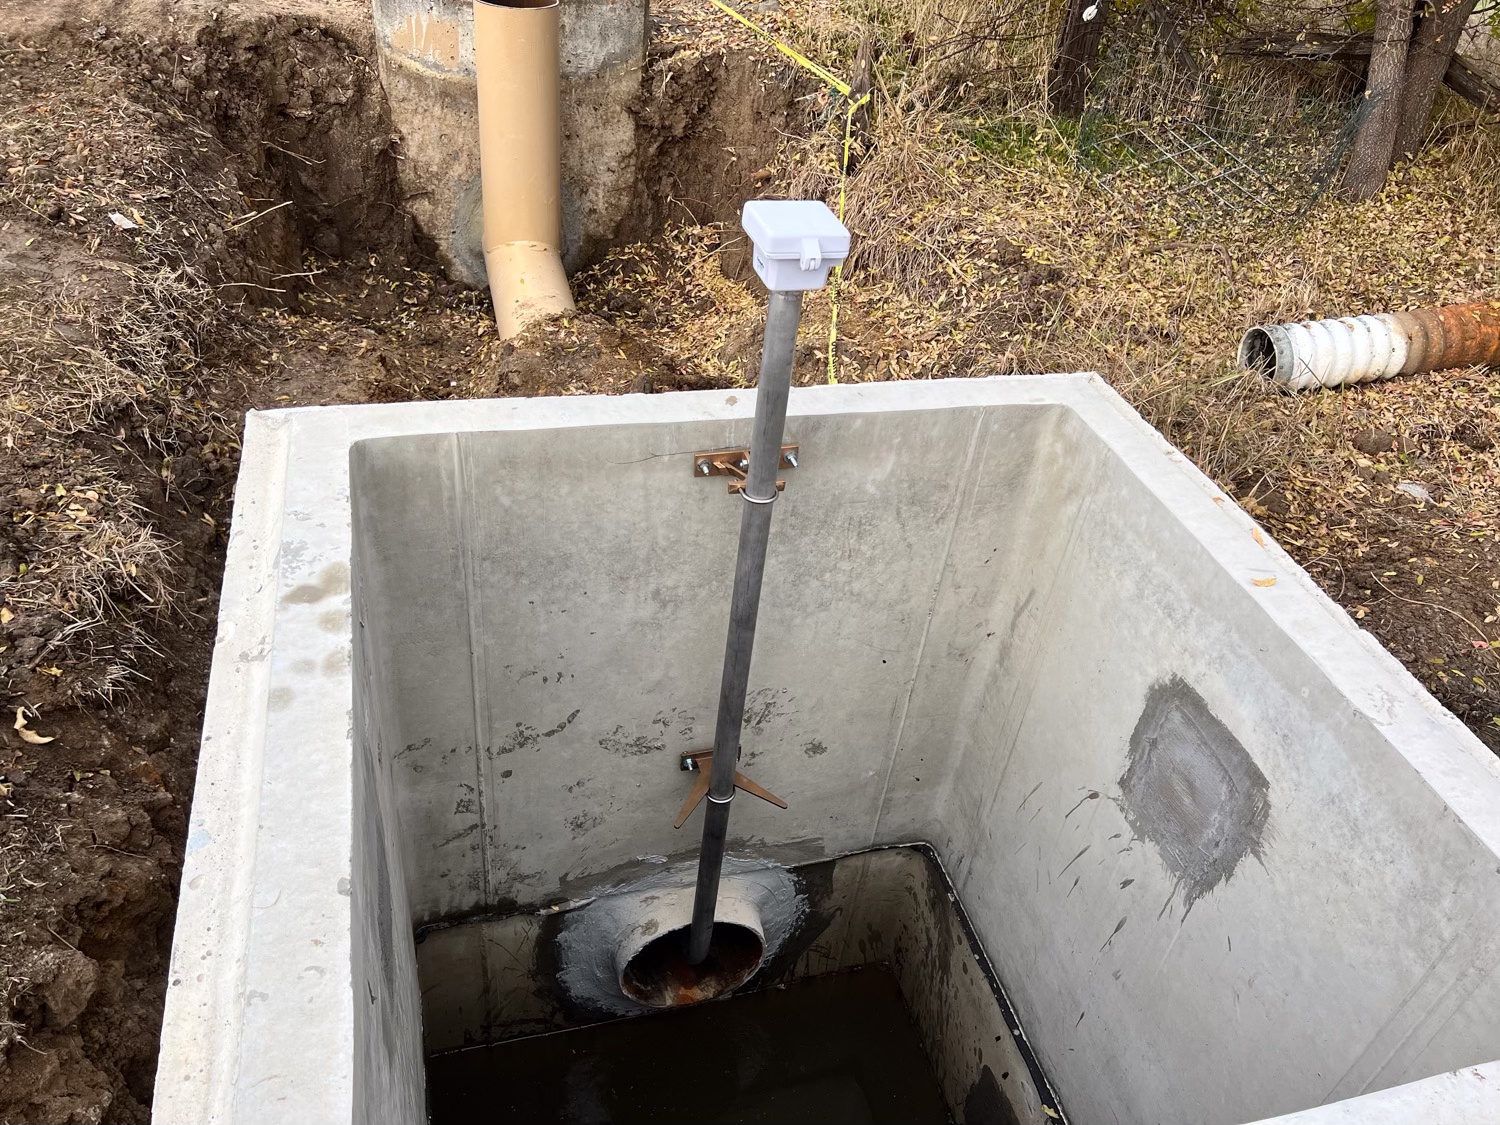
This shows the length of fence as I have moved it from one check to another before setting it up.

There is plenty of clover and trefoil, but in some of the areas it has been overshadowed by the annual ryegrass. That is another challenge. Annual rye was NOT part of the seed mix. There were three perennial grasses in the mix, but the ryegrass that was already in the soil took over. Fortunately it is a good feed, but it grew so quickly that it has been a real challenge to manage. This paddock is one that Dan topped with the mower several weeks ago and the clover is more visible here.

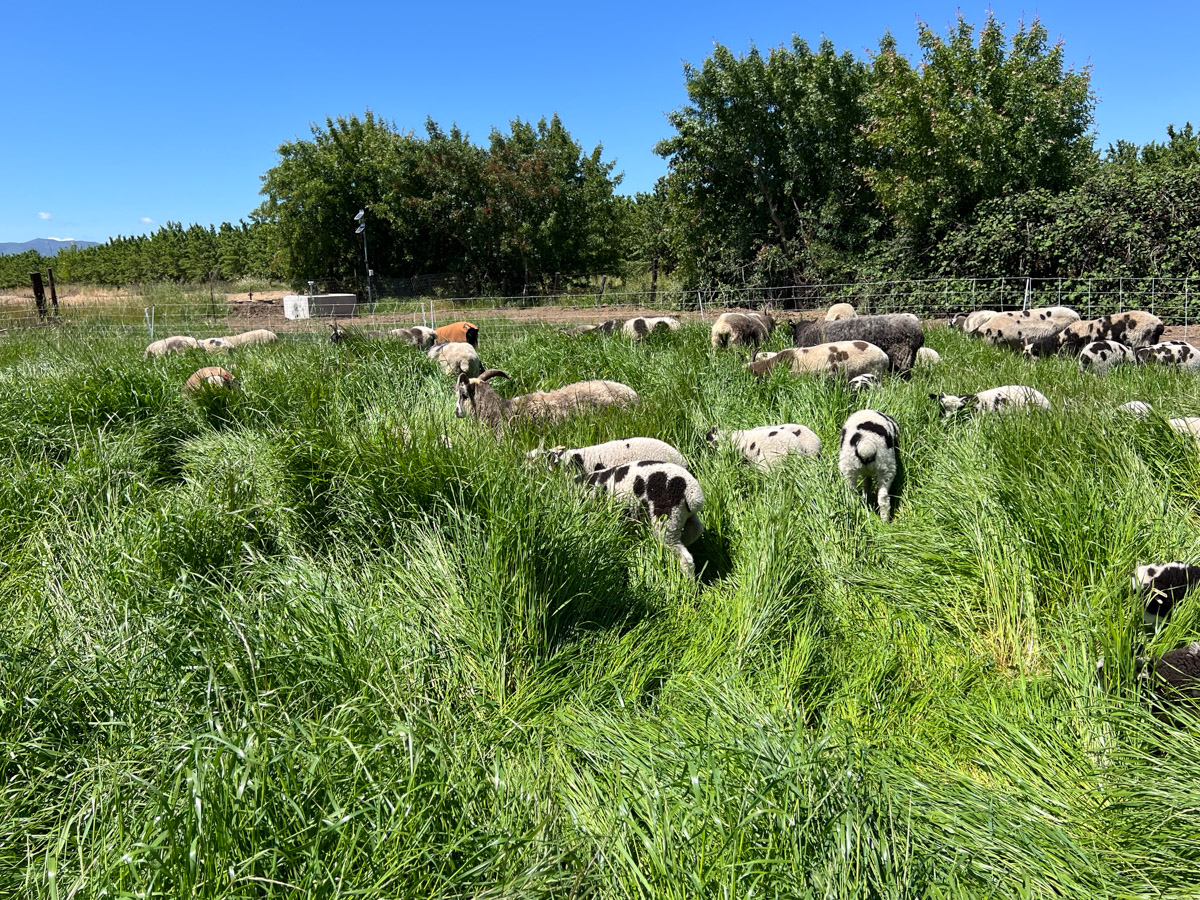
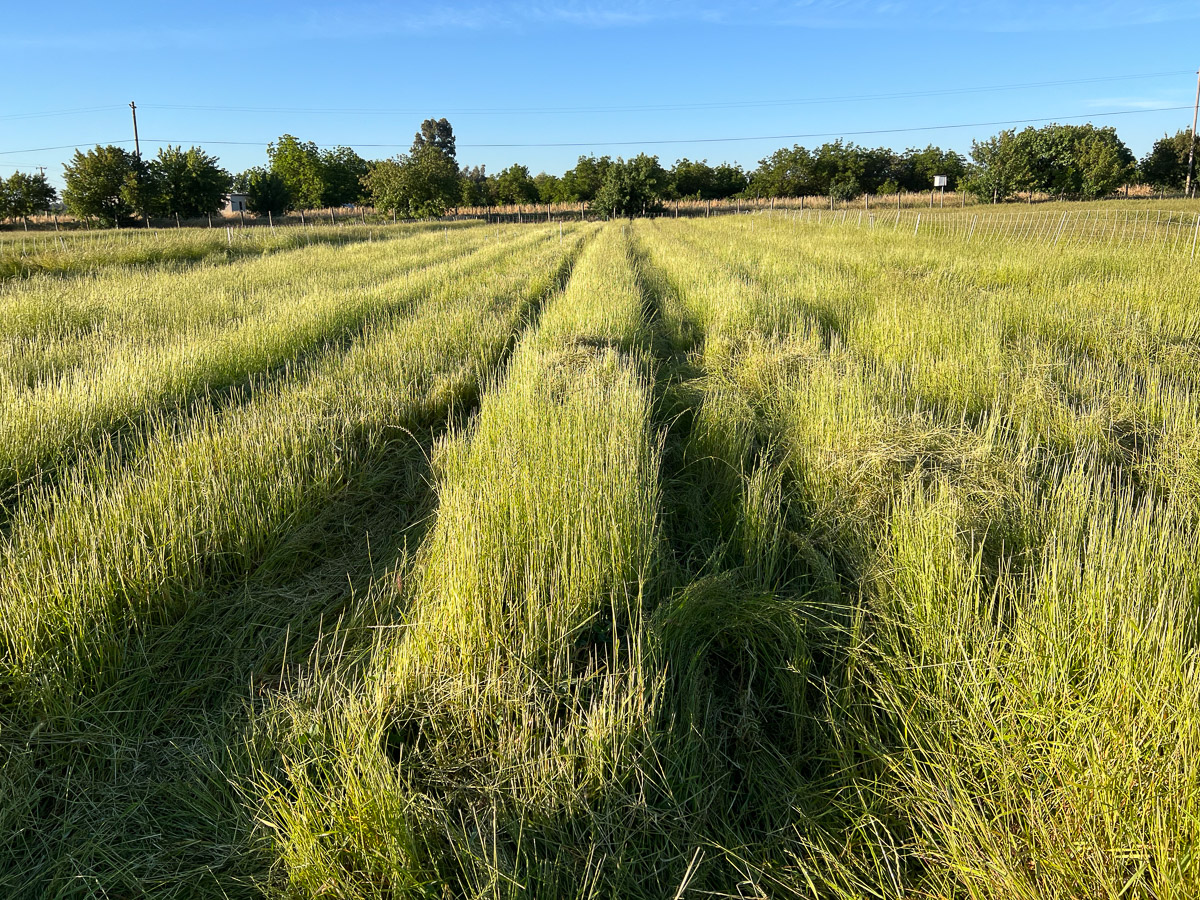
So far it seems that I can graze the sheep on each 30′ strip for two days. I could probably add another day but I want to move them across the field to try and keep up with that ryegrass. We also want to make sure that the clover and trefoil get well established before grazing them heavily. It is time consuming to move that length of fence from one check to another every two days, so this last time I moved only one of the fences to the west. There is no fence down the center of this photo. I moved the fence that was on that check to the next check to the west. So the right half of the photo is where the fresh feed is. The sheep can tell where there is fresh feed, and they spent the next two days mostly on that half. They are also able to eat more of the ryegrass that is still on the check once the fence is removed. If this method works then I’ll move one fence every two or three days.

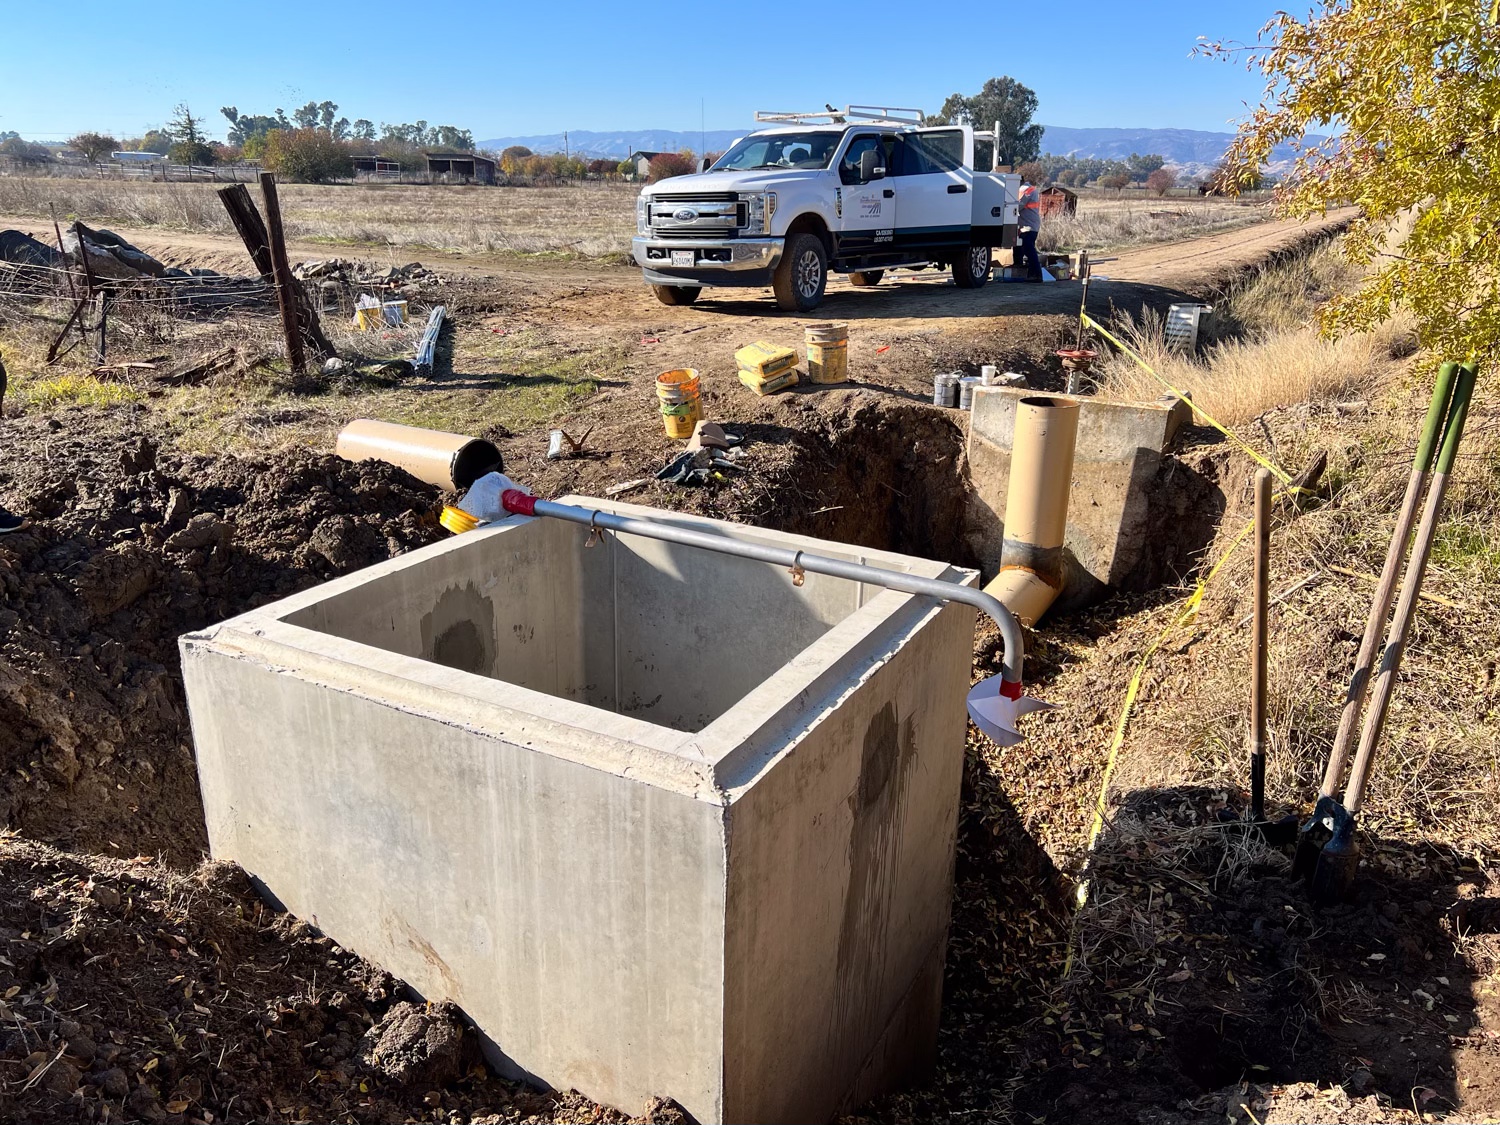
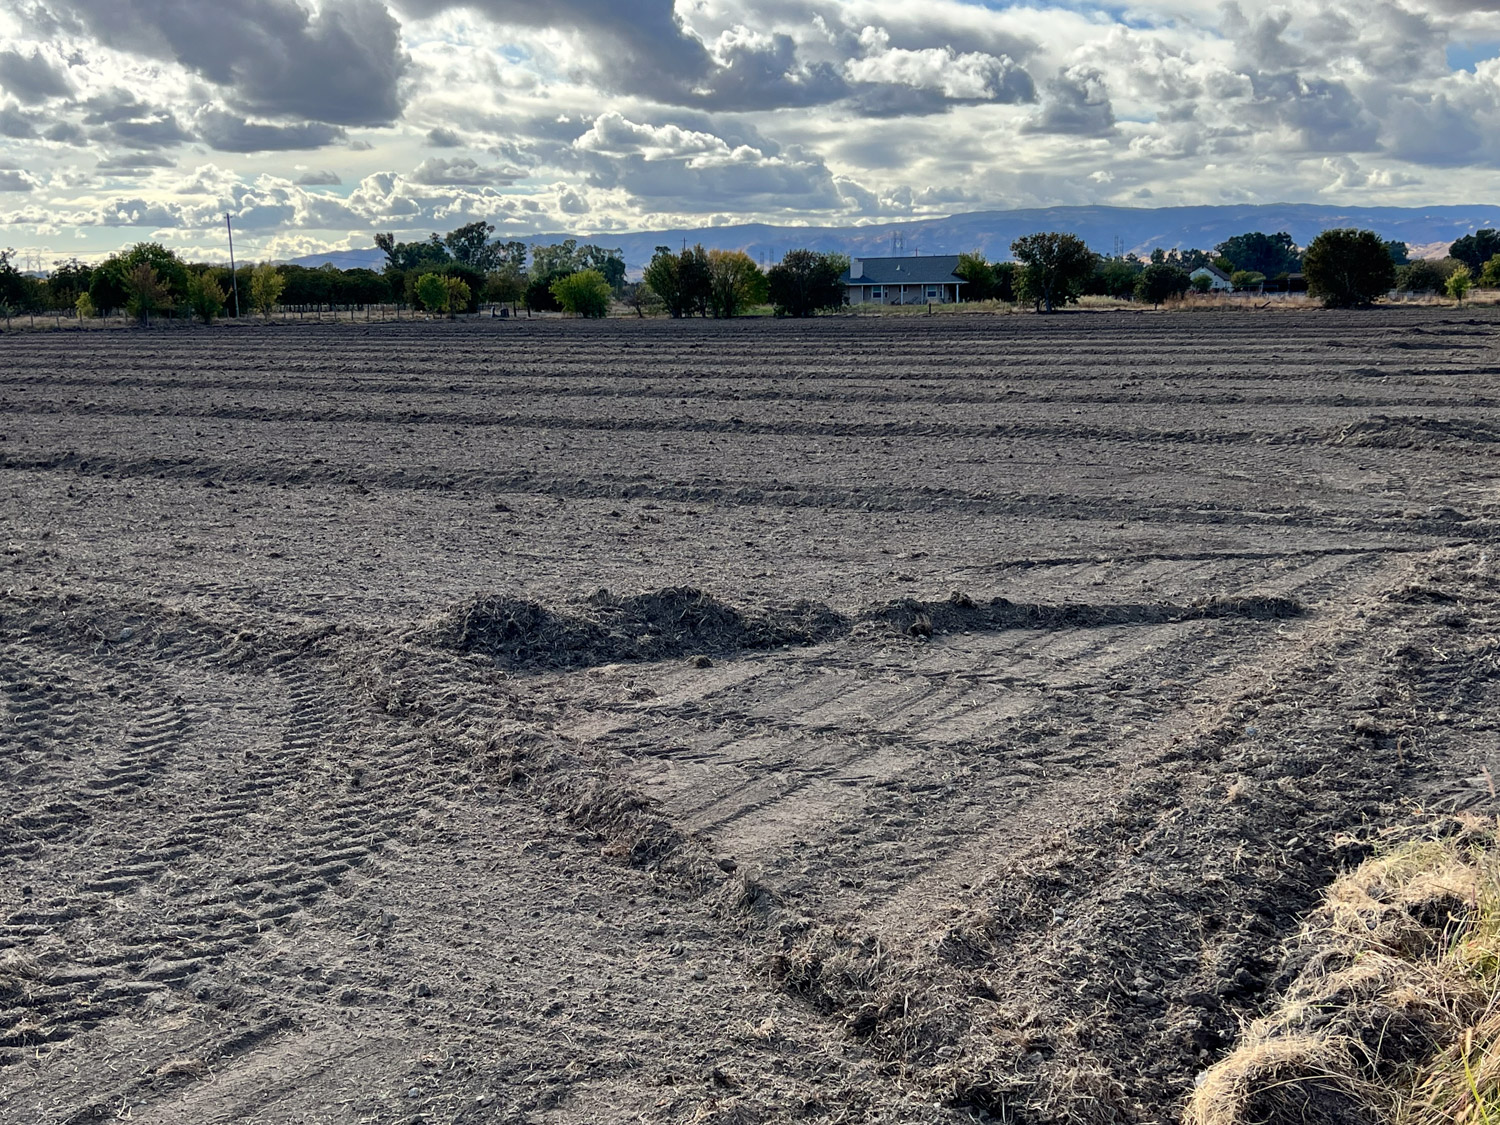
This photo is from a month ago when we moved them to the south field and set the north-south fences up to include two checks. We added east-west fences to have them eat each part more throughly. However, we have no drinking water source out there now so they have to have to be given access to the barn.

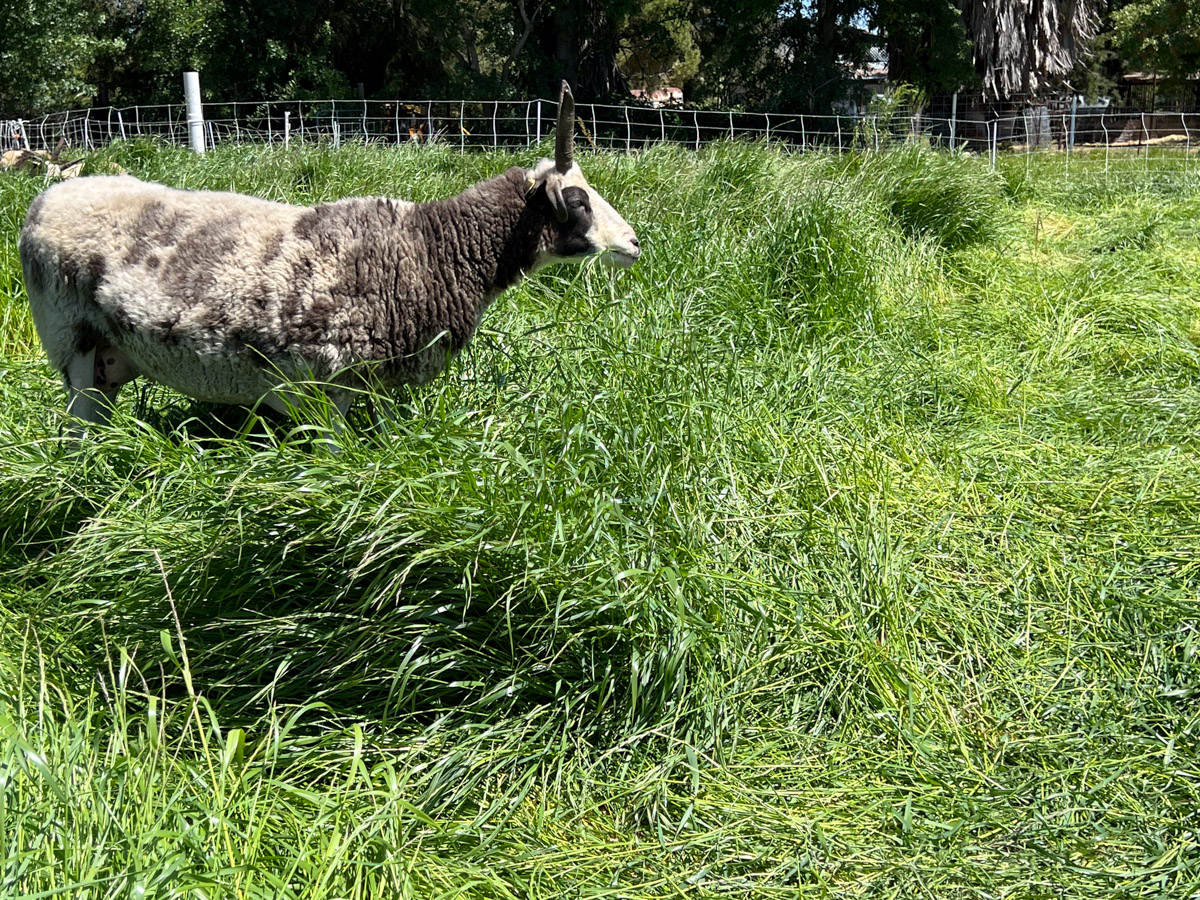
You can see how overwhelming the ryegrass is. There is clover there but it is hidden. When the grass is this tall the sheep trample it more than eat is and it has the effect of mulching the field. That is not what we want to encourage the clover and trefoil to grow.

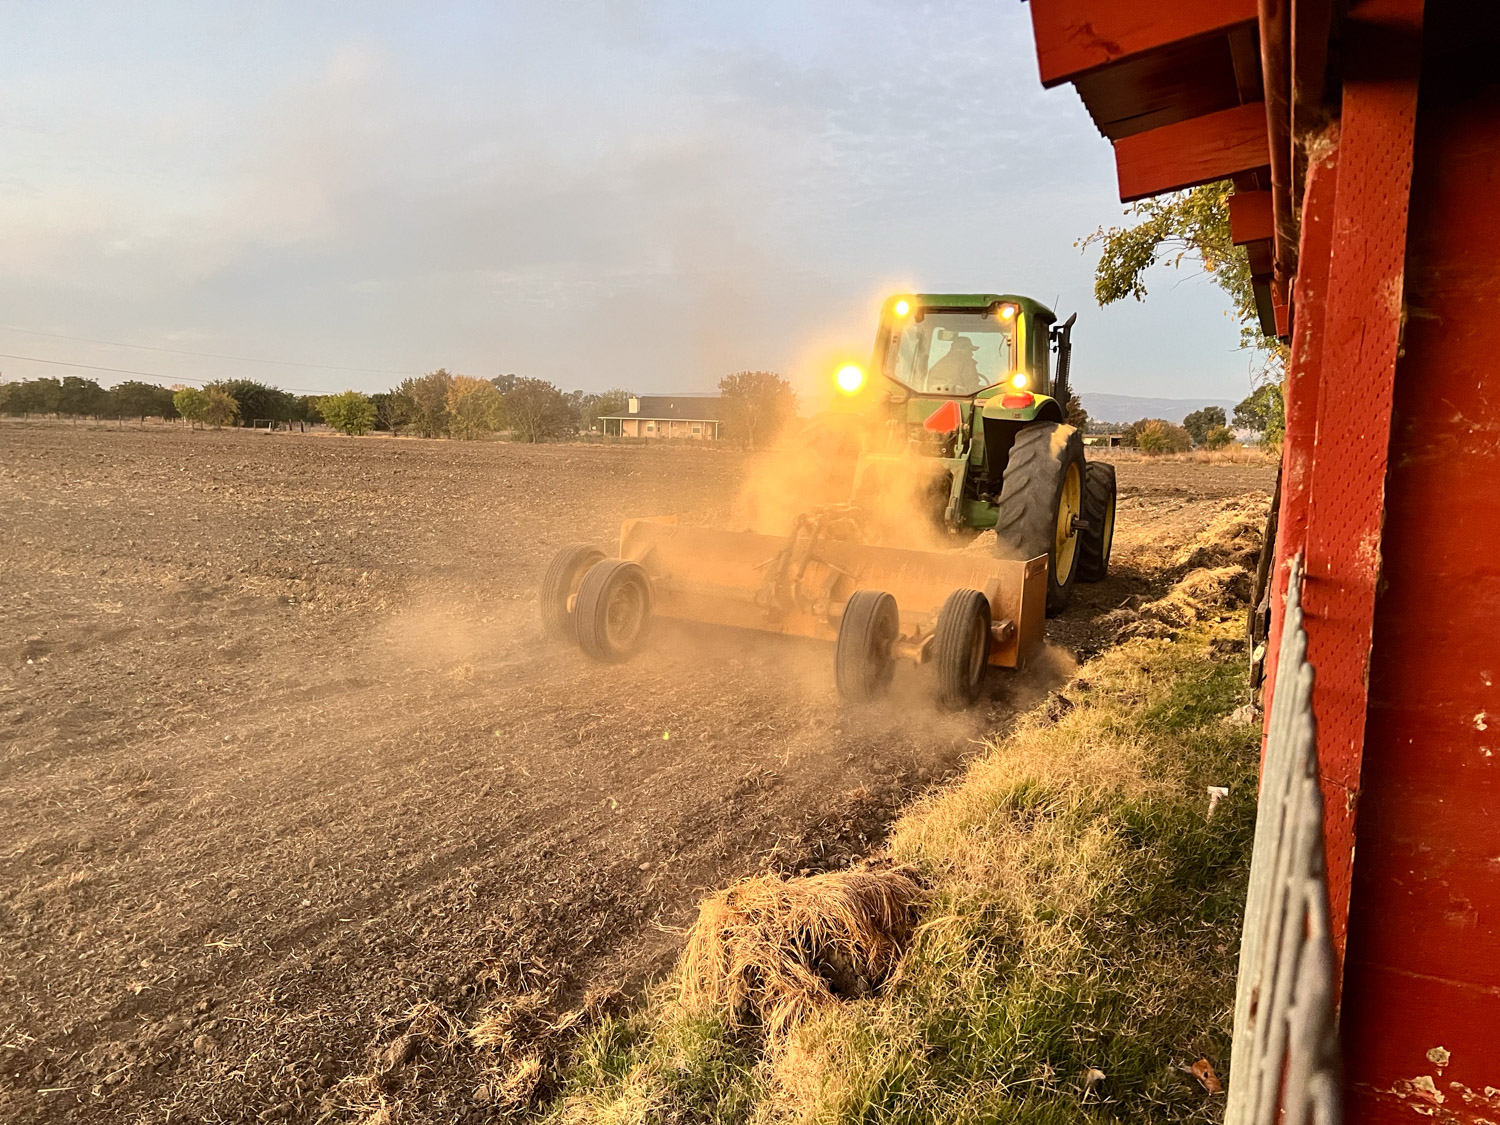
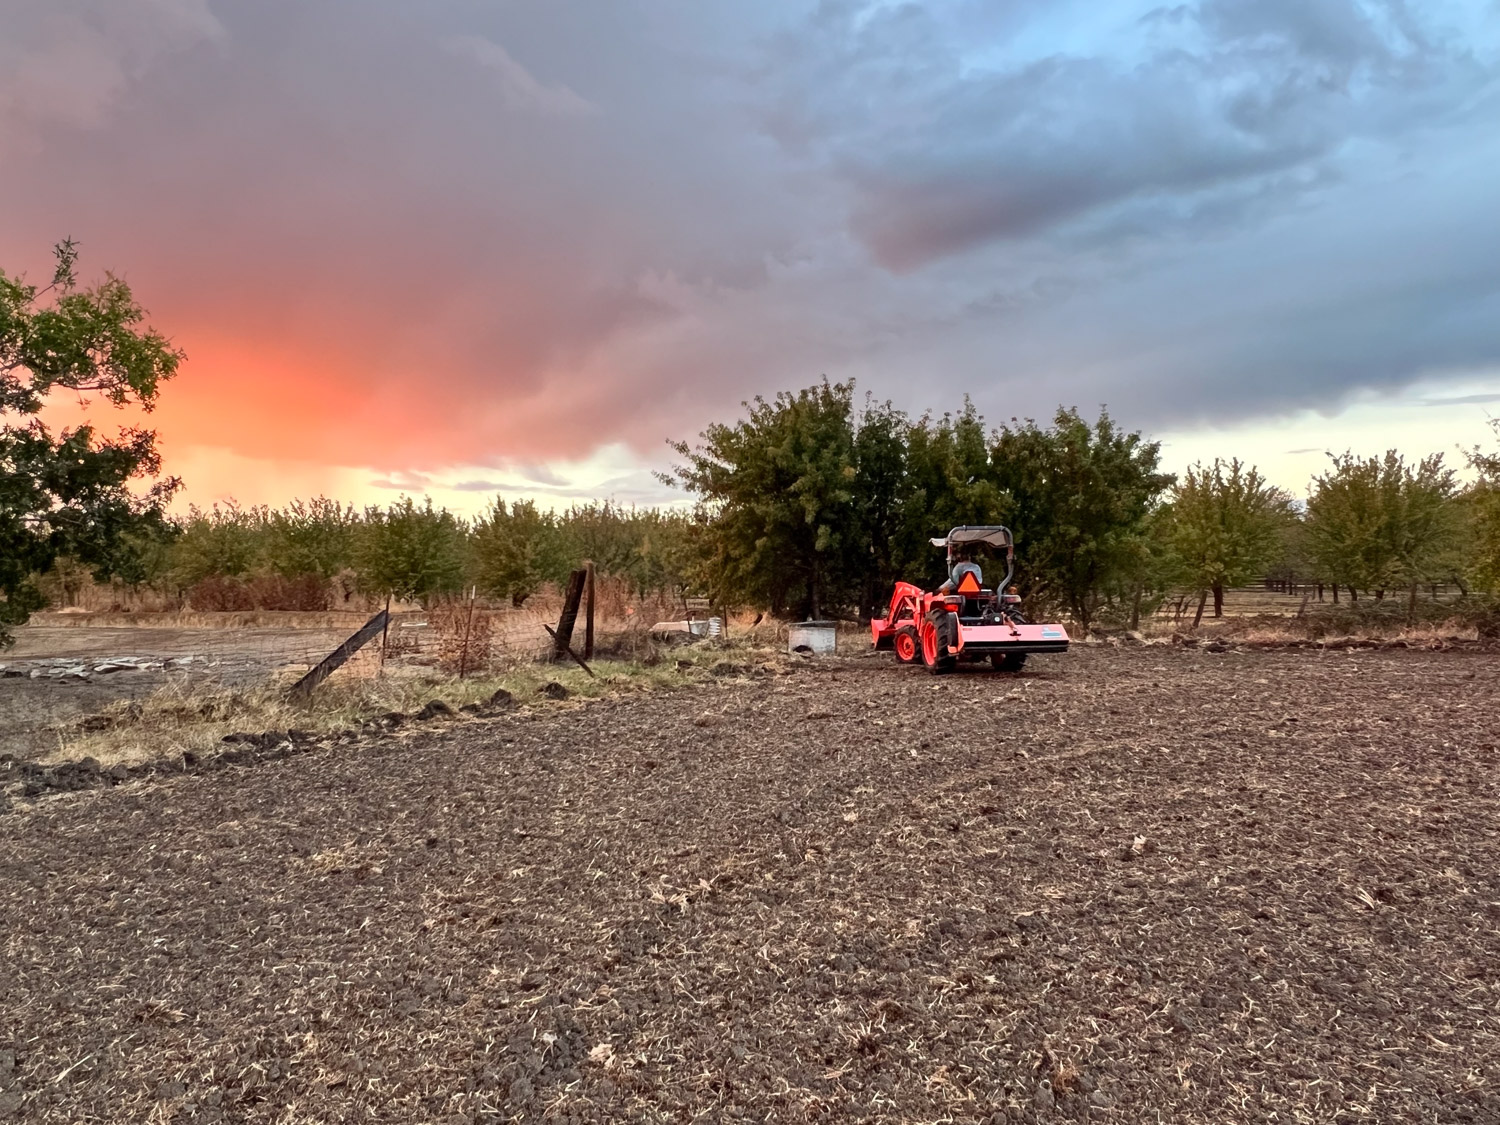
When Dan topped the ryegrass the sheep could move through it more easily and it allowed the other plants to have light.

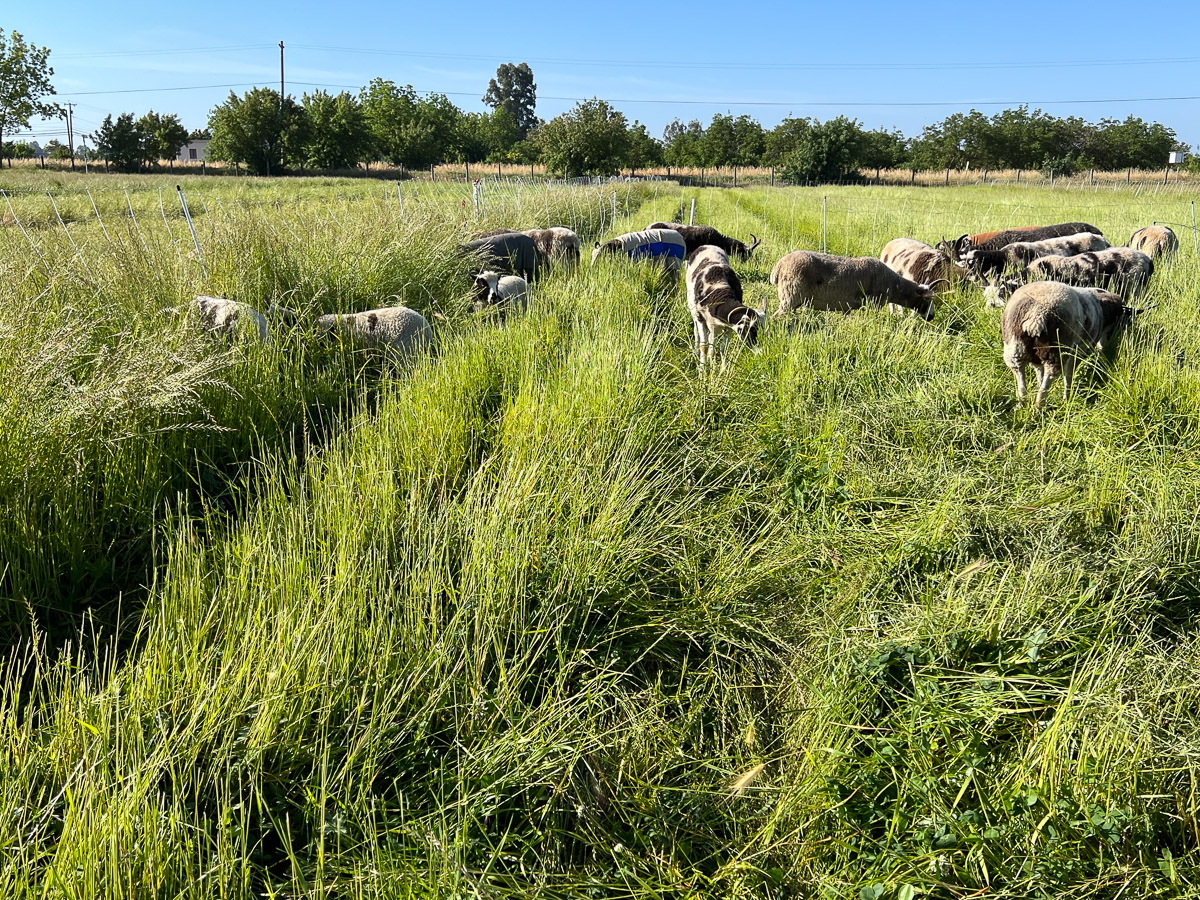
This view shows how they were able to graze the mowed part.

It’s great to have all this feed now, but I wish that I had more sheep right now to use all that feed.

Grazing and Irrigation 4 – April 28

I was gone for four days and my brother had finished setting up fences in the north pasture. This is how the pasture looked where I was to remove this fence and let them into the last part,

As described in the previous posts most of this tall grass is annual rye, not a species in the seed mix we planted.

The challenge was to graze it enough to not only feed the sheep, but to remove the cover from the clover growing beneath.

This is the opposite view from the first photo, but the same location where that net fence had been.

Dan took the tractor into the south field and mowed on top of the checks (the raised borders that control the irrigation water)–not so low as to impact the clover, but to top that grass and make the checks more visible and make it easier to set up the fences.

Close-up view showing the clover.

After mowing that strip.

Pasture and Irrigation Renovation – Part 13

The main part of this plan was the pasture and irrigation work. However we have a couple of additional projects. One was accomplished last week. Personnel from the Solano RCD brought two owl boxes and installed them. How about that for service!

This one is on the south fence and the other is on the west. In this photo this box is being held in place with additional wood boards while the concrete in the hole hardens.

I walked out there today just after the support boards were removed. There are wood chips inside and this hole faces east. The extra panels on the top and the west side are to help with temperature control in the summer. Part of me wants to write an Owlish Address of some kind on the box.

This is the view from the road when I walked to the owl box. It is far too wet to walk through the pasture or Across the Road. So I used this as a reason to get Ginny out for a short walk.

It rained a lot last night and today and I was interested to see the pasture from different views. This is the east side looking south. The photo above this one is the east side looking northwest.

This is the same side of the pasture, but from the opposite end. There is water in the deep ruts made by the trucks when they installed those moisture sensors described in the previous post, but, other than the ruts, the lower end of the field doesn’t have the standing water that there is in the upper end. Interesting.

This is the southwest corner of the property. The standing water is in the ruts where the truck maneuvered. The soil moisture sensor is on that pole at the right. You can just see the other owl box along the fence line near one of the trees.

I walked around the west property line to the northwest corner where the concrete box is. There is standing water in the area where the trucks drove but not in the rest of the field. I think that the last work to be done is to fill in with all that extra dirt around the box. I assume that they will cover this open box, but I’m not sure. If they don’t we’ll put a wire cover on it.

Pasture and Irrigation Renovation – Part 12 – Watching Grass Grow

Yesterday’s post described seeding on November 19, just before the 4″ of rain that we got over the next 3 days. Now we’re waiting for grass to grow.

This was grass growing on December 1.

Yes, it’s there, but you have to be paying attention to see what’s happening. We’re not just watching for grass. We want to see those broad-leaf plants too.

This is three days later on December 4.

Rodents at work.

The next day the irrigation crew came back to install the flowmeter and soil moisture sensors. That tube on top of the concrete box has a something that looks like a fan or propellor on the end of it.

That is the part that is now in the pipe and the rod is mounted to the concrete box.

The pole outside the box has solar panels and some other kind of gadget on it. At this point I don’t know how any of it works. We’re going to have a lesson about how to interpret the data it will provide to my phone.

There are two soil moisture sensors at the other end of the field. We had them place those poles where there will be fence lines so the sheep won’t be tempted to rub on them.

That white spot that looks like a quarter, at the bottom of the photo, is a rod that will measure moisture at 3 depths.

That data will also be transmitted to my phone.

This is the south end of the field. It is still wet enough that when the workers drove back and forth between these moisture sensors they created deep ruts. That’s unfortunate but there is nothing that can be done now. I think we have to wait until next year and then maybe disc this and the west side of the field where there is also compaction from vehicles during the final installation. We’ll wait and see.

Now we’re just waiting for more rain and grass.

Pasture and Irrigation Renovation – Part 11

Yesterday’s post brought us up to November 19 when the work on the irrigation pipeline was almost finished. The field wasn’t yet seeded and significant rain was due that night.

There is a story about the seed. It was a special order to get the quantity and mix we specified. On November 8 we drove to the seed company in Tracy to pick it up to save on shipping cost and so it would be here when Michael was ready for it. The order wasn’t correct so the company was going to ship it to us the following week. It didn’t come on the day it was supposed to, and we didn’t want it to arrive while we were gone. It would be on a pallet which would need to be unloaded and we couldn’t risk the seed getting wet if it rained. So we scheduled delivery for the following Tuesday, the day after we’d be back from Arizona. The shipping company called on Tuesday to say it would be here Wednesday. We needed to get that seed in the ground on Tuesday because of the imminent rain.

Fortunately we were told that the seed could be taken off the truck so we could pick it up. Dan I drove to Sacramento to pick it up at the trucking company location. I texted Michael that the seed we would be back home with the seed by about 2:00.

The air seeder has two long arms that distribute the seeds as it’s being driven.

I don’t know the details of how it is set up but this is a look at the part under the hopper where the seed falls into the black tubes in a measured quantity.

There is a control here where Michael set the amount of seed to apply. He somehow calibrated it to apply 30 pounds/acre when the tractor is driven at 6 mph.

It took only a few hours to apply the seed using this equipment.

This was followed up with ring rollers to help the seed have more soil contact. It was getting dark.

After rolling the main part of the pasture, Michael had to adjust the width of the rollers to squeeze between the new valves that are 30 feet apart. This was to access the north part of the field.

Michael’s son had been riding in the cab while Michael was working. While he adjusted the rollers (and Dan was watching to make sure they cleared the valves) I took Bodie into the barn to feed the sheep with me.

Seeding was just in time. We had almost an inch and a half of rain that night.

The NRCS engineer wanted to certify the pipeline work, but now it was too muddy for people to walk or drive across the field and even on the road to the west. I walked out there by walking on the dried grass to the side of the dirt road west of our property so I could send photos. This shows the work the welder did the previous day when he could drive on that road. He cut out a circle on the horizontal pipe, matched the vertical pipe with another cut, and welded them together.

There is a precisely measured hole in the top of the horizontal pipe. I think the purpose is for air flow to help with water flow.

The finished connections that need to be covered. But, wait, they are not finished. There will be another post that shows a flow meter being installed.

Avoiding the dirt most of the way, this is how my boots looked just….

…walking across the dirt road to get to the corner of the property. I sent the engineers the required photos and these last two to show that it was not a good time for anyone to visit.

Pasture and Irrigation Renovation – Part 10

The last post I wrote about this project was on November 21, two weeks ago. At that point we had just come back from our Arizona trip The pipeline was put in while we were gone. We were anxious to get both the irrigation work and the field work finished before the real winter rain started. With it this late in the year it was certainly possible that there would have been significant rain before this time. I don’t know what we would have done if that had happened. I think the whole thing would have been put off if the ground was as wet as it is now.

So in these photos the ground is dry. This is the view from the western edge to the east. The pipeline is 15″ and the valves are 30 feet apart

That is a pretty deep trench at this end. There has to be gravity flow so I assume the west side is a little higher than the east.

View to the west.

The is the trencher they used. I was interested in that conveyor that looks as though it is just stuck in that wheel to get it out of the way. But, of course that is not the case–it is supposed to be there. . As the wheel turns, the dirt is brought up to the top where it drops onto the conveyer which drops in a long ridge next to the ditch.

This view if from the corner where the water enters our property There is a north-south pipeline buried here.

This is the connection where we get the water from the SID canal.

The concrete box is 8 feet deep. A flow meter will be placed in one of the pipes.

Another private contractor showed up this day. He is a welder and his job was to cut a hole in the horizontal pipe and shape and then weld an upright pipe onto the horizontal one. I think it is to allow air flow in the pipe so that the water will flow better.

This is the row of valves after the trench has been mostly filled in.

This was all finished just in time before heavy rain was predicted to start. The other crucial task was to get the field seeded before rain made it impossible to drive a tractor across the field. Rain was due by sometime during the night.

To be continued because I’m too tired…

Pasture and Irrigation Renovation – Part 9

I wrote the last post about this project 9 days ago. The crew had removed the old standpipe at the northwest corner of the pasture and replaced it with a new concrete box. When we irrigate the box will fill with water and create pressure to force water into the rest of the system.

In the meantime we were concerned with getting seed on the pasture at the best time. Michael had finished putting up borders, even though the irrigation pipeline work would disturb the upper end of the field. We needed all of that work to be finished before seeding. I had ordered the seed mix from a company in Tracy, about an hour and a half from here. I said that we’d pick it up to save on shipping cost and to have it here when Michael was ready for it. This time of year farmers are trying to get the field work finished before it rains a lot and they can’t get on the fields at all.

The day after the irrigation work was done in the corner we drove to Tracy to pick up the seed we had ordered. This photo is the warehouse there. There was some kind of communication problem between the order desk and the warehouse. Our order was wrong. I had paid for 350 pounds of seed but there was only 64 pounds there. The people at the seed company said they’d get the seed to us on Wednesday of the next week. That was the day before we were to leave on a 5 day trip. (That will be in the next blog post.)

The next morning I took these photos (above and below) of Michael smoothing out the edges of the field.

Skip ahead five days. The irrigation crew planned to come out on the 15th. We left that morning for Arizona. I asked my friends who were going to farm sit to take photos of the progress for me.

The crew spread the pipe out in the proper location. Then there was a lot of digging. They used this excavator at the northwest corner.They used a trencher for most of the lines.

The pipe that runs east-west in front of the blackberries has one T to send water south to the other east-west pipeline.

This is the rest of the pipeline at the north end in front of the blackberries.

This photo shows what the valves look like. They will be at ground level.

Here is that first east-west pipeline completed.

Pasture and Irrigation Renovation – Part 8

I wrote the last post about this ten days ago. This project is taking a lot longer than I’d hoped. The last field work was October 31 when Michael put up the borders. It wasn’t until November 6 that the irrigation part of the project started.

This is a photo taken in May when we were starting to irrigate. This is just outside of our fence line. The water is starting to flow down the ditch after SID (Solano Irrigation District) personnel opened a valve. The red wheel controls the position of the gate that lets water into a pipe at the base of that concrete structure.

The water goes through the pipe into the concrete standpipe in the northwest corner of the pasture. There is an opening that faces south and water flows into our ditch. We are replacing the ditch system on our property with a pipeline. We can’t pump because there is no power back here. Therefore the whole system has to work with gravity feed. Engineers from Pacific Southwest Irrigation proposed this system, approved by NRCS.The first step was to replace this standpipe and pipeline

I was surprised at the finesse with which the excavator operator could work around the existing structure. It was important to not damage the concrete structure that has the red wheel control. They had to dig up the existing pipe that went into an opening at the base of that structure. In this view the top of that standpipe to be removed has already been knocked off.

A lot of dirt had to be moved and this pile was a lot bigger by the time they finished.

Some handwork (with a shovel) was necessary to break away the mortar.

They also used a handheld jack hammer to break more away without damaging the concrete box. The excavator loosened the old pipe without damage to the remaining structure.

Eventually they were able to remove the old pipe and the rest of the standpipe.

In the meantime Dan made a frame and poured concrete to extend the walkway behind the barn. The concrete chunks under the new concrete are the leftover parts of that foundation that we hauled out of the pasture after the initial work to remove it.

This is the new pipe.

It was lifted into position and then cut to fit.

The crew dug a pit and made a concrete pad at the bottom.

The next day they installed two concrete box structures with the pipe that connects the SID structure to this one. The view is to the west. That tree is right at the corner of the property.

The view east. This was last Friday. Another crew will be here this Thursday or Friday to work on the rest of the pipeline. We wlll be gone, but that is another story. I need to get my friends to take photos.

Pasture and Irrigation Renovation – Part 7

As I mentioned in the last post we were concerned with the weather. In some years there could have been significant rain by this time. As it was we’d had only a trace. On October 31 Michael brought a tractor here to put up borders in the field. Brett’s job had been to level the field while creating a slight slope west to east and north to south so that the water would flow. The borders are important to direct the water that will be released from the valves during irrigation.

Green and yellow tractor with orange border maker attached.

This tractor is set up with the border maker. The photo shows the wings that were folded in for transport down the road. That coiled up cable will help to set the distance for the wings to spread out. By the way, those back tires are taller than I am!

Green tractor with orange border maker attached.

A view from the back. The part with the oval cut out will form the top of the borders.

I climbed up and took a photo of the inside of the enclosed cab.

The wings are spread out here to create borders with 30′ spacing. Michael figured out where to start and sets uses GPS (I think) to keep the lines straight.

Computer screen inside cab of tractor.

Michael invited me to ride along. I rode for a few passes until his wife came with lunch and his young son who was going to ride along with him to finish the job. I took this photo of the computerized controls. This reminds me of looking in an airplane cockpit. There are lots of knobs and dials and screens. If you want to do the job correctly you need to know how to set all the parameters. At least the tractor stays on the ground.

Tractor pulling border maker in a dirt field.

This is the last pass down the field.

Prepared dirt showing borders for irrigation. Clouds in the sky.

The next job for Michael will be to come back with a different tractor to smooth out the ends of the field where the borders stop. Michael is doing us a favor by working this 7-acre job. The normal minimum is 40 acres. It makes more sense to use equipment of this size for a larger property.

Red barn in background with blue sky. Field has been disced and has borders for irrigation in place.

Here is how the field looks now ready for seeding.

Pasture and irrigation Renovation – Part 6

The last post ended with land leveling on October 18. Pipe and other supplies had been delivered October 16 but we had to wait for Brett’s work to be finished before starting anything else. The next two parts of this project were to install the irrigation system (Hunter from the irrigation company) and to create borders and seed the pasture (Michael with the field equipment). Initially we thought the pipeline work would be next and we would finish with the rest of the field work. Michael talked to Hunter about the best order of operation here. We were getting worried about weather. It was important to get this work done before there was too much rain that would stall the work. Also both of them have other much bigger jobs that they are trying to finish while the weather holds. I left it to them to work out the best way to accomplish this. Hunter and Michael went to school about the same time, along with my son, Chris. (In fact, Hunter and Chris were on the same rugby team for a season, and Michael’s mom and I carpooled at times to get the kids to school.)

Michael brought a tractor over on October 24. He and Dan and I had walked the field and determined that part of the field could use another discing. That is where the concrete had been. When leveling, that area seemed to have been scraped but left a surface that wasn’t as good for creating the borders and seeding.

Michael had one of his employees disc that portion of the field to help loosen it up.

The next day Dan and I picked up more chunks of concrete that had surfaced. Over the last couple of weeks we had picked up a lot of this that was scattered throughout the field.

Before Hunter could do the first part of the irrigation work Dan had to remove the fence in the northwest corner of the property.

This is the view from the field to the northwest.

The view from outside the field looking to the east. This is part of the SID (Solano Irrigation District) system. There is a metal gate at the bottom of that concrete structure that lets the water into our ditch which is now all filled in and leveled. It will be replace with a pipeline. Dan removed the fence and old posts and other debris from this corner.

To be continued.